Social Login Pro is a simple but comprehensive solution to let your customers log in or register a new account on your Shopify website with their social network account such as Facebook, Google, Twitter, Amazon, etc. This app gives your storefront a convenient social login section on “Login form”, “Create new account form” or anywhere you want using embedded code.
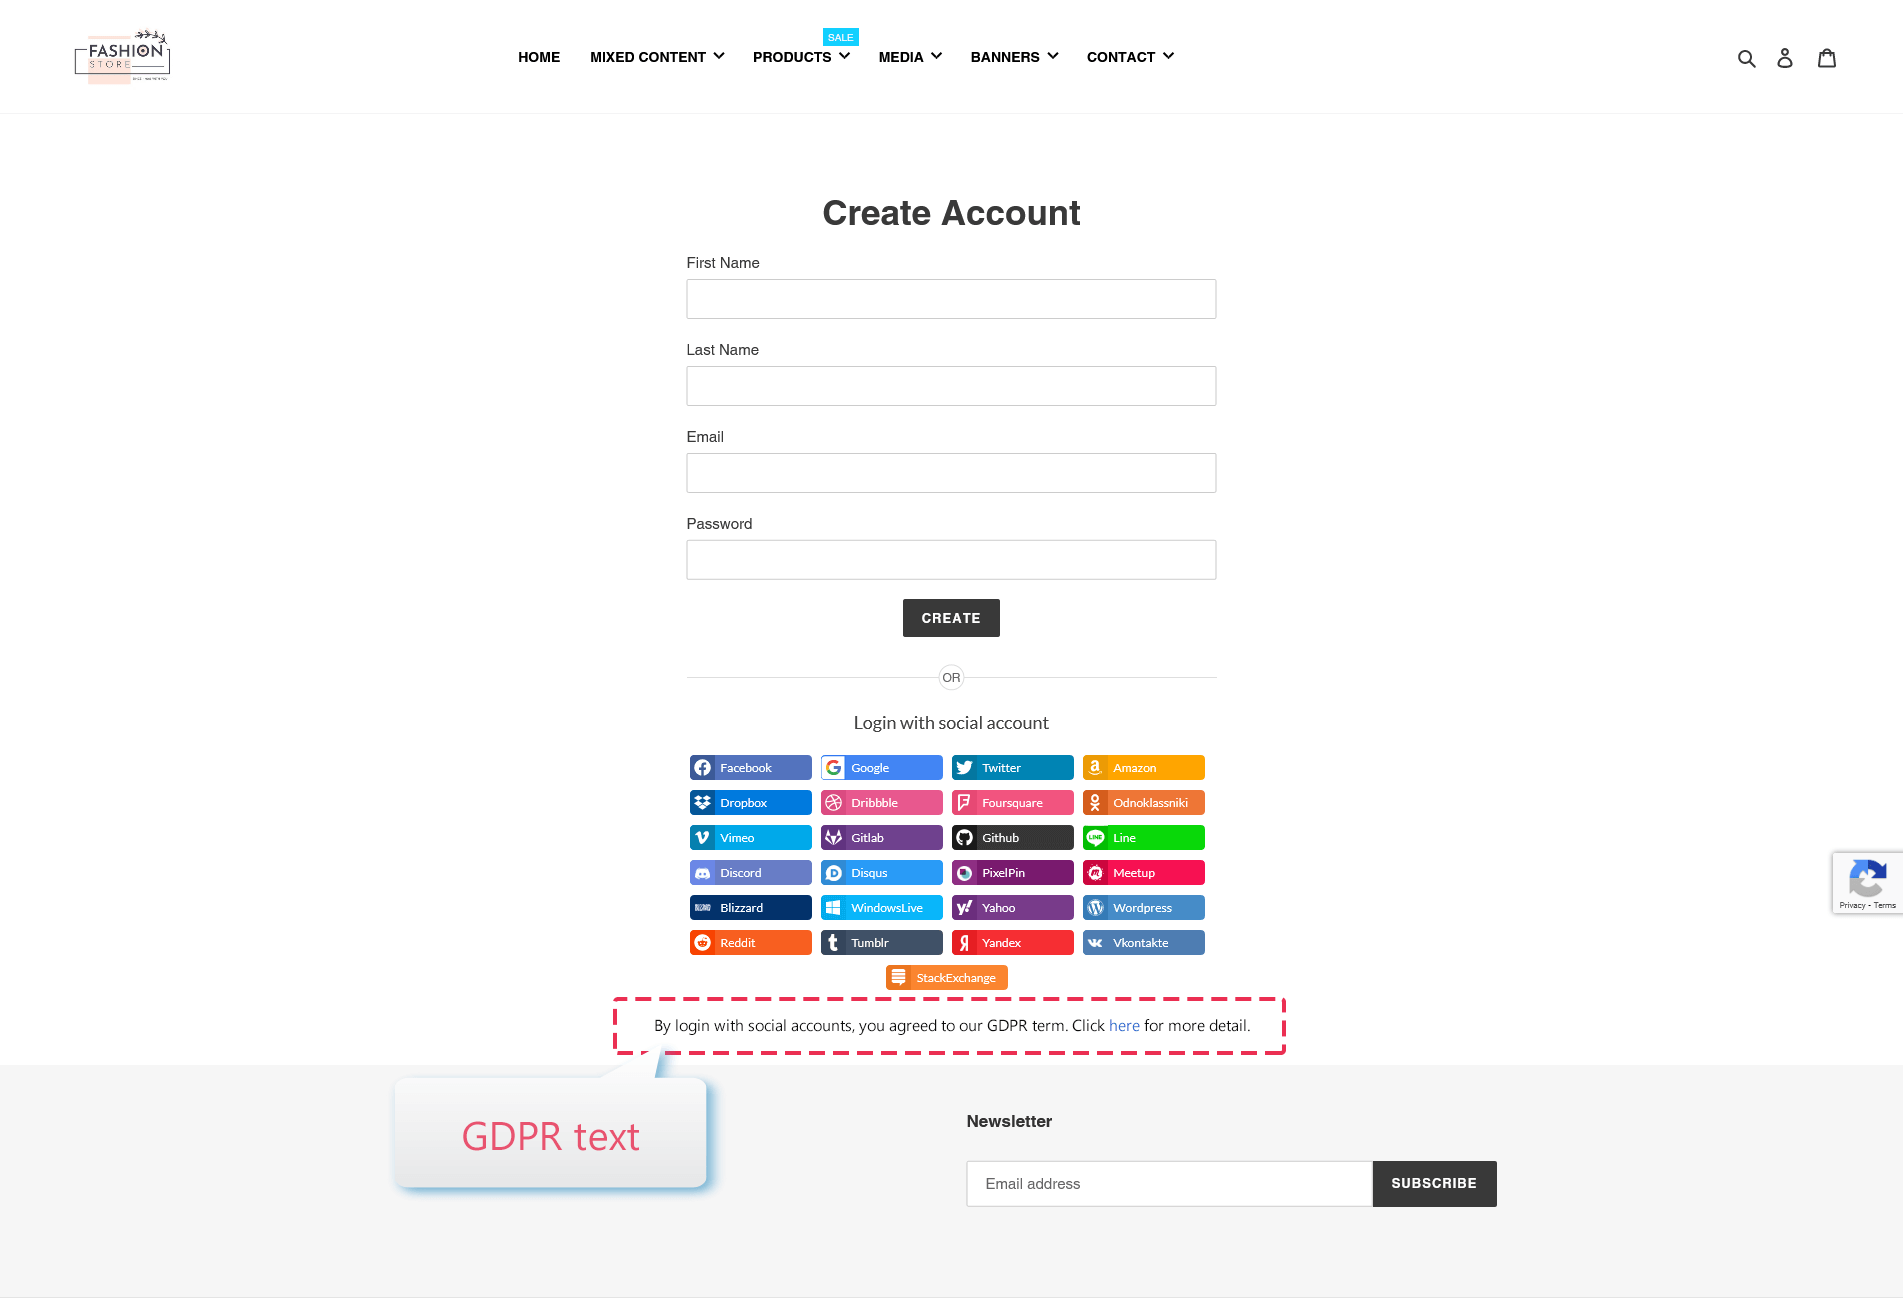
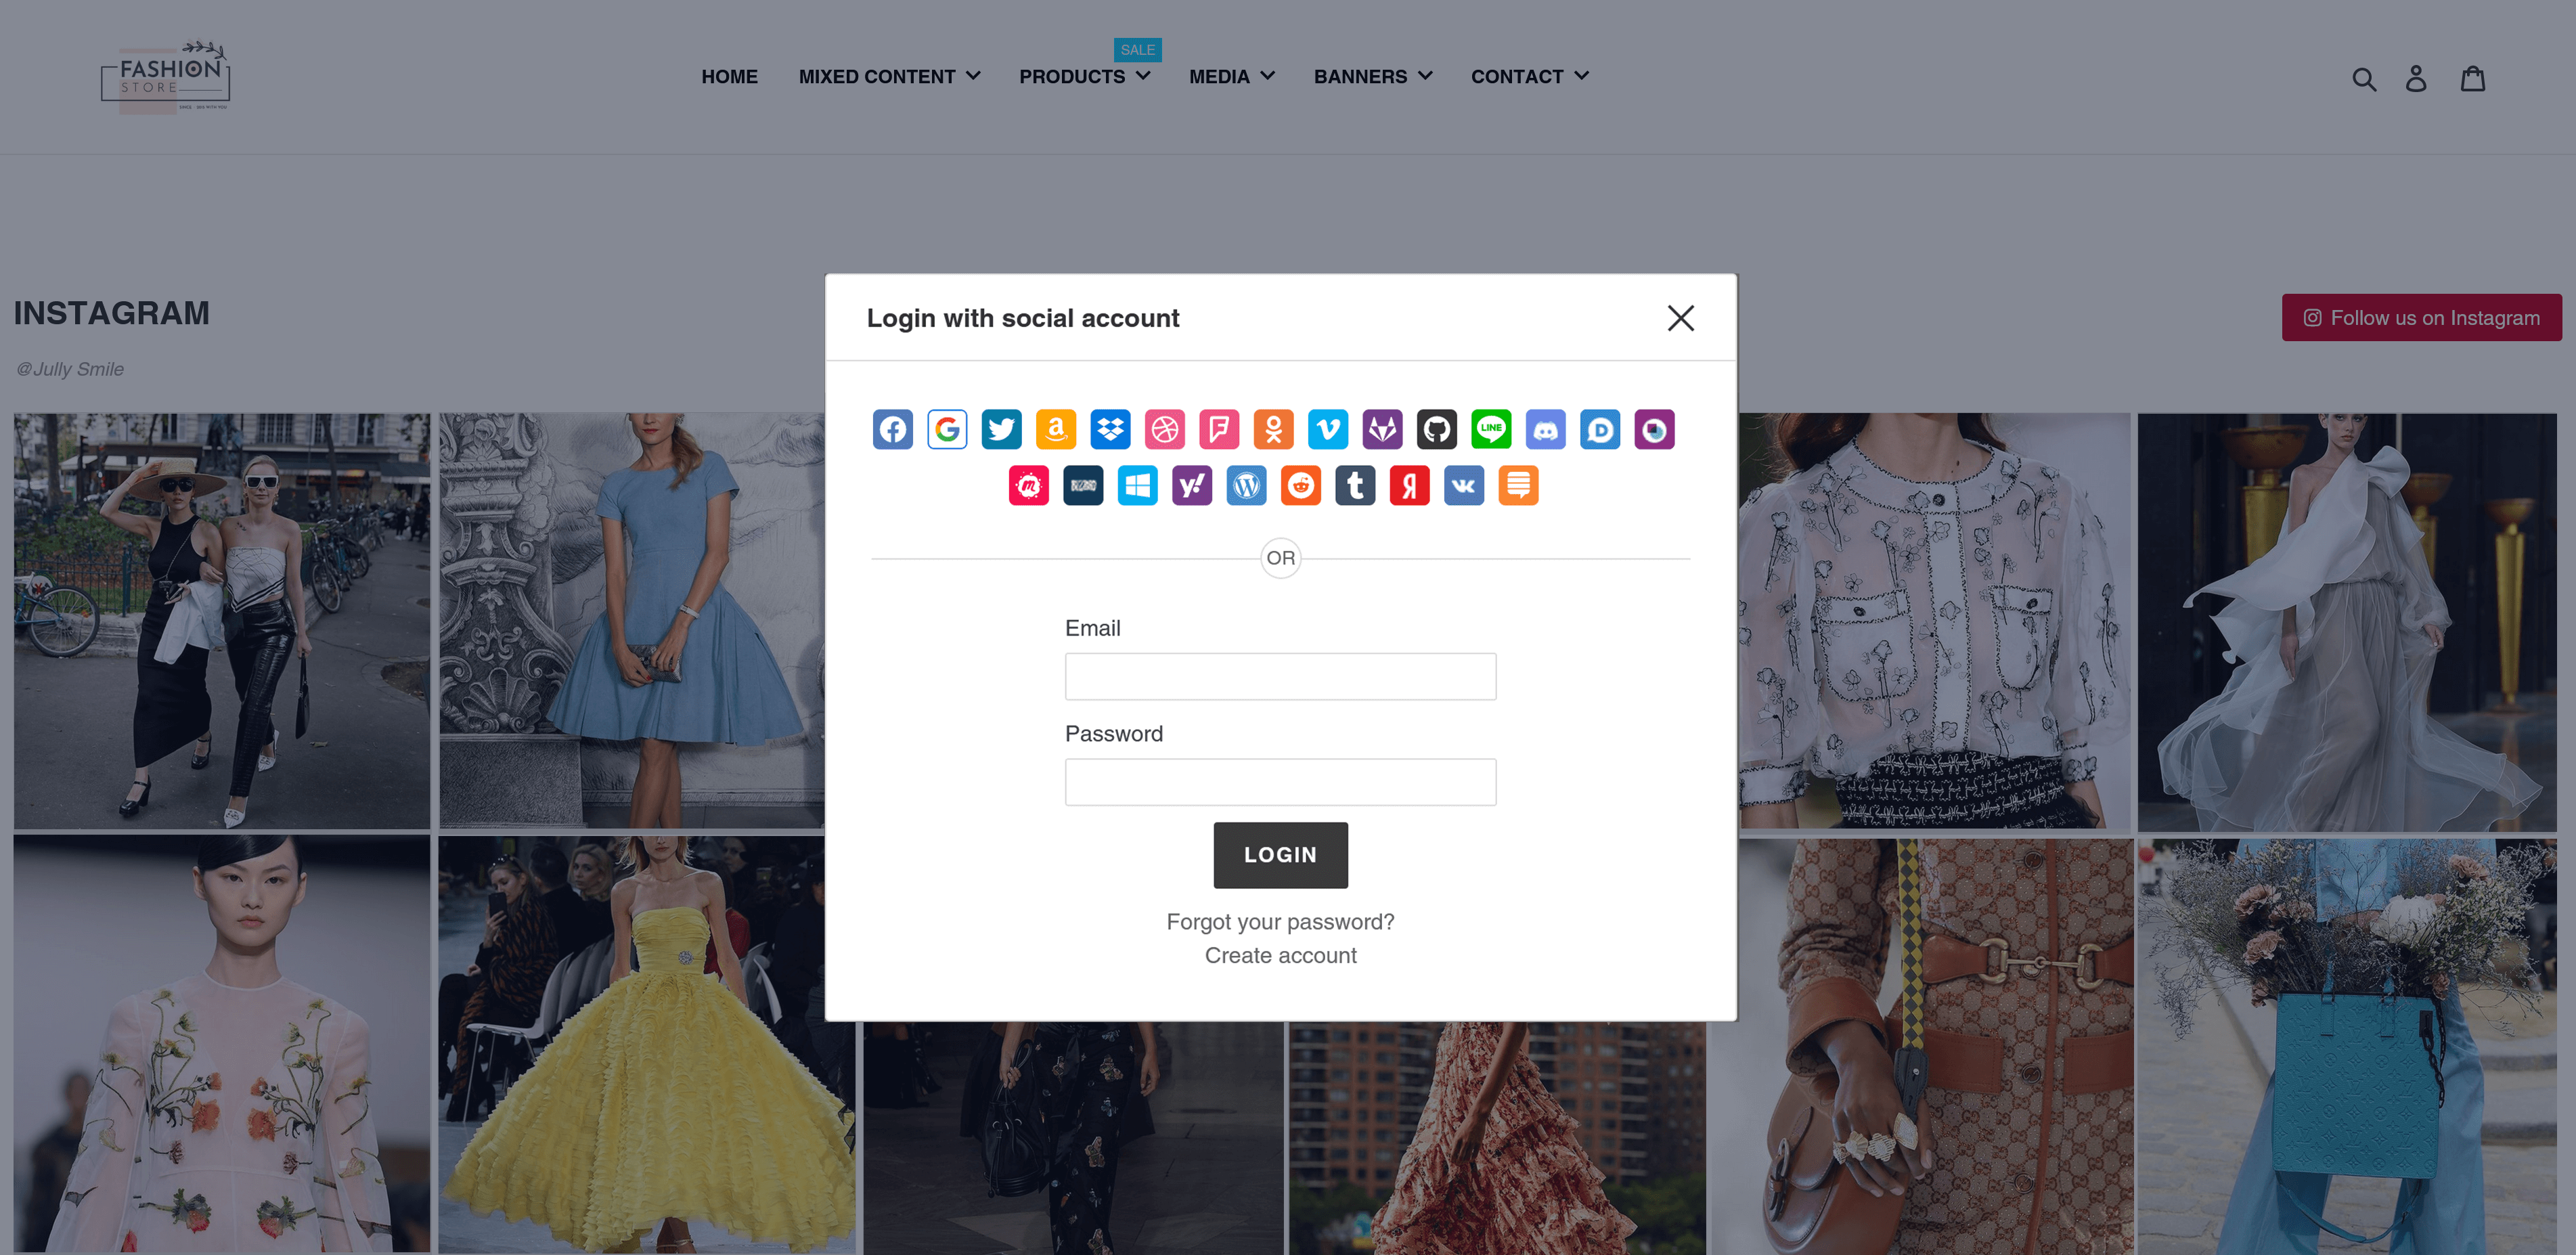
By default, this app will create social login buttons on your online store “Login form” and “Create new account form”:

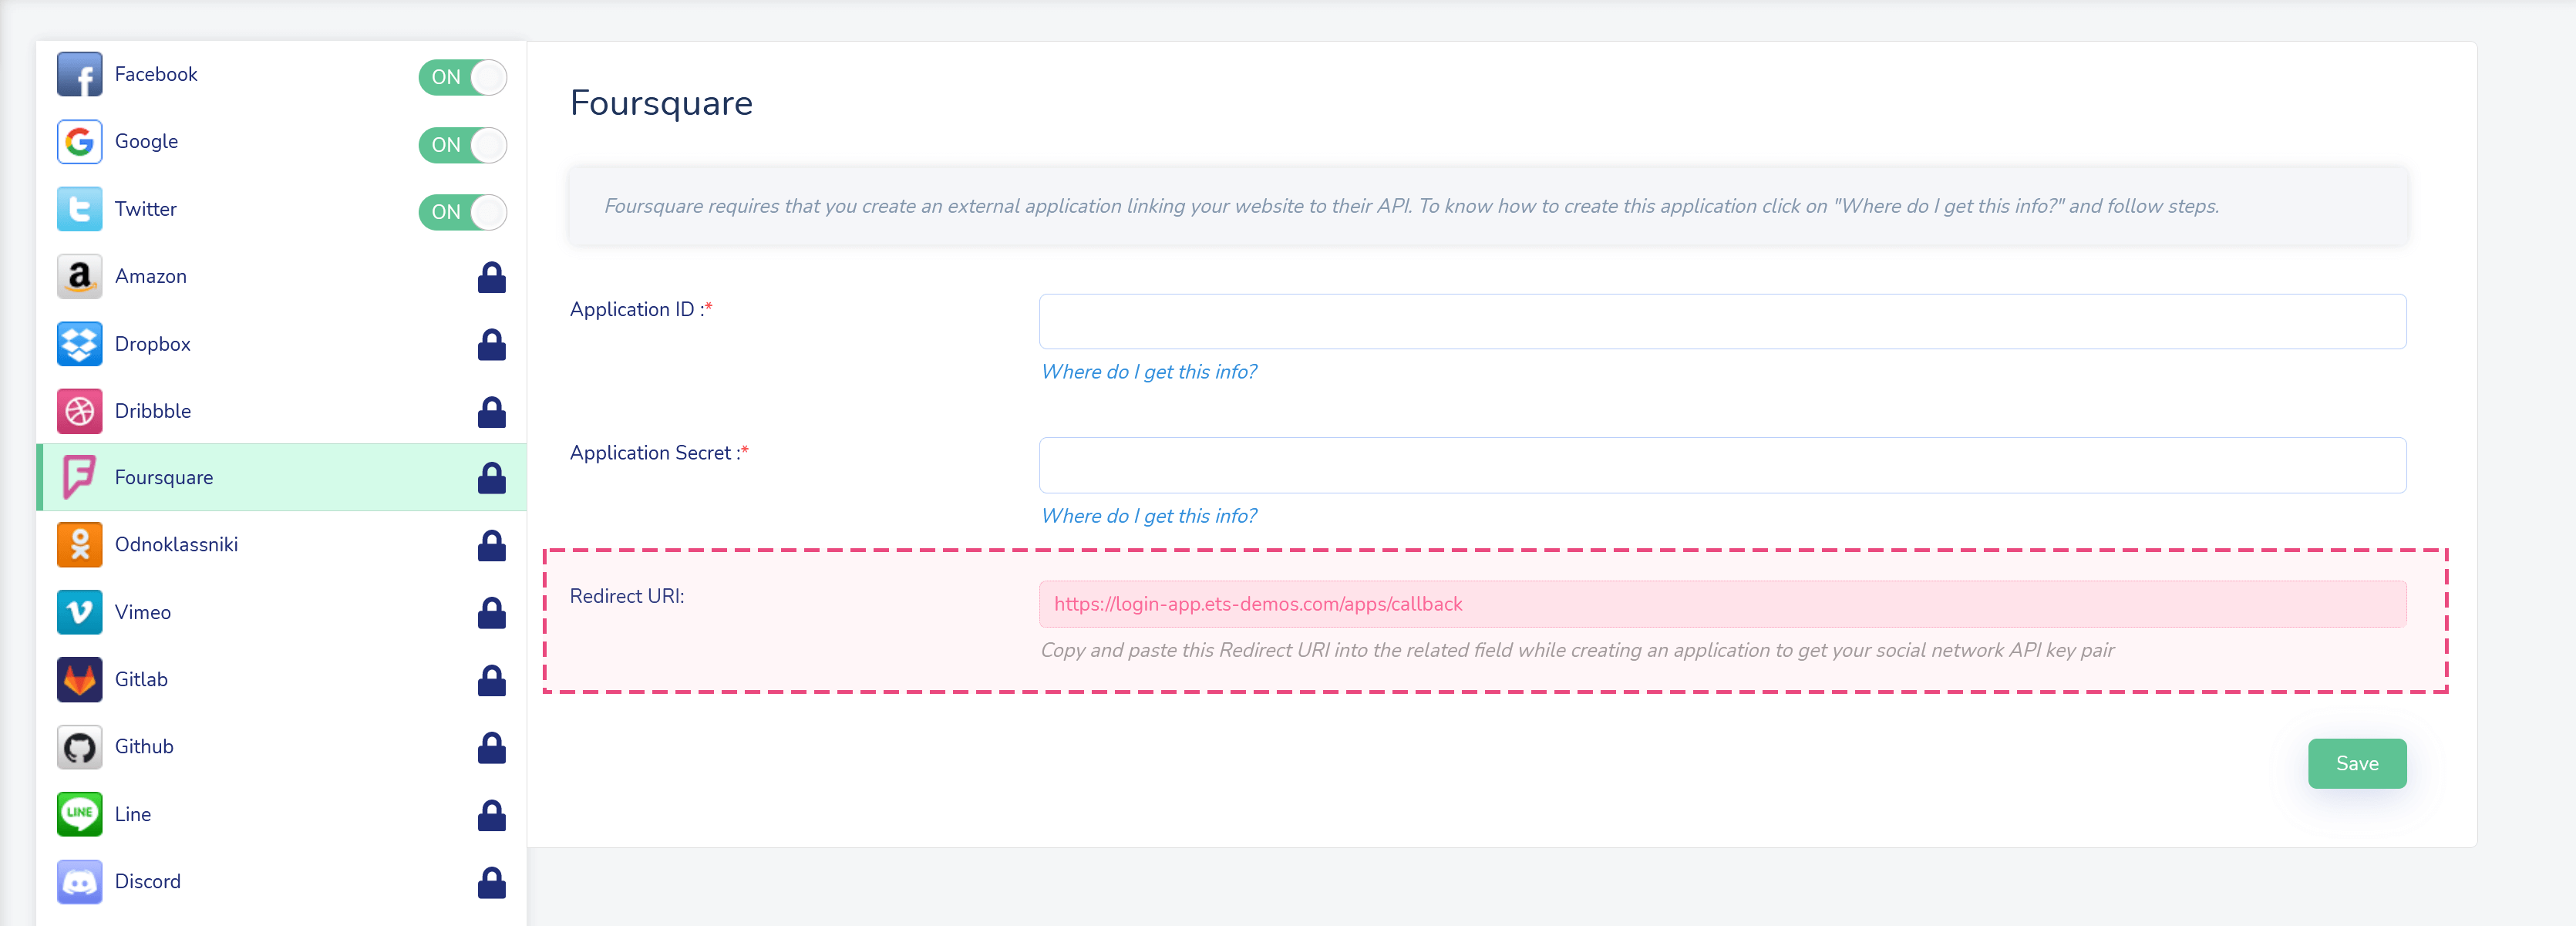
But if you want to display the social login buttons to another position on your online store, “Embedded code” is useful for you.
In this section, we will guide you on how to customize social login buttons and how to use embedded code to display social login buttons on your Shopify online store.
A. Position setting
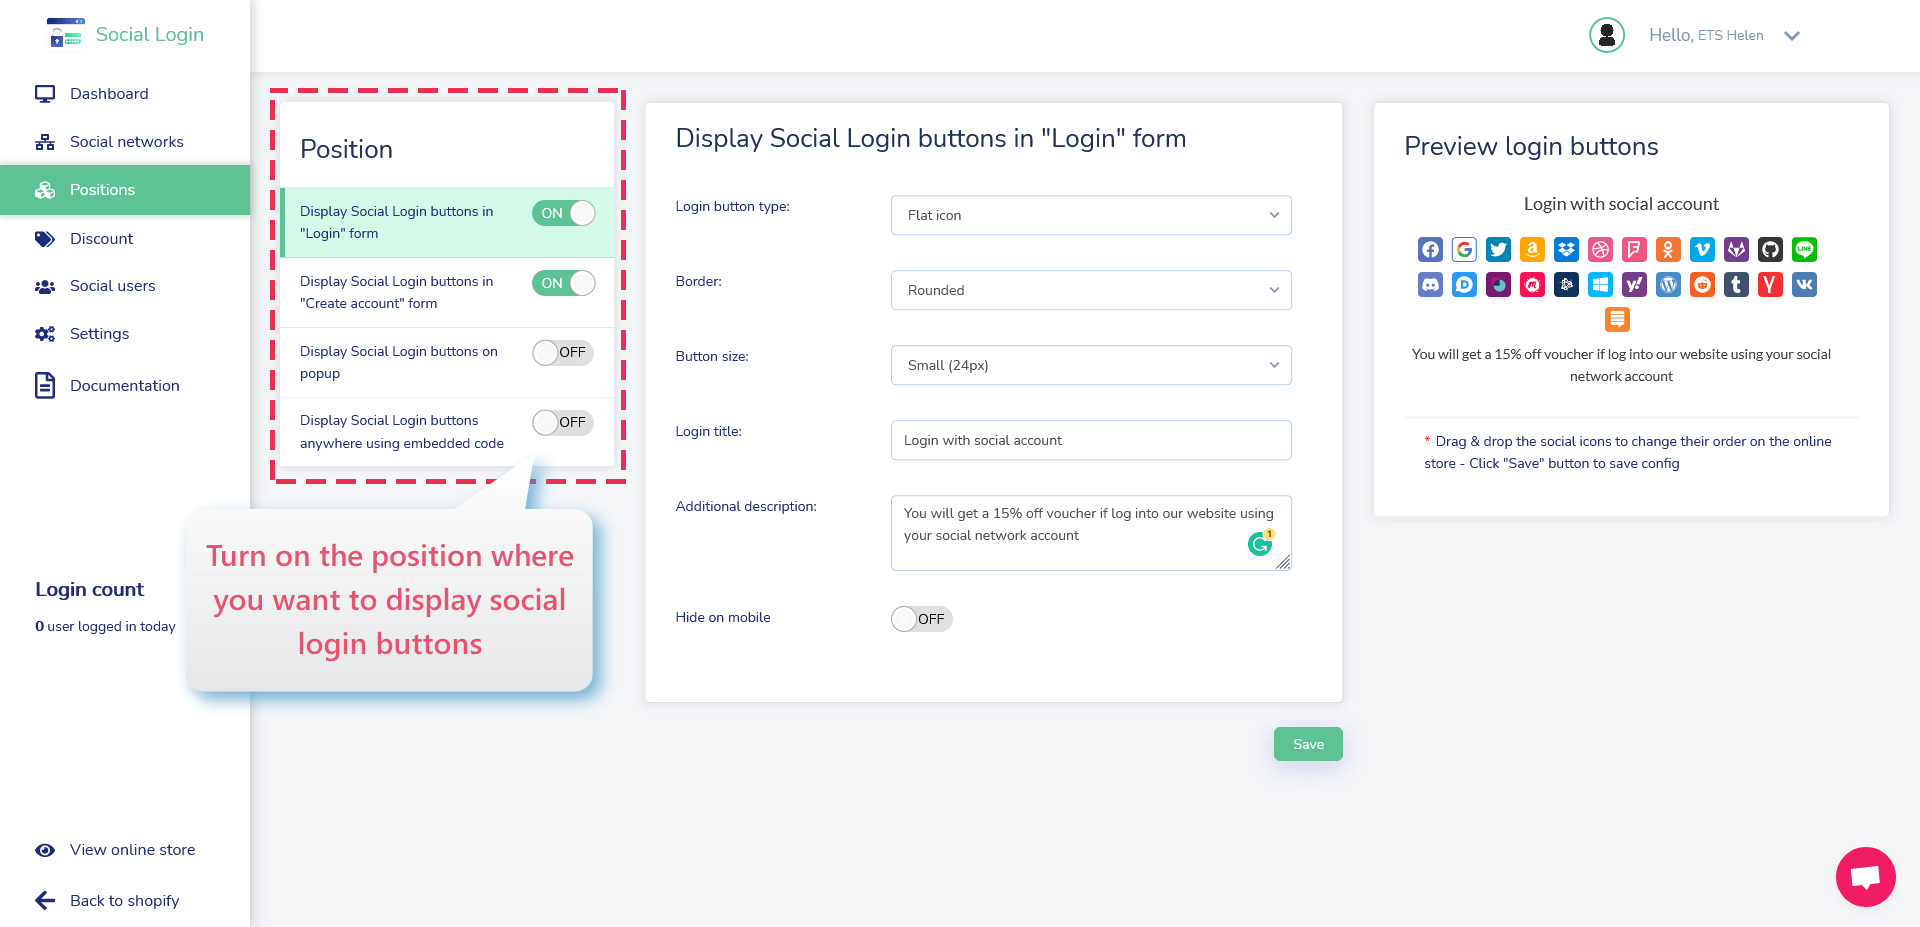
From Social Login Pro configuration page, navigate to “Positions” tab. You can select where to display social login buttons by turn on the respective position.
- Login popup: You can allow customers to log in through a login popup and saving their time. Customers won’t have to navigate to the Login page to enter their account info.
You may select how the login popup appears: when customers hover the mouse pointer over “Account” button or when customers click on “Account” button.

Login popup appears when customers hover the mouse pointer over “Account” button:

Login popup appears when customers click on “Account” button:
B. Customize social login buttons
On the middle column of “Positions” page, you can customize how social login buttons will be displayed on the storefront.
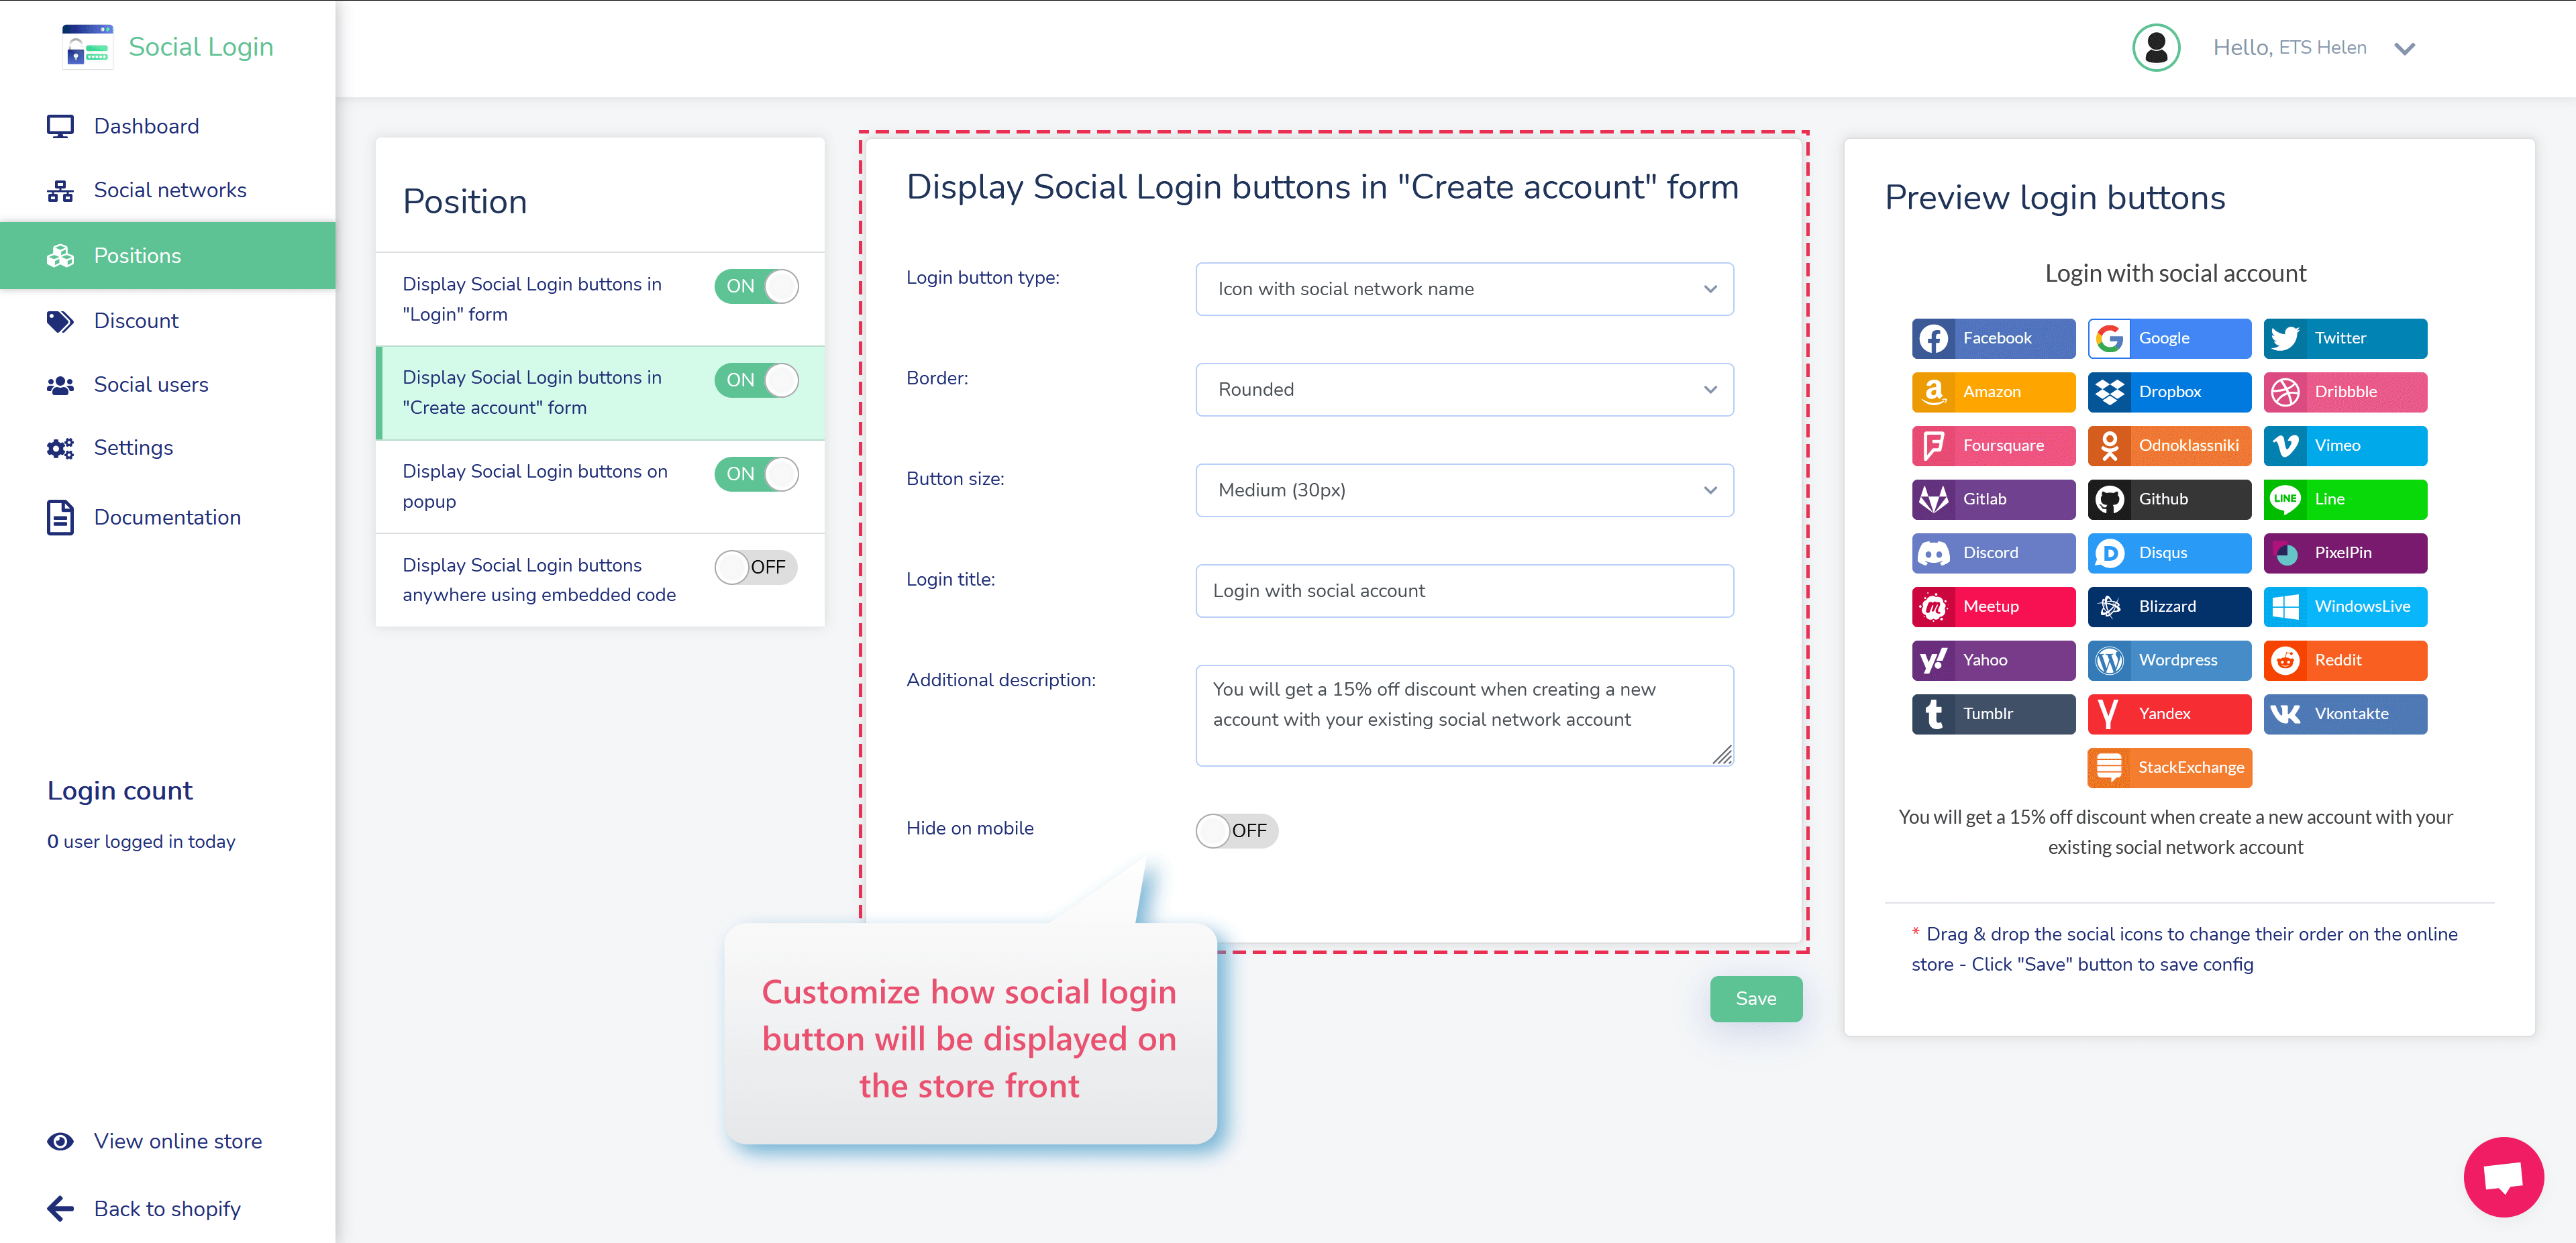
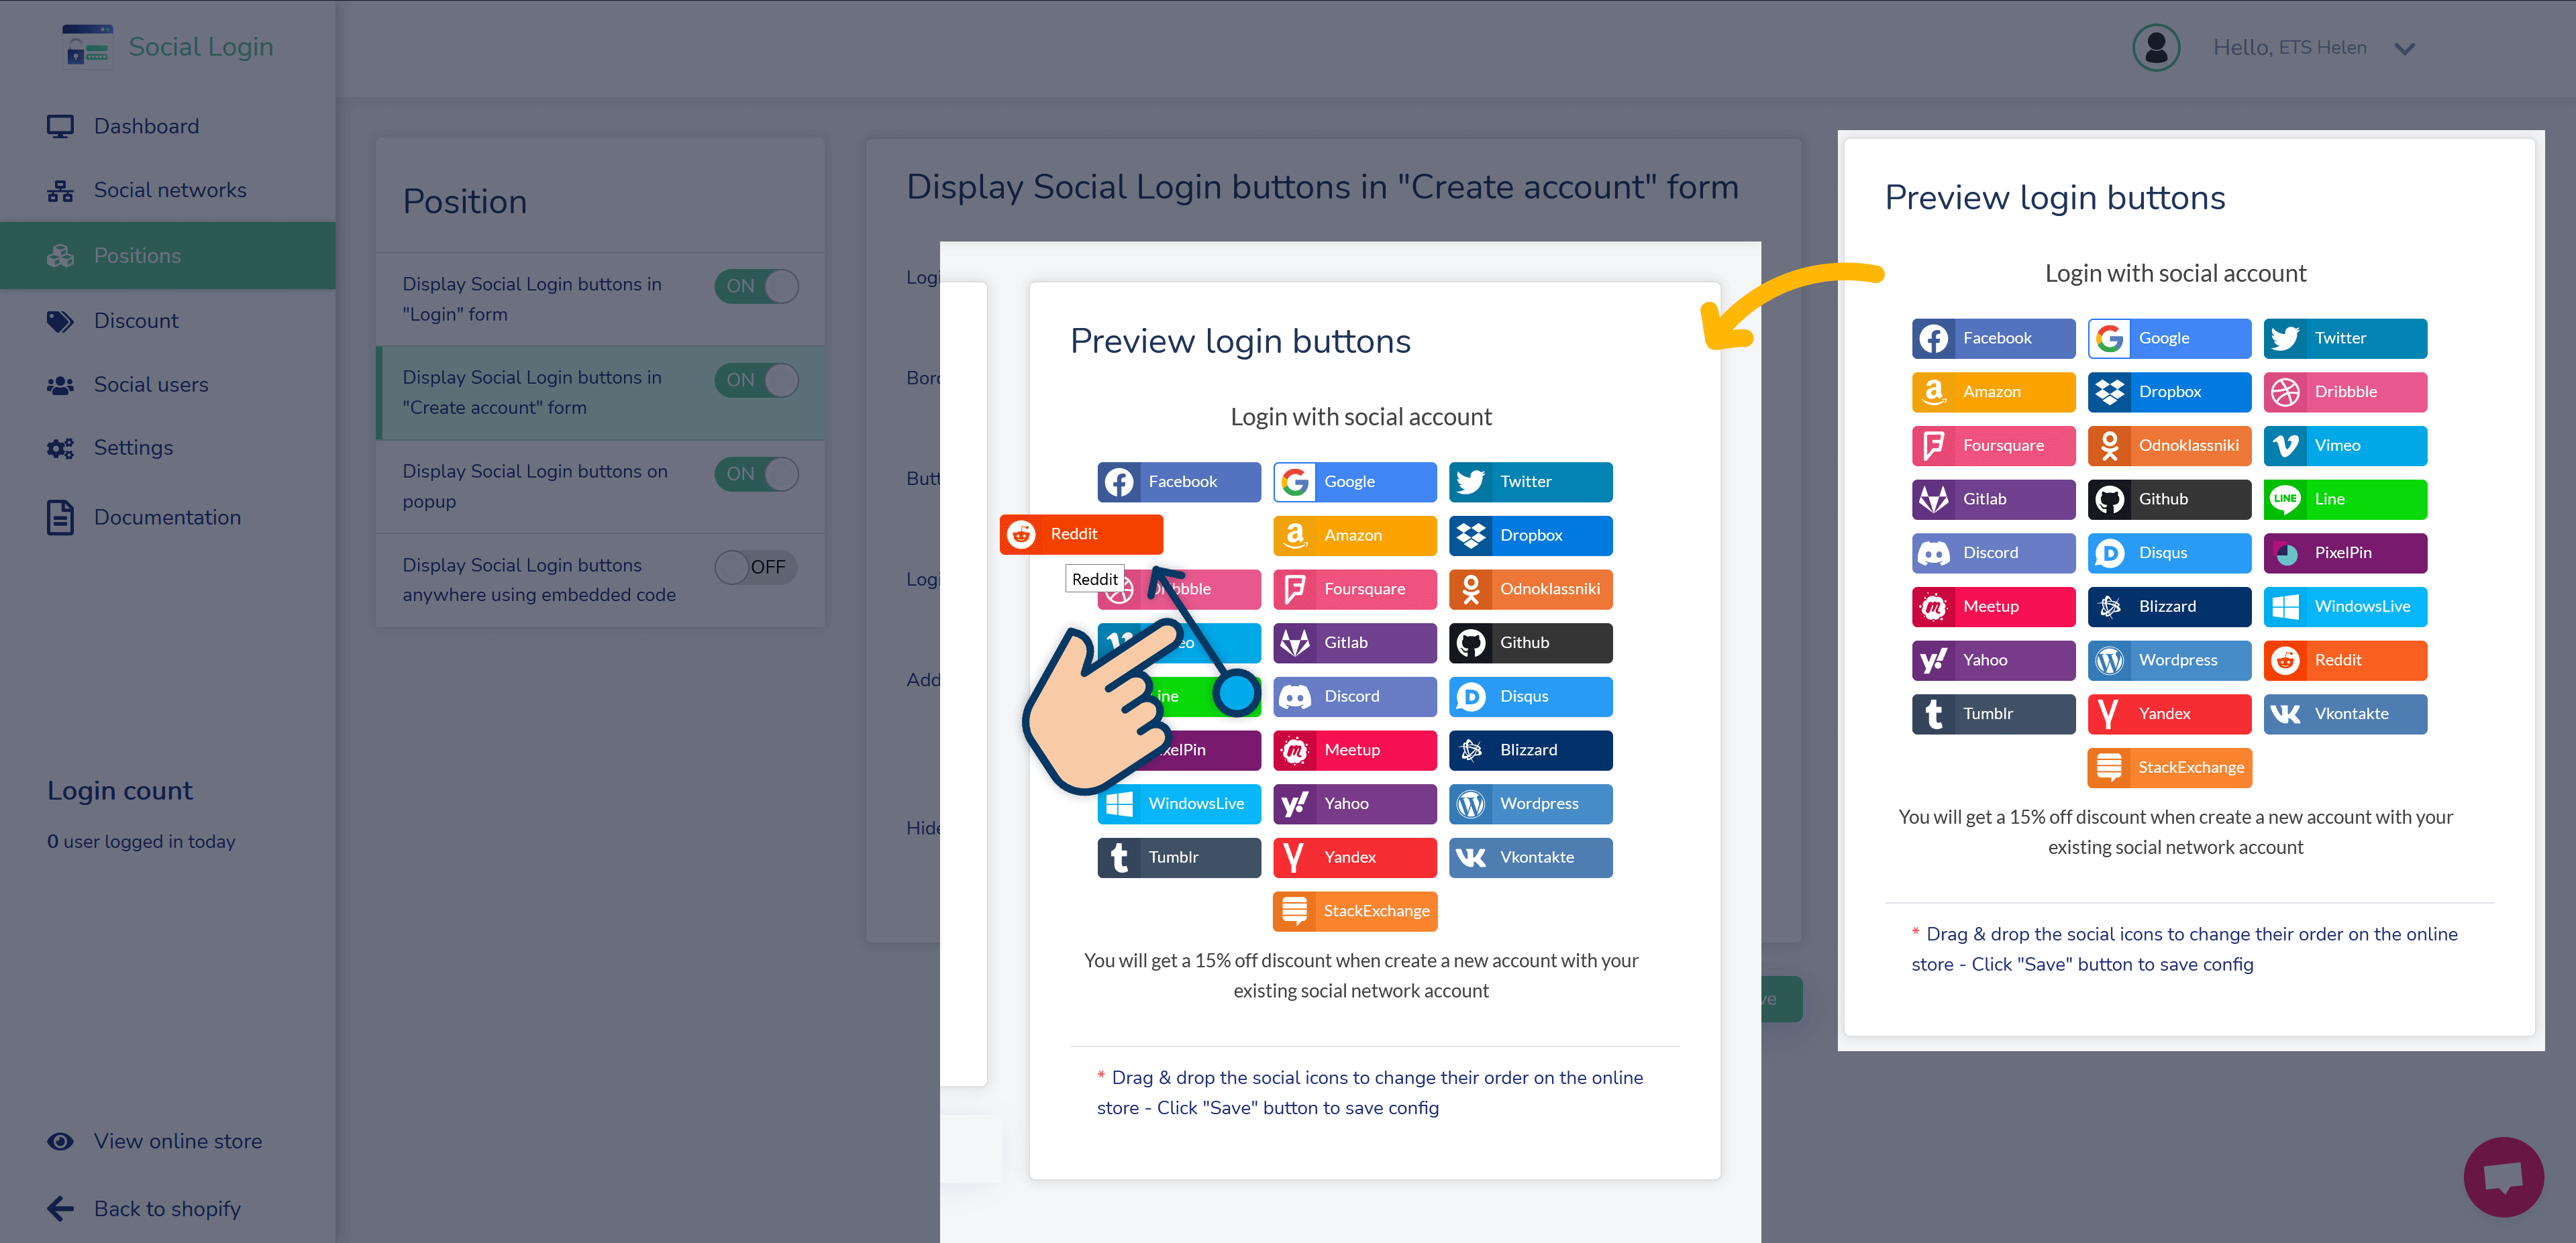
On the right column is “Preview social login buttons” area, you can see every change applied without opening your storefront. You can drag and drop the social icons to change their display order.
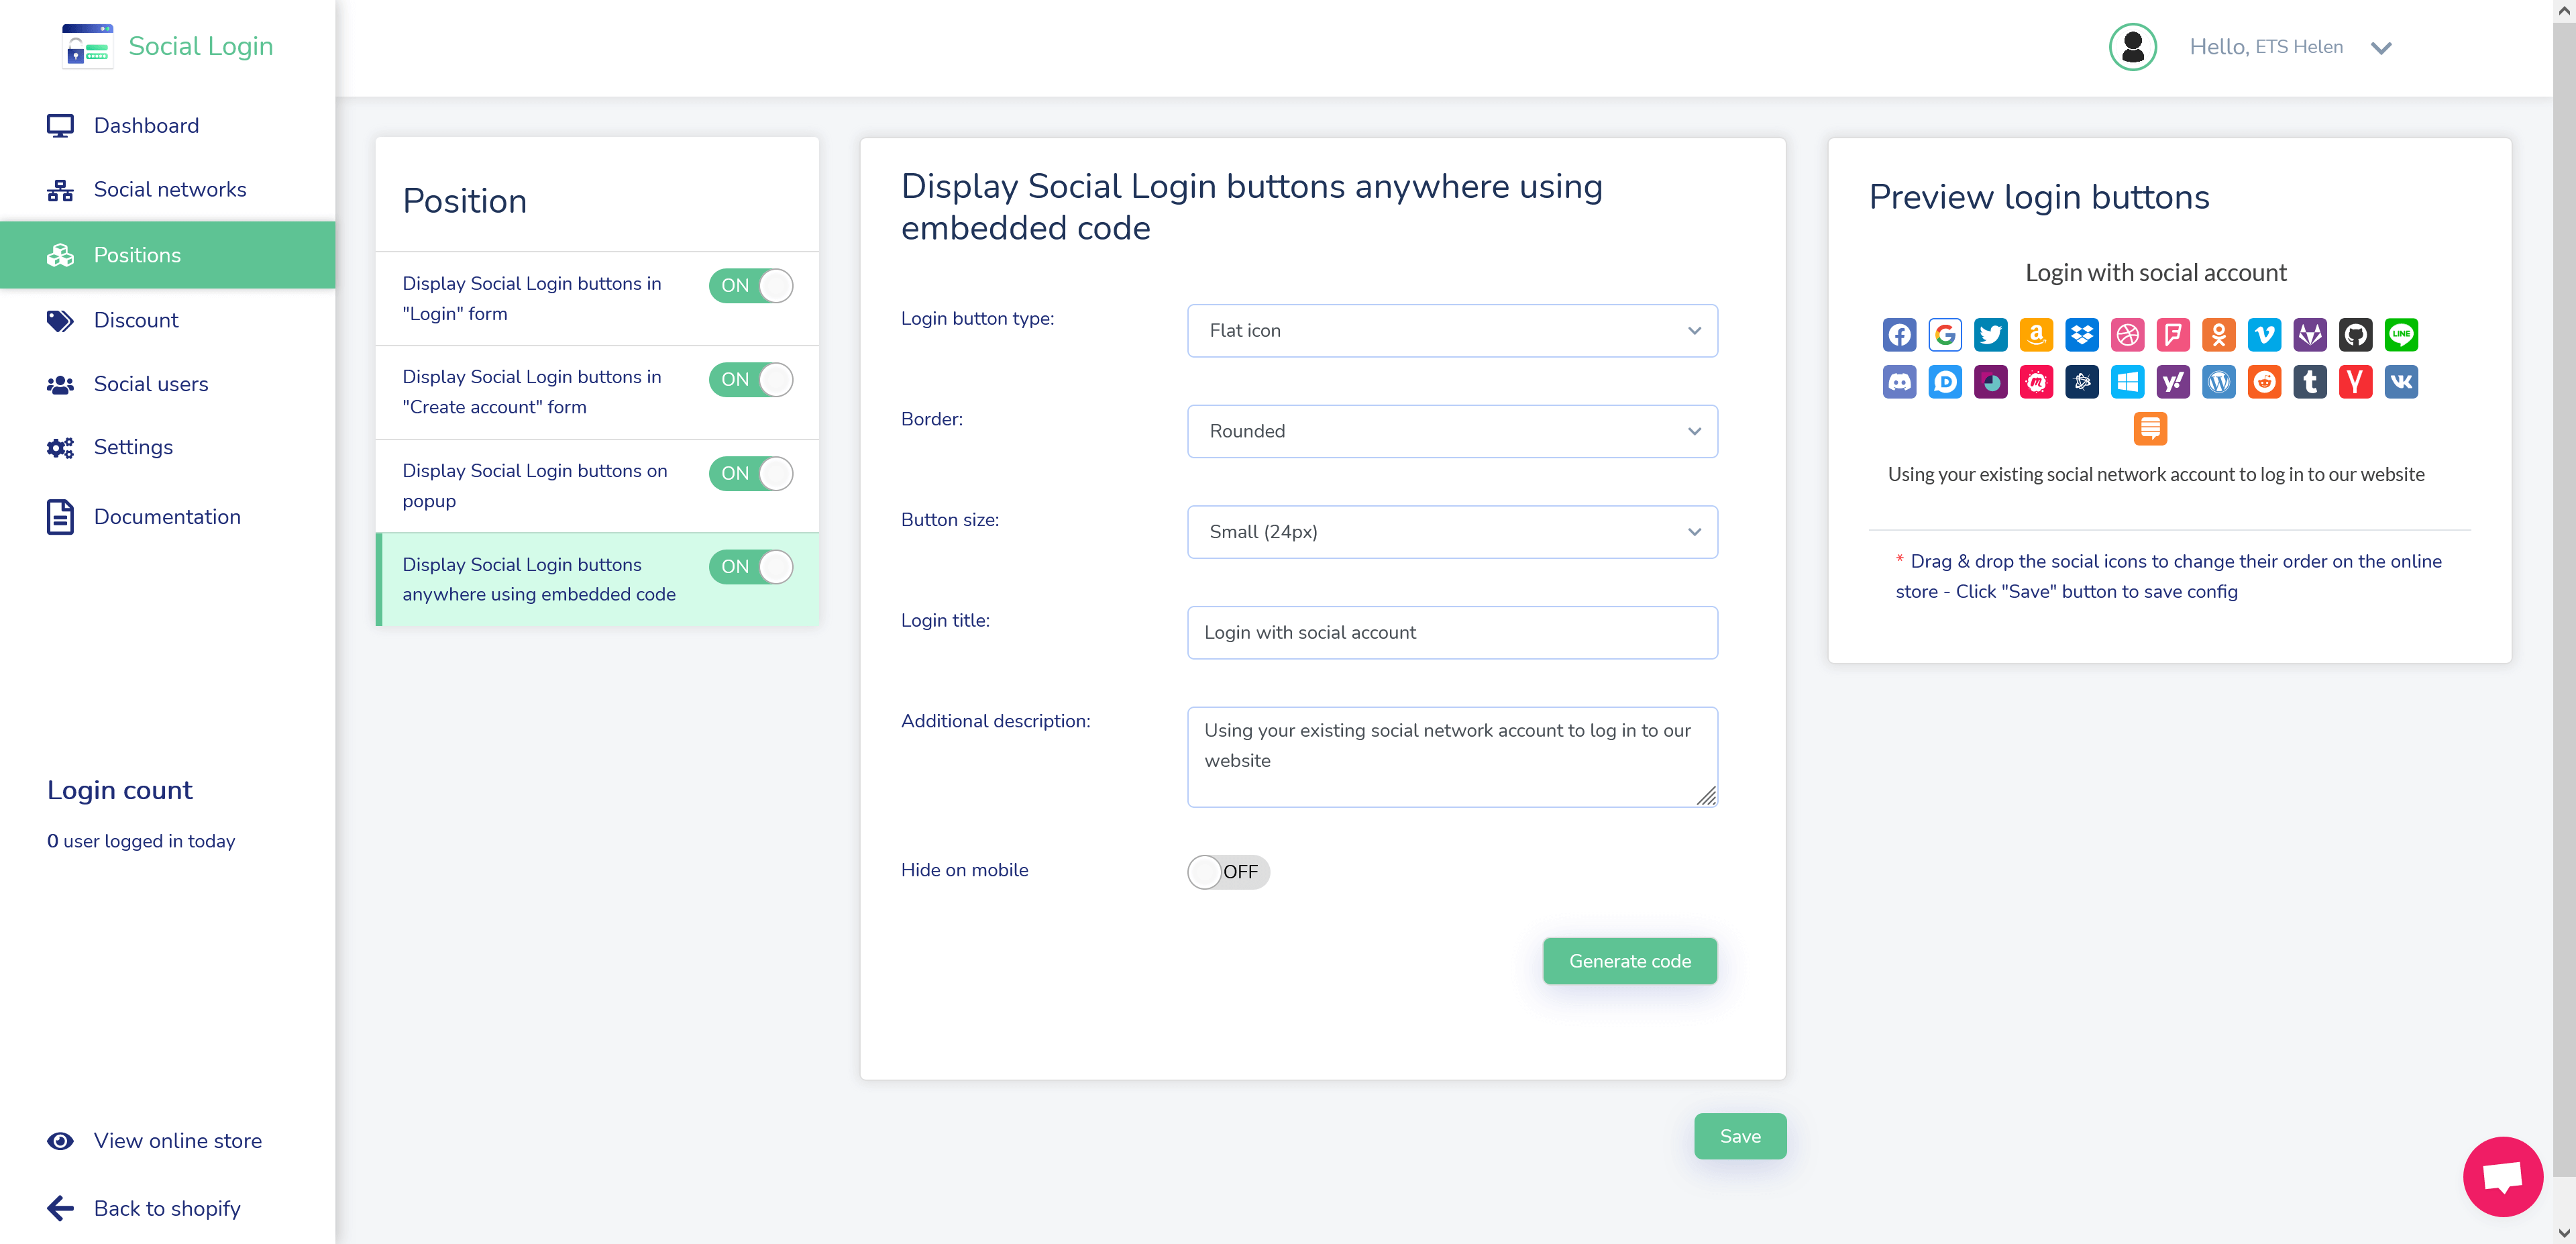
C. Display social login buttons anywhere you want with embedded code
In order to display social login buttons on your online store, normally you should select “Login form” and “Create account form“. In case you want to display social login buttons to another position on your online store, “Embedded code” is useful for you.
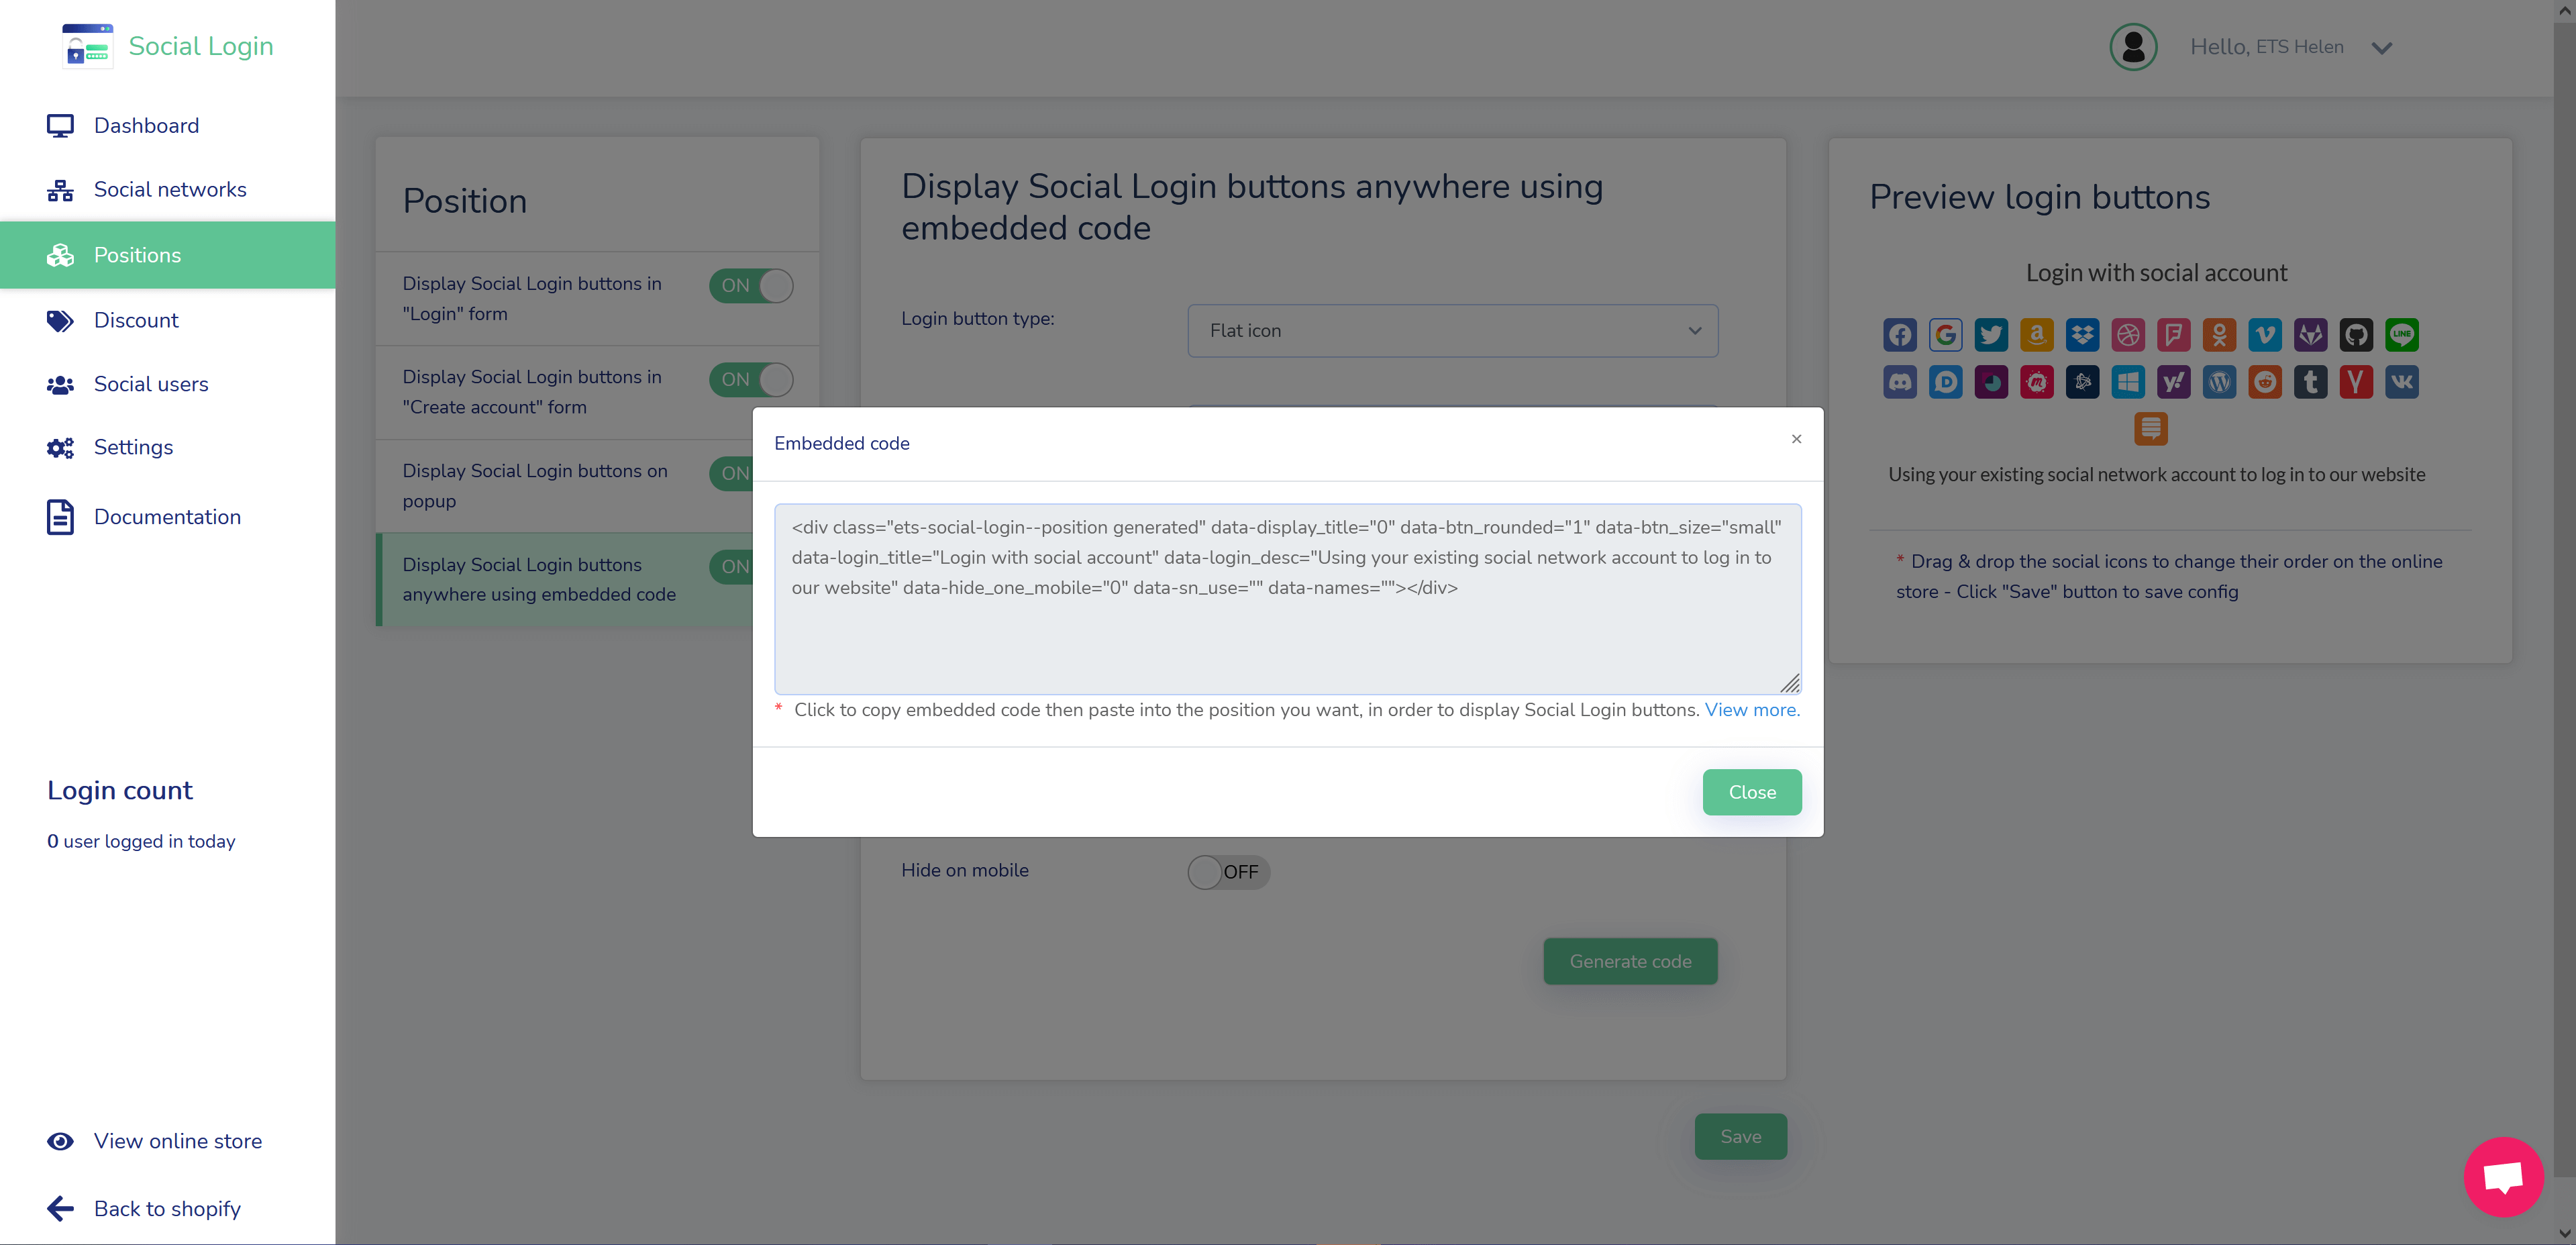
How to get embedded code
- On “Positions” page, enable “Display social login buttons anywhere using embedded code” option then customize how social login buttons will appear.
- Click on “Generate code” button to get embedded code.
- Copy and paste the embedded code to the blog page, product description, template .liquid files, etc. where you want to display social login buttons.
How to use your embedded code
After getting the embedded code for social login buttons as instructed above, you can paste it into any template .liquid file you want to display social login buttons. Here are some examples of using embedded code on the product description area and on a .liquid file:
Embed code on the product description area
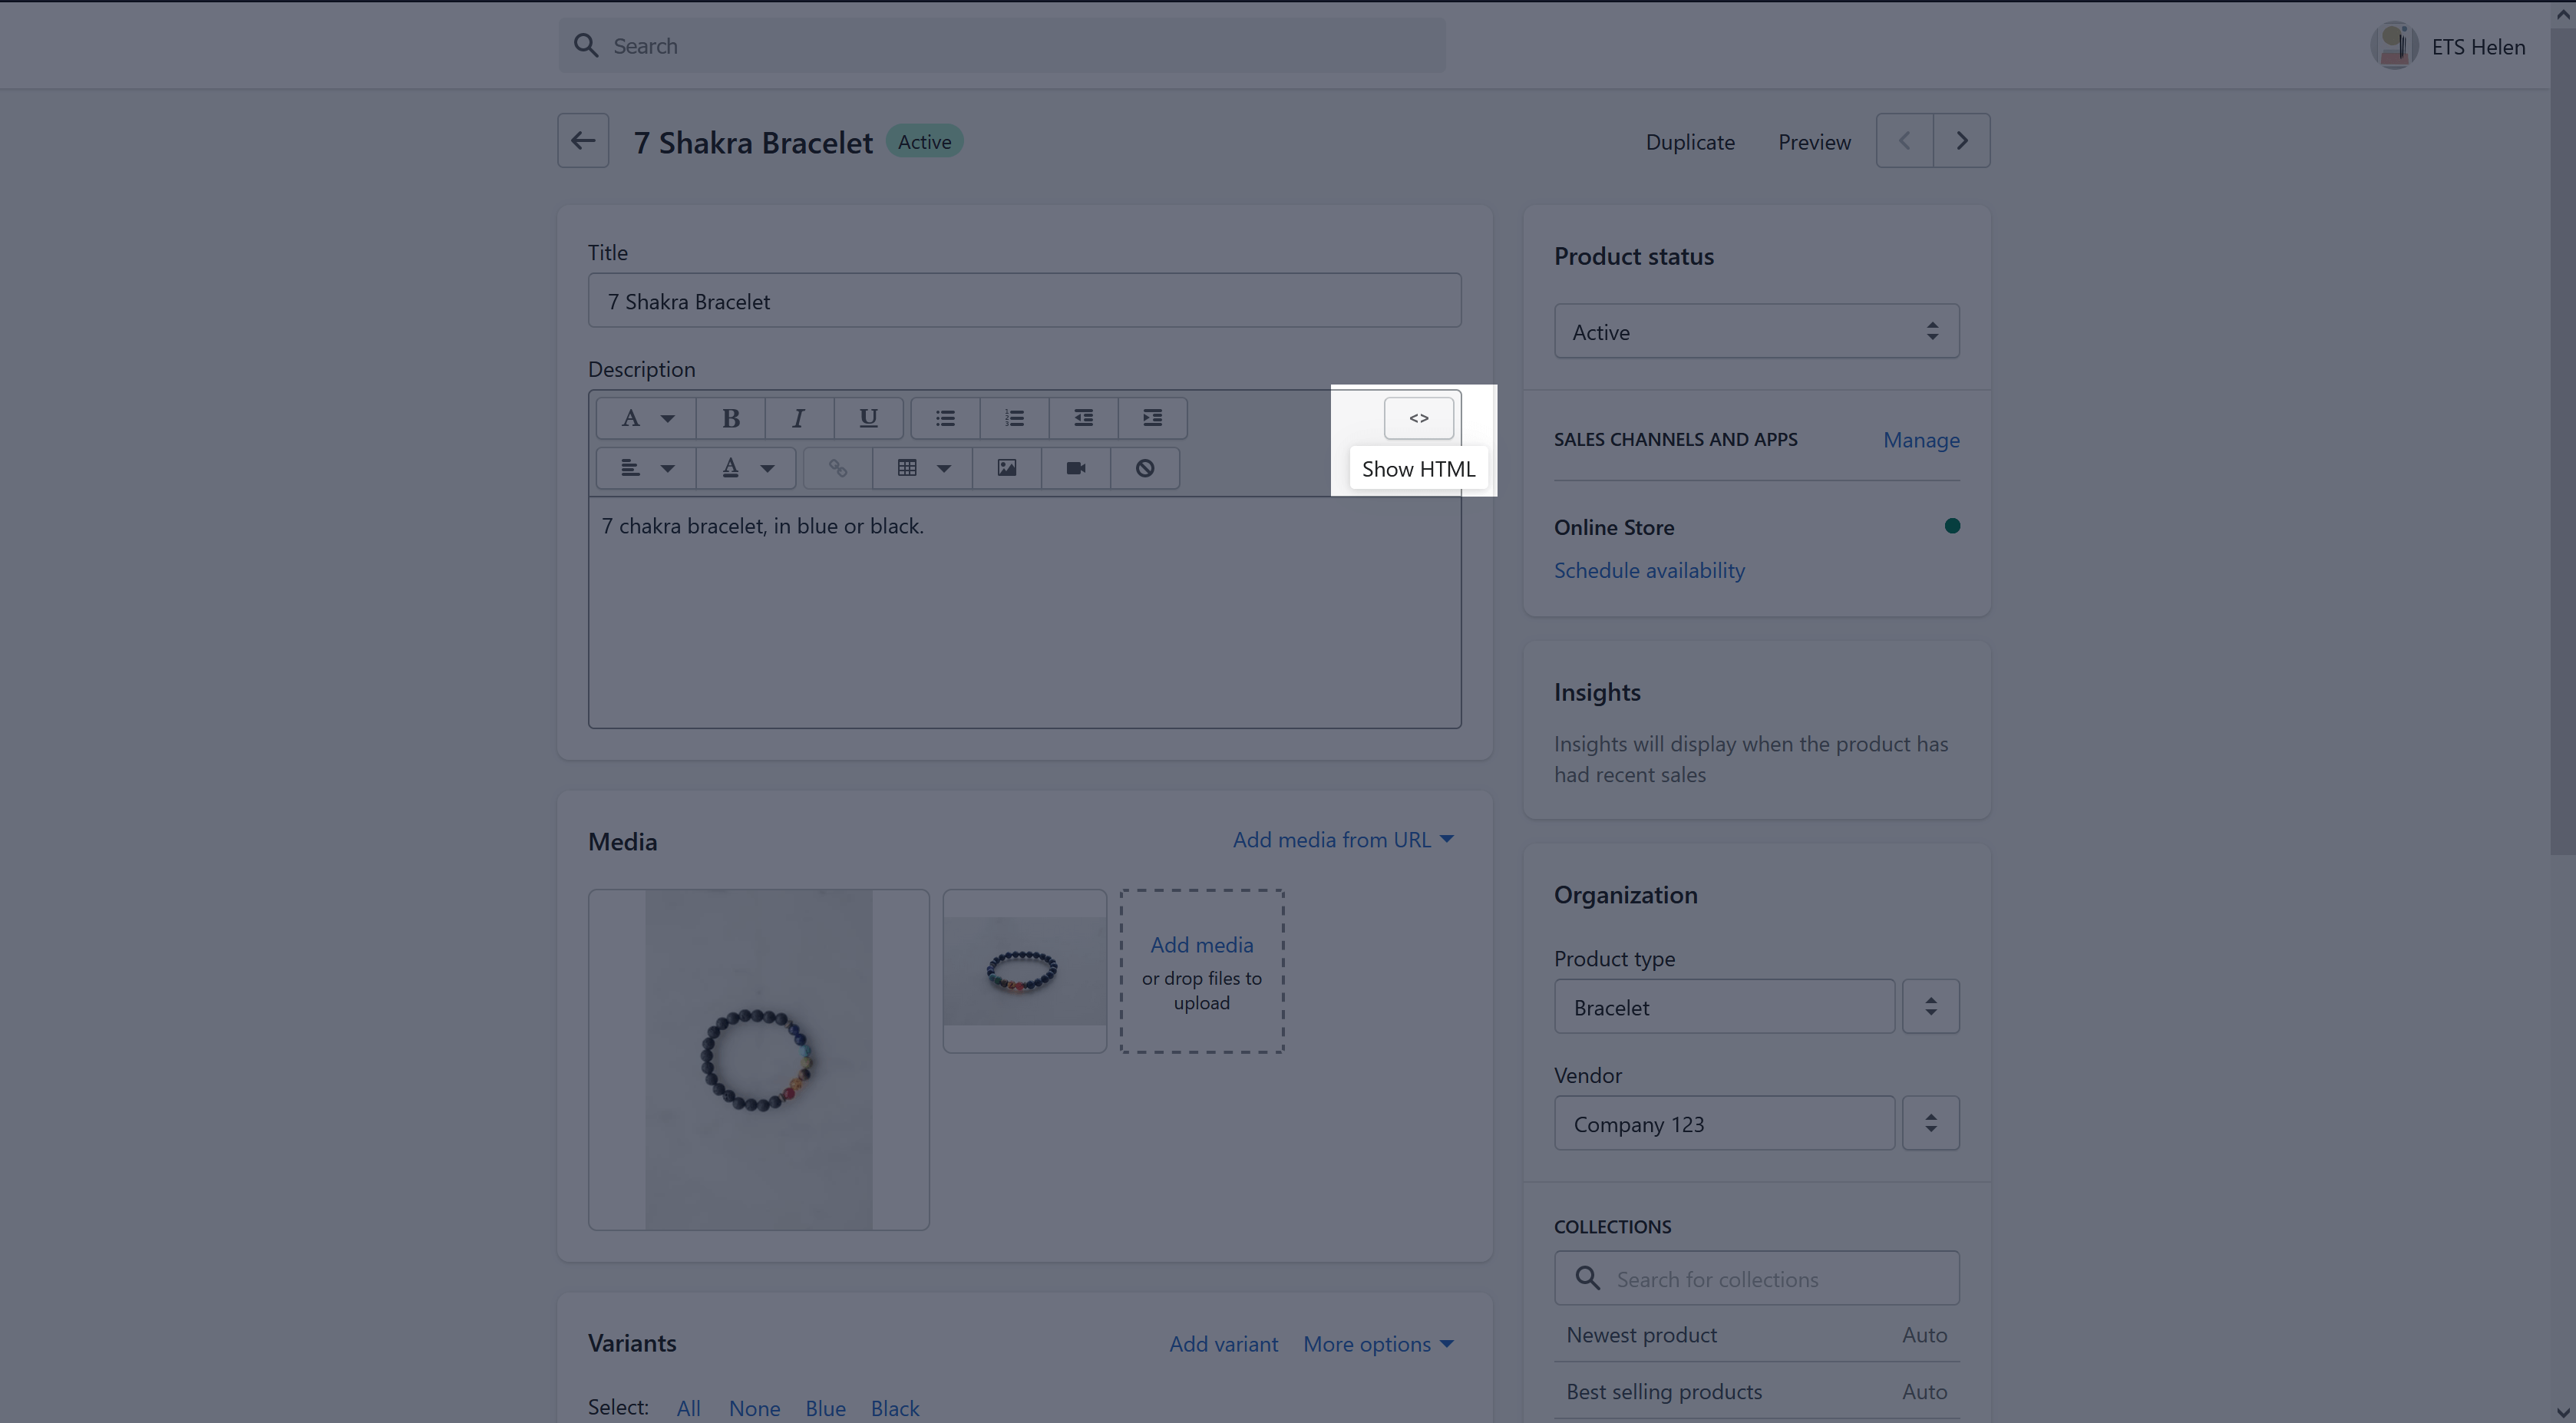
STEP 1: On your Shopify admin, navigate to “Products” page. Click on a product you want to display social login buttons in the product description area.
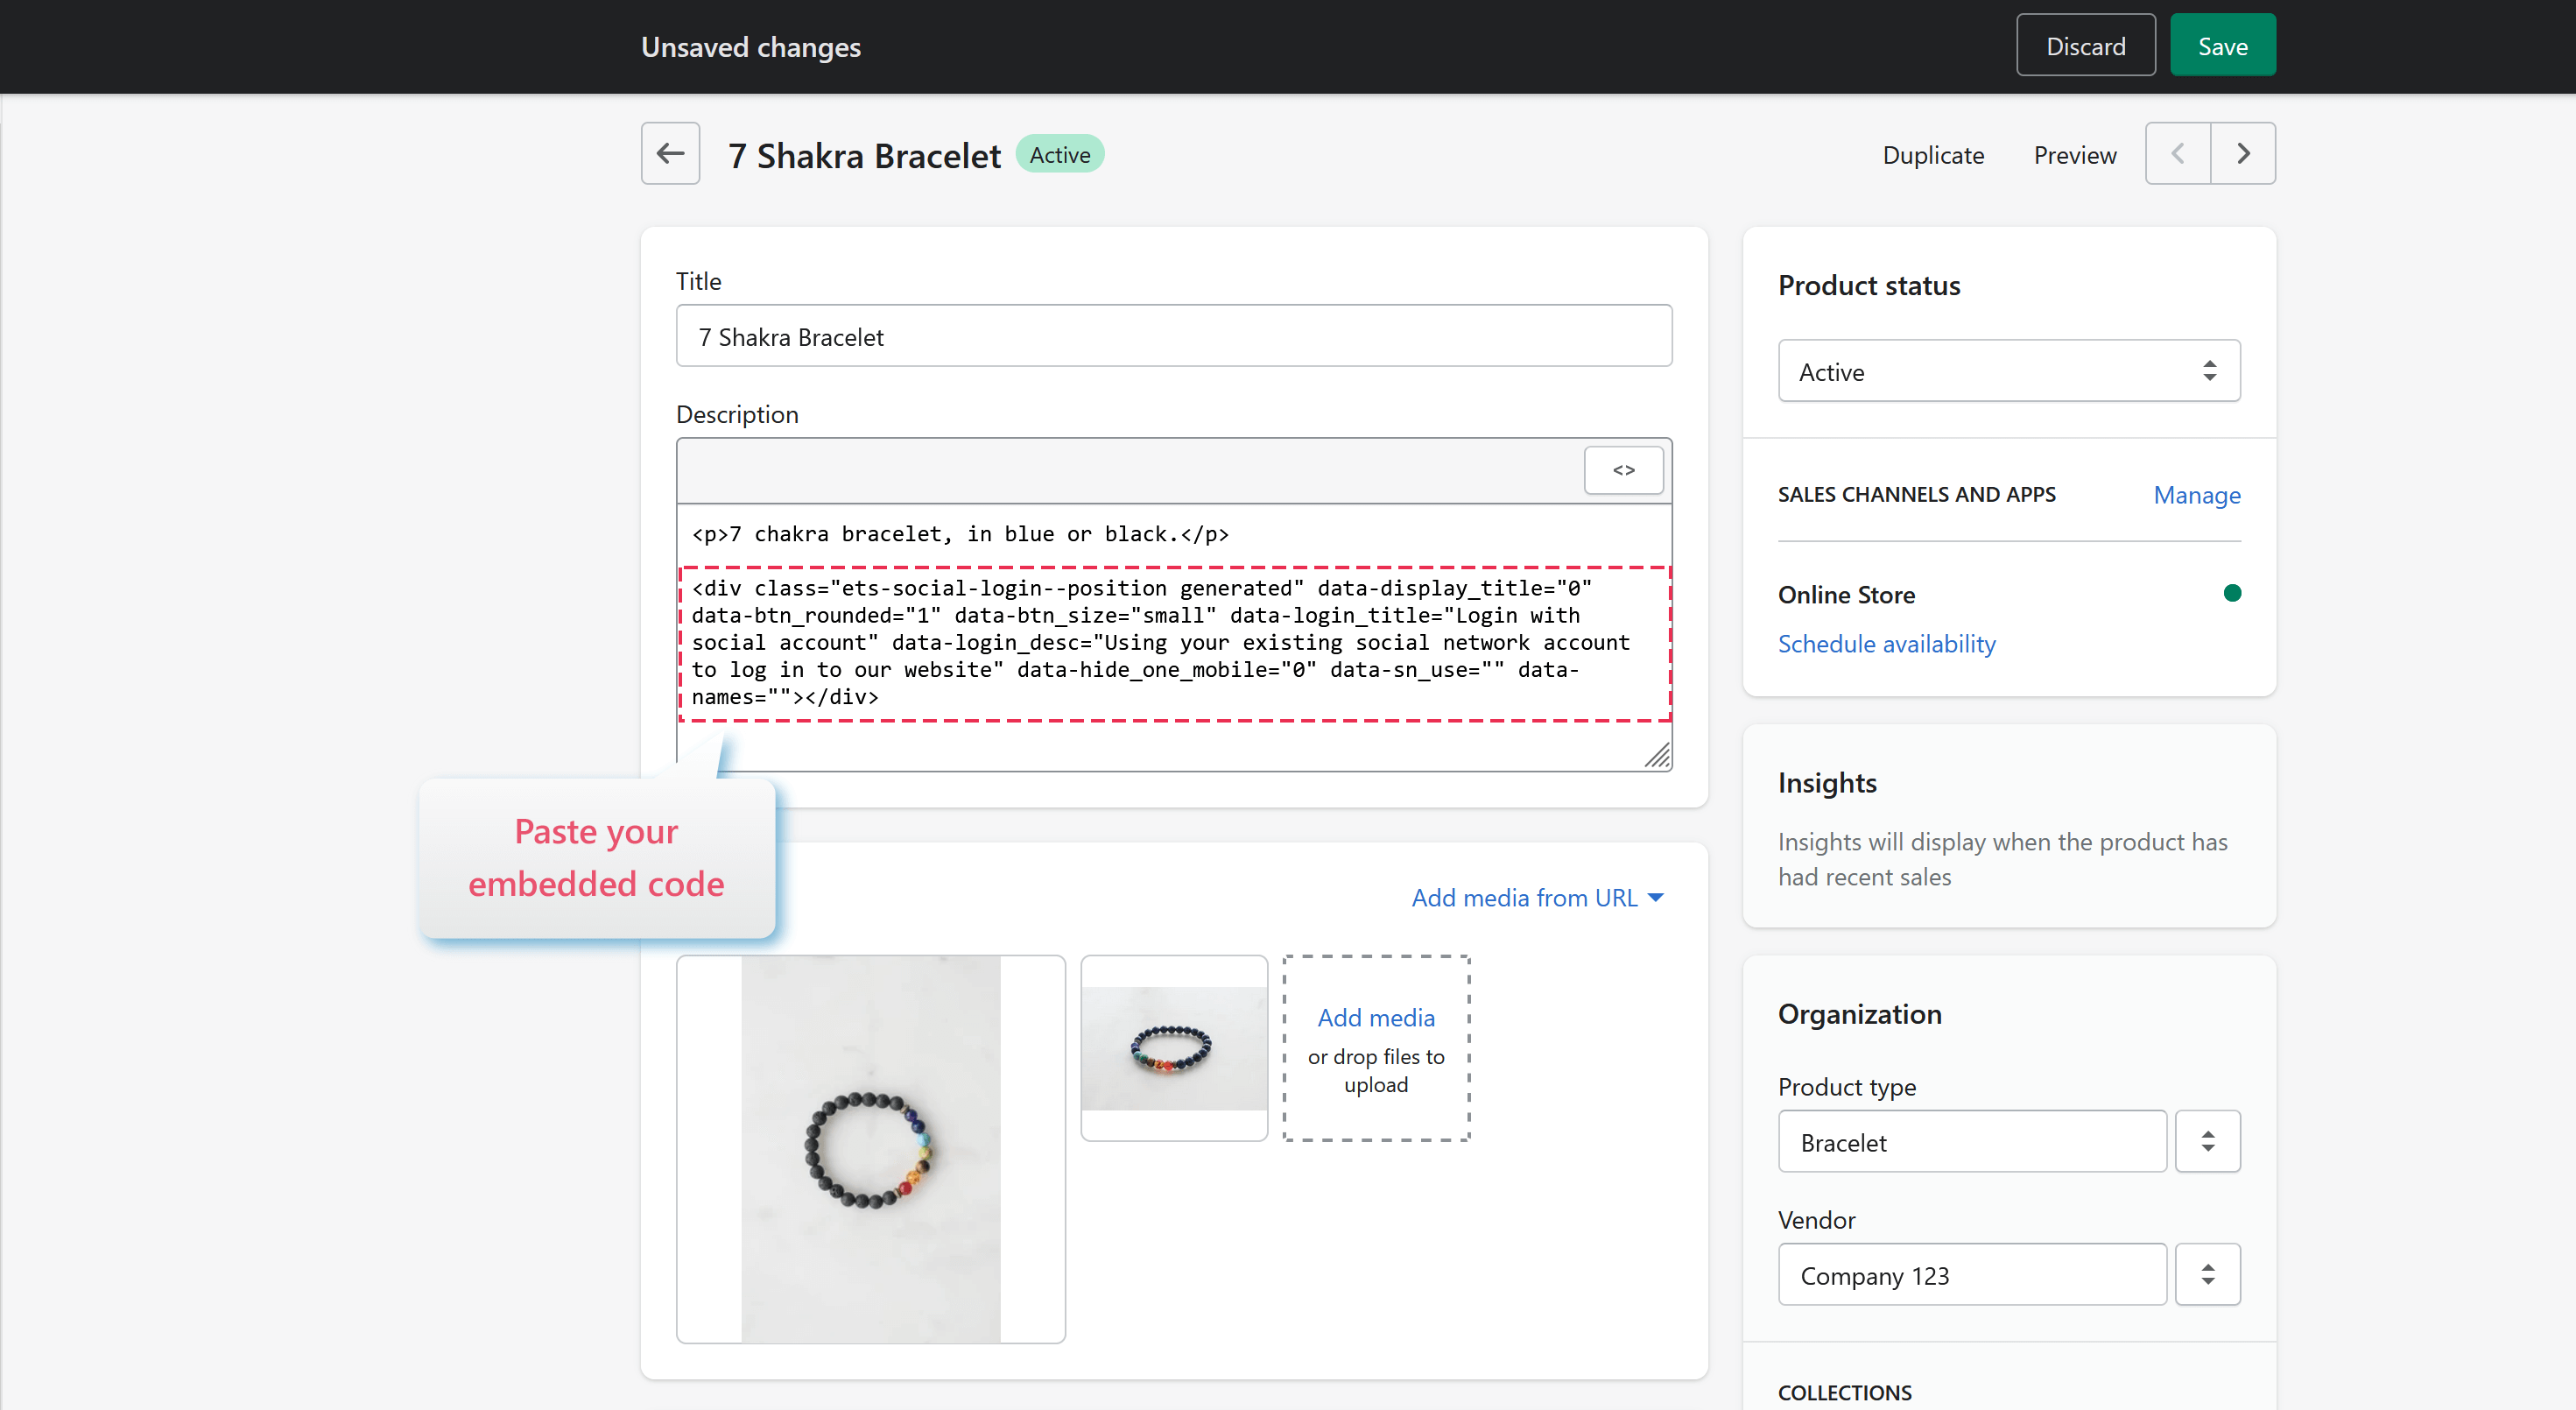
STEP 2: On “Description” field, click on “Show HTML” button. Paste the embed code on “Description” field. Click on “Save” button.
STEP 3: And we’re done! Open your product detail page and see the change!
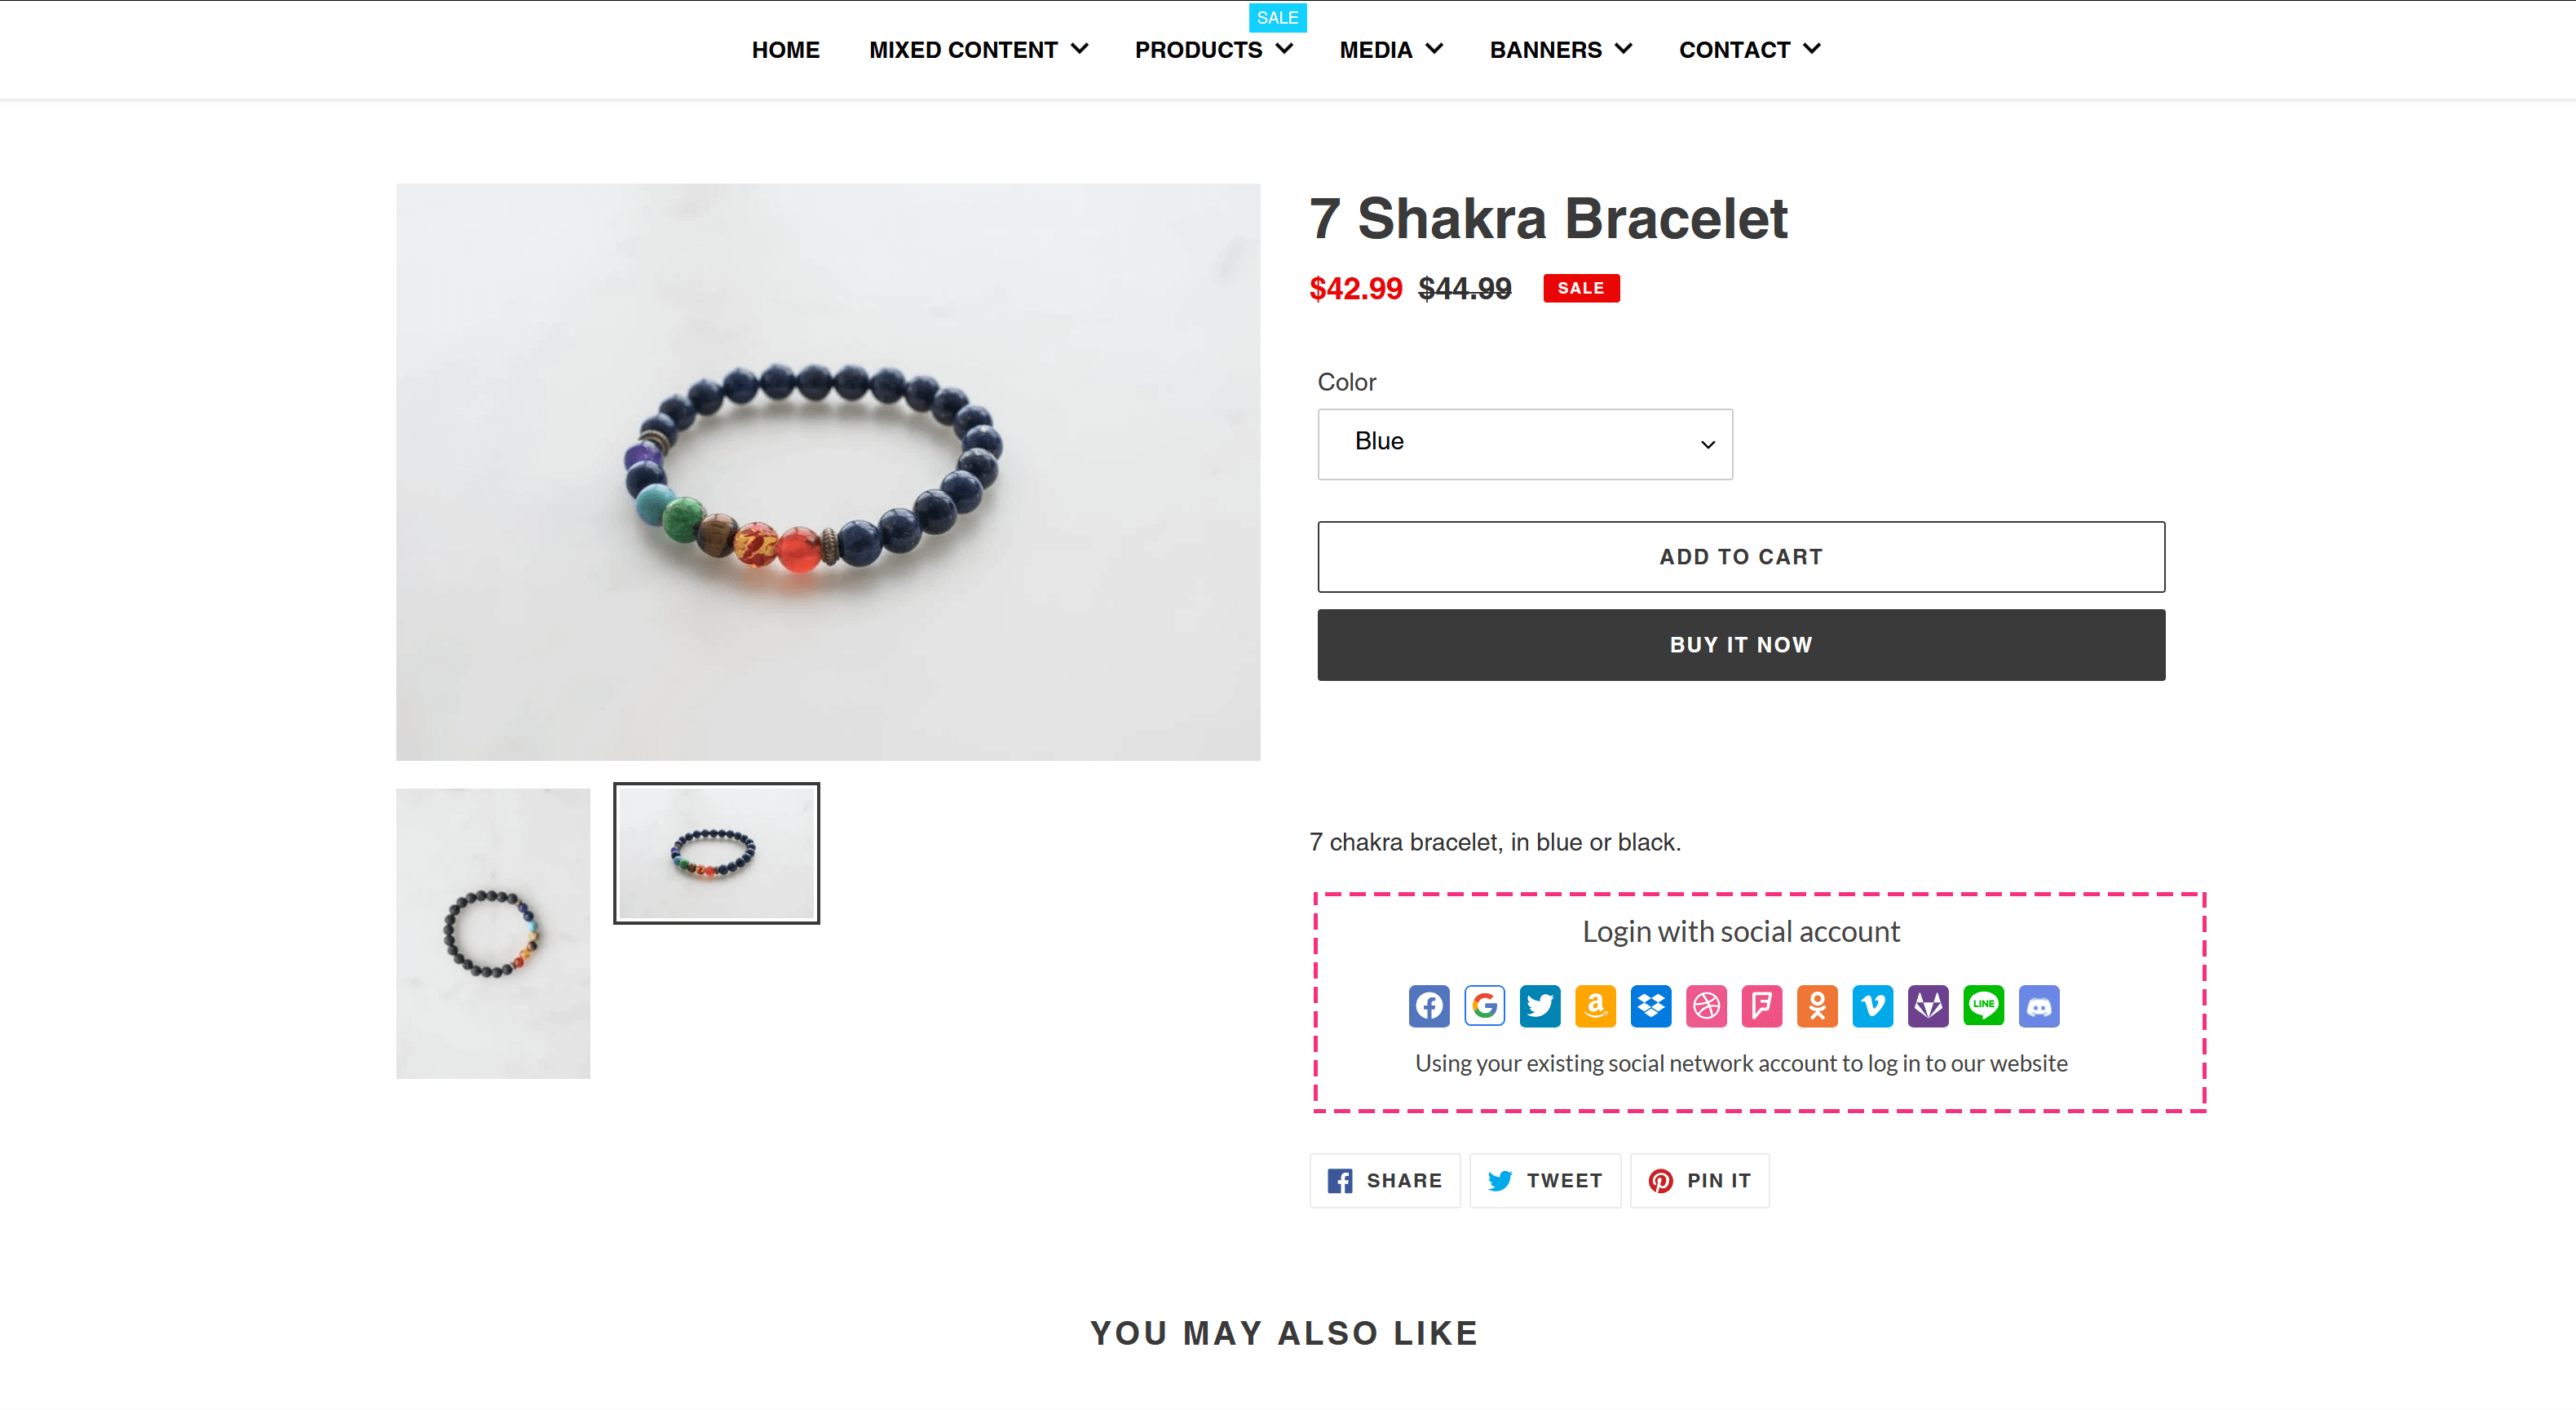
To remove social login buttons out of the product description area, just delete the embedded code on “Description” field.
Embed code on a .liquid file
STEP 1: Navigate to “Online store” > “Themes” page. Click on “Actions” dropdown menu. Select “Edit code“.
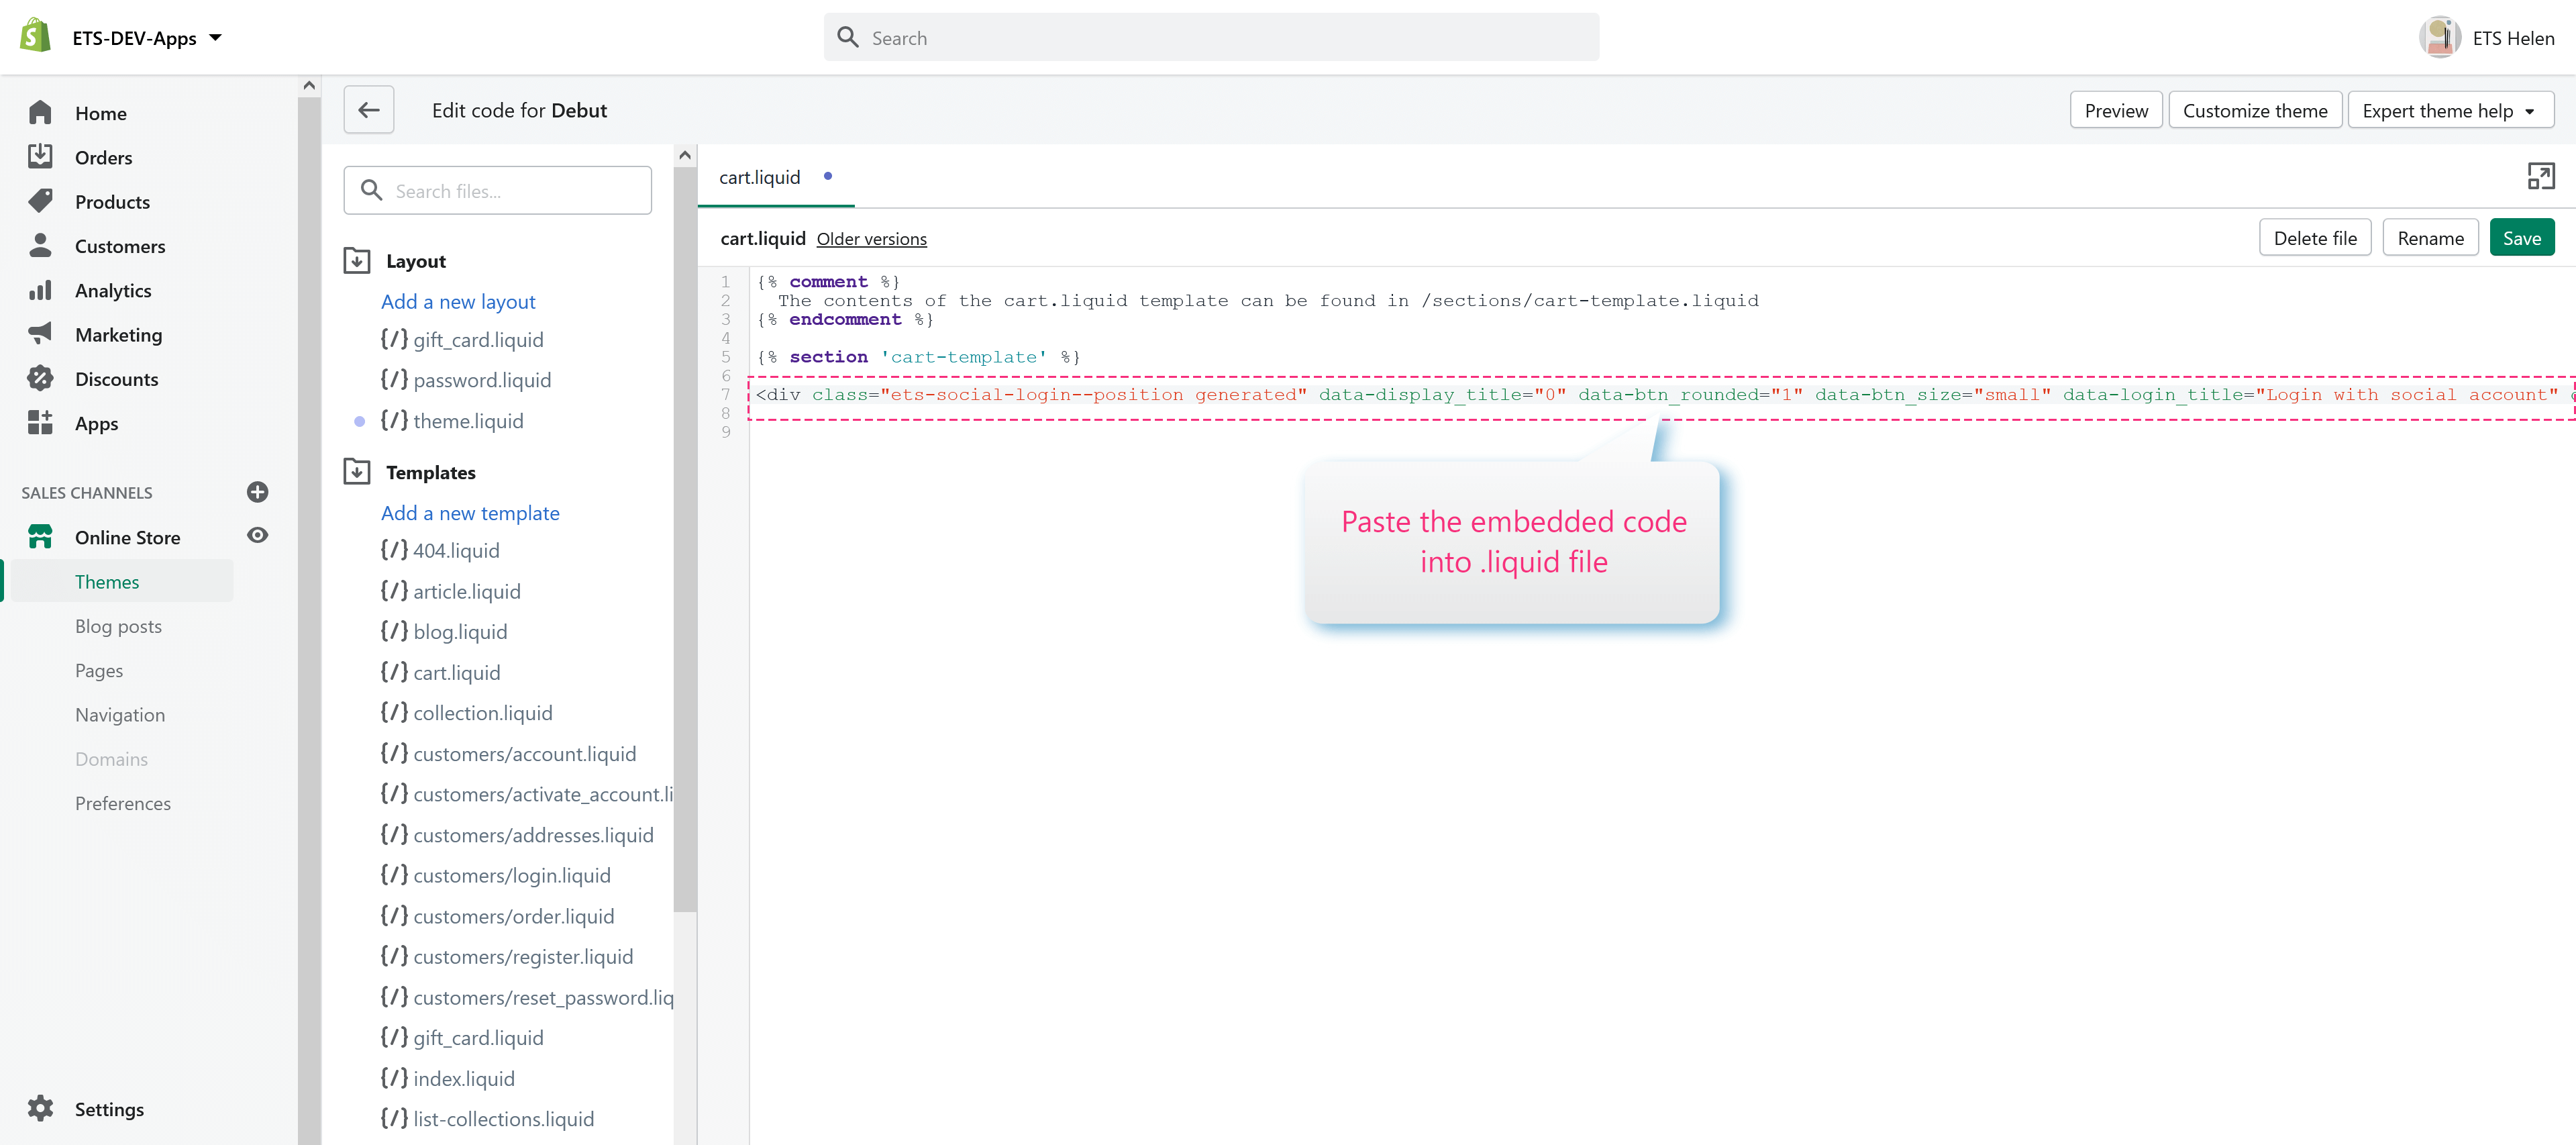
STEP 2: Scroll down and select any .liquid file you want. For example, we’re selecting “cart.liquid” file. Paste the embedded code. Click on “Save” button.
STEP 3: Open the cart page and see the change.

If you want to remove social login buttons from your web page, just delete the embed code on .liquid file.