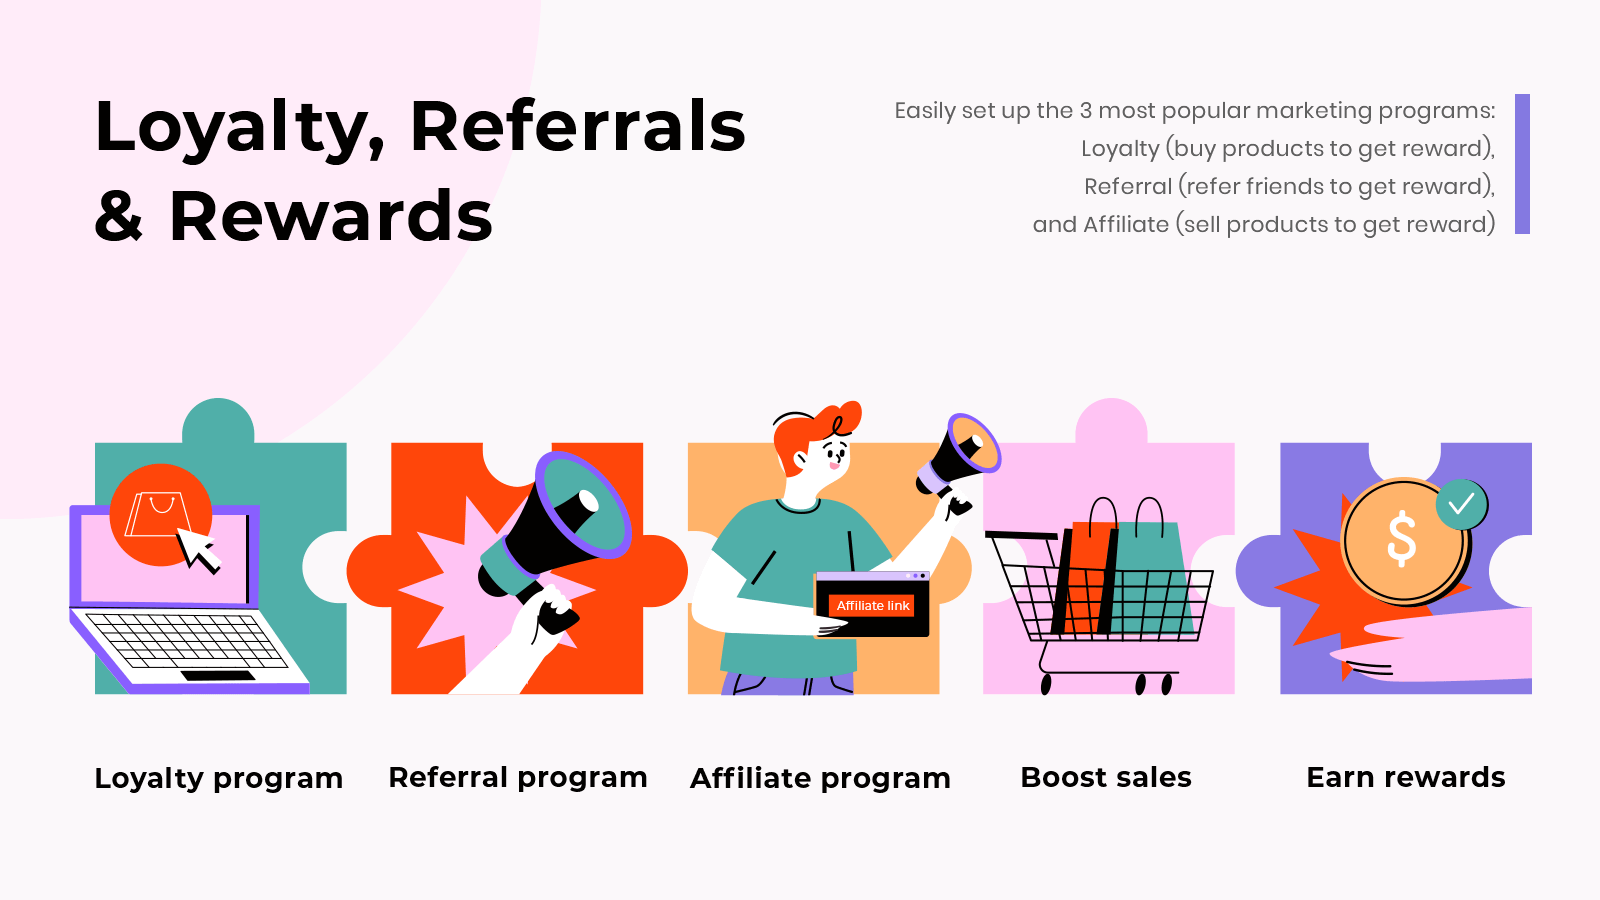
(1) Loyalty Program
This feature allows you to give customers reward points when purchasing products. You also can set up conditions, calculations as well as the number of reward points they will receive.
1.1 Condition
To apply this program to your Shopify store, first you need to configure the conditions for it.
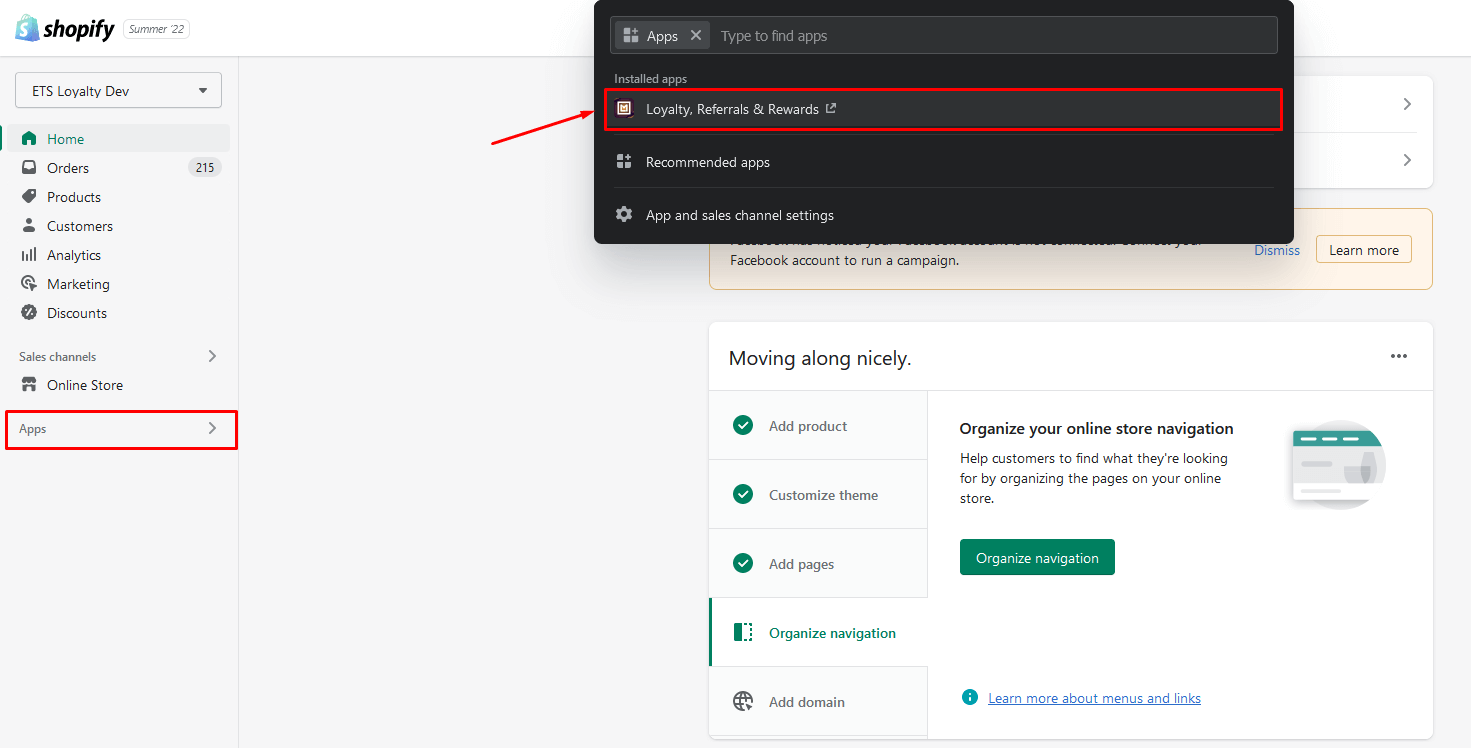
- Navigate to the “Loyalty Program” on the navigation bar.
- On the “Conditions” tab, enable this program.
- Enter the minimum spent amount and the minimum item of product a customer needs to achieve to join the loyalty program.
- Select all products or specific product categories applied for this program.
- Exclude products: select products that you don’t want to apply this program.
- Include specific products: select the products you want to apply this program even though they are not in the selected collections above.
- Click “Next” to move to the next step.

1.2 Reward settings
After configuring the conditions, you need to set up the Reward settings for the Loyalty program.

- Enter the discount percentage of product price customers will receive when purchase loyalty products.
- Set up the minimum item of product to get the reward.
- Enter maximum reward amount per shopping cart
- Enable/disable the remaining options depending on your use purpose.
- Click “Next” to move to the final step.
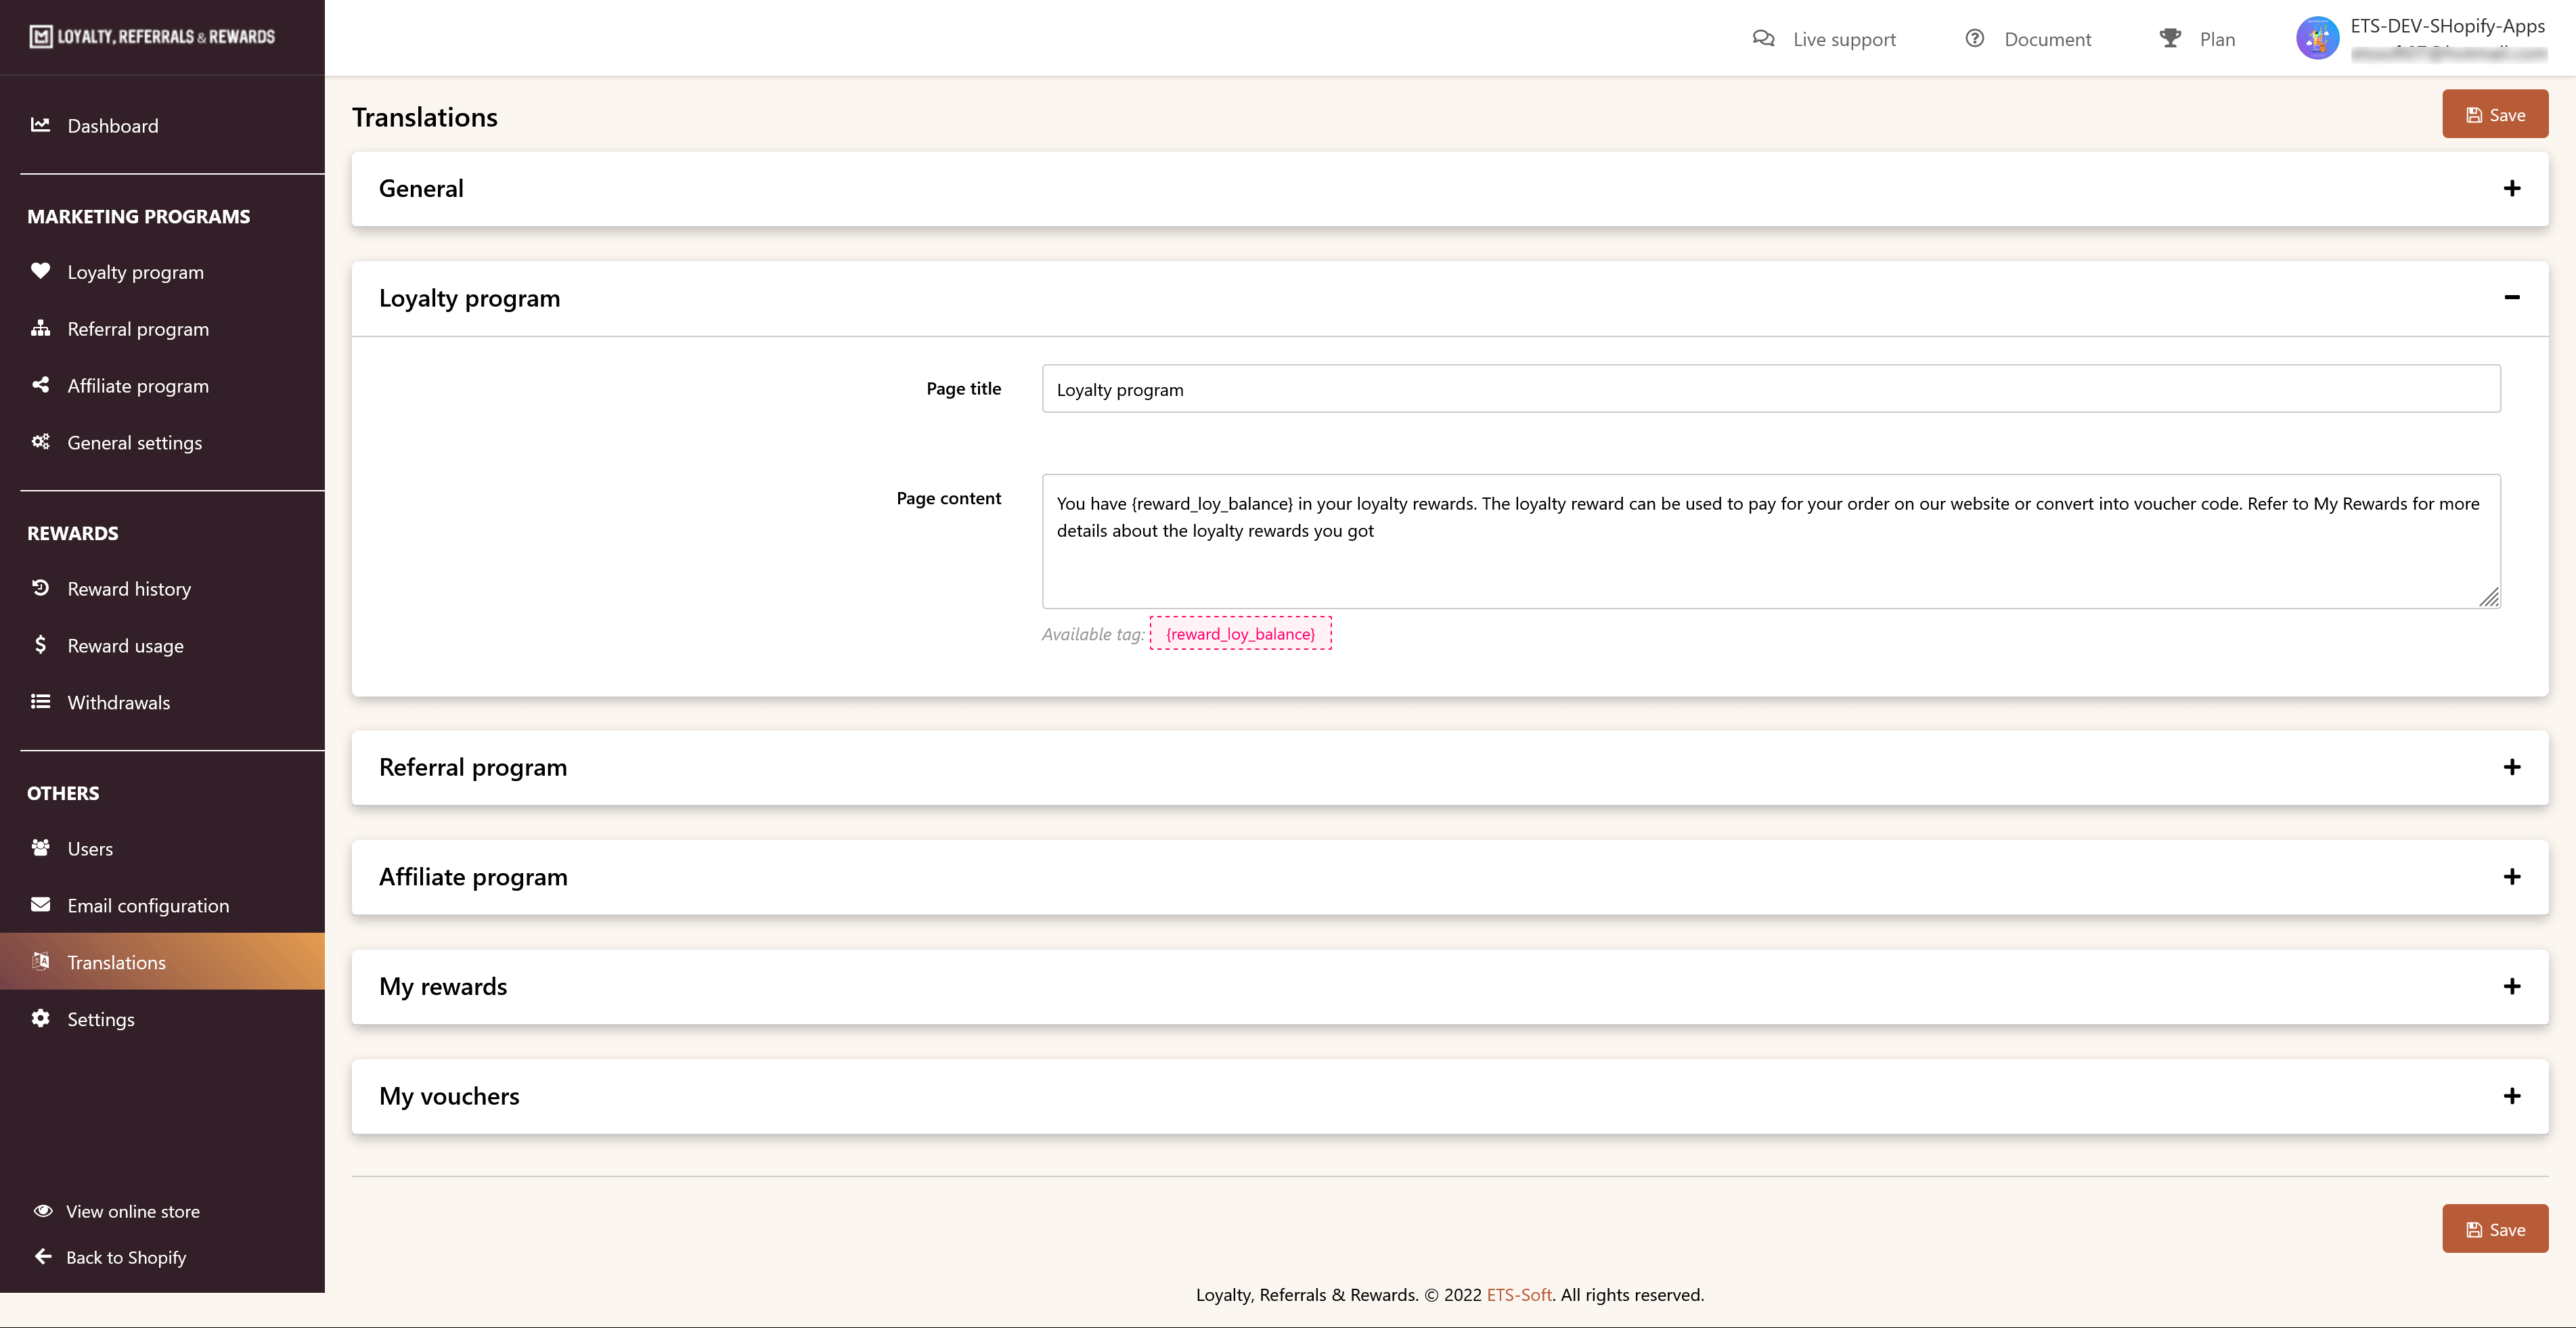
1.3 Messages
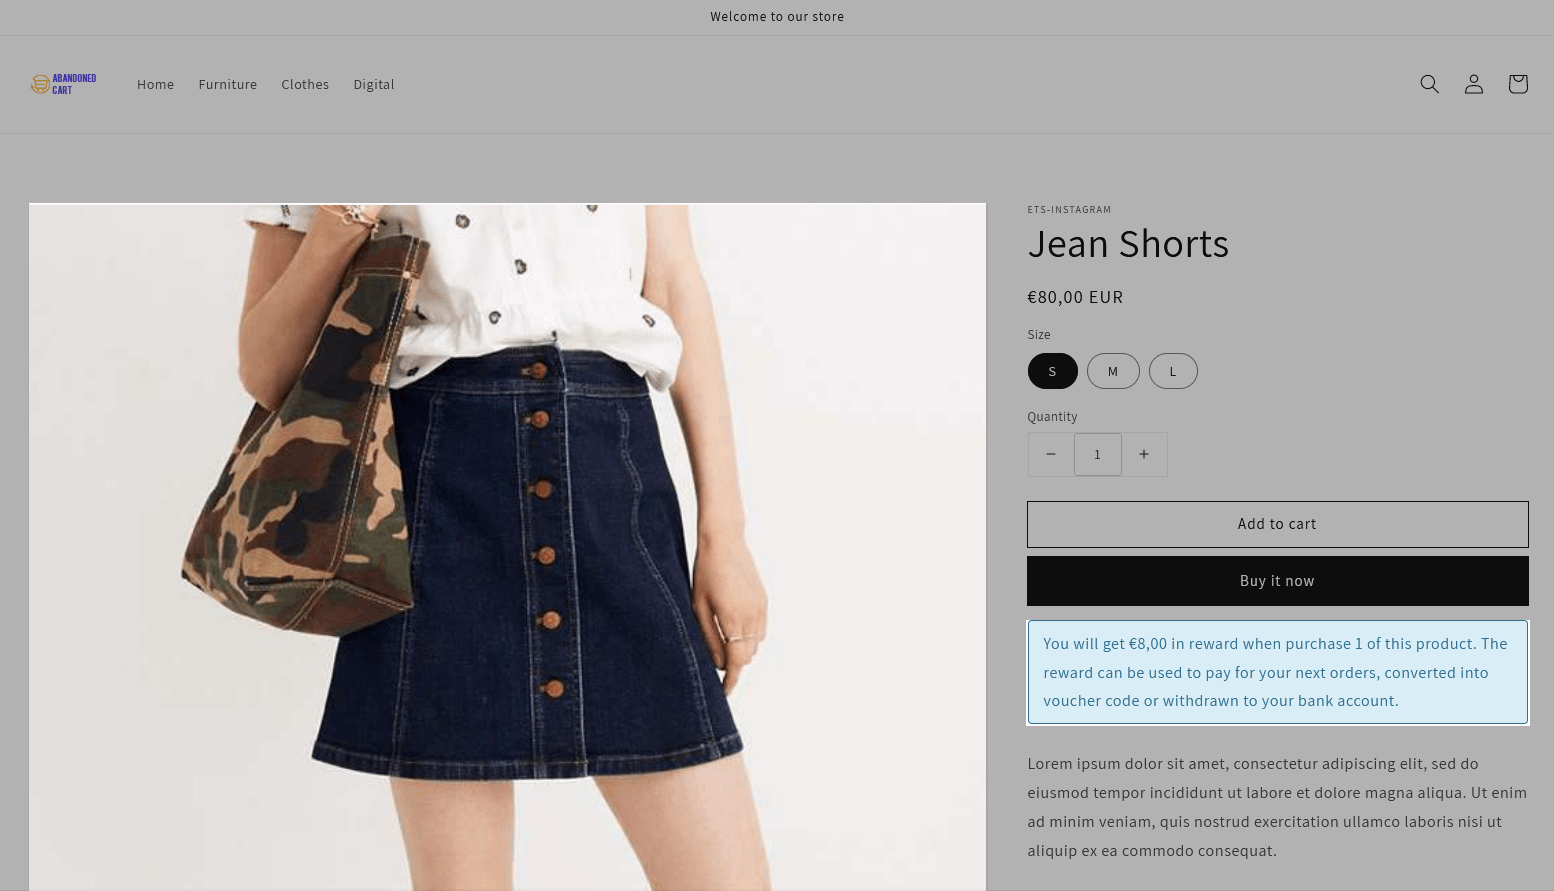
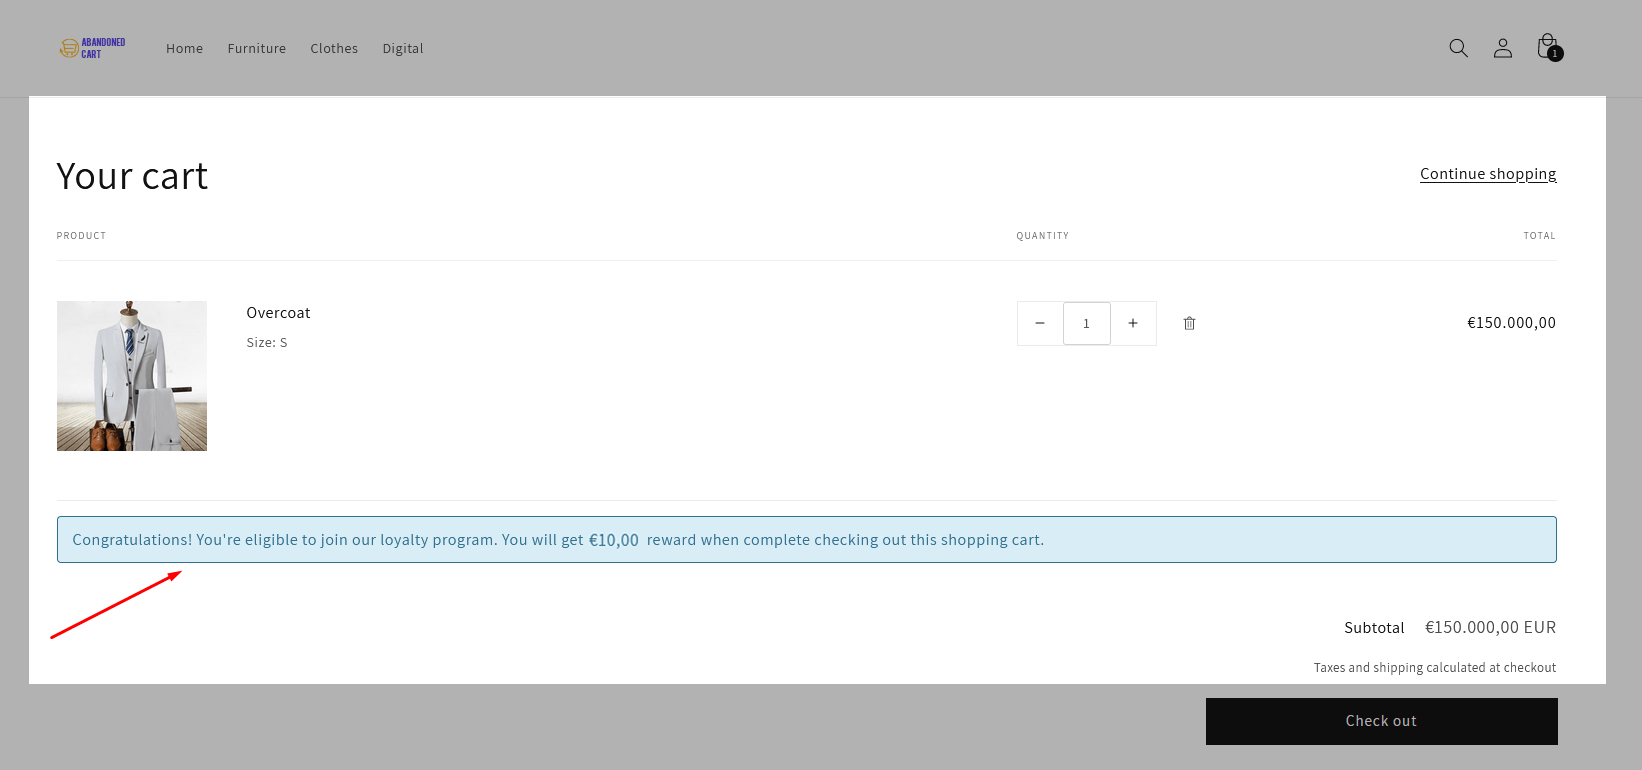
To launch this program, you need to complete this final step. On the “Messages” tab, you can edit the content of the message sent to customers on the product page, shopping cart page, or “My account” page in different cases. You also can write and display an explanation message about the Loyalty program to inform customers, help them understand, and incentive them to join!
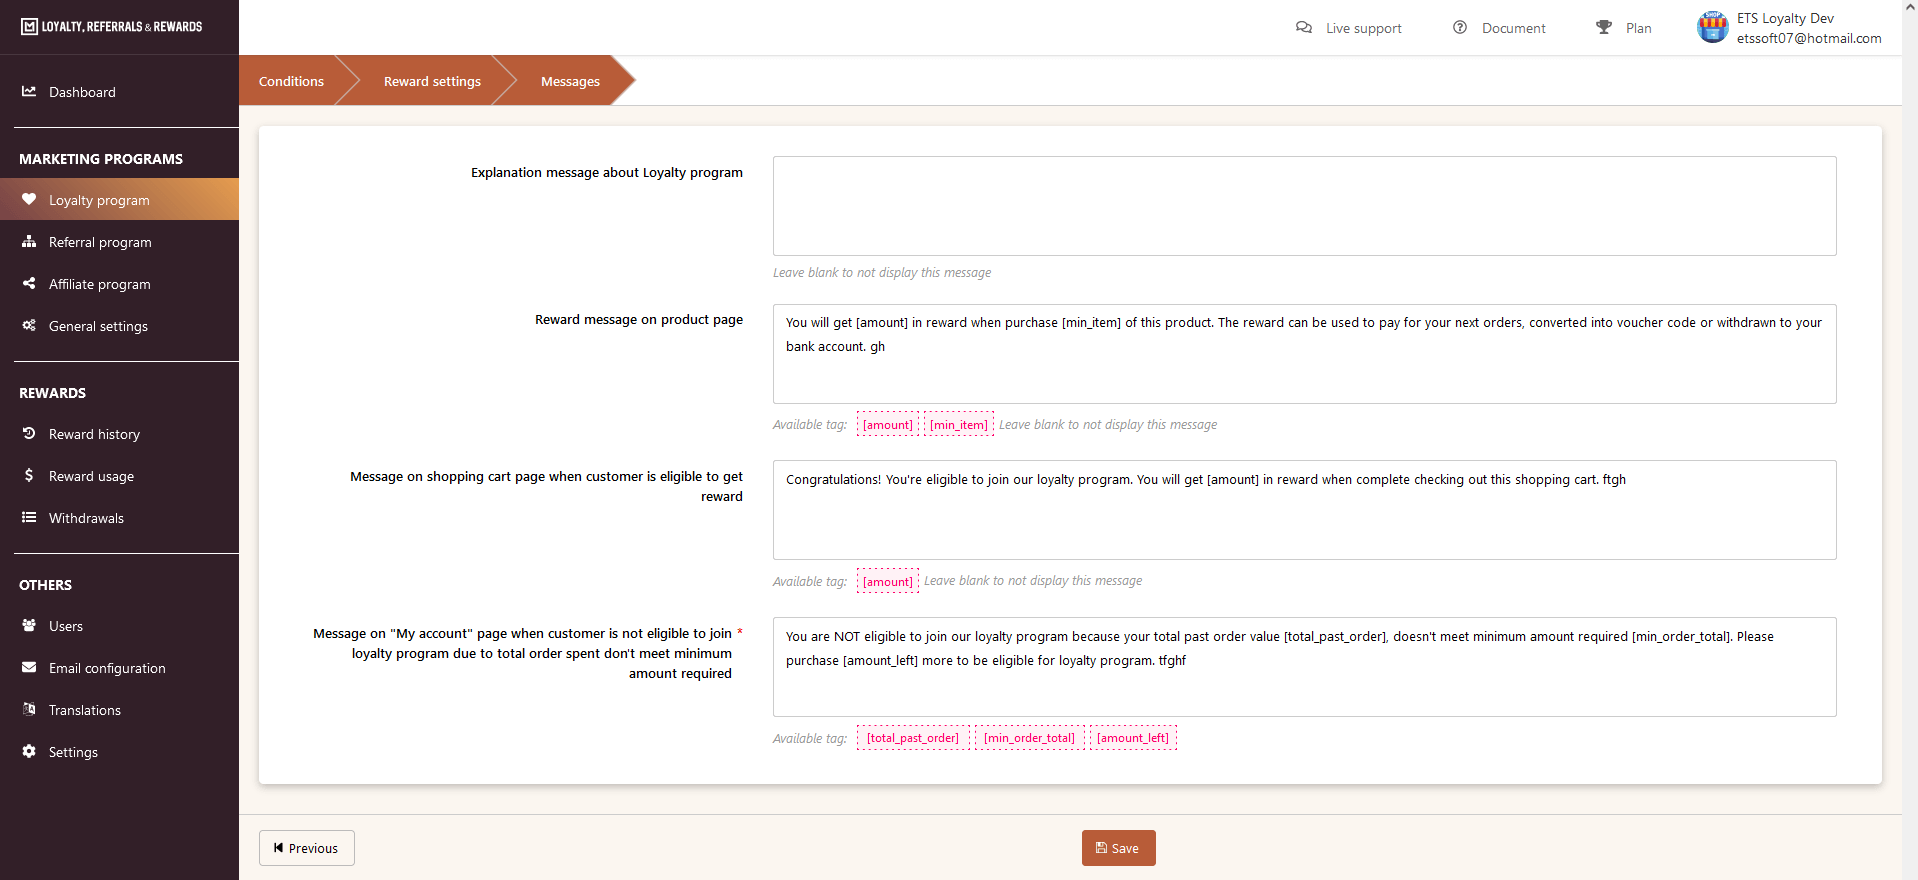
Our app provides available tags that you can use to make your message content. After editing, remember to click “Save” and you’ve done!
Here are some examples of messages displayed in the front office:
- On the shopping cart page:
(2) Referral Program
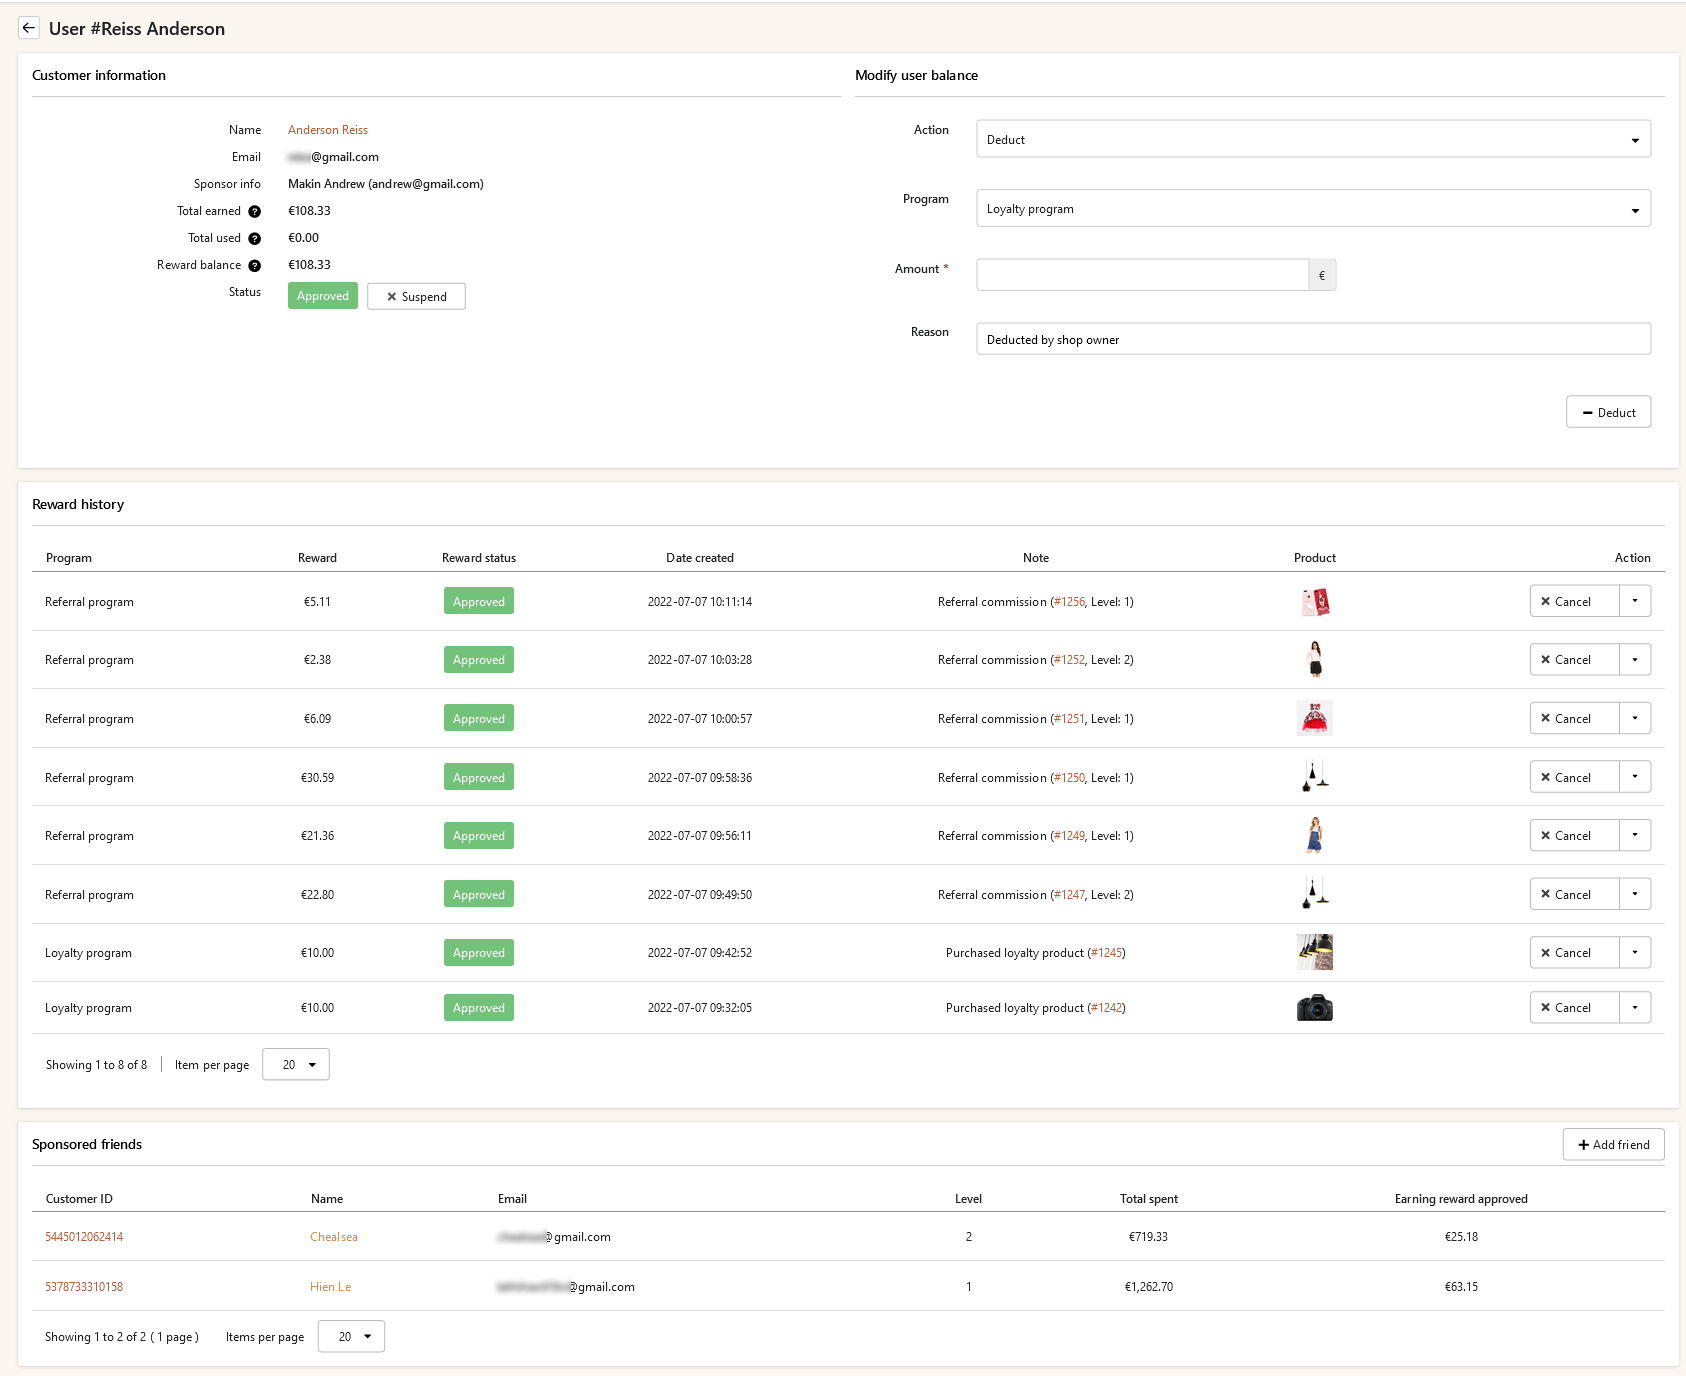
Referral Program allows your customer to invite their friends to register for an account/purchase products to get rewards. From there, helps you to leverage your existing customers and turn them into sponsors who assist spread the word about your business & products to additional potential clients as an extra channel to promote your brand.
2.1 Conditions
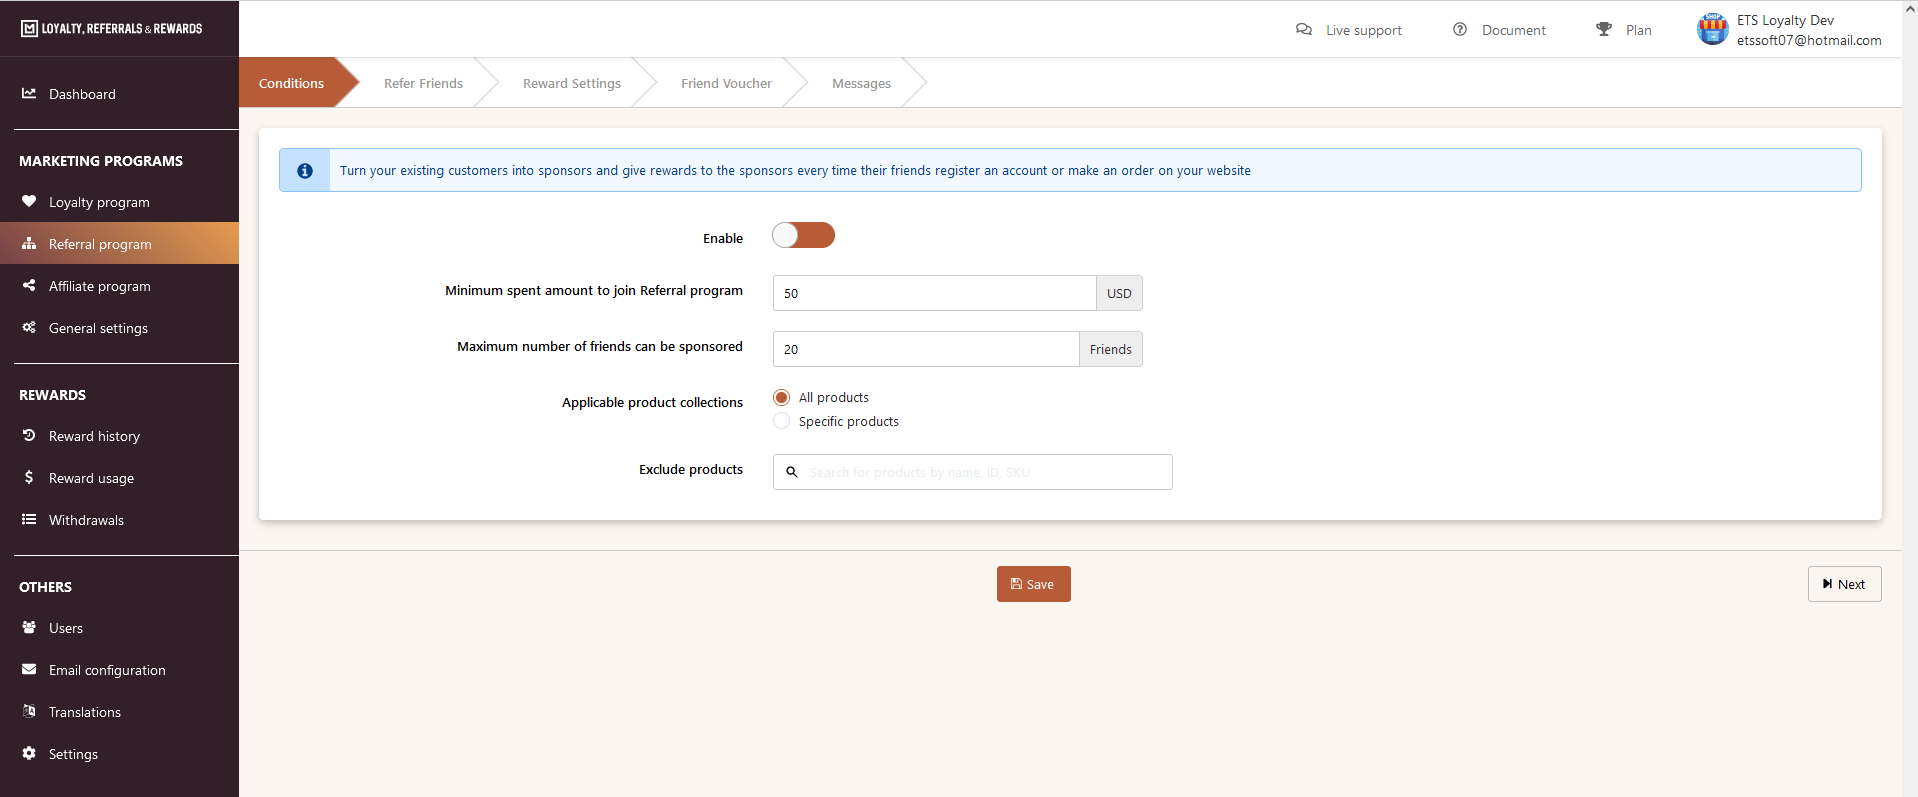
- Enable this program
- Enter the minimum spent amount a customer needs to achieve to join the Referral Program.
- Enter the maximum number of friends who can be sponsored by a customer.
- Select include/exclude products you want/don’t want to apply in this program.
- Click “Next” to move to the next step.
2.2 Refer Friends
Our app provides 5 options that you can allow customers to refer their friends:
- Using URL banner
- Sending an invitation via email
- Using voucher code
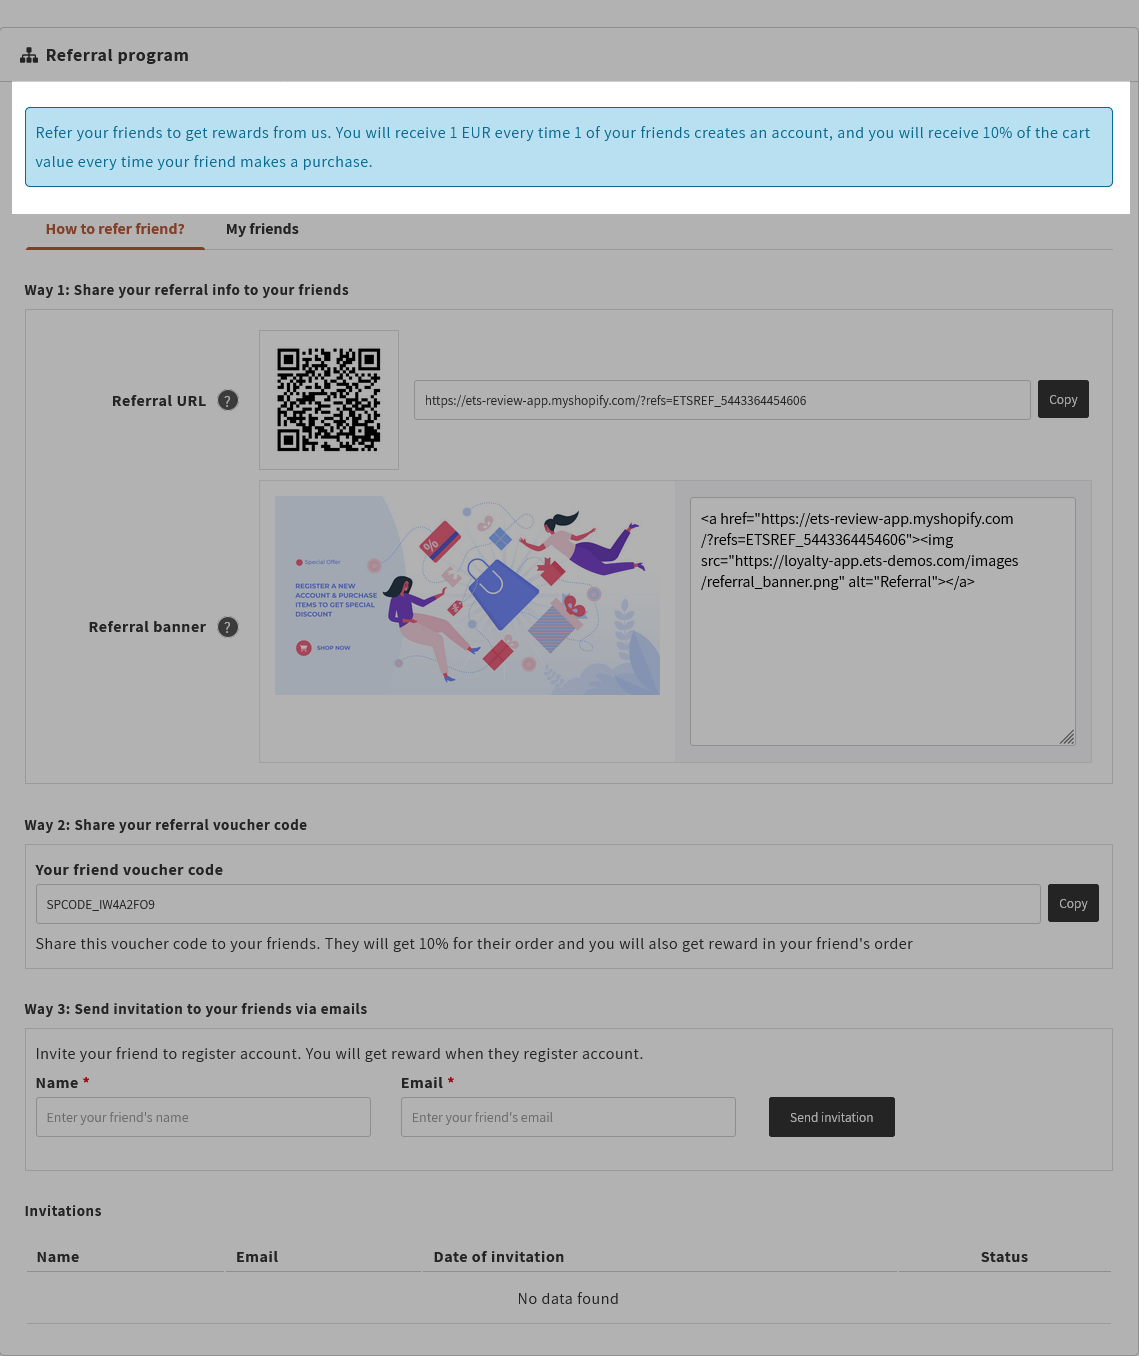
- Referral URL
- Referral QR code.
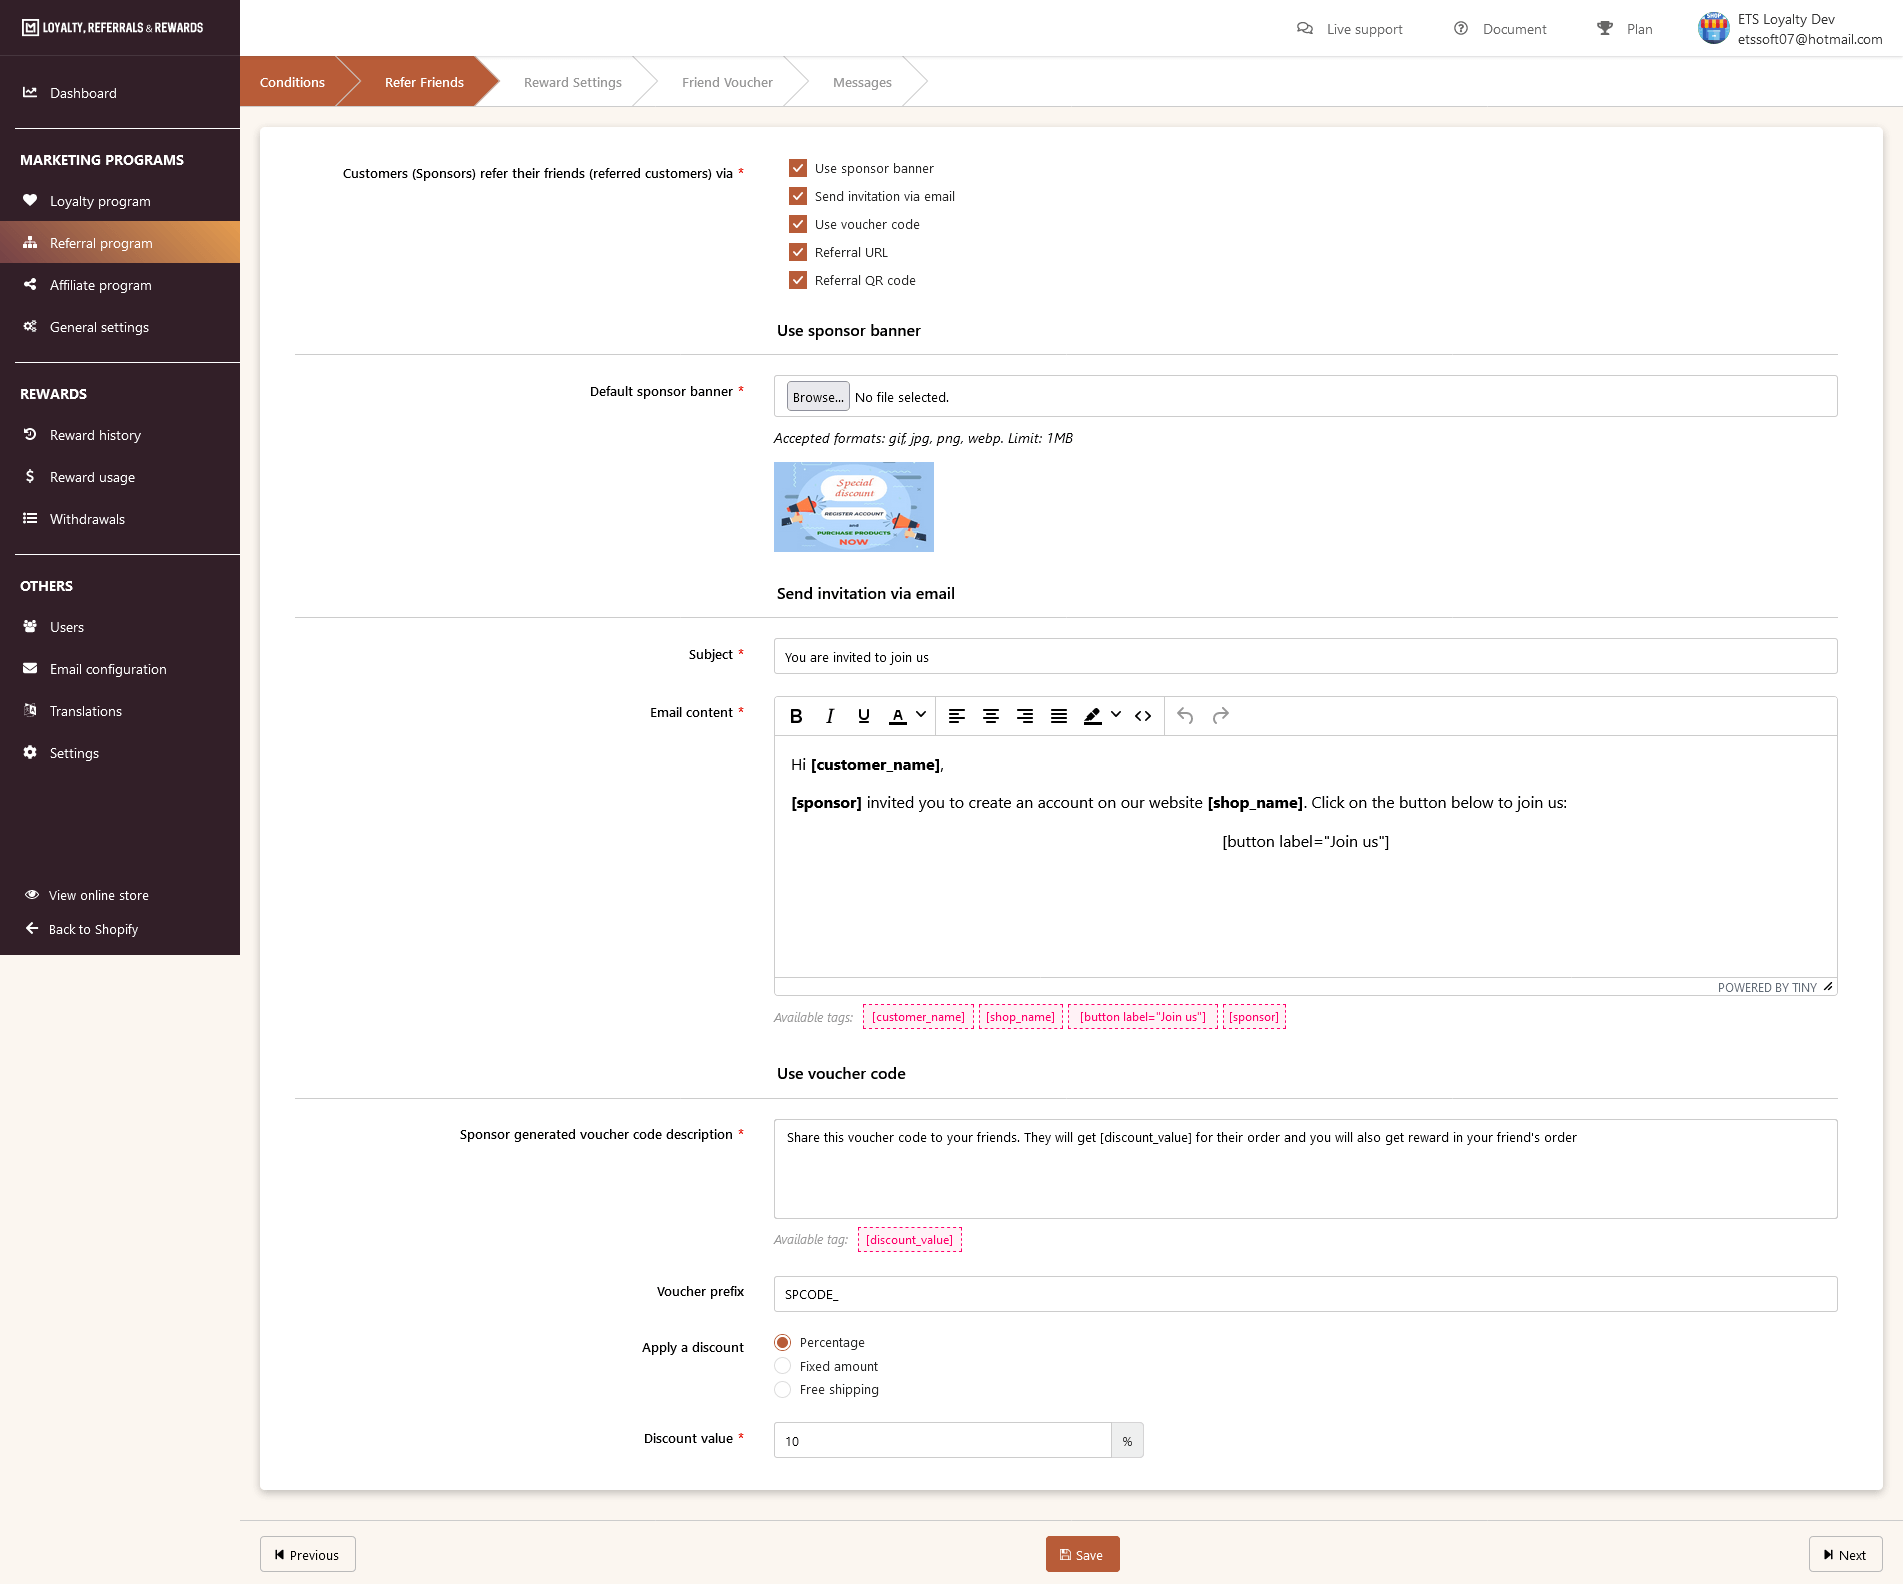
You can edit the content of each program from your back office easily. All of the referral programs will be displayed in the front office. Sponsors only need to log in to their accounts, go to My account>>Referral program, and choose the most suitable referral way they want to refer their friends.
- “Referral URL” and “Referral QR code” will be created automatically and customized for each customer. Sponsors can easily copy and send Referral URL or Referral QR code to their friends.
- Use sponsor banner: upload a banner from your back office then it will be displayed on the sponsors’ account with a link. Sponsors can copy that link and paste it on any page of their website to display the banner.
- Use voucher code: From your back office, you need to edit the voucher code description, choose a discount type and enter discount value. A voucher code will be created and displayed on the sponsors’ accounts, they can easily copy and send it to their friends. When their friends use this code to make a purchase, they will get a discount for their order and sponsor will also get rewards from there.

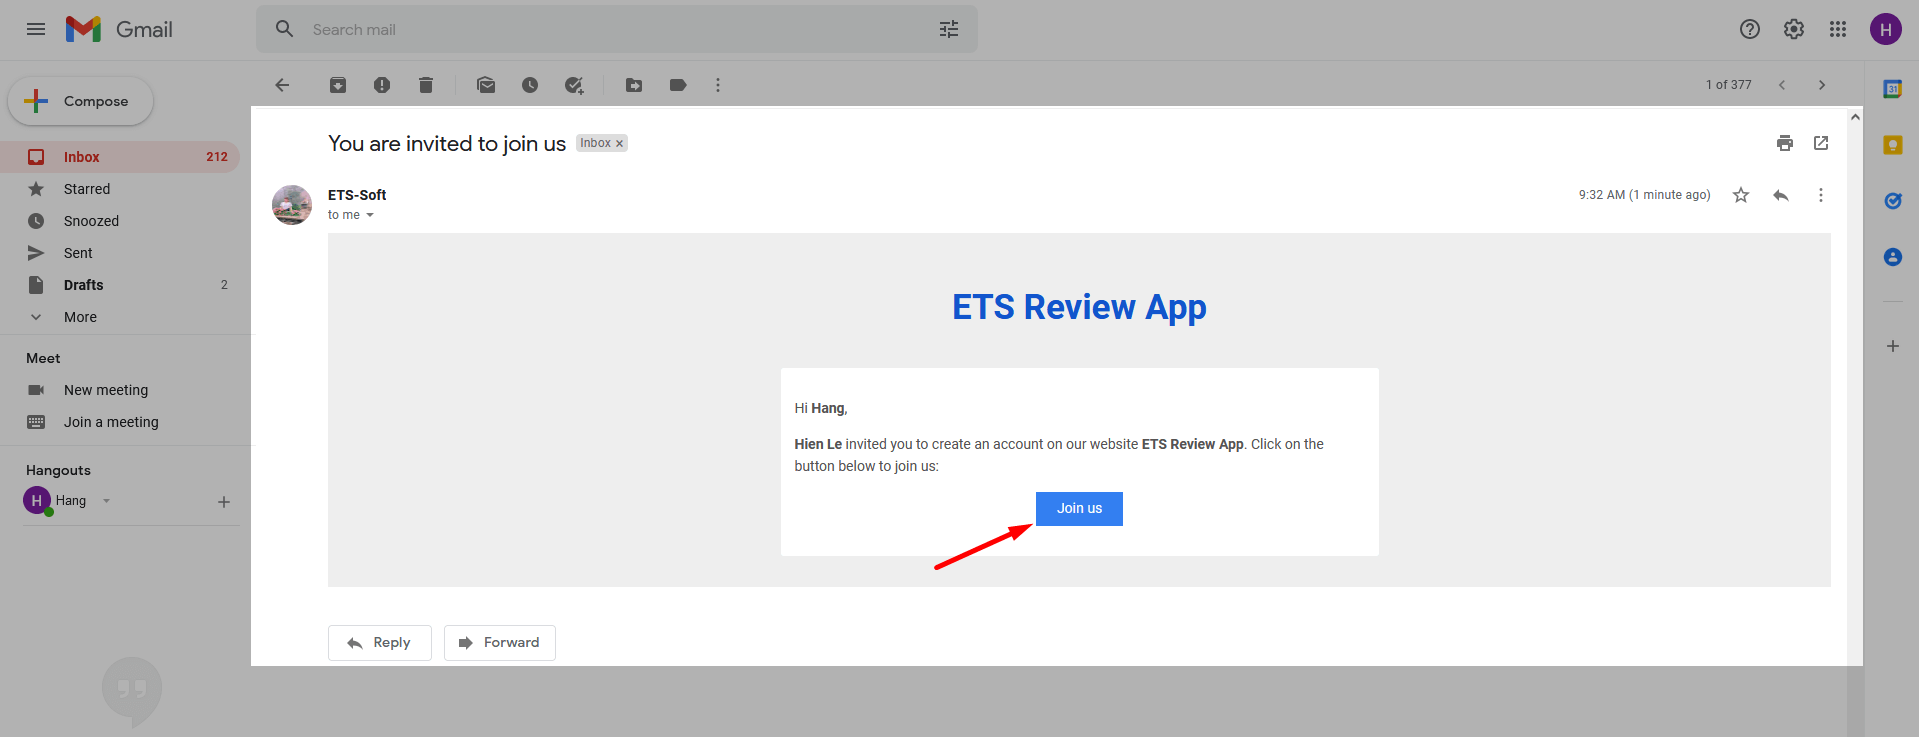
- Send invitation via email: As I mentioned above, you can edit the content of the referral email and use available tags provided by this app. Sponsors only need to enter their friend’s name and email and then click “Send invitation” button. A referral email will be sent to their friends, click on the button on the email and they can go to your website.
2.3 Reward Settings
This program allows sponsors to get rewards when referred customers create accounts or make purchases. Enable the options you want and fill in the value needed to configure how to calculate the reward to give to the sponsor (referrer).
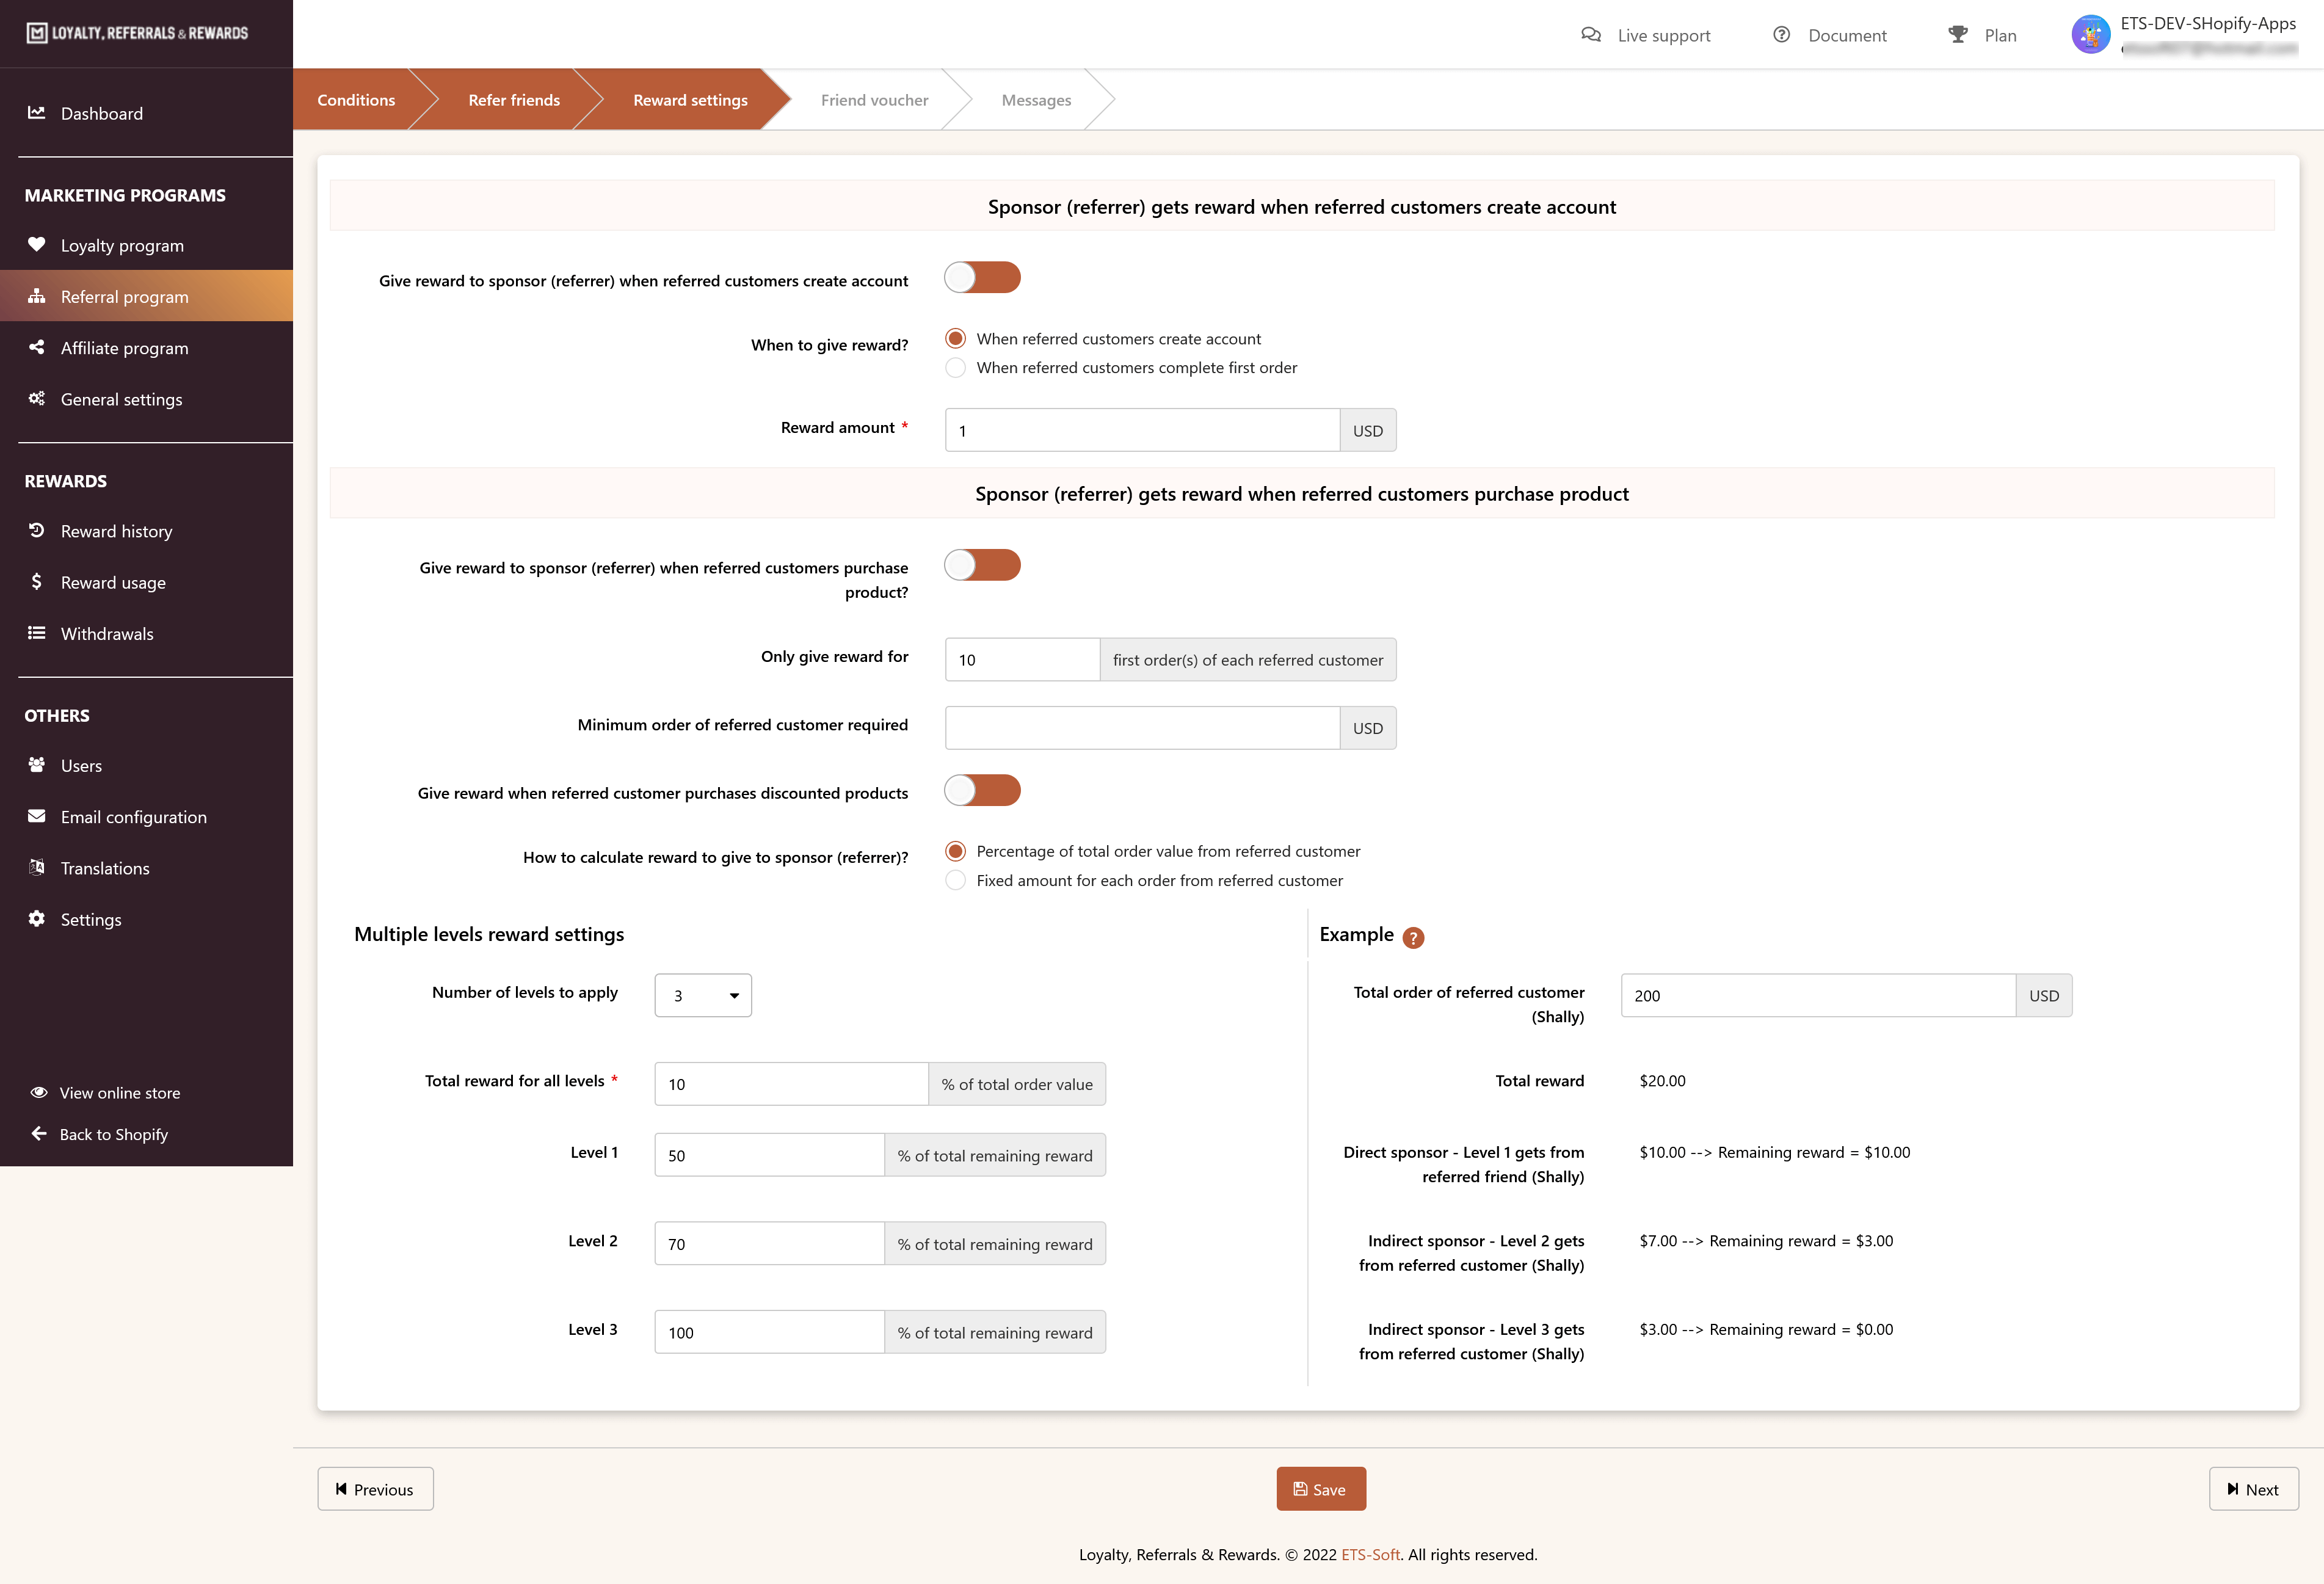
Moreover, our app supports multi-level marketing (sponsors can also get rewards when referred customers from lower levels purchase products). To help you understand more about this program and the referral rewards calculation, let’s refer to the example of 3 levels sponsor below!
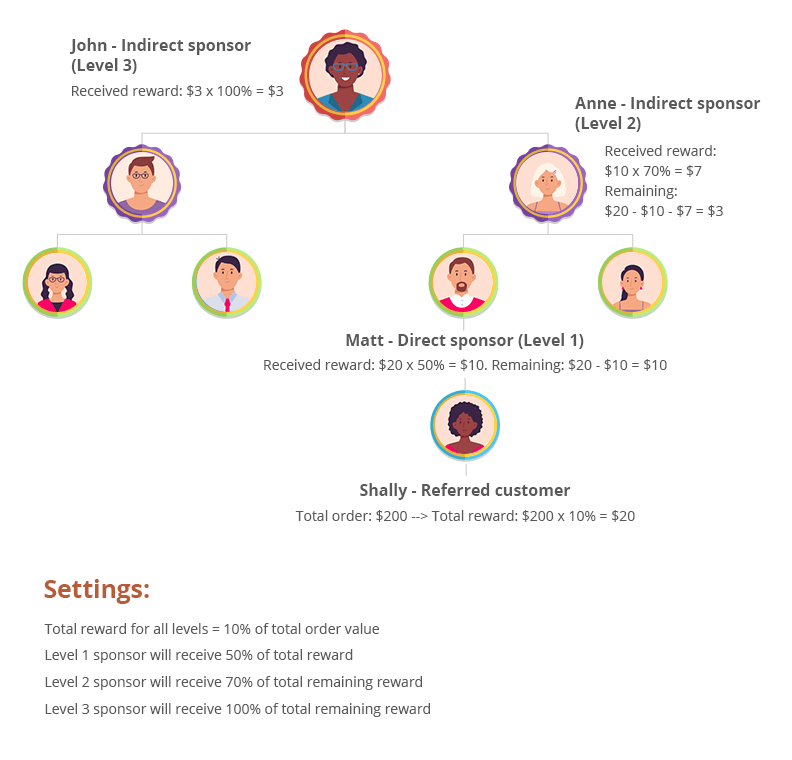
For example, Shally buys an order of $200. We set “Total reward for all levels” as 10% of the total order value.
- Level 1 sponsor will receive 50% of the total reward.
- Level 2 sponsor will receive 70% of the total remaining reward (total reward – the reward that sponsor Lv1 received).
- Level 3 sponsor will receive 100% of total remaining reward (total reward – the reward that sponsor Lv1 & Lv2 received)
Remaining reward = total reward – reward that lower levels received
Total reward will be: 200$ x 10% = 20$
- Anne (Level 1 sponsor) is the direct referrer of Shally. Anne will get 50% of total reward: 20$ x 50% = 10$.
Remaining reward = 20$ – 10$ = 10$
- Matt (Level 2 sponsor) is the indirect referrer of Shally: Matt will get 70% of the remaining reward: 10$ x 70% = 7$
Remaining reward (after Anne and Matt received reward) = 20$ – 10$ – 7$ = 3$
- John (Level 3 sponsor) is also an indirect referrer of Shally: John will get 100% of the remaining reward: 3$ x 100% = 3$
Remaining reward (after Anne, Matt and John received reward) = 20$ – 10$ – 7$ – 3$ = 0
We have just explained the calculation of 3 levels of reward settings. With higher levels, you can set up the reward for each level as you like, and the calculation is the same as above.
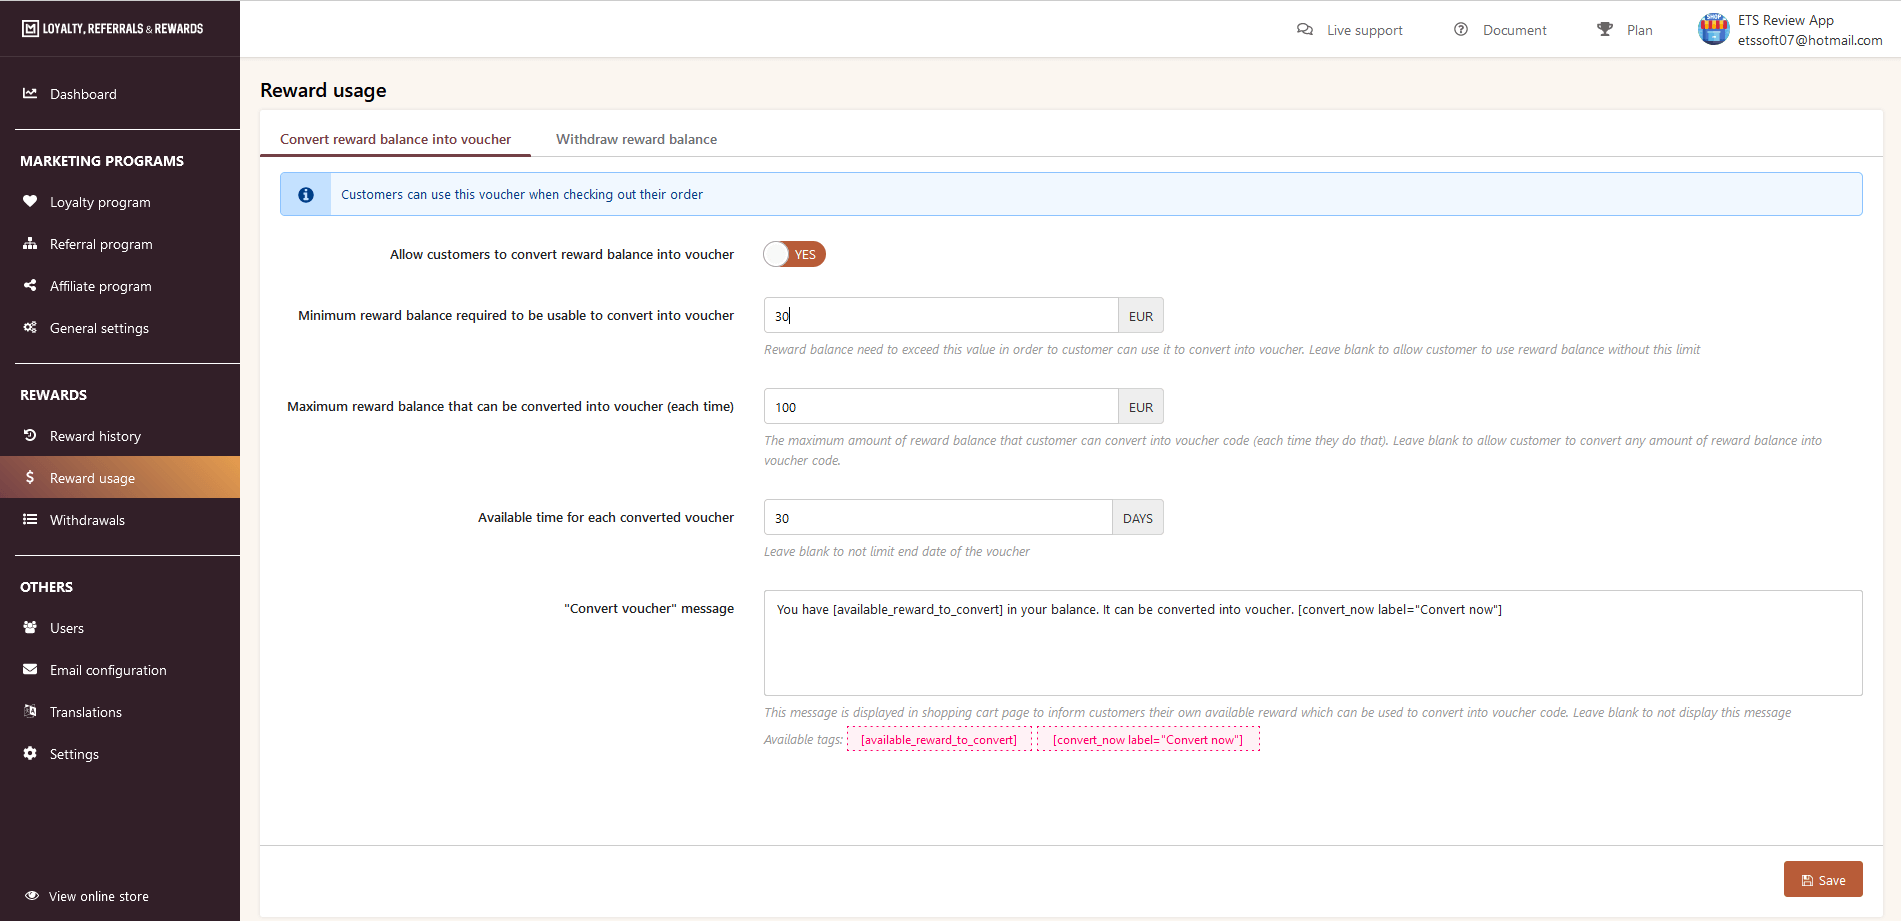
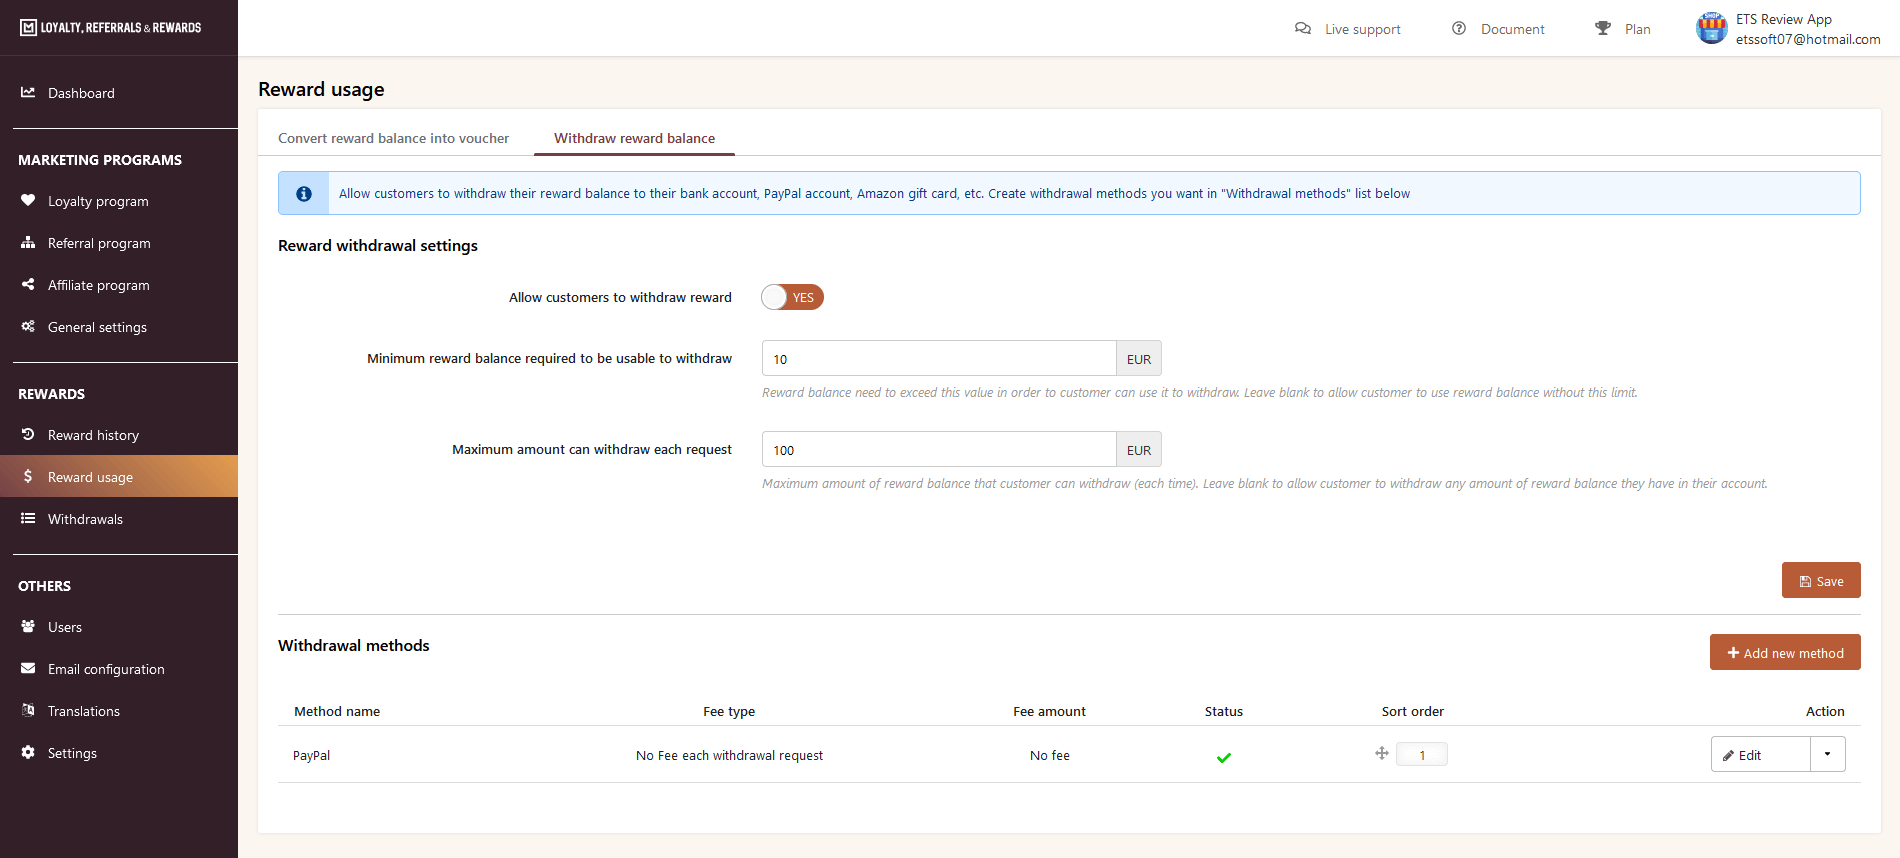
2.4 Friend Voucher
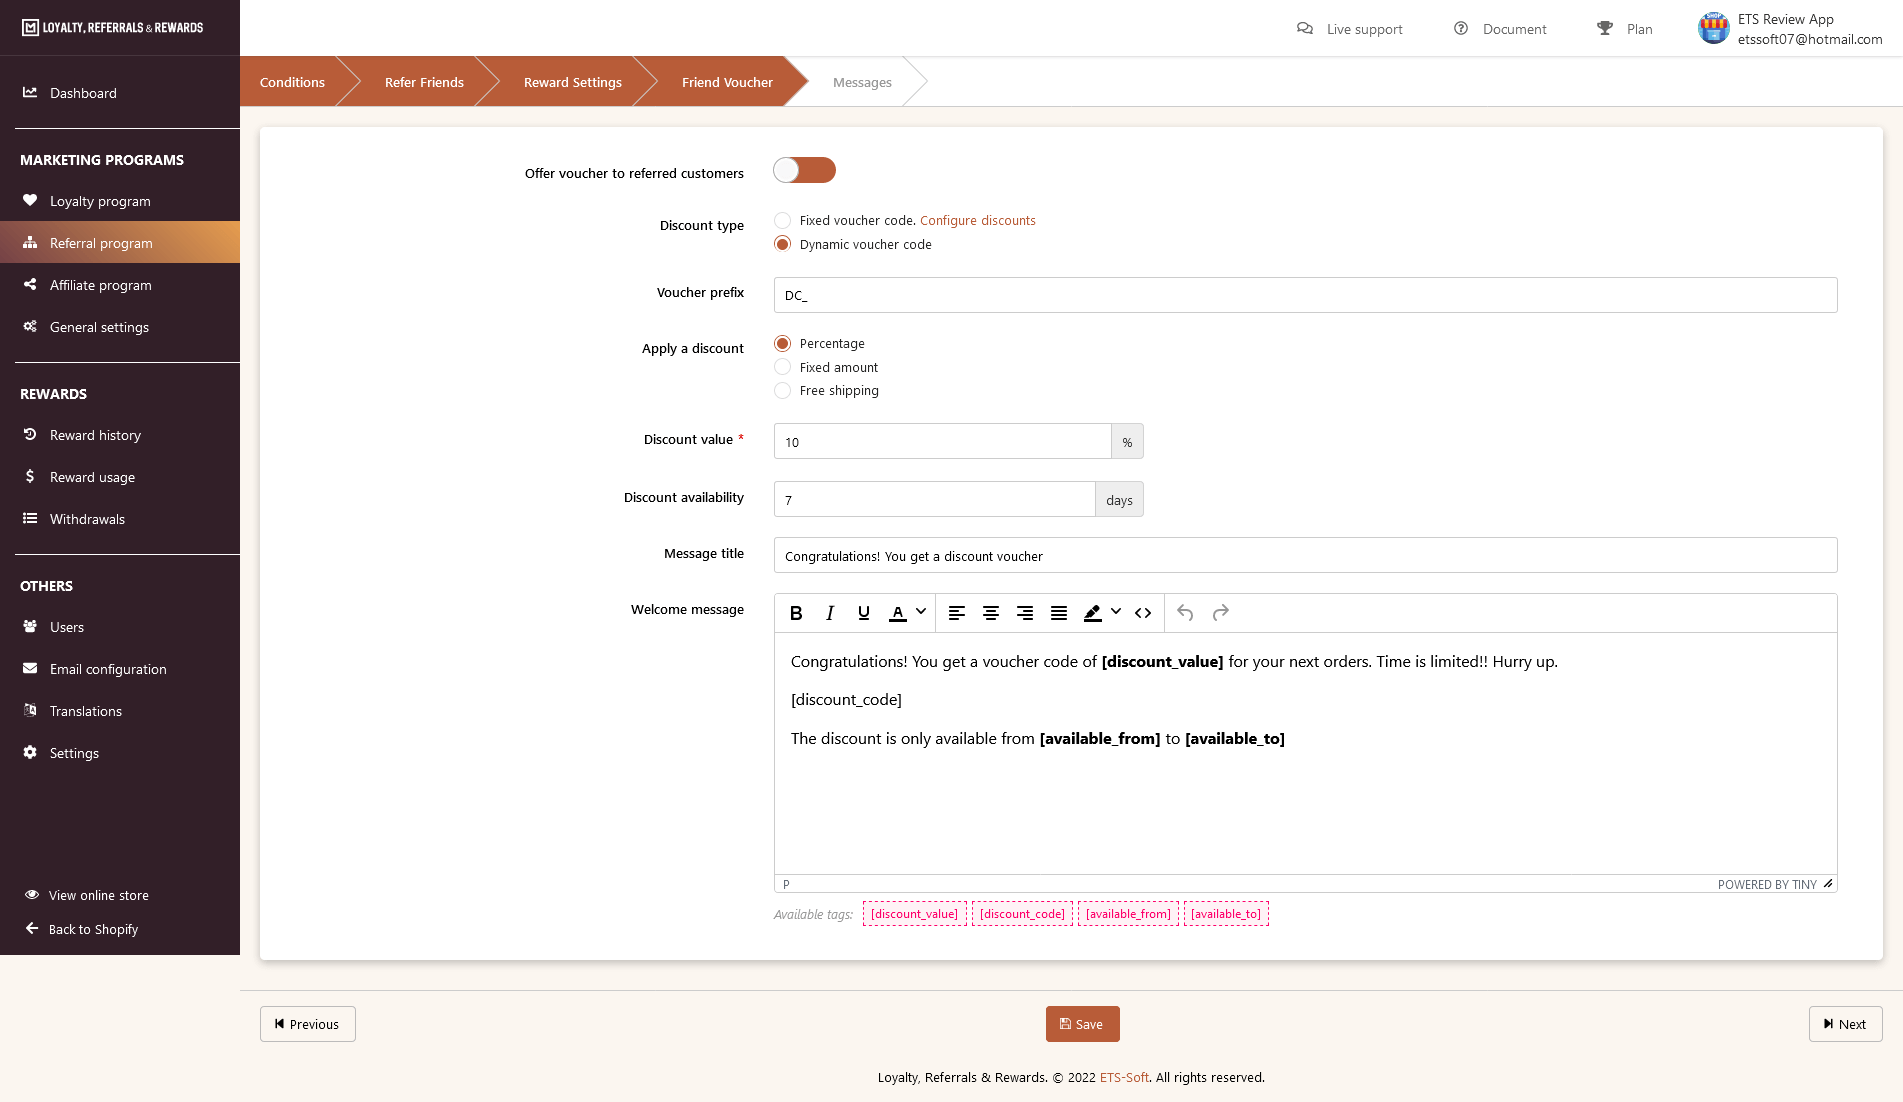
Loyalty, Referrals & Rewards app allows referred customers to receive rewards. Take your time to set up a voucher for them if you want!
- Enable “Offer voucher to referred customers” option.
- Select discount type
- Customize voucher prefix if needed
- Choose how to apply discount voucher
- Enter discount value and a number of the day discount available.
- Edit message title and welcome message content accordingly. You can use the available tags provided.
- Click “Next” to move to the next step.
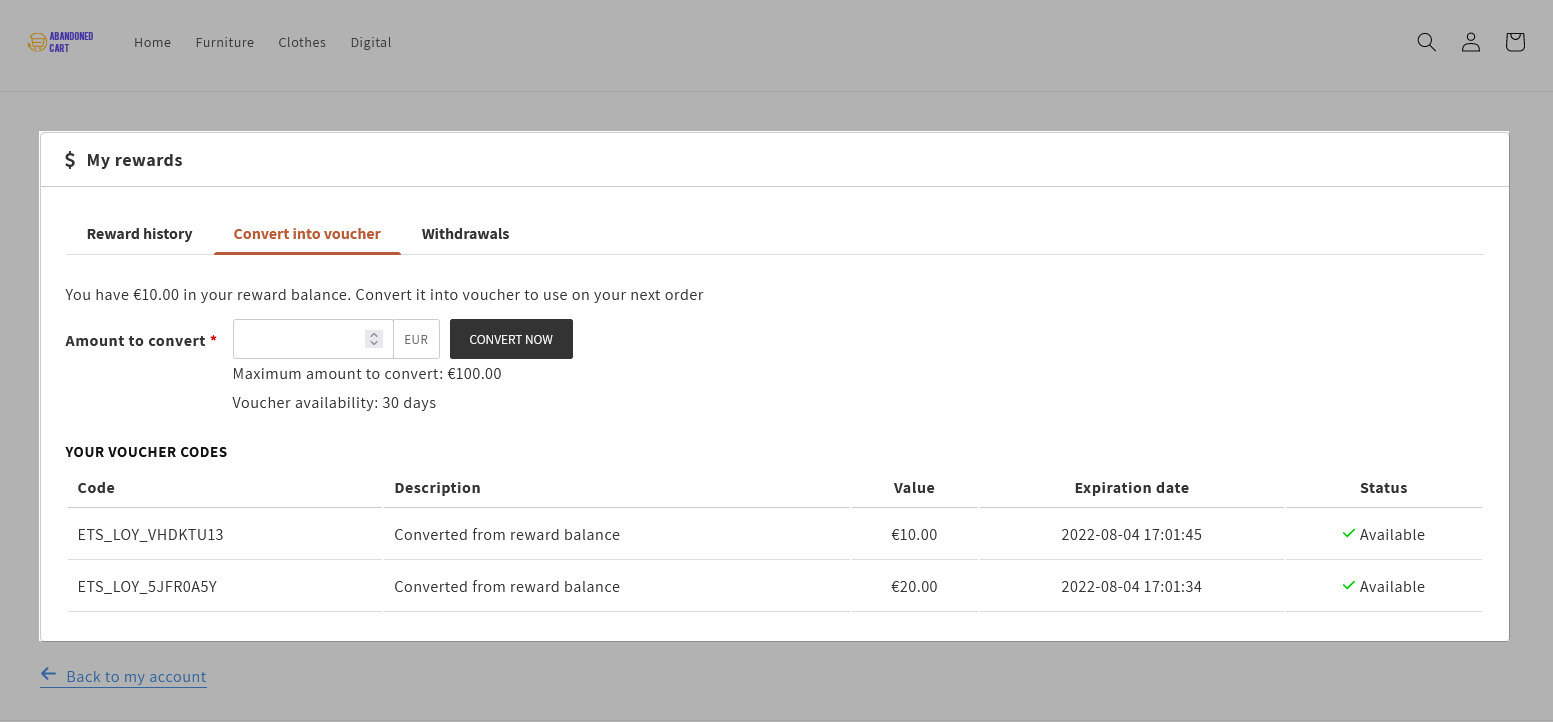
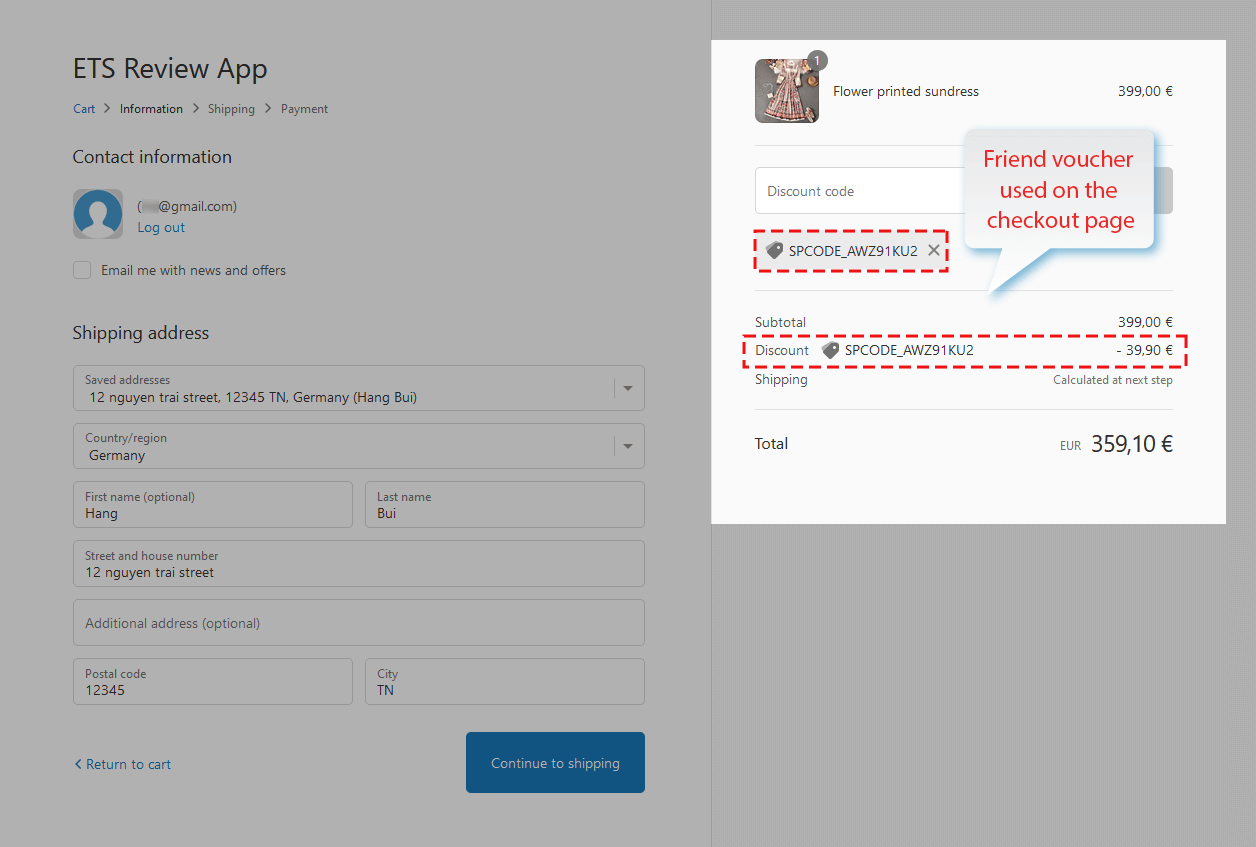
An example of using a friend voucher:
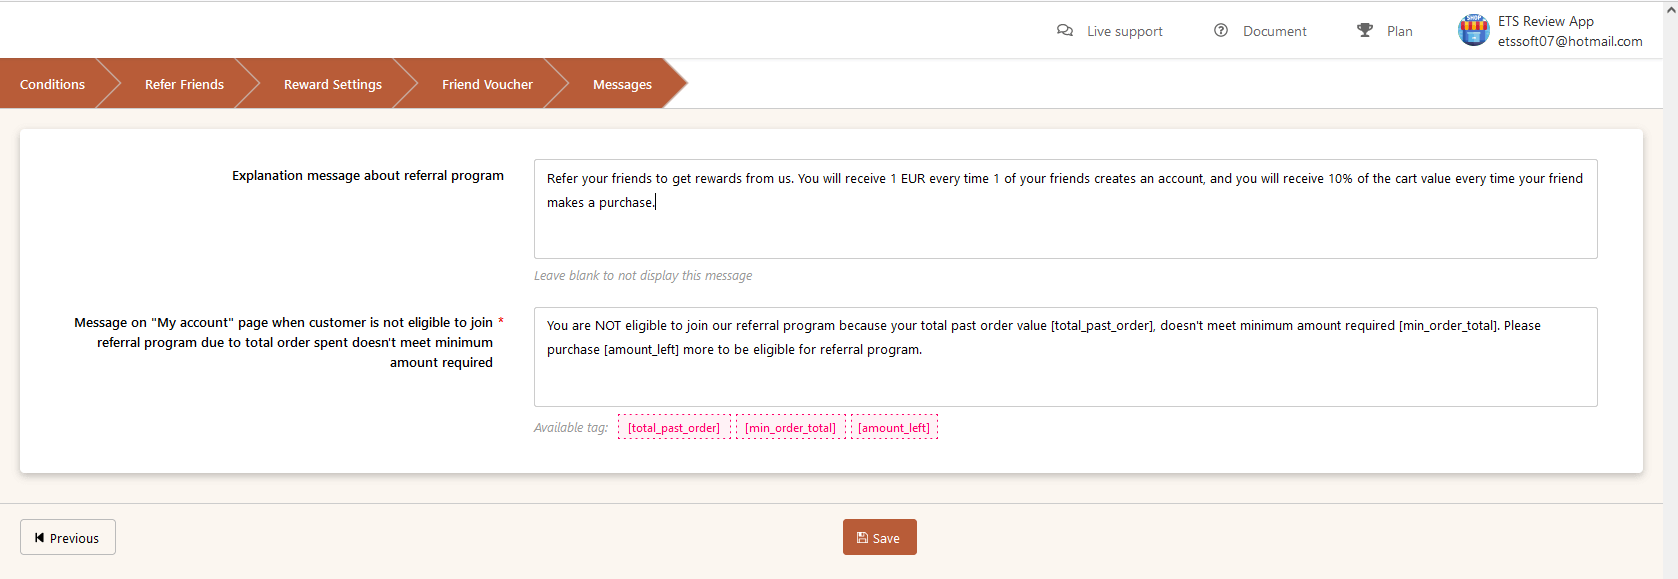
2.5 Messages
Here you can write an explanation message about the referral program and display it in the “Referral program” area in the front office for customers to understand. Also, you can edit the content of the message on the “My Account” page when the customer is not eligible to join the referral program due to total order spent doesn’t meet the minimum amount required.
Click “Save” to run this referral program on your website!
Example of explanation message on the front office:
Message on “My account” page when a customer is not eligible to join the referral program:

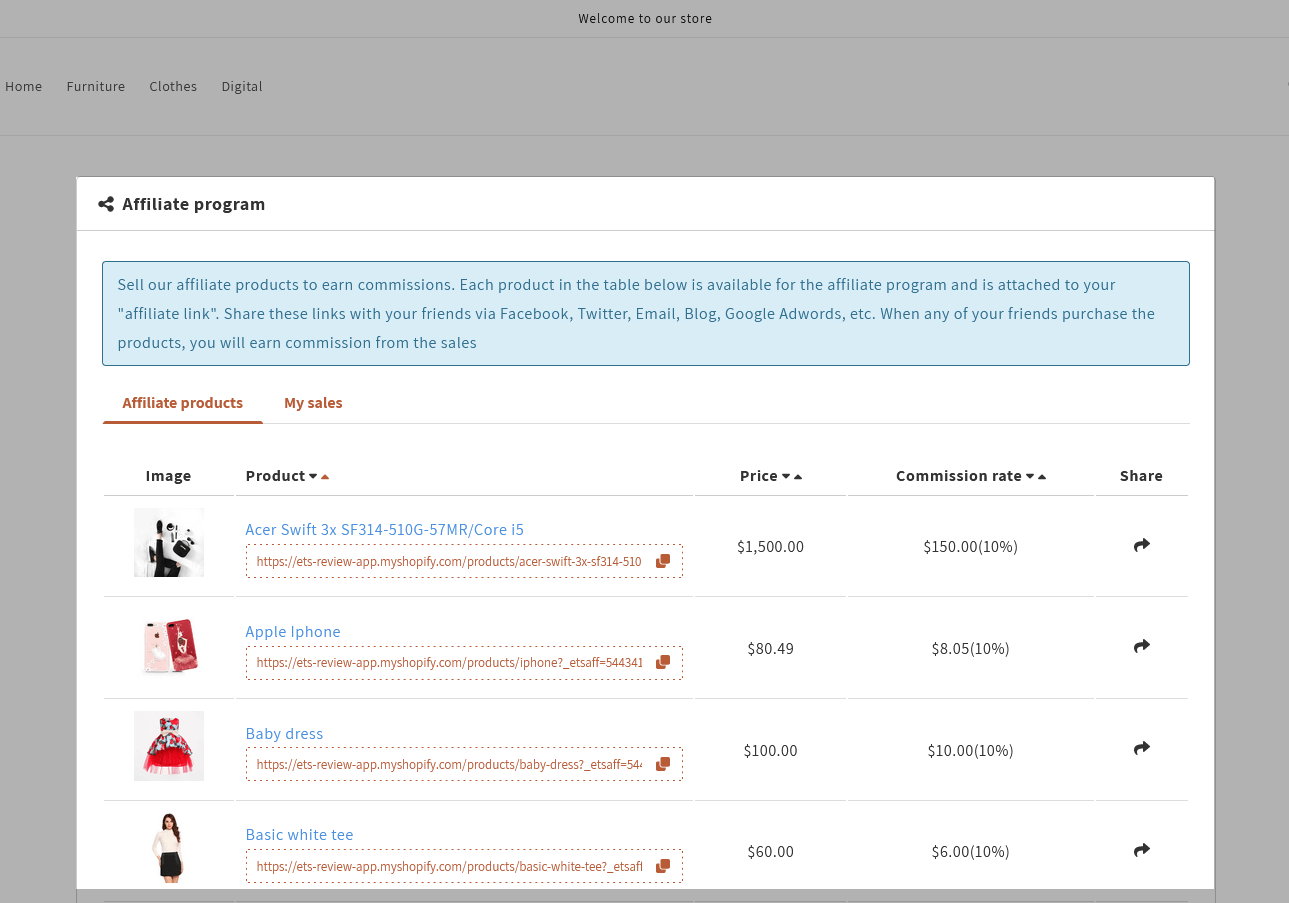
(3) Affiliate program
This feature helps you to create more sale opportunities and increase revenue by promoting your customers to sell affiliate products to earn commissions and become your affiliate sellers.
3.1 Condition
The first thing you need to do is set up conditions for the affiliate program. Go to the “Condition” tab to start!

- Enable this program
- Set up the minimum spent amount to join the affiliate program
- Select all products or specific product categories applied for this program.
- Select include/exclude products you want/don’t want to apply in this program.
- Enable/disable “Apply for discounted product” option according to your needs
- Click “Next” to move to the next step.
3.2 Reward Settings
Go to this tab to calculate the reward to give affiliate sellers when customers purchase their affiliate products.
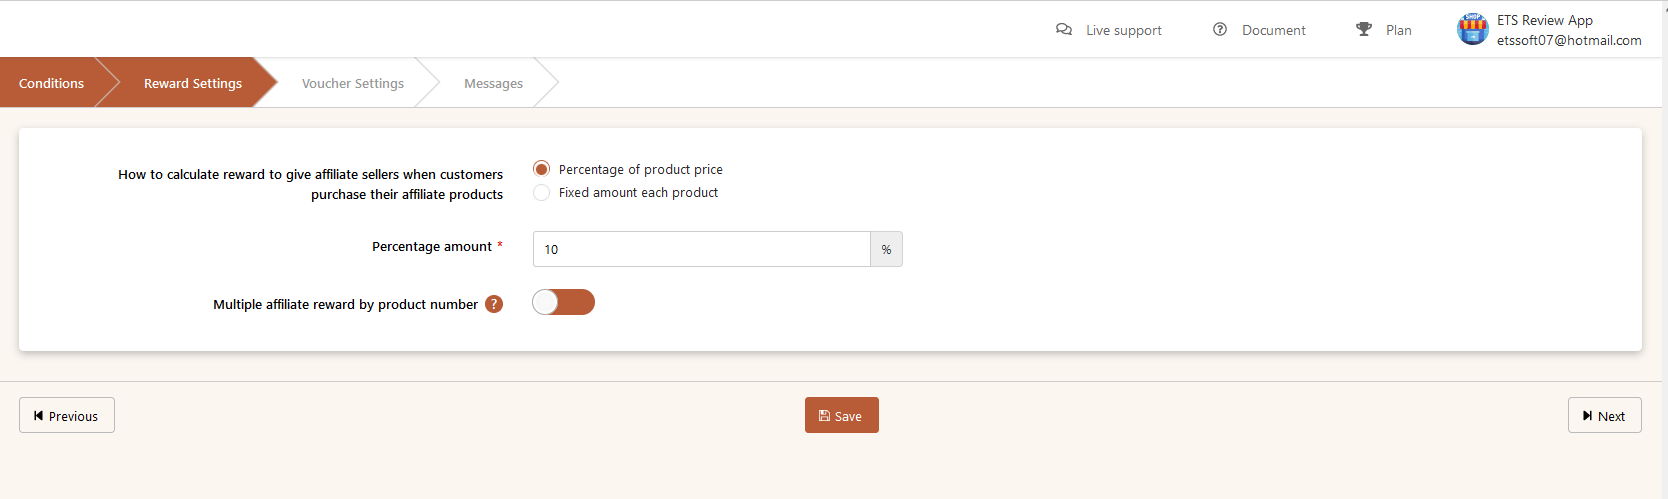
- Choose to calculate the reward by the percentage of product price or fixed amount for each product.
- Enter a commission percentage or a fixed amount of commission the affiliate seller will receive.
- “Multiple affiliate reward by product number”: enable this option if you want to give more rewards to affiliate sellers if customers purchase multiple similar products.
- Click “Next” to move to the next step.
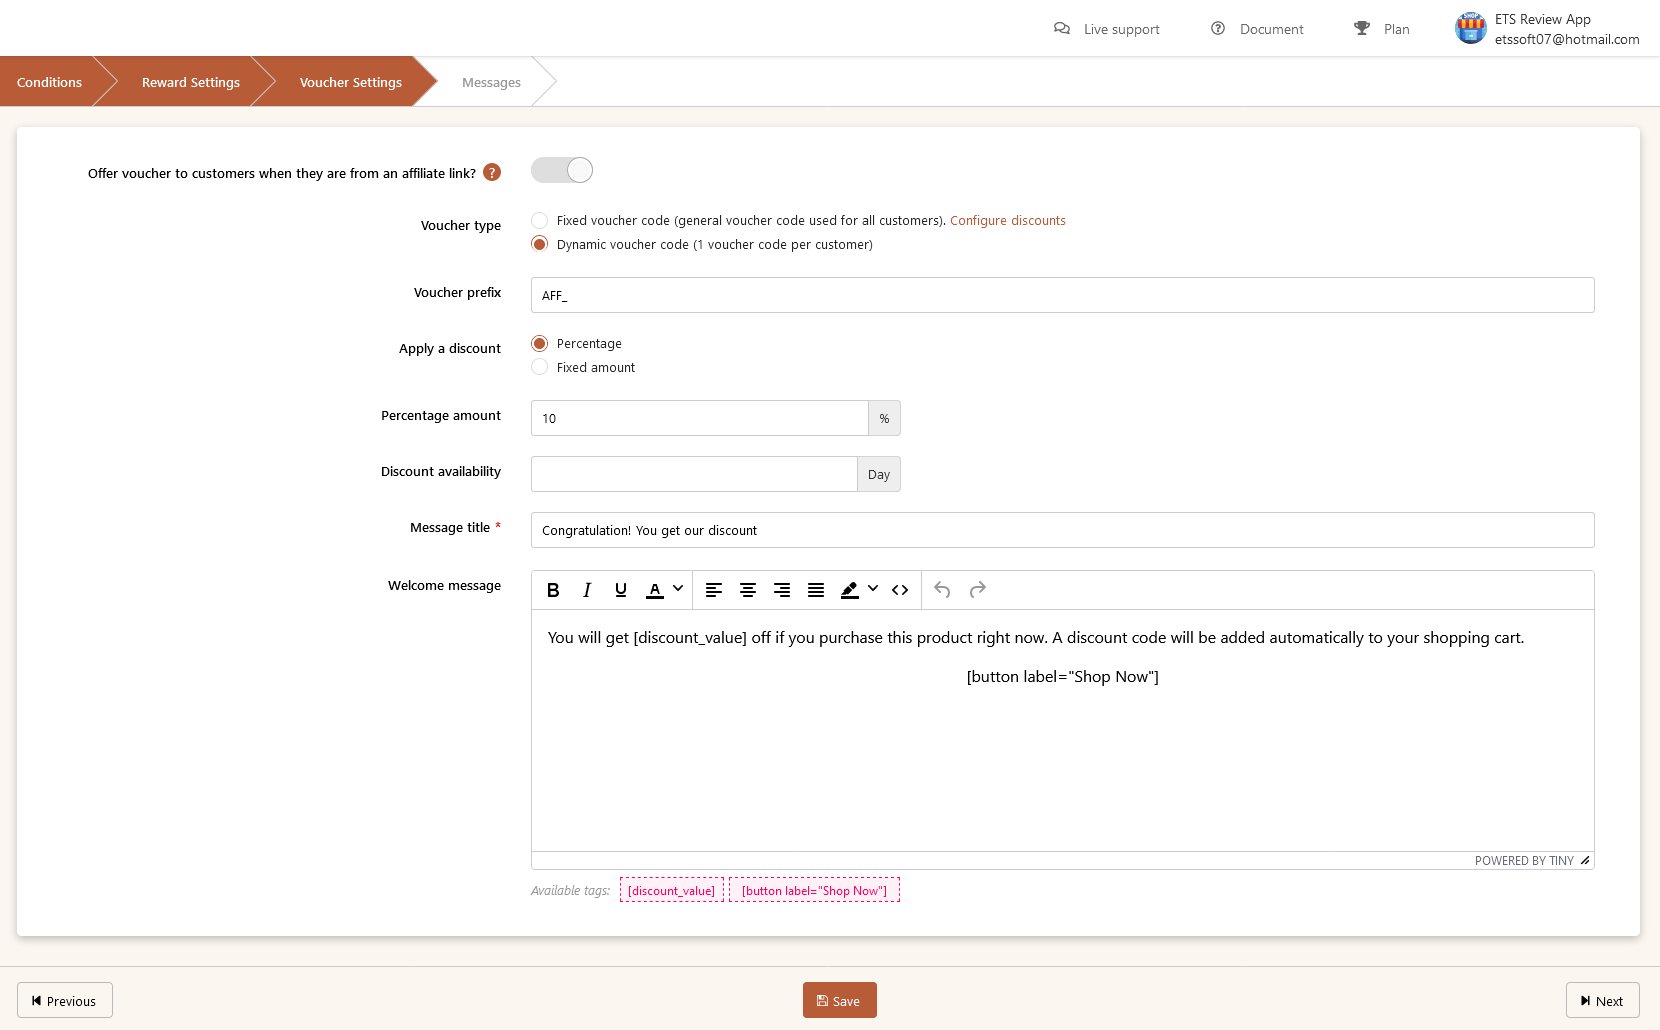
3.3 Voucher Settings
This program brings benefits to both you and affiliate sellers, even for the customers who buy products from affiliate links by giving them a voucher code.
Our app support 2 voucher types: Fixed voucher code and dynamic voucher code. The steps to configure the voucher are similar to the two programs above!
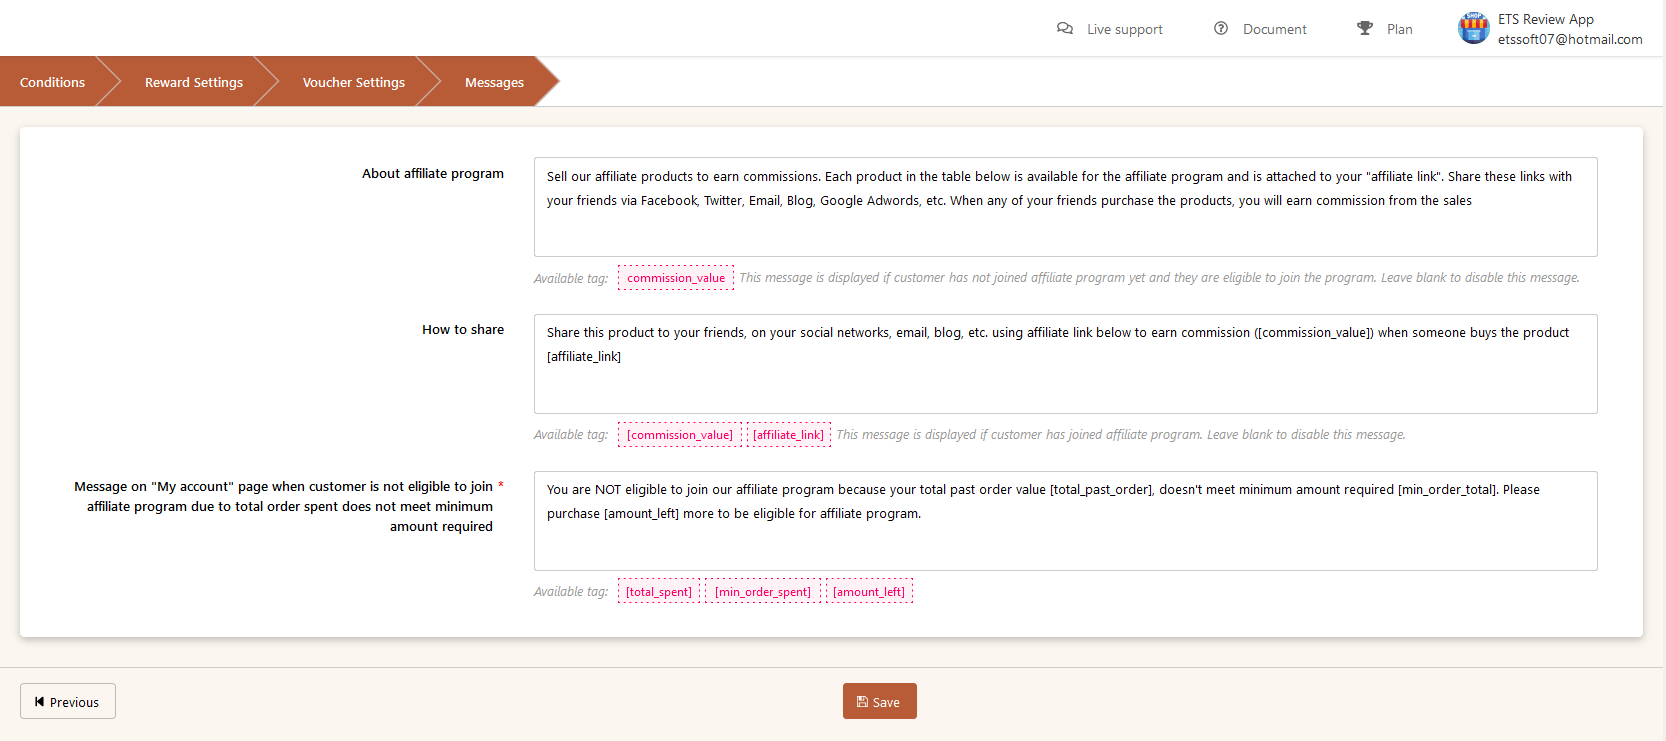
3.4 Messages
You are enabled to edit the content of the introduction message to introduce customers to this program and encourage them to participate.
In addition, you can also edit messages instructing customers to share affiliate links and the message on the “My Account” page when the customer is not eligible to join the affiliate program due to the total order spent does not meet the minimum amount required.
Affiliate program displayed on the “My Account” page:
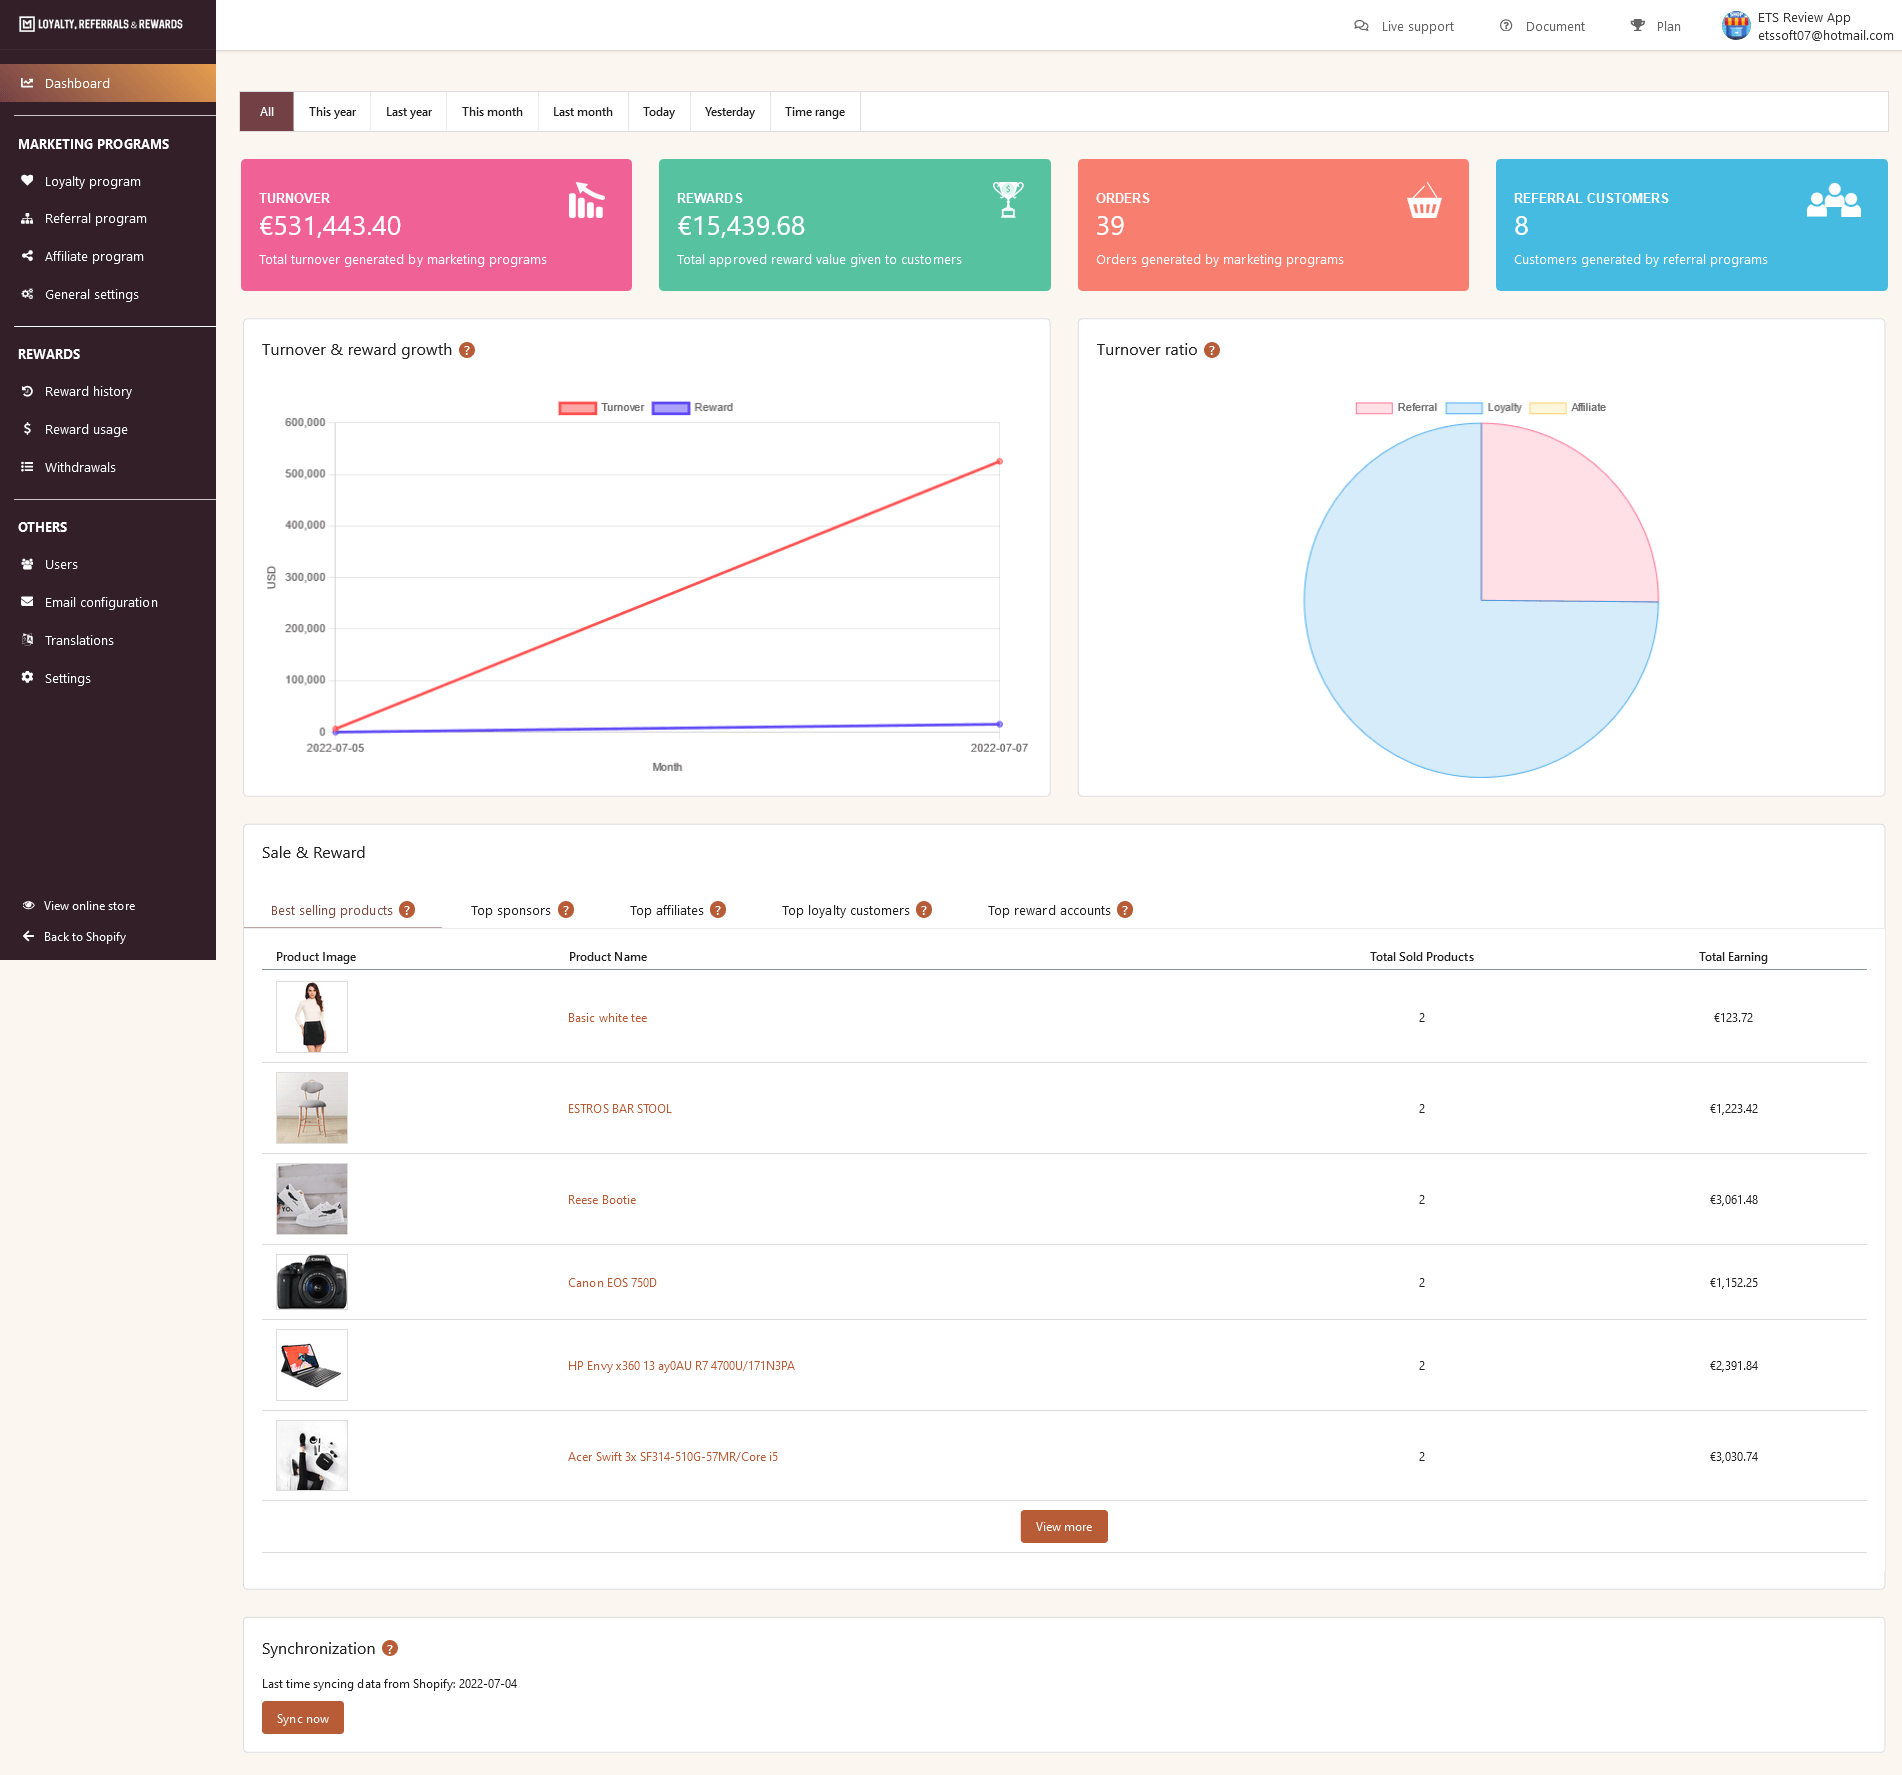
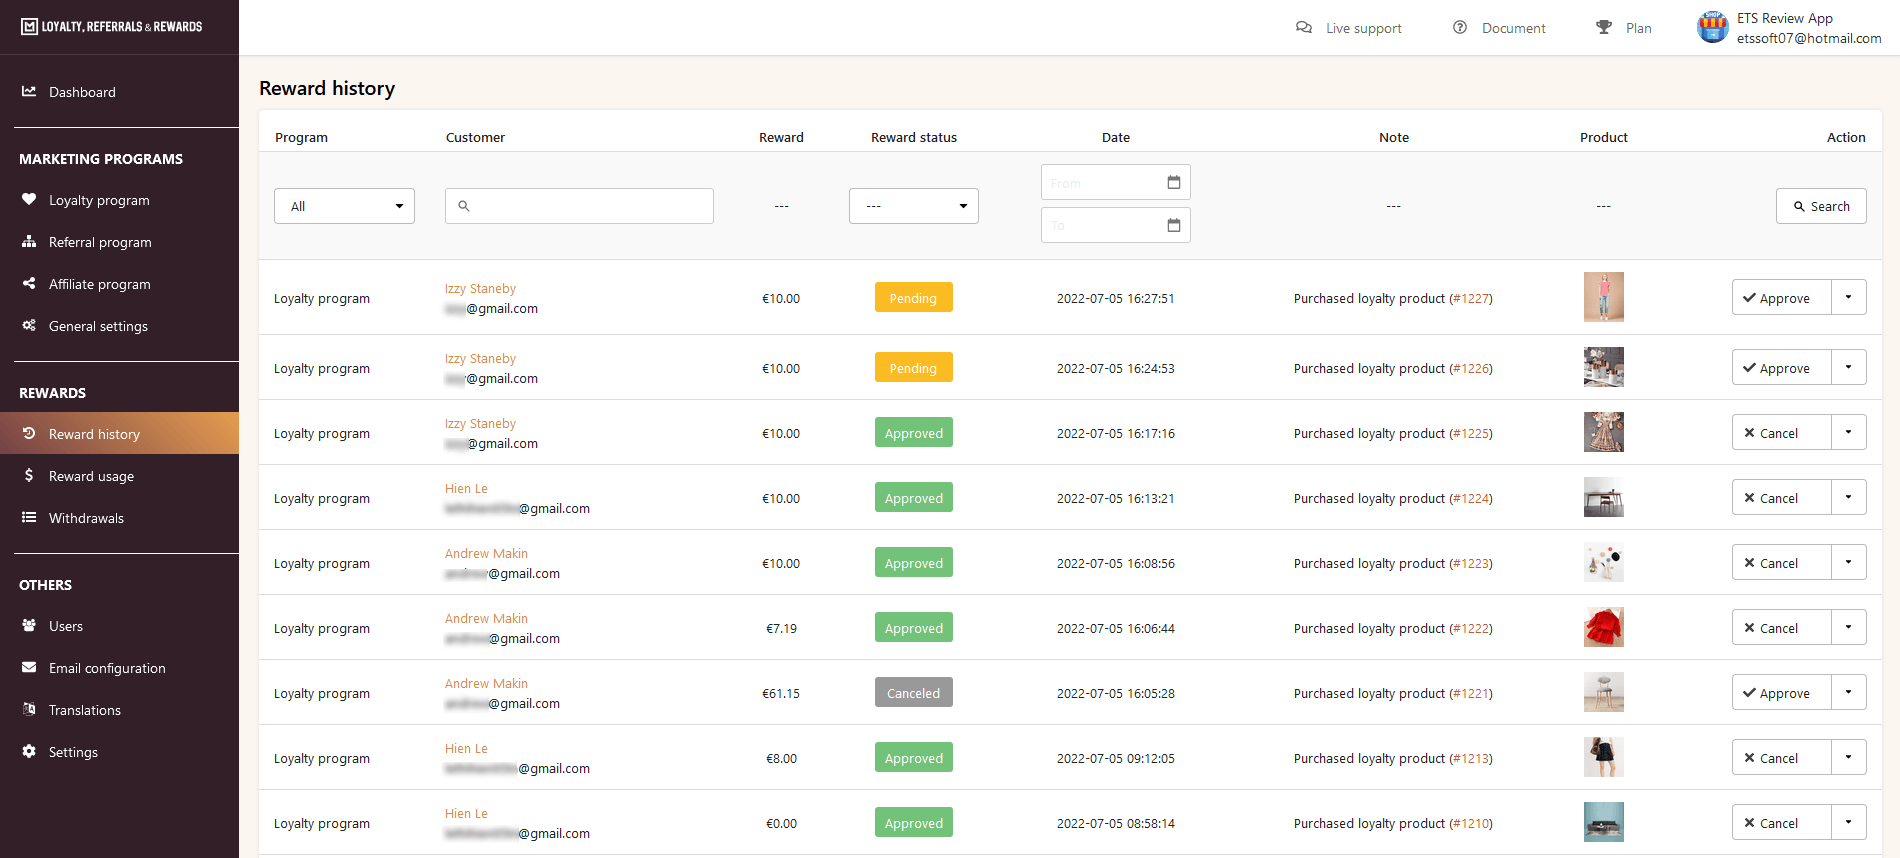
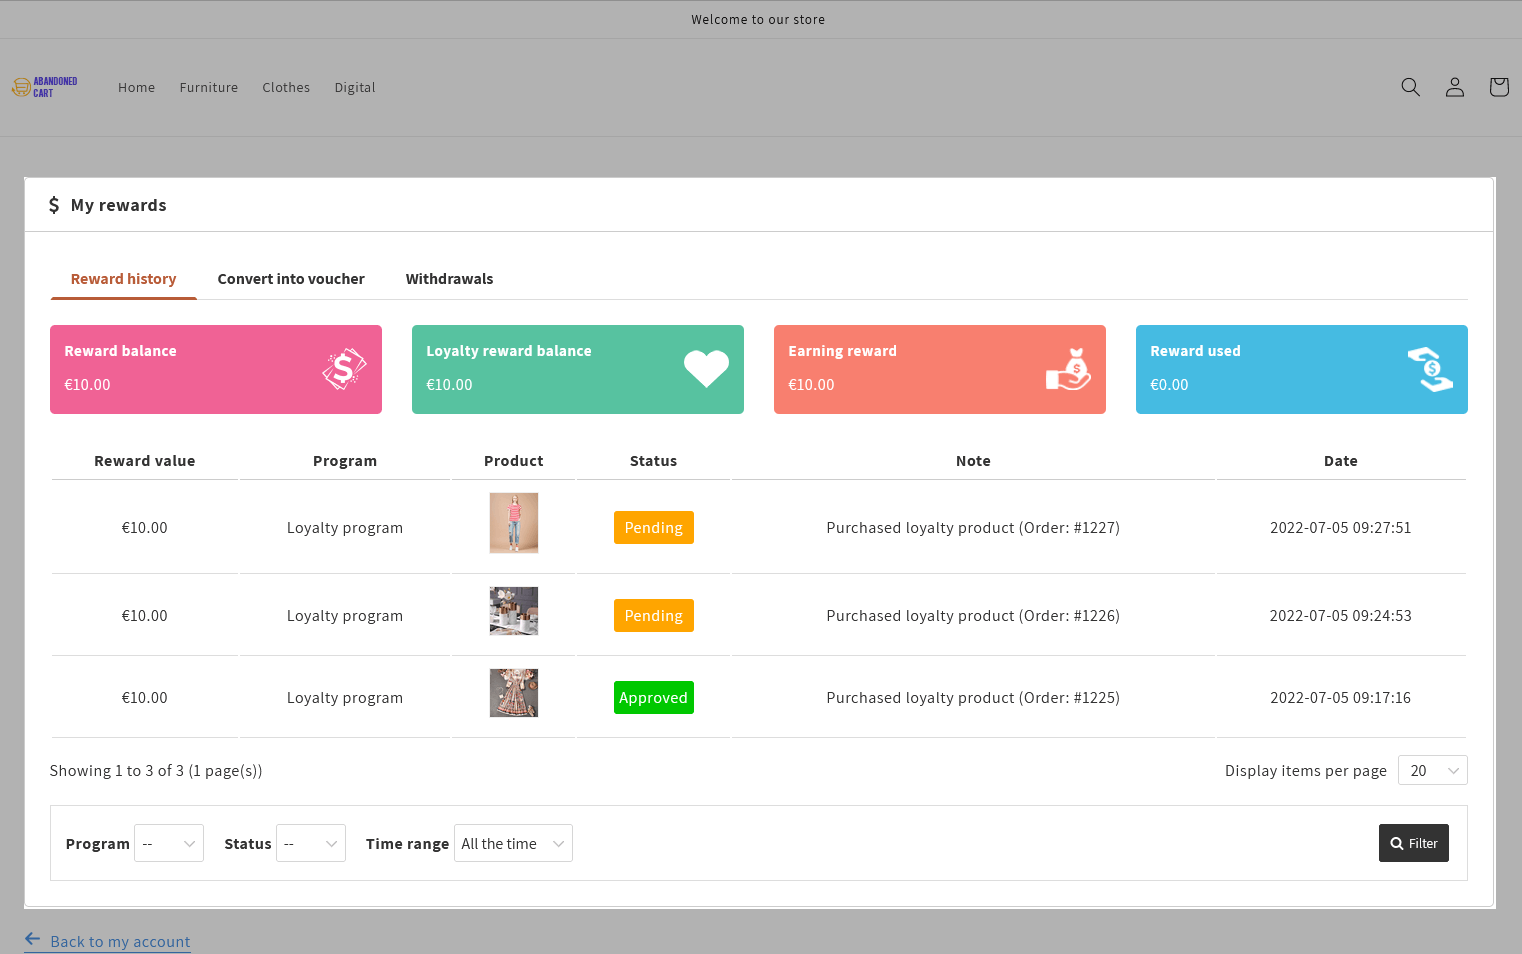
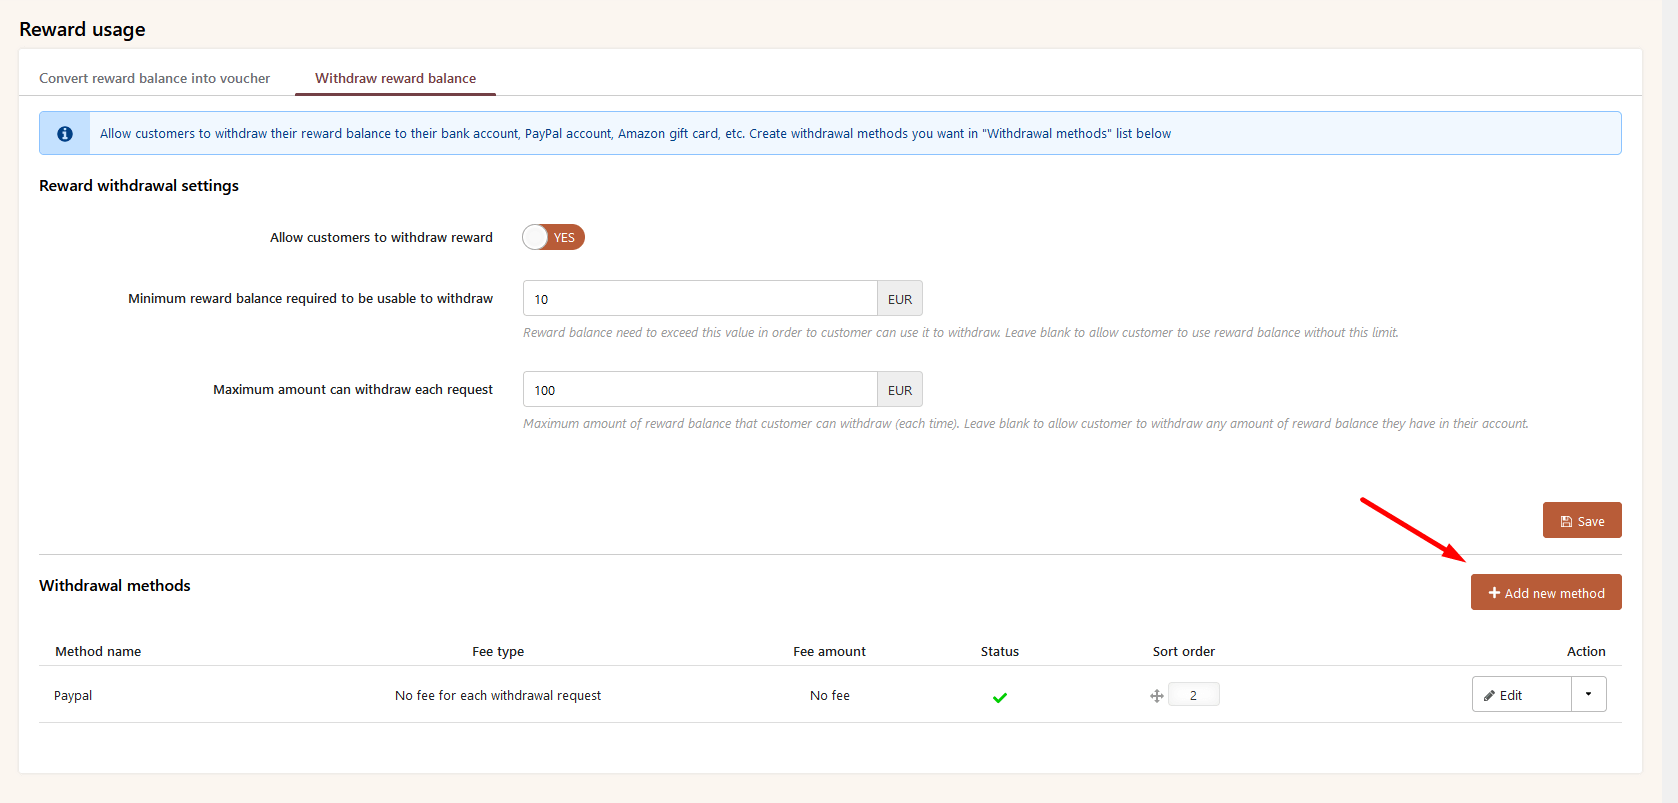
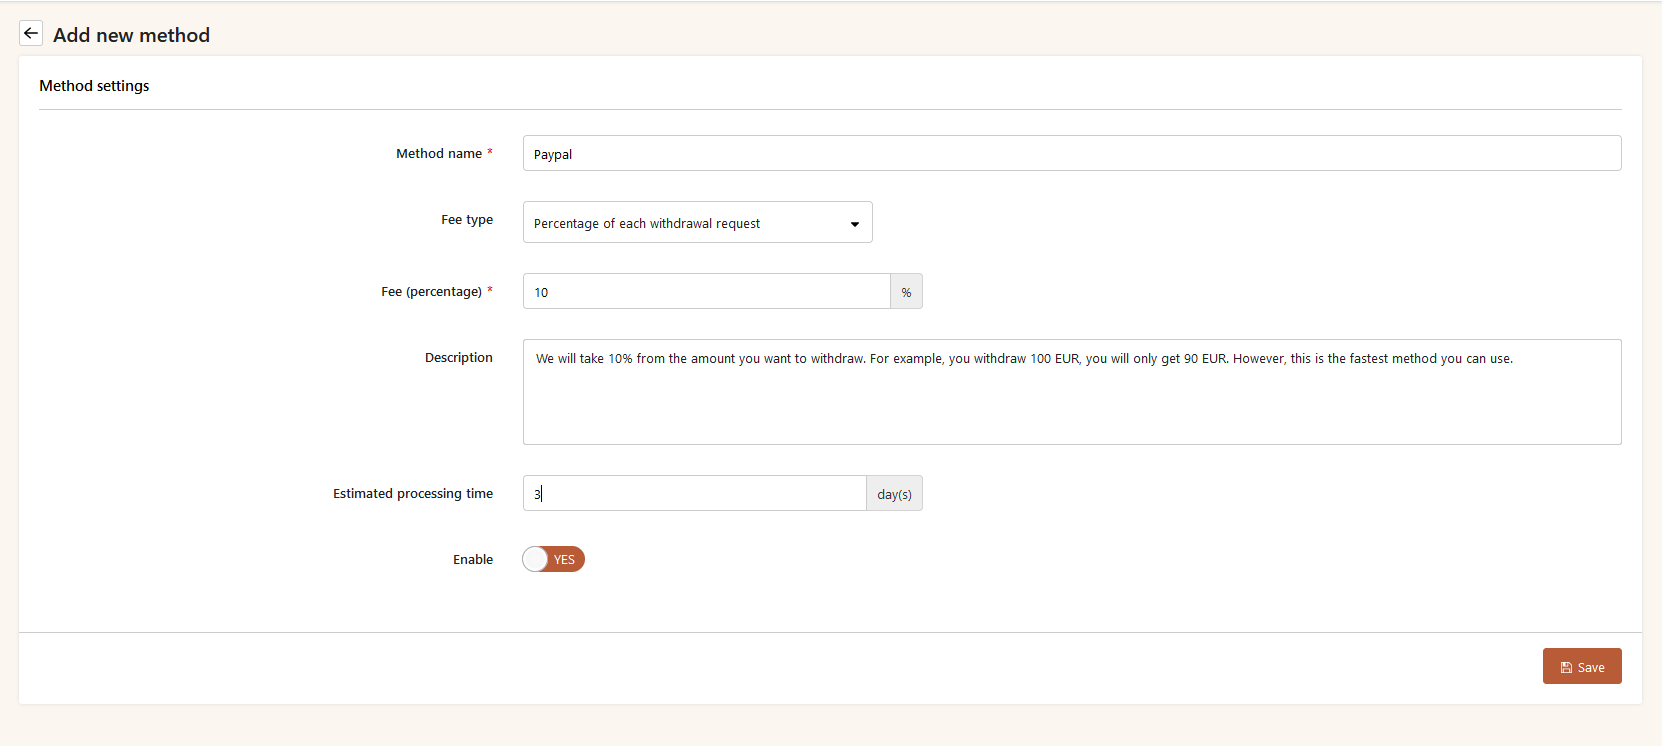
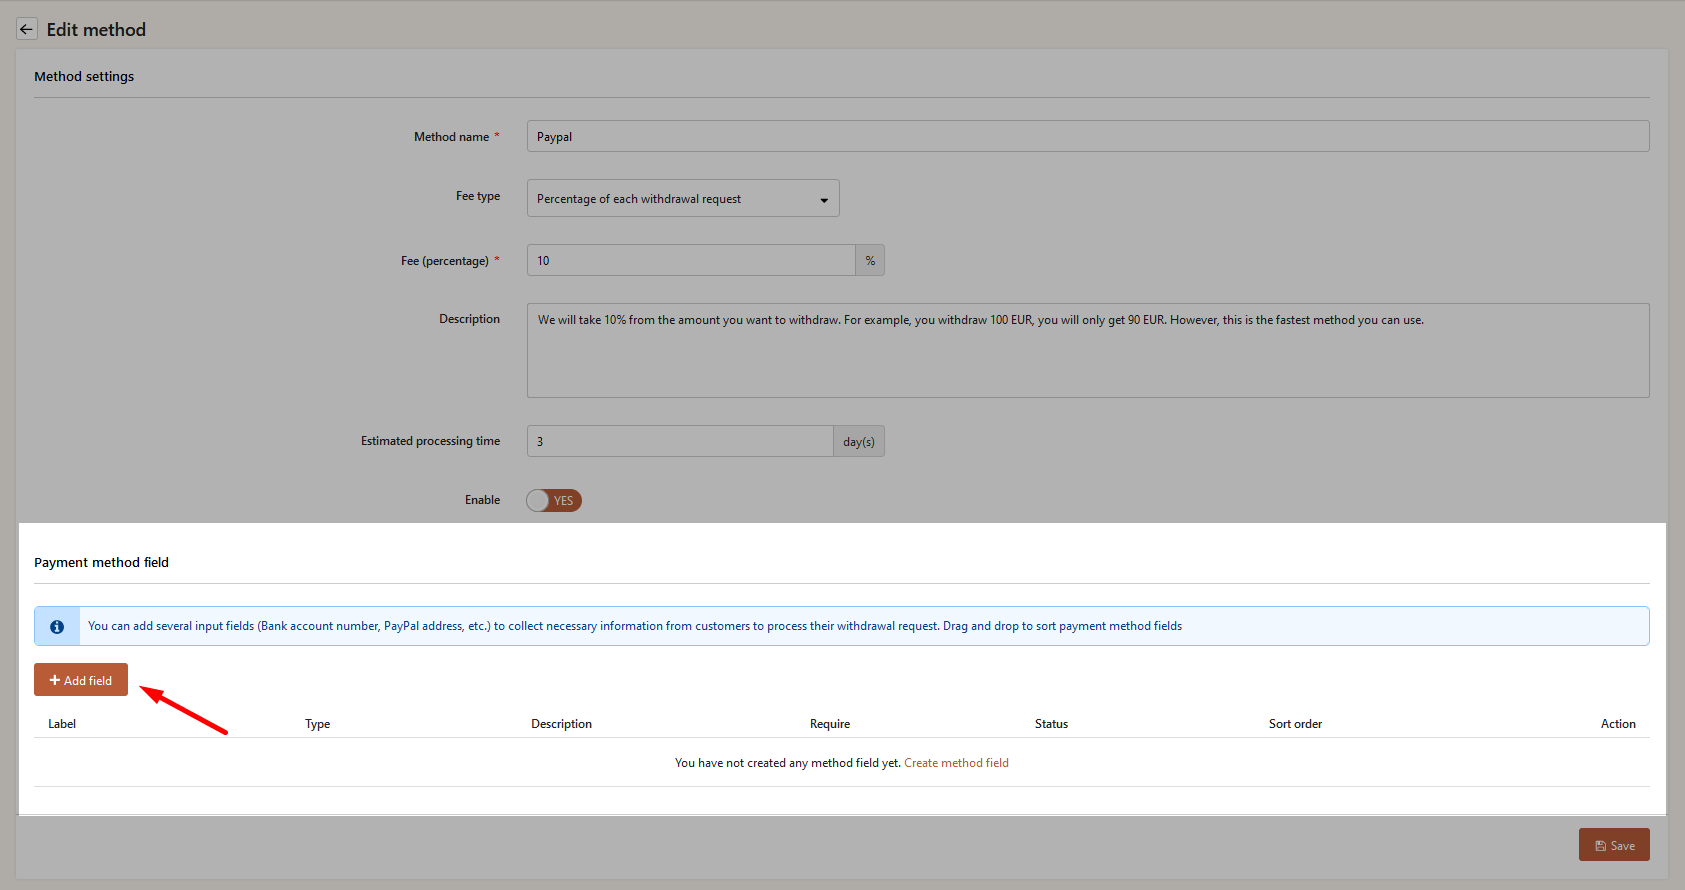
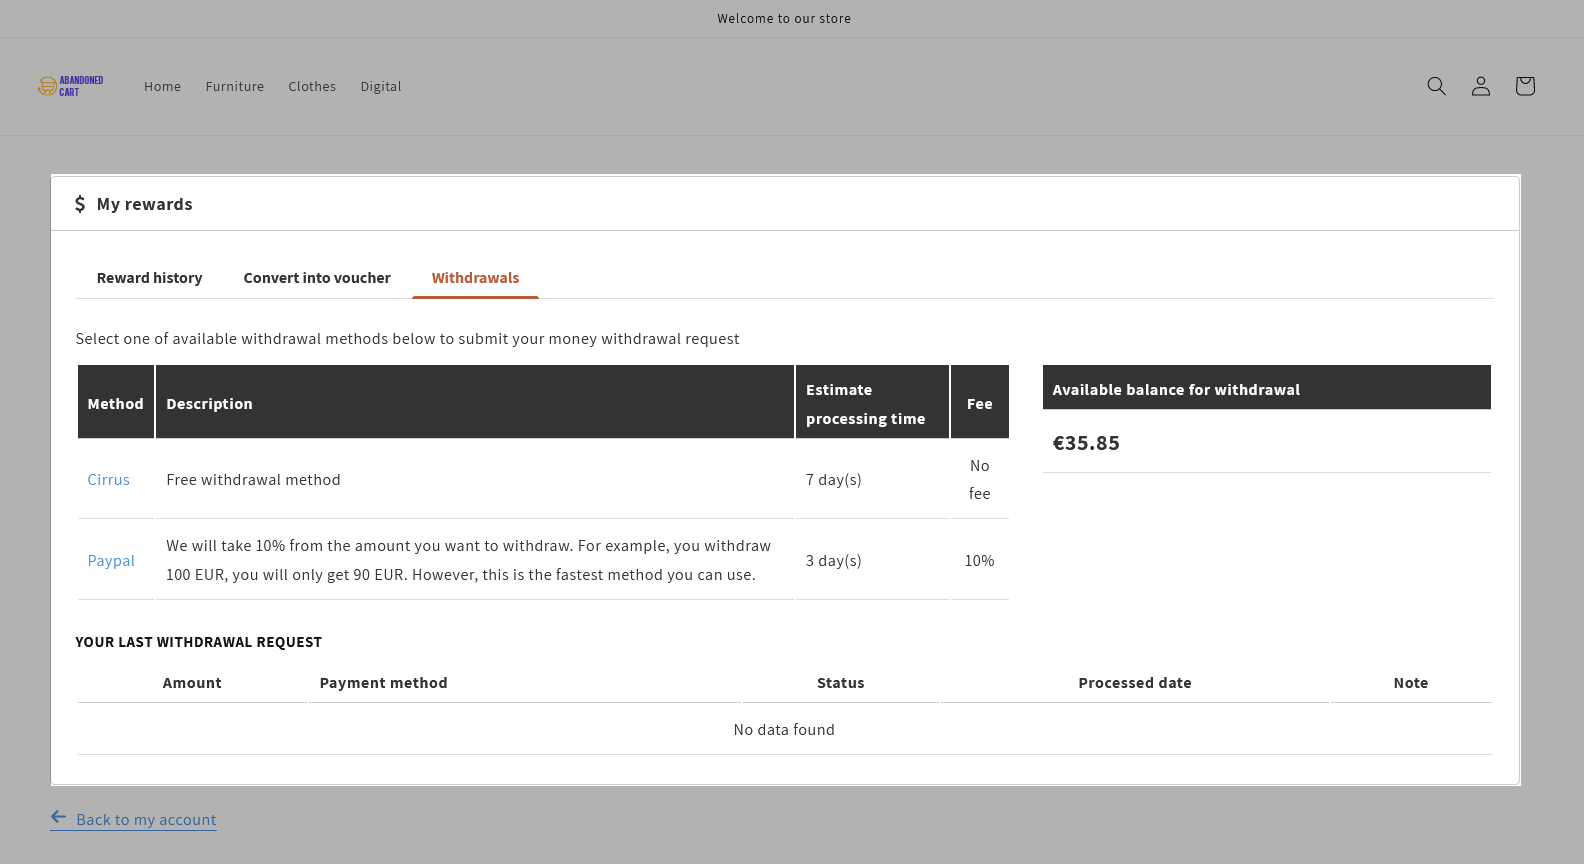
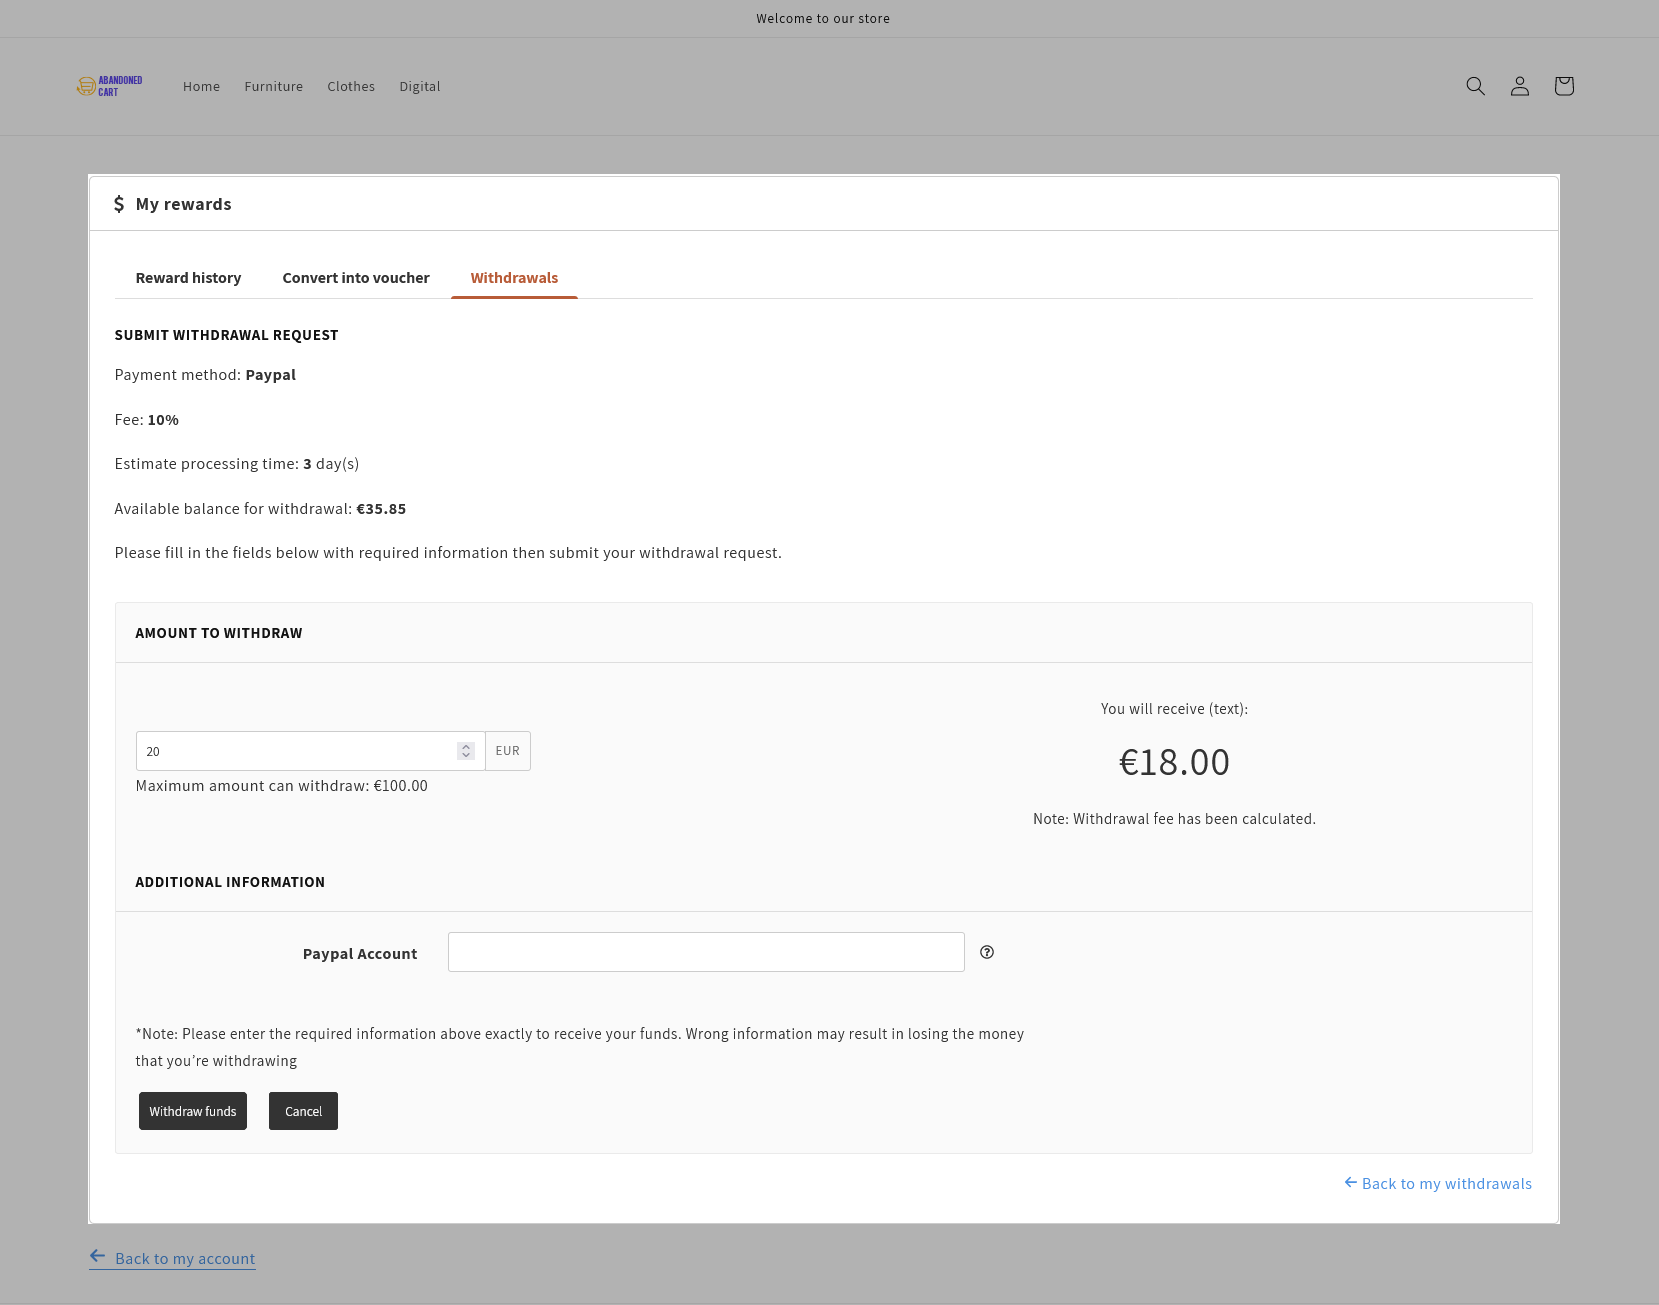
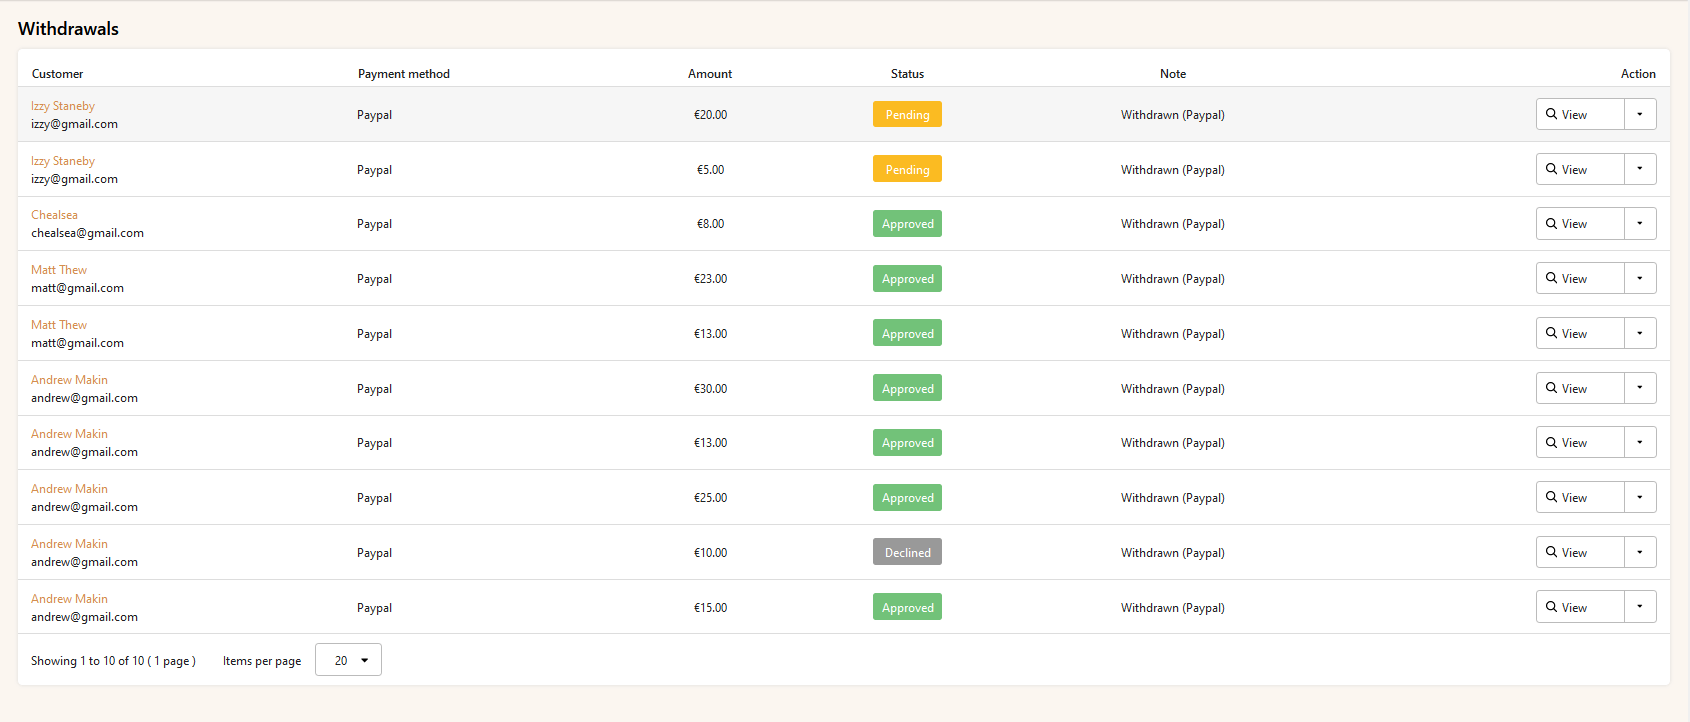
(4) General Settings
This app allows you to set reward status (pending, approved, or canceled) depending on the payment status of the customers.