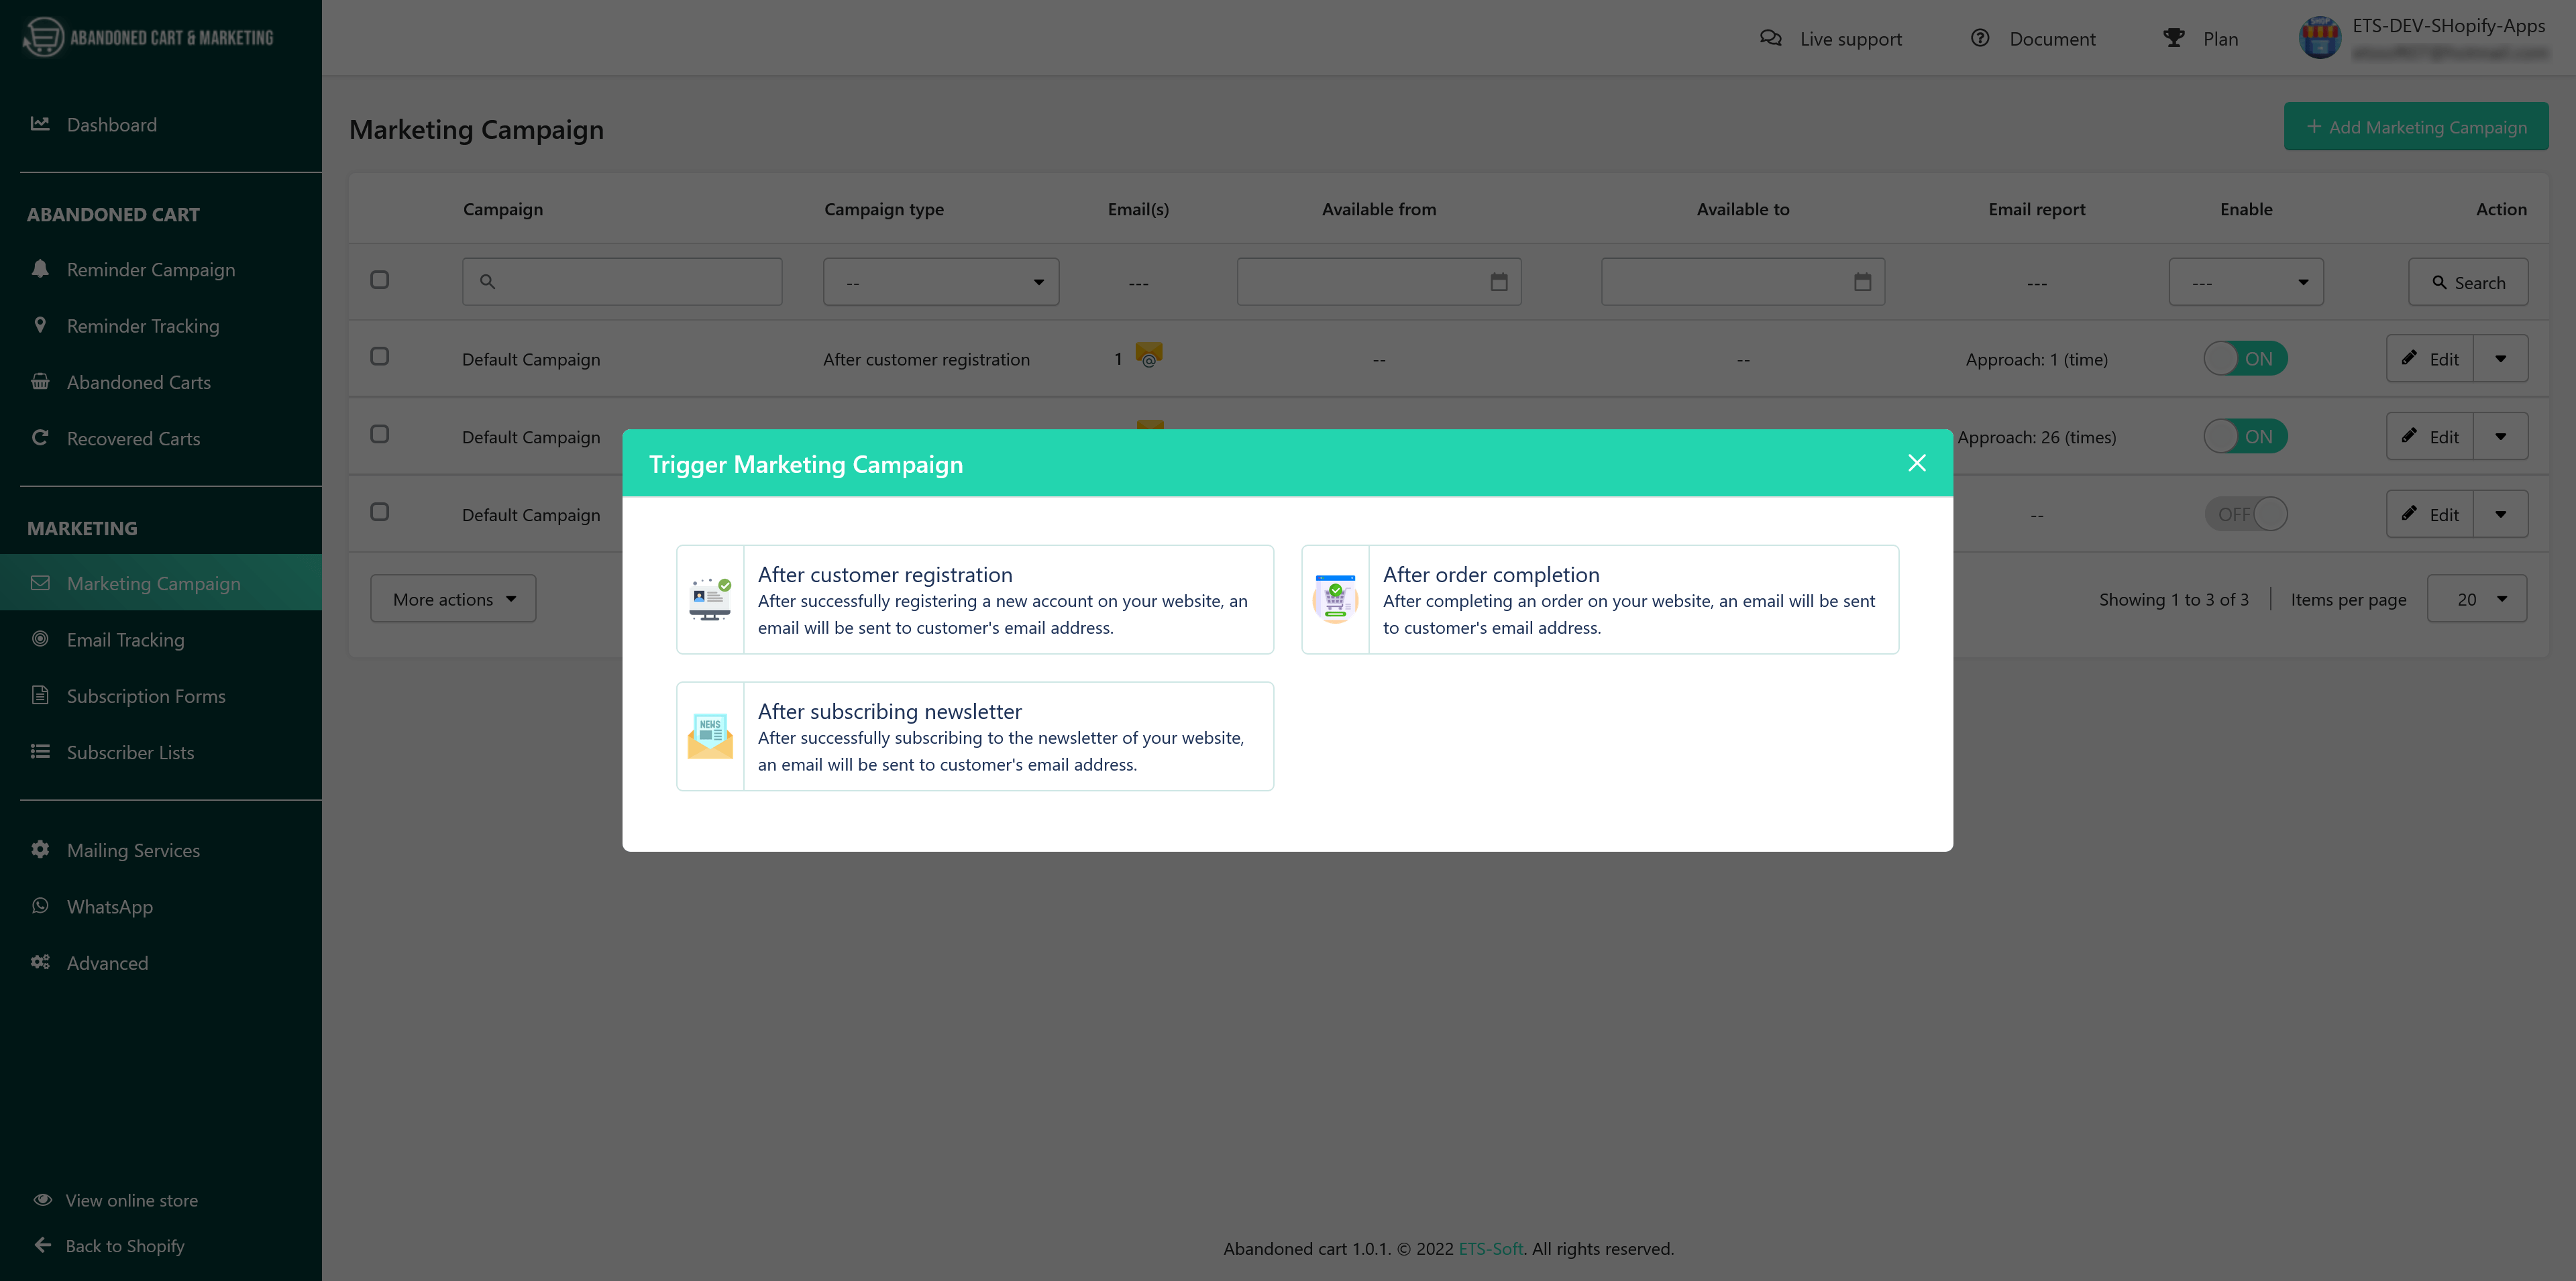
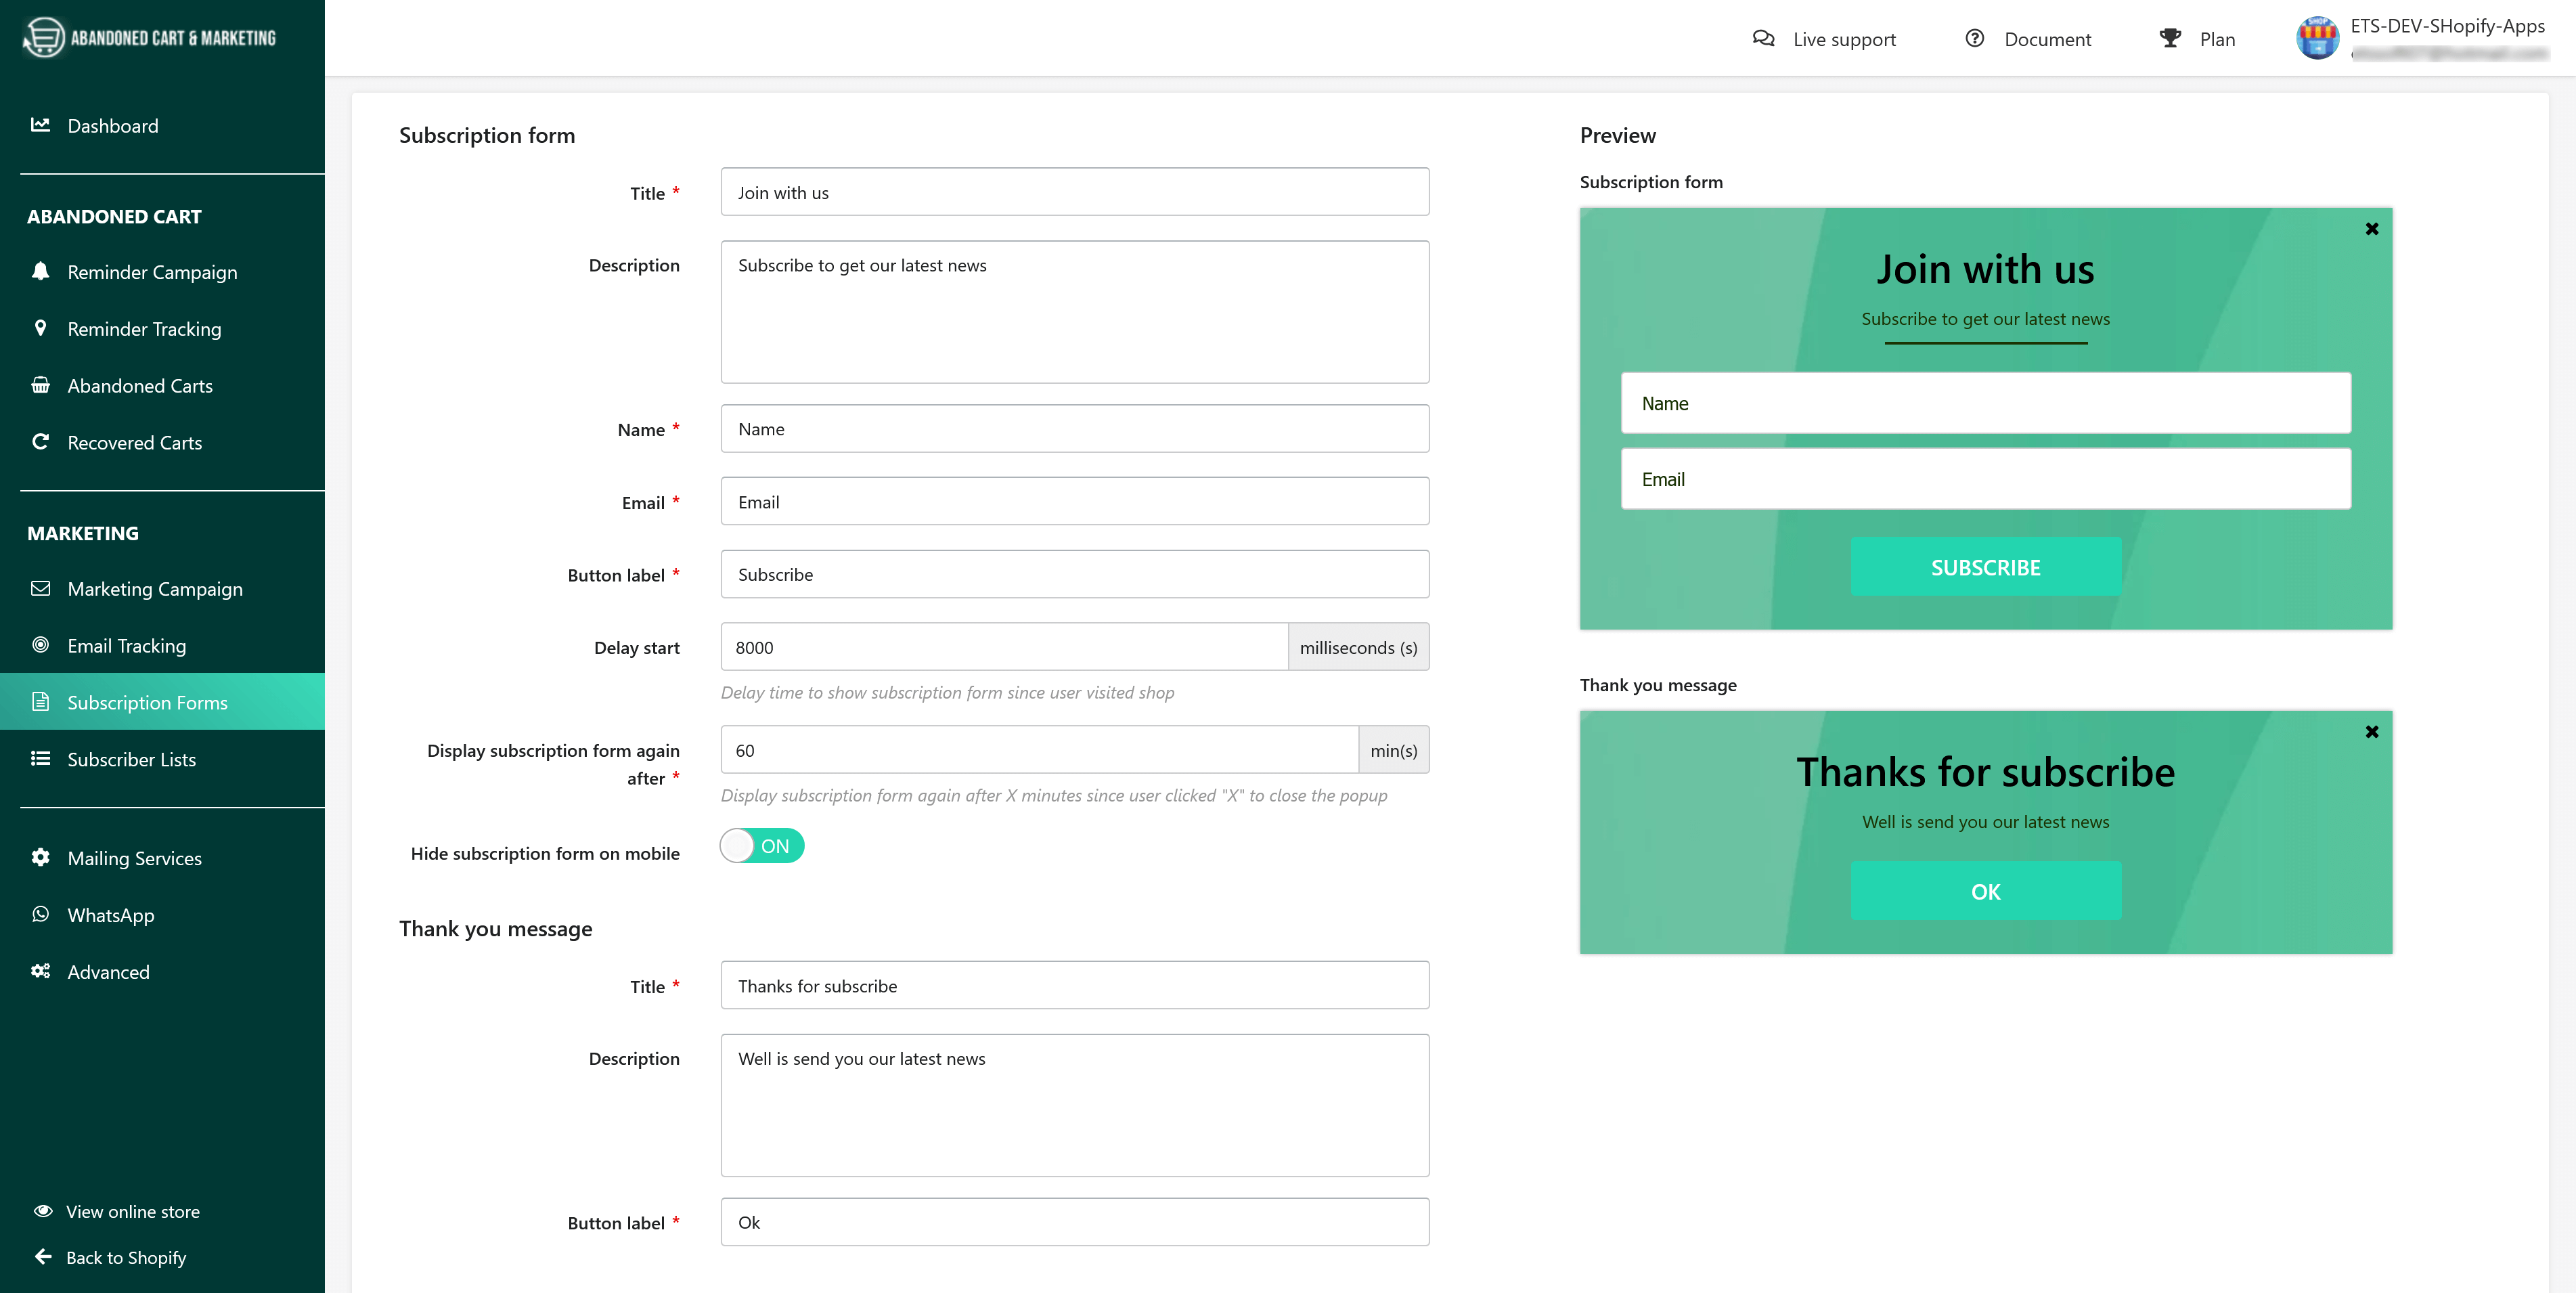
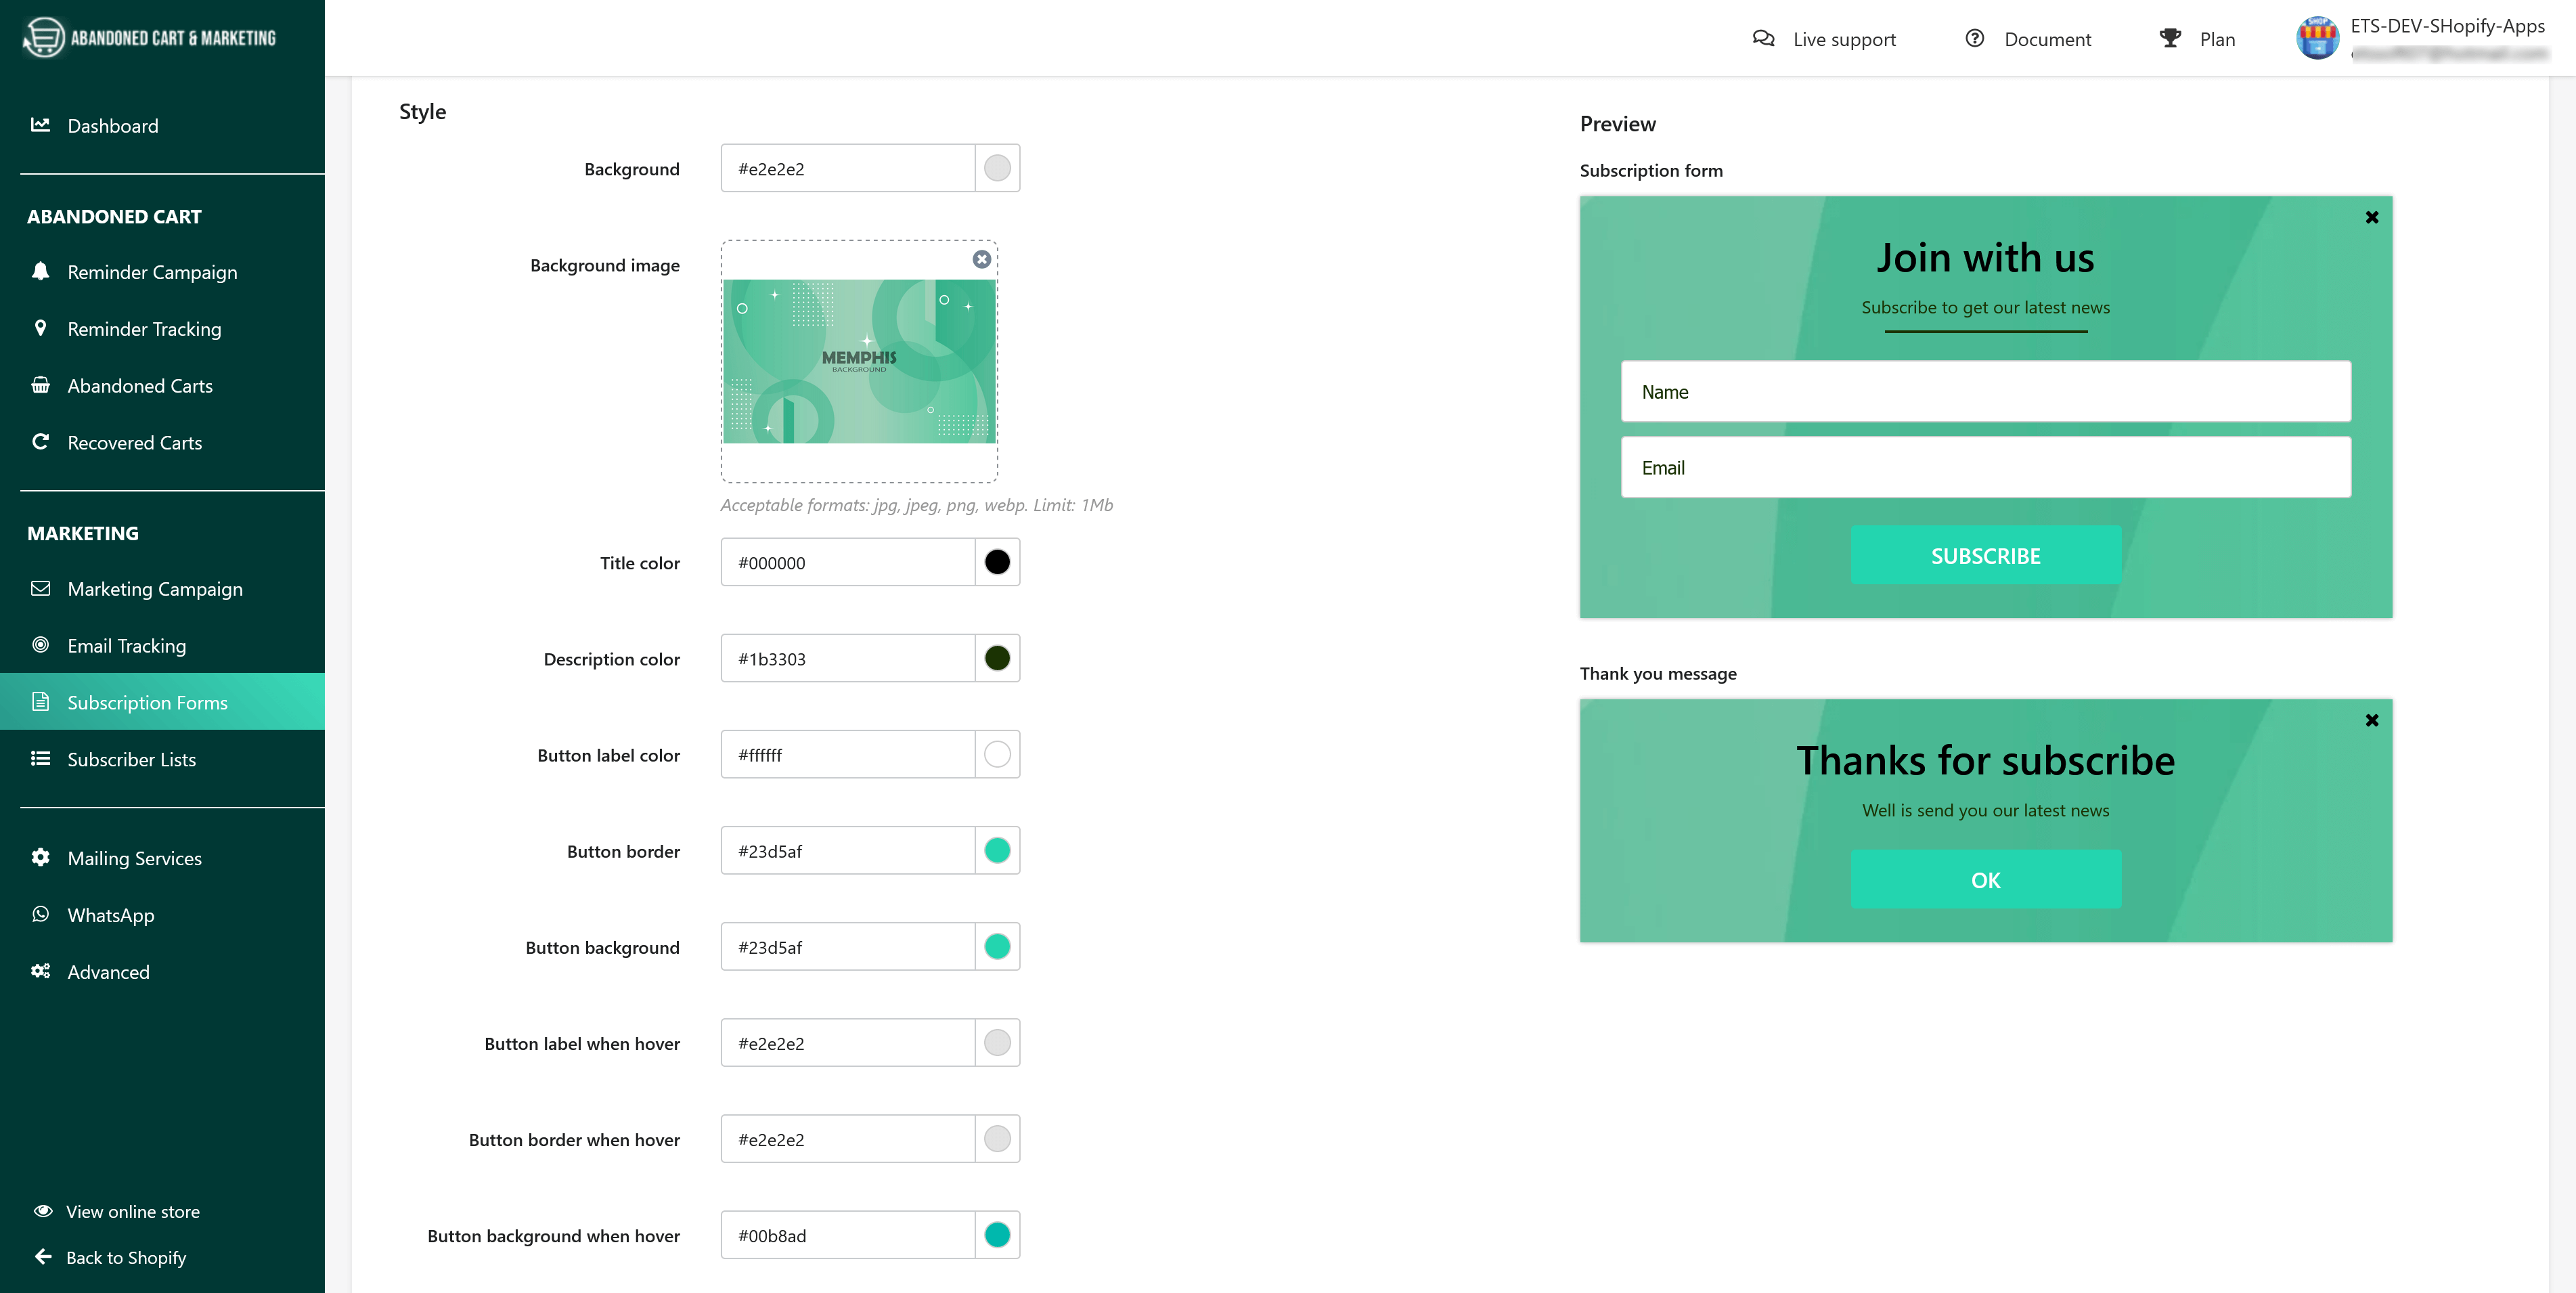
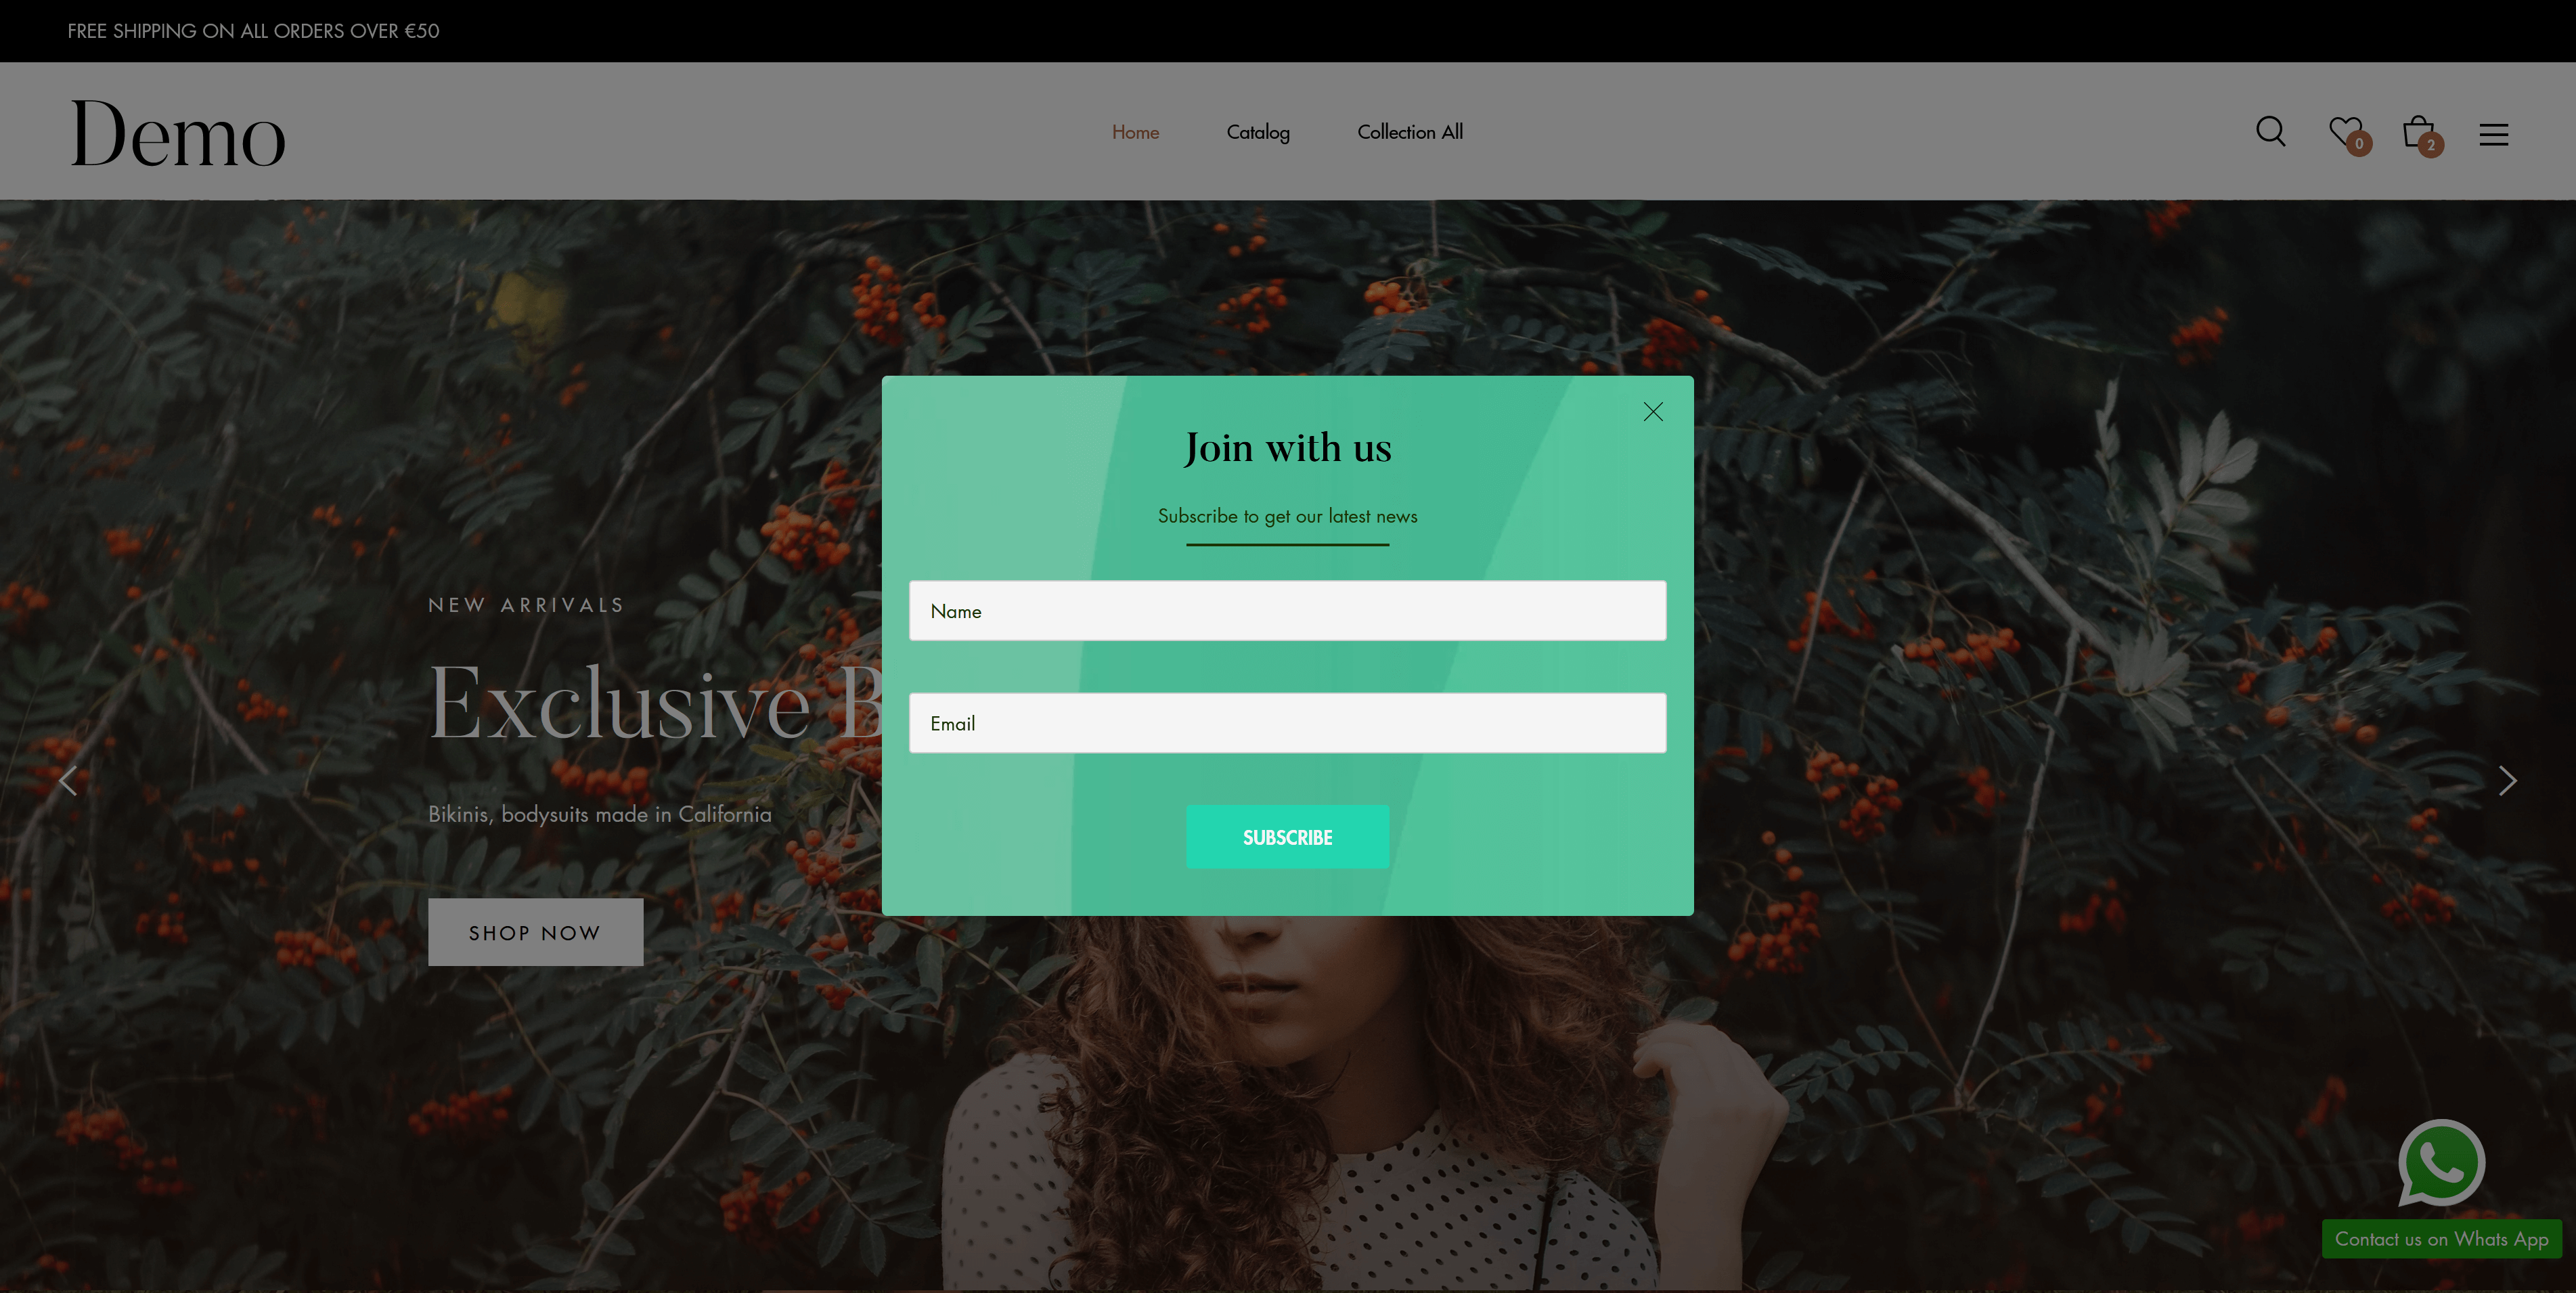
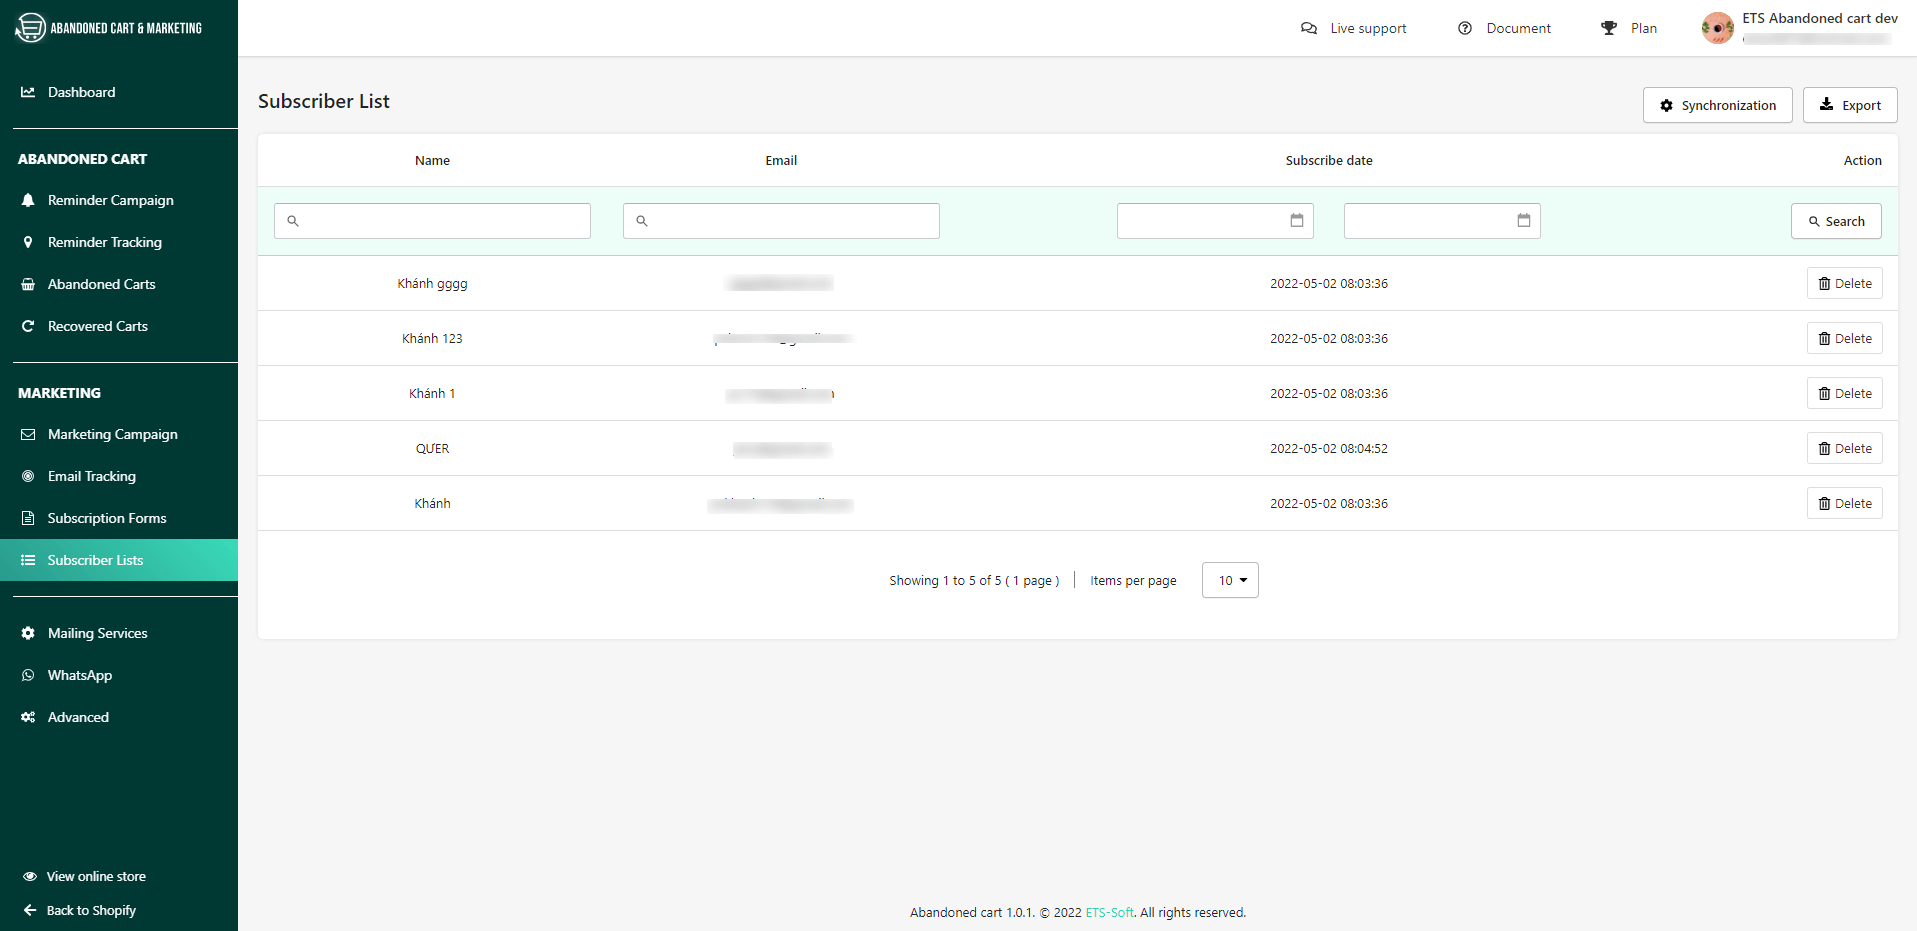
Navigate to “Reminder Campaign” page and then you can create unlimited reminder campaigns for unpaid carts, helping to reduce cart abandonment by sending reminder emails automatically or displaying a cart reminder under the form of a web browser notification (Web push).
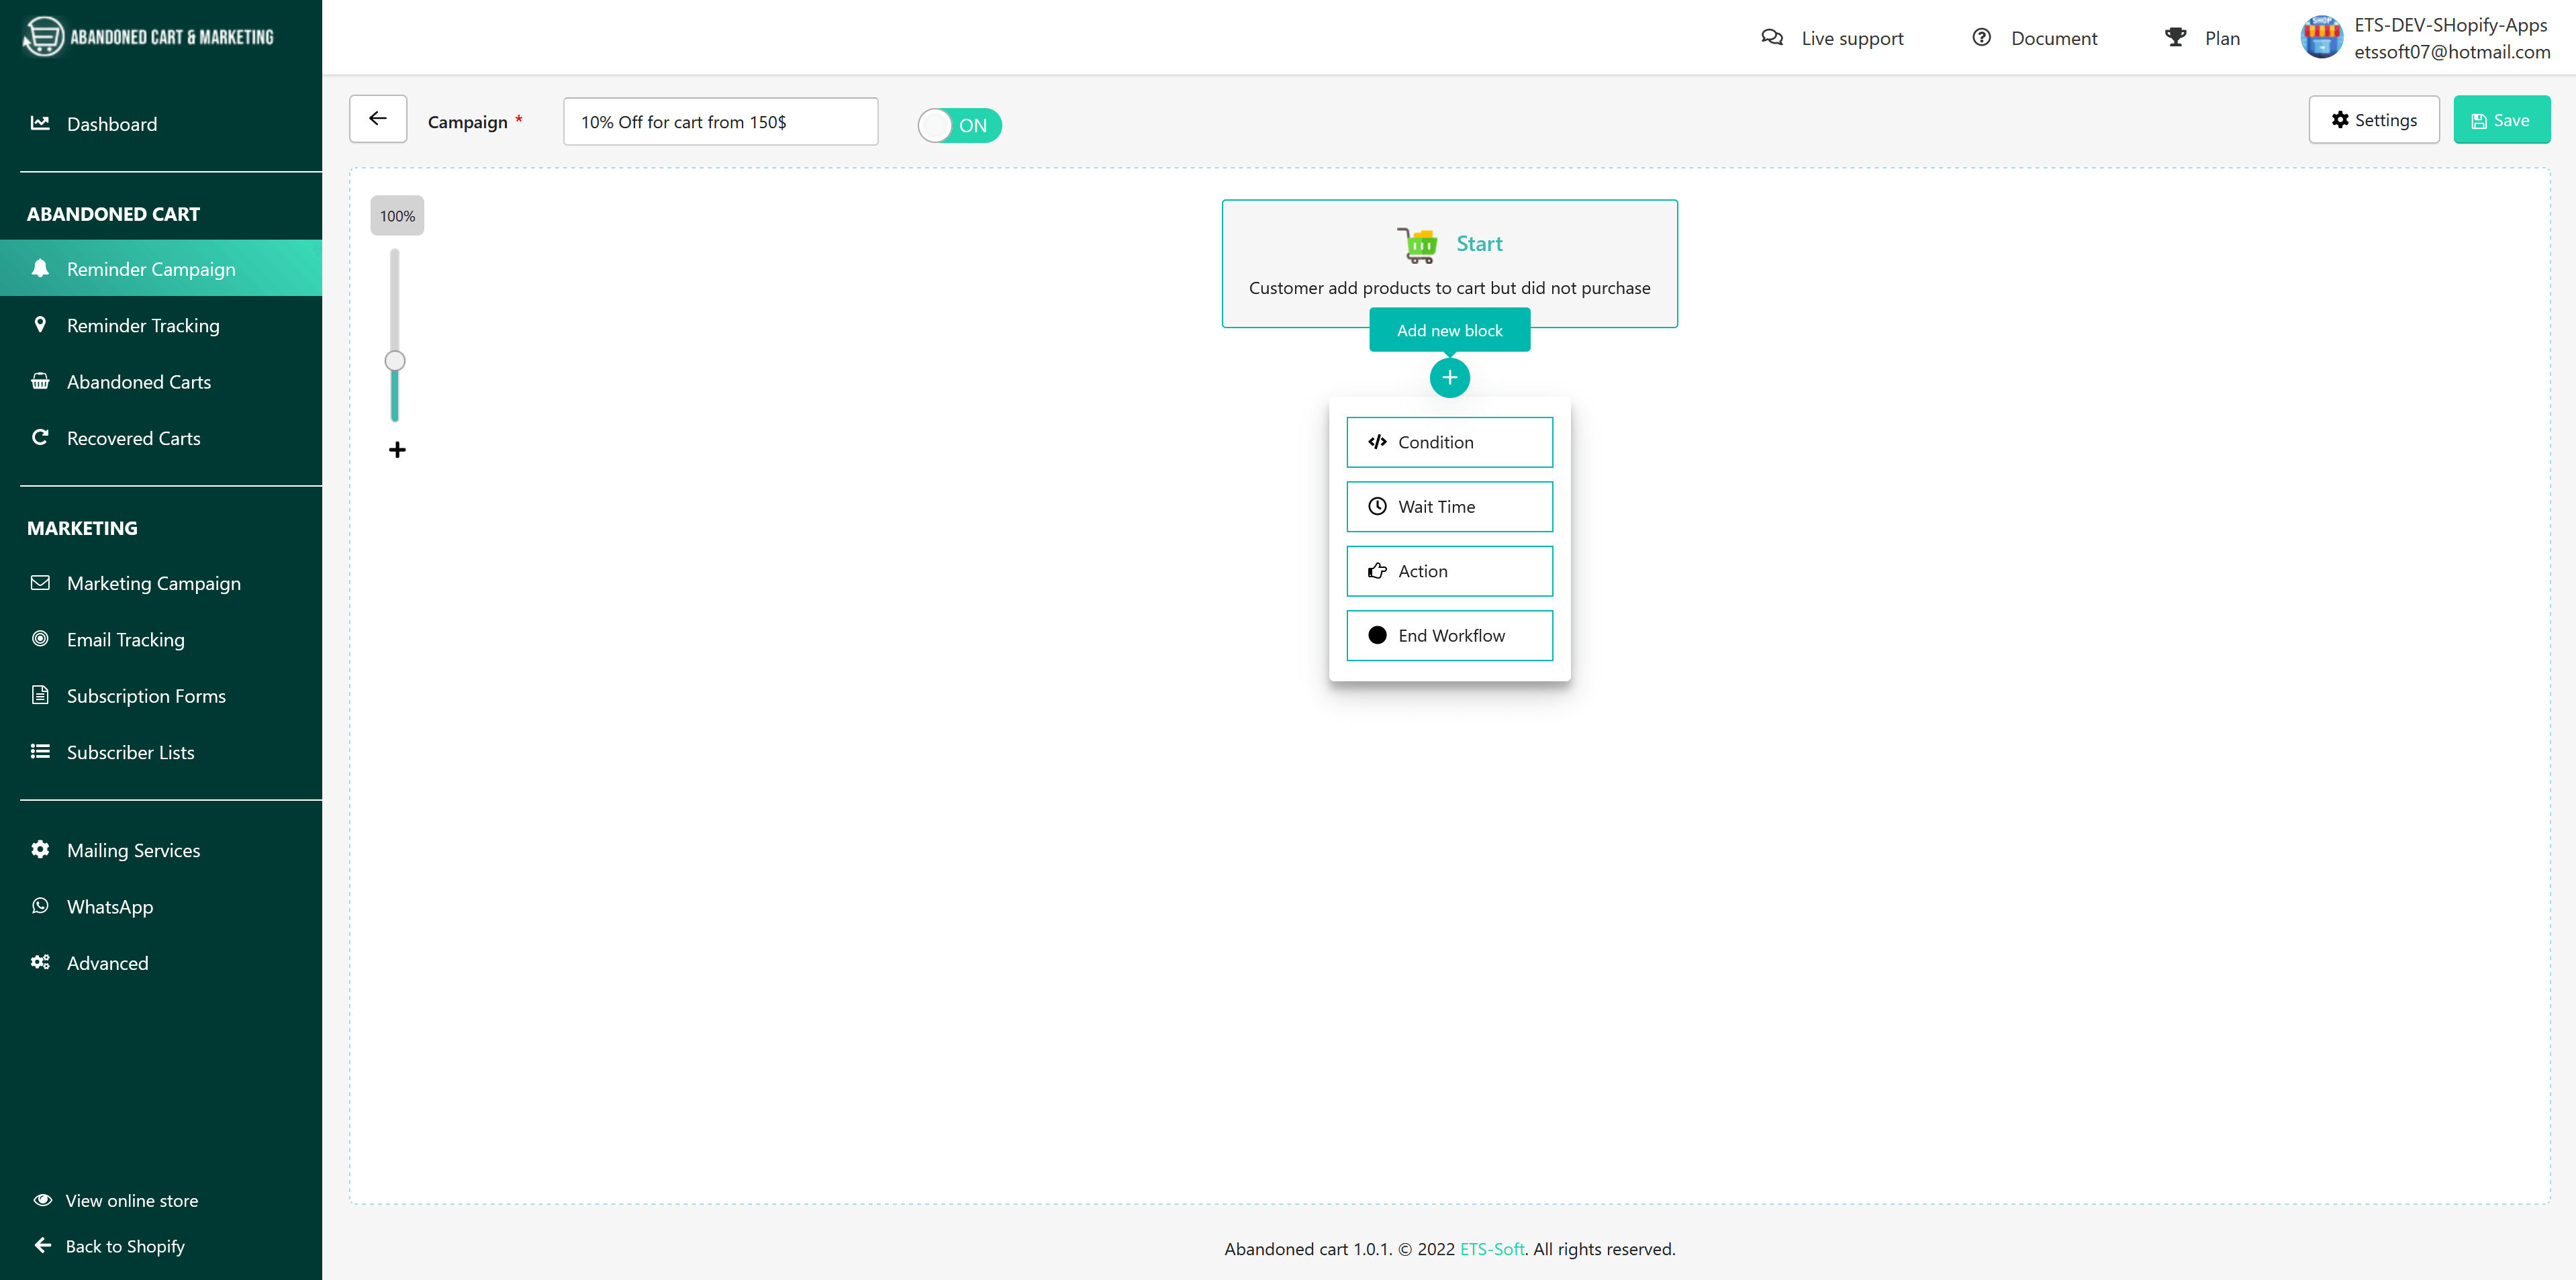
Now, start adding a new reminder campaign!
- Click on the “Add Reminder Campaign” button at the top right corner of the page to add a new one.
- Enter the campaign name. Turn on/off the switch to enable/disable your campaign.
- Use the slider on the top-left corner of the workspace to zoom in/zoom out.
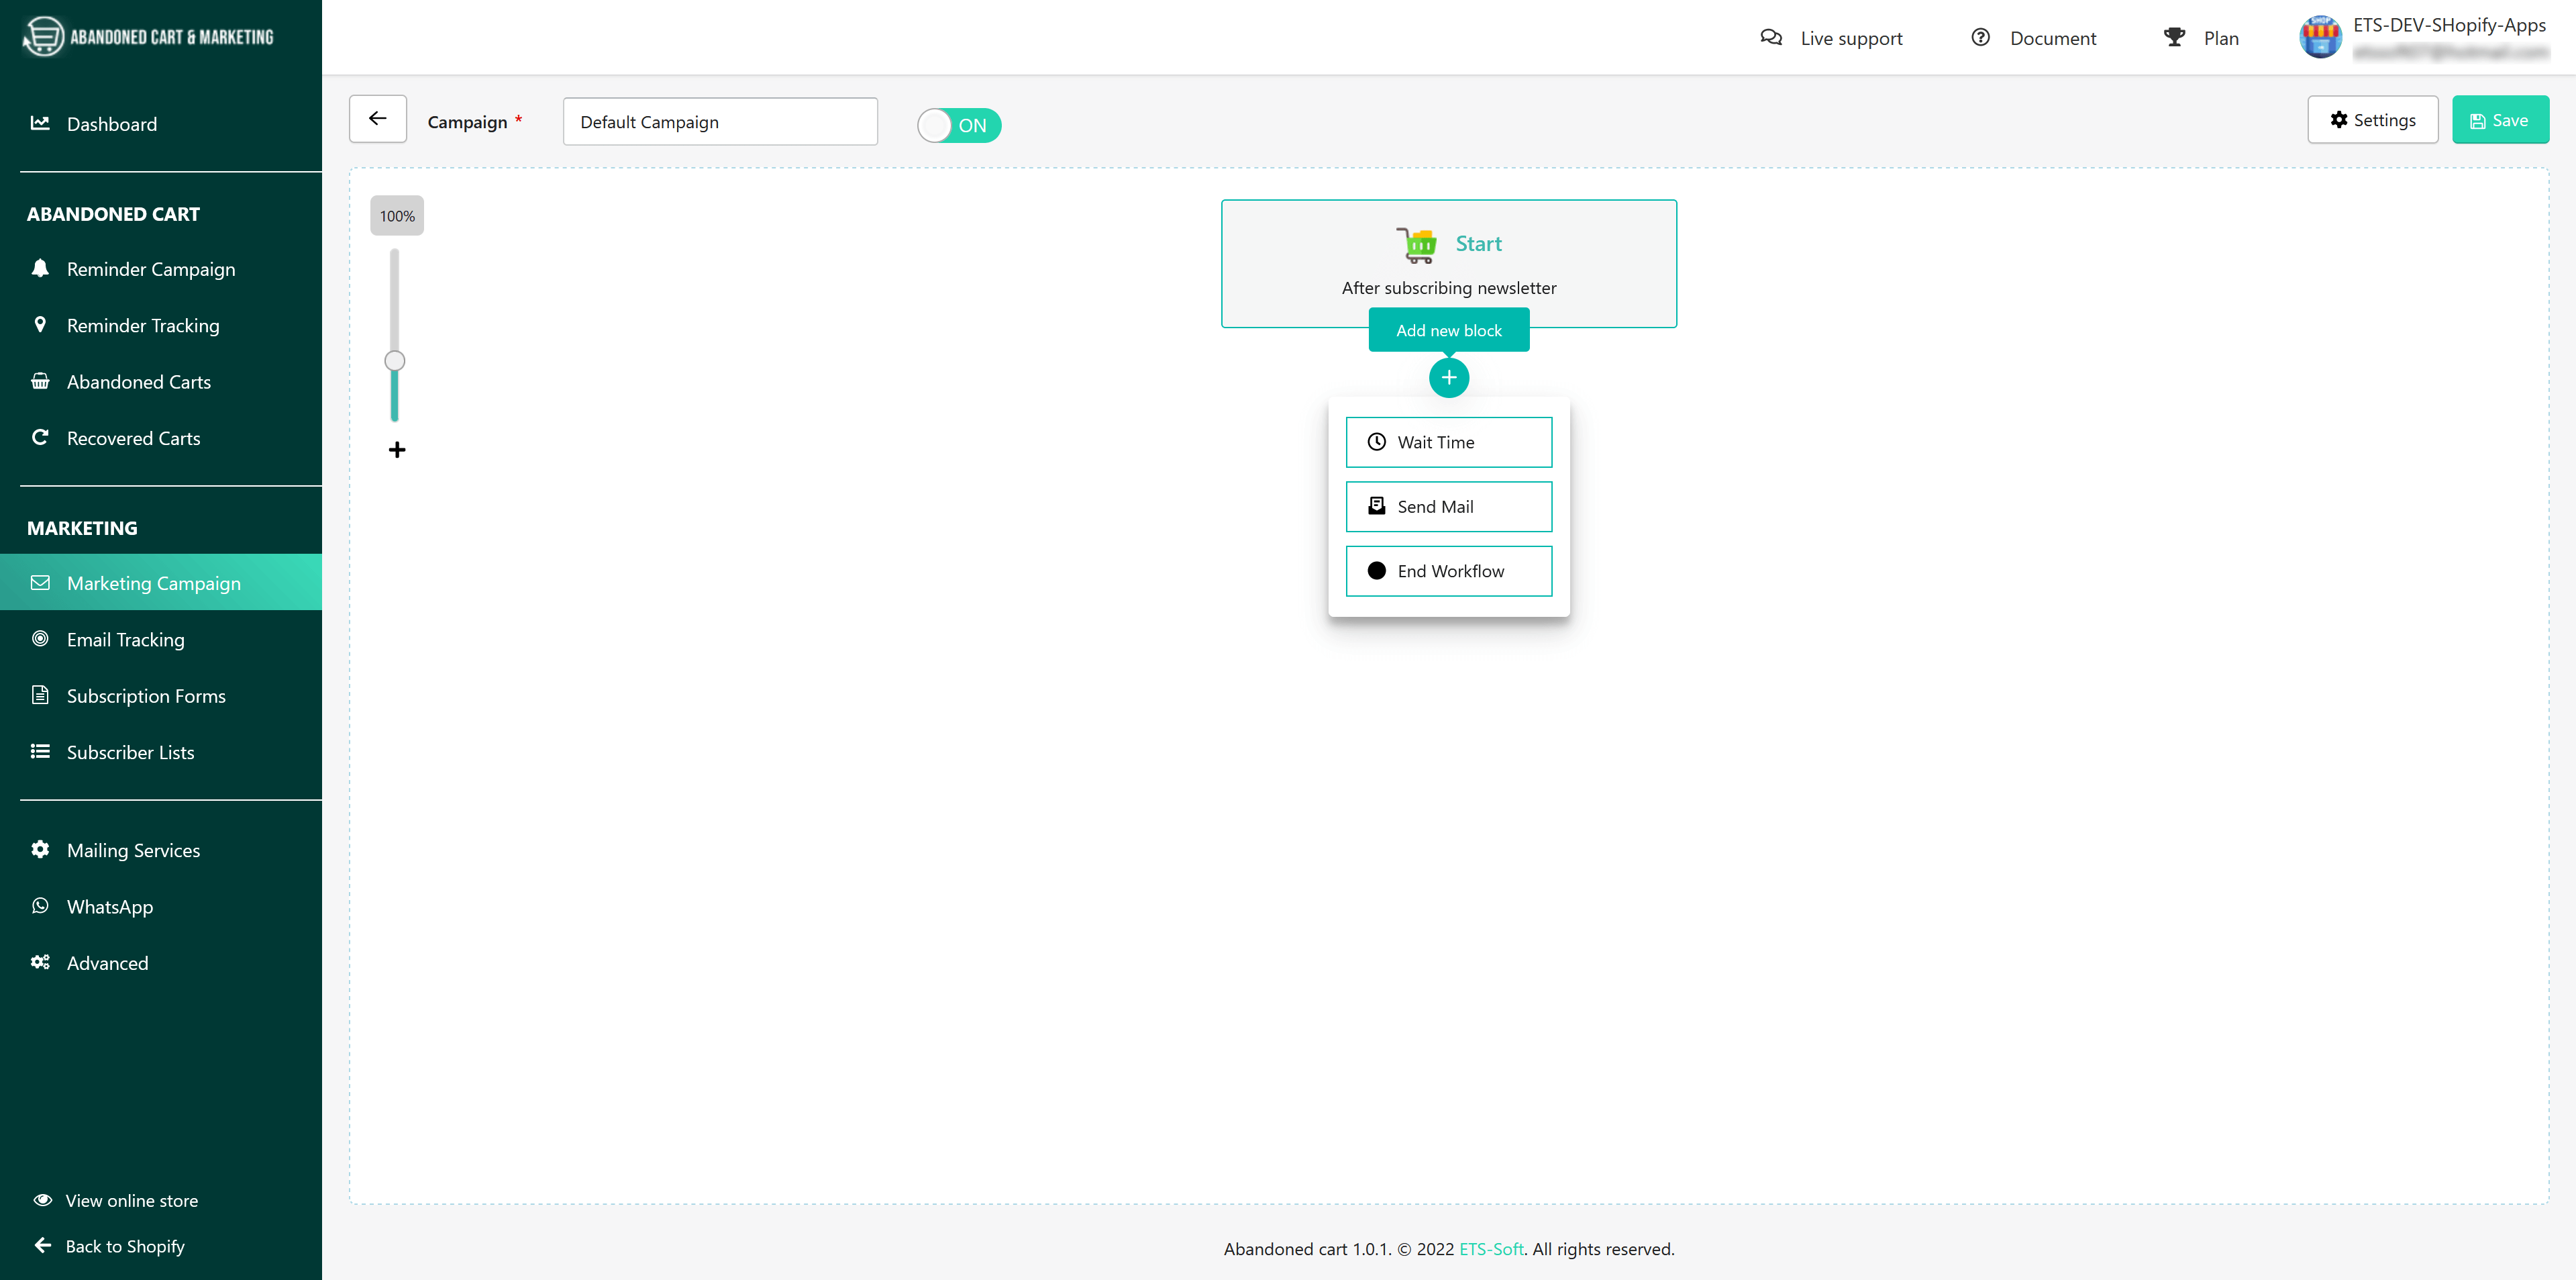
- Click on “+” button to add a new block and add options to set up your campaign.
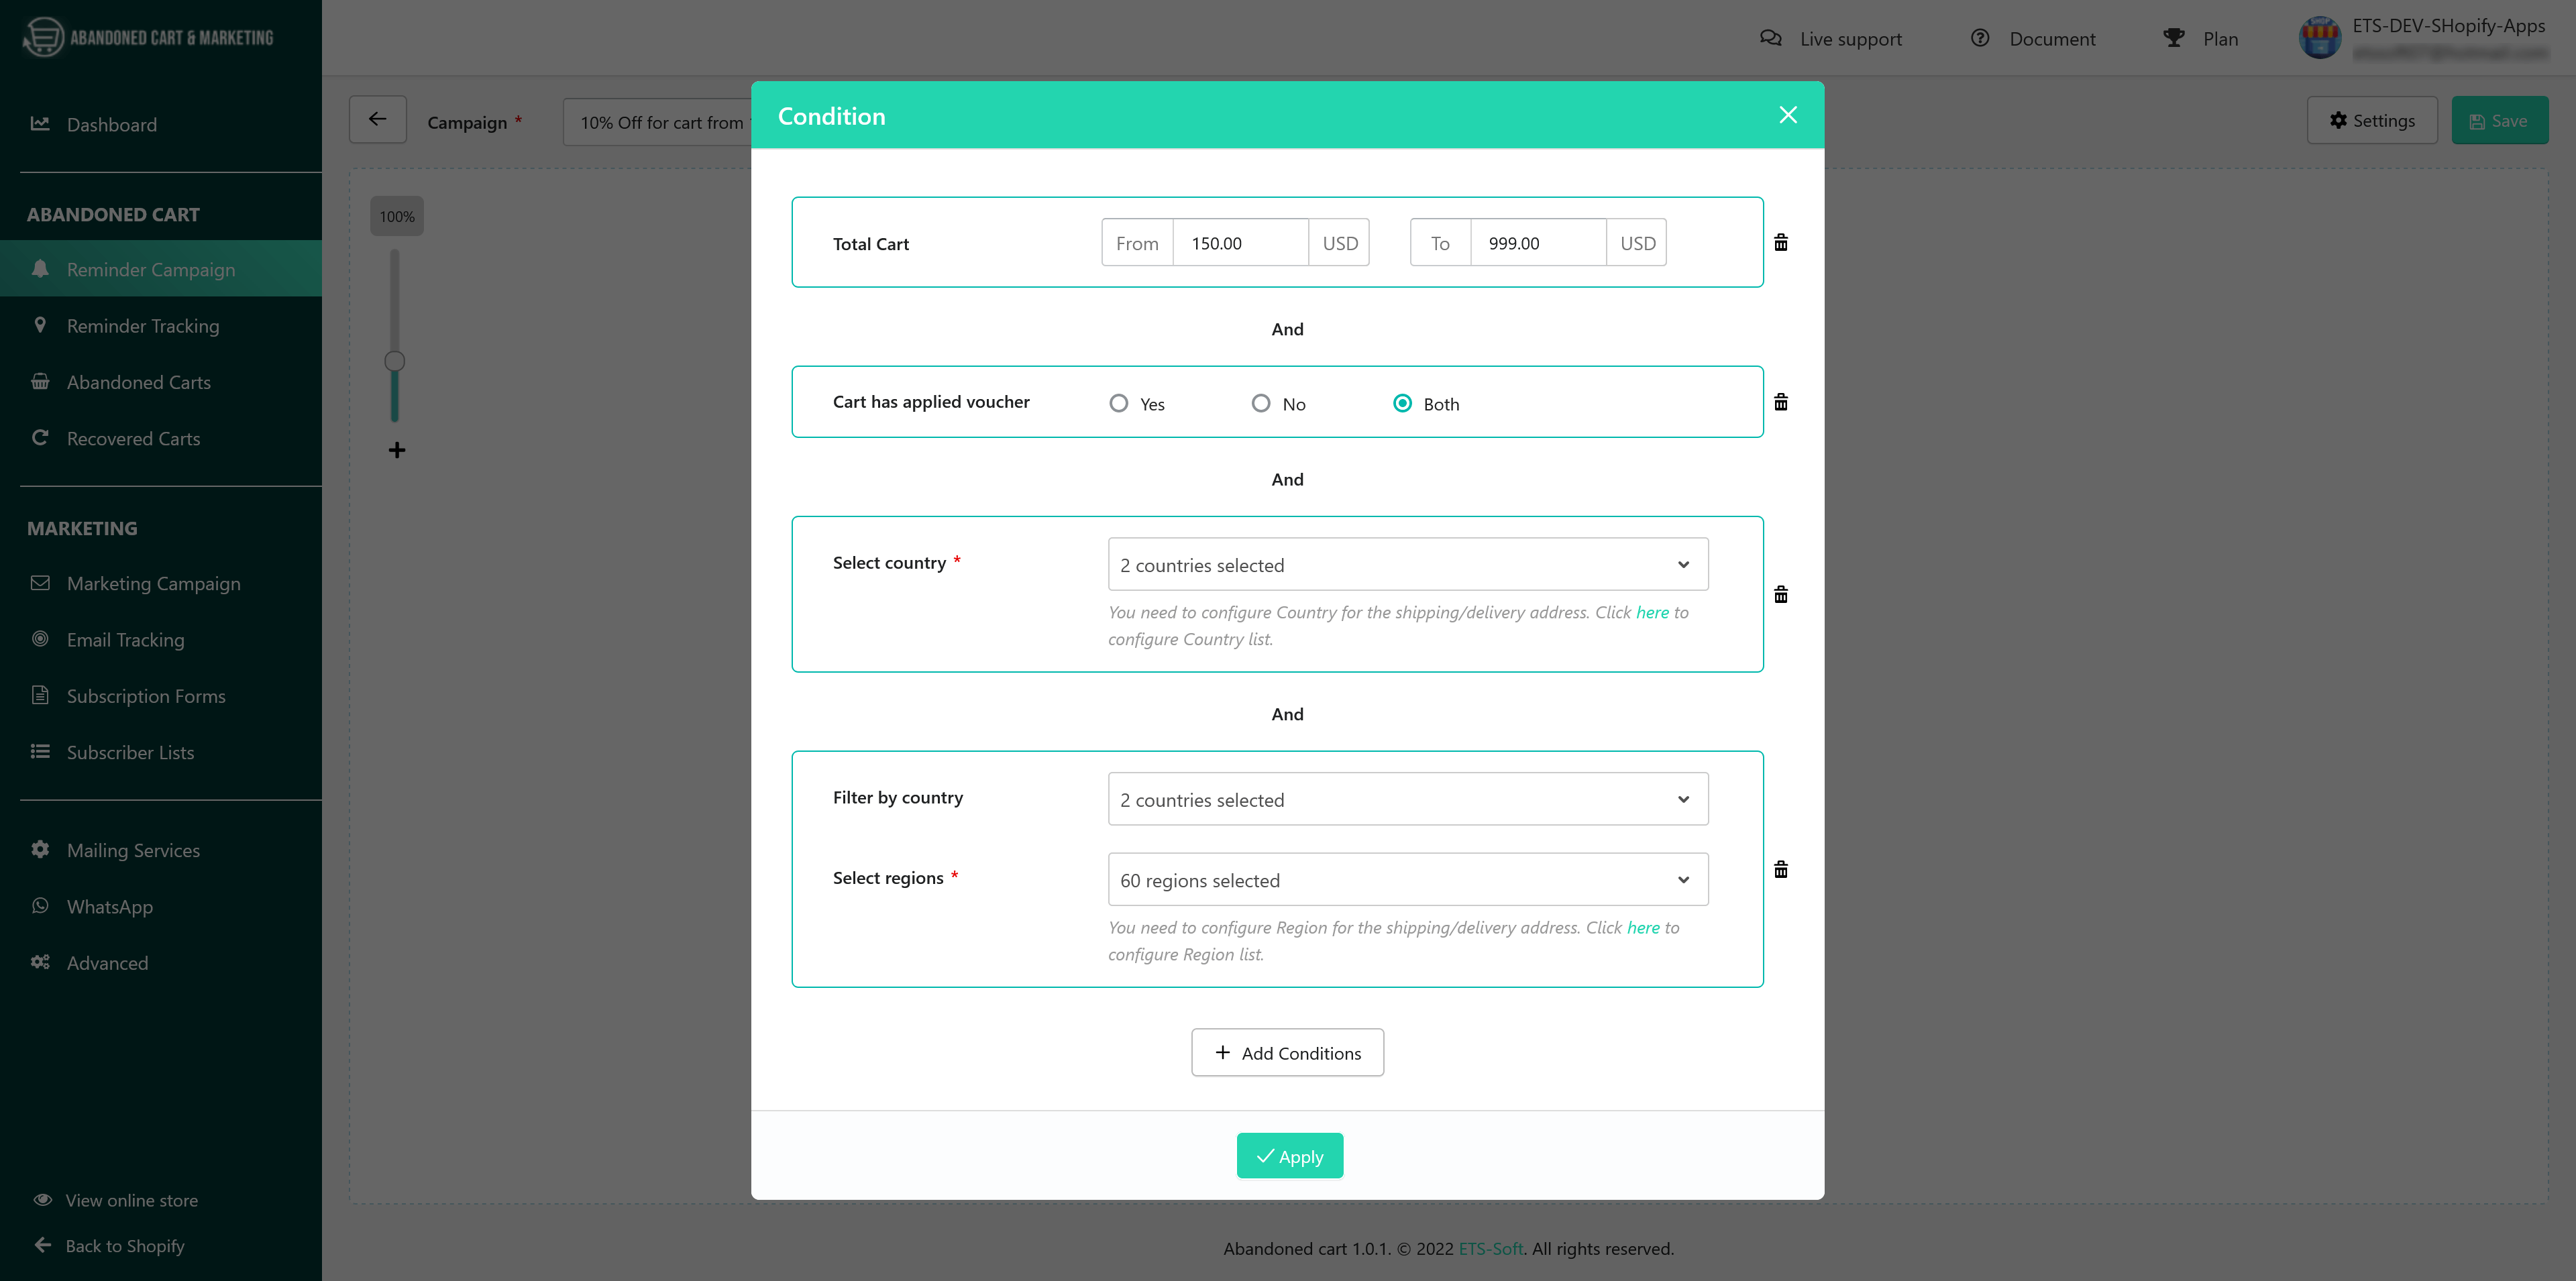
Condition block
- Click on “Condition” to set up conditions for the reminder campaign. On the “Condition” popup, there are 5 types of campaign conditions that you can choose from.
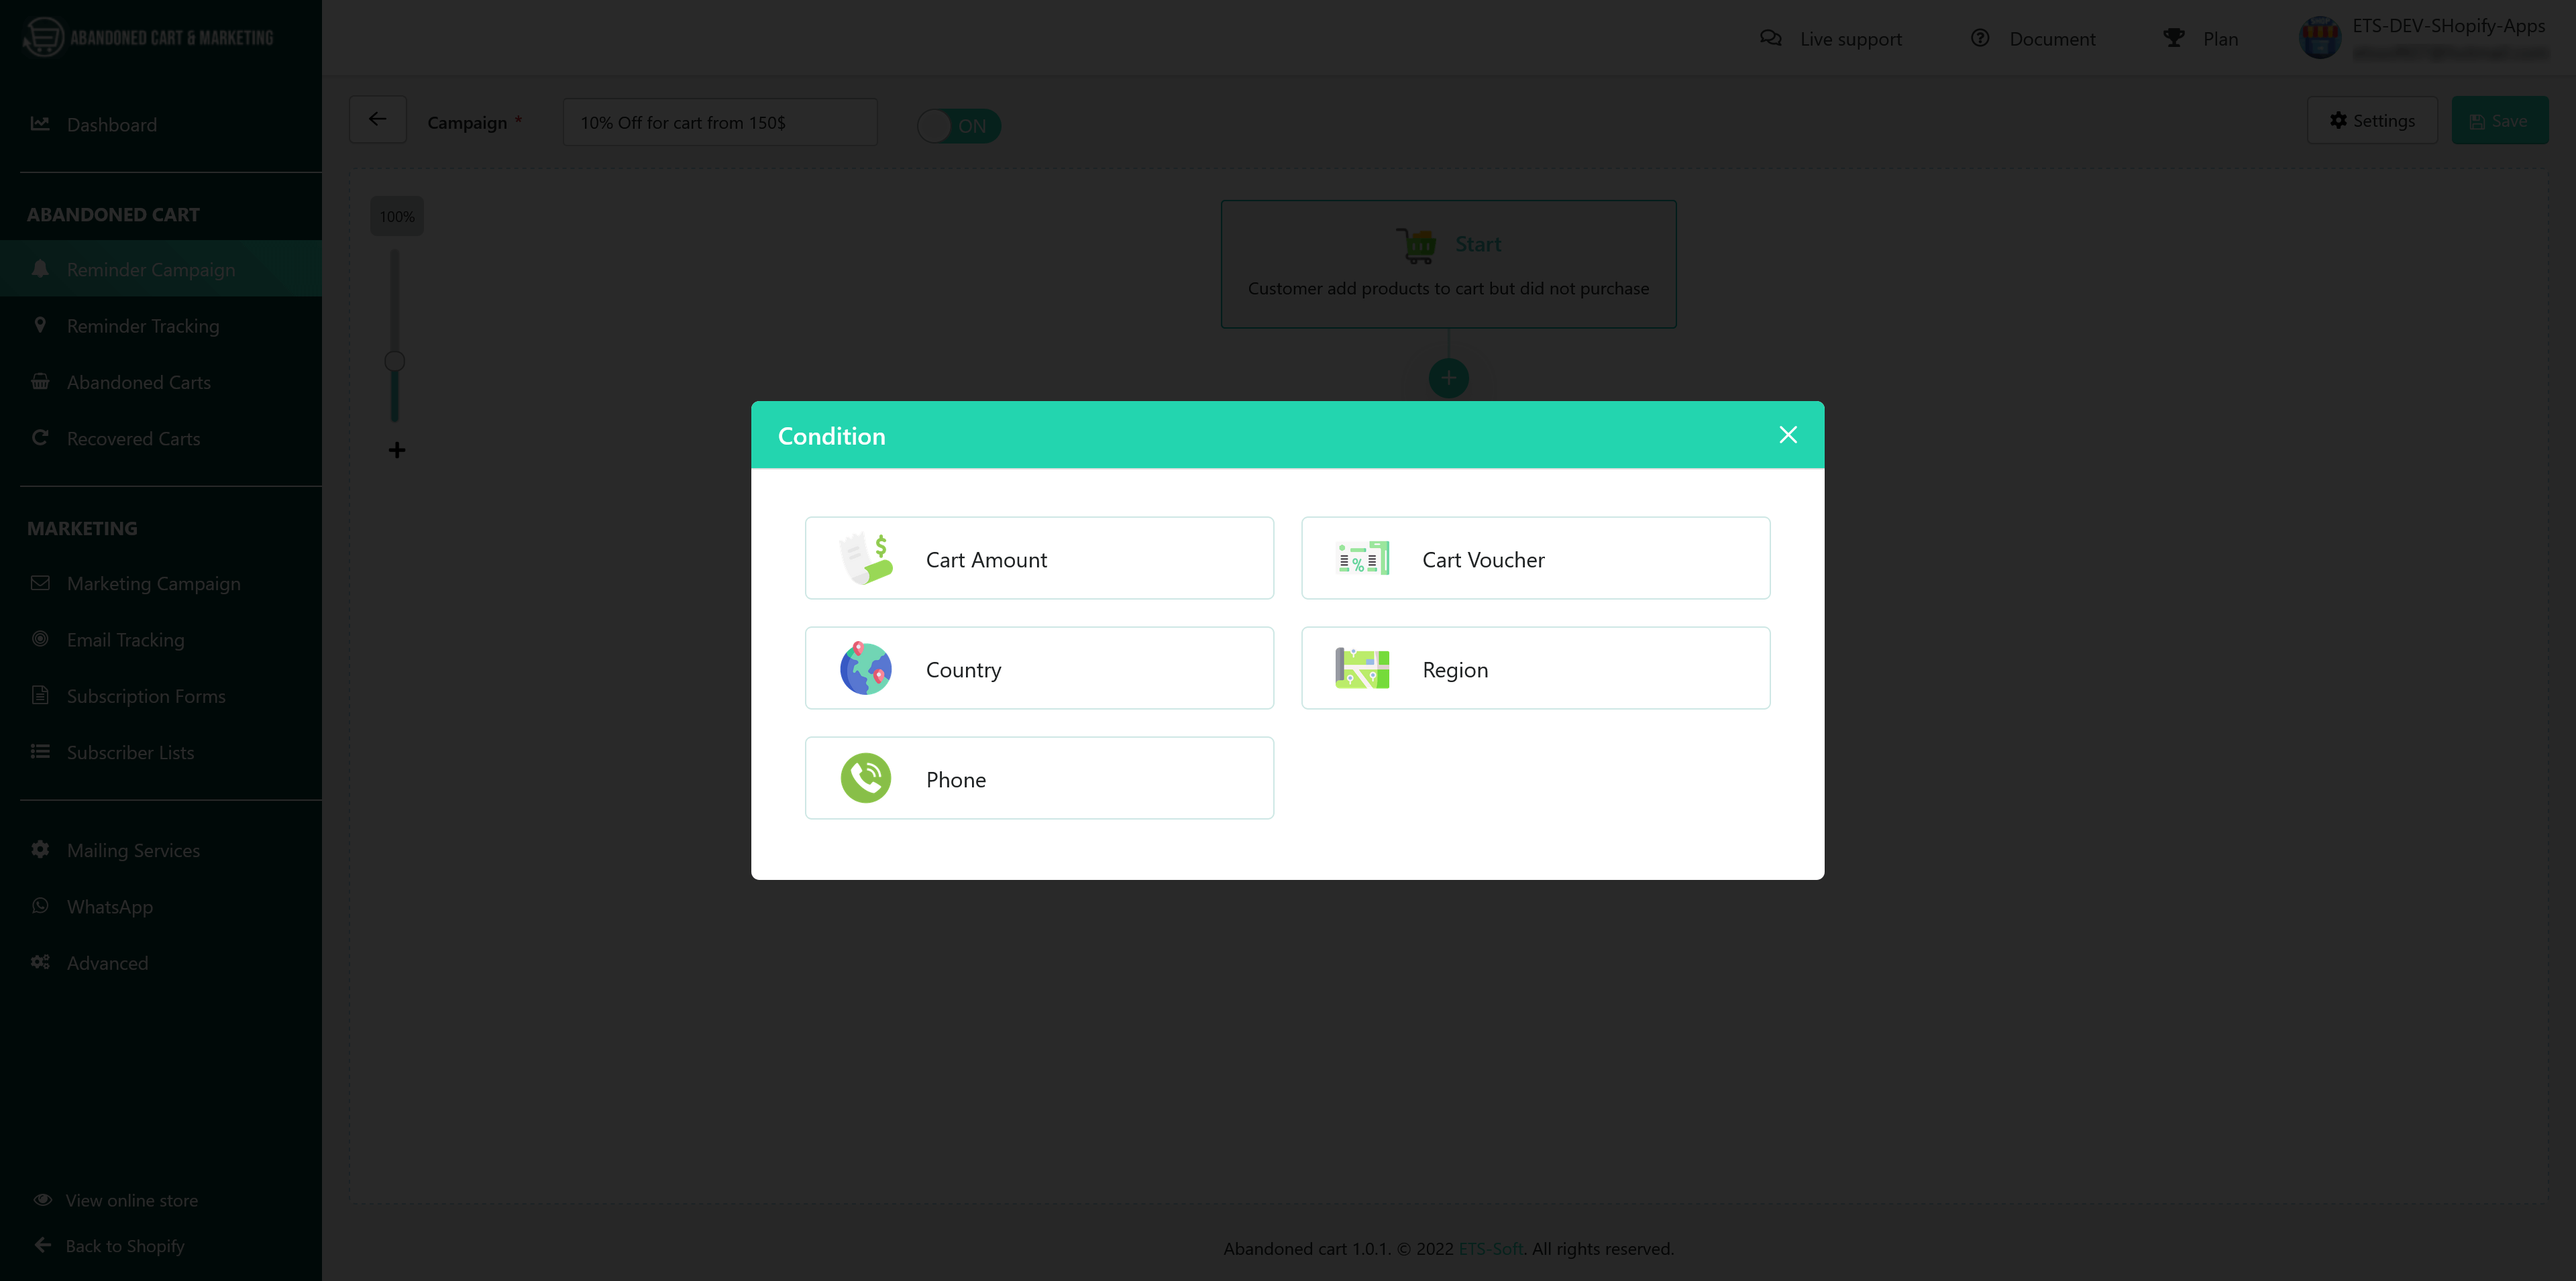
- You can set up a maximum of 5 conditions for each reminder campaign. Click on “Add Conditions” button to add other conditions you want. Click on “Apply” button to finish.

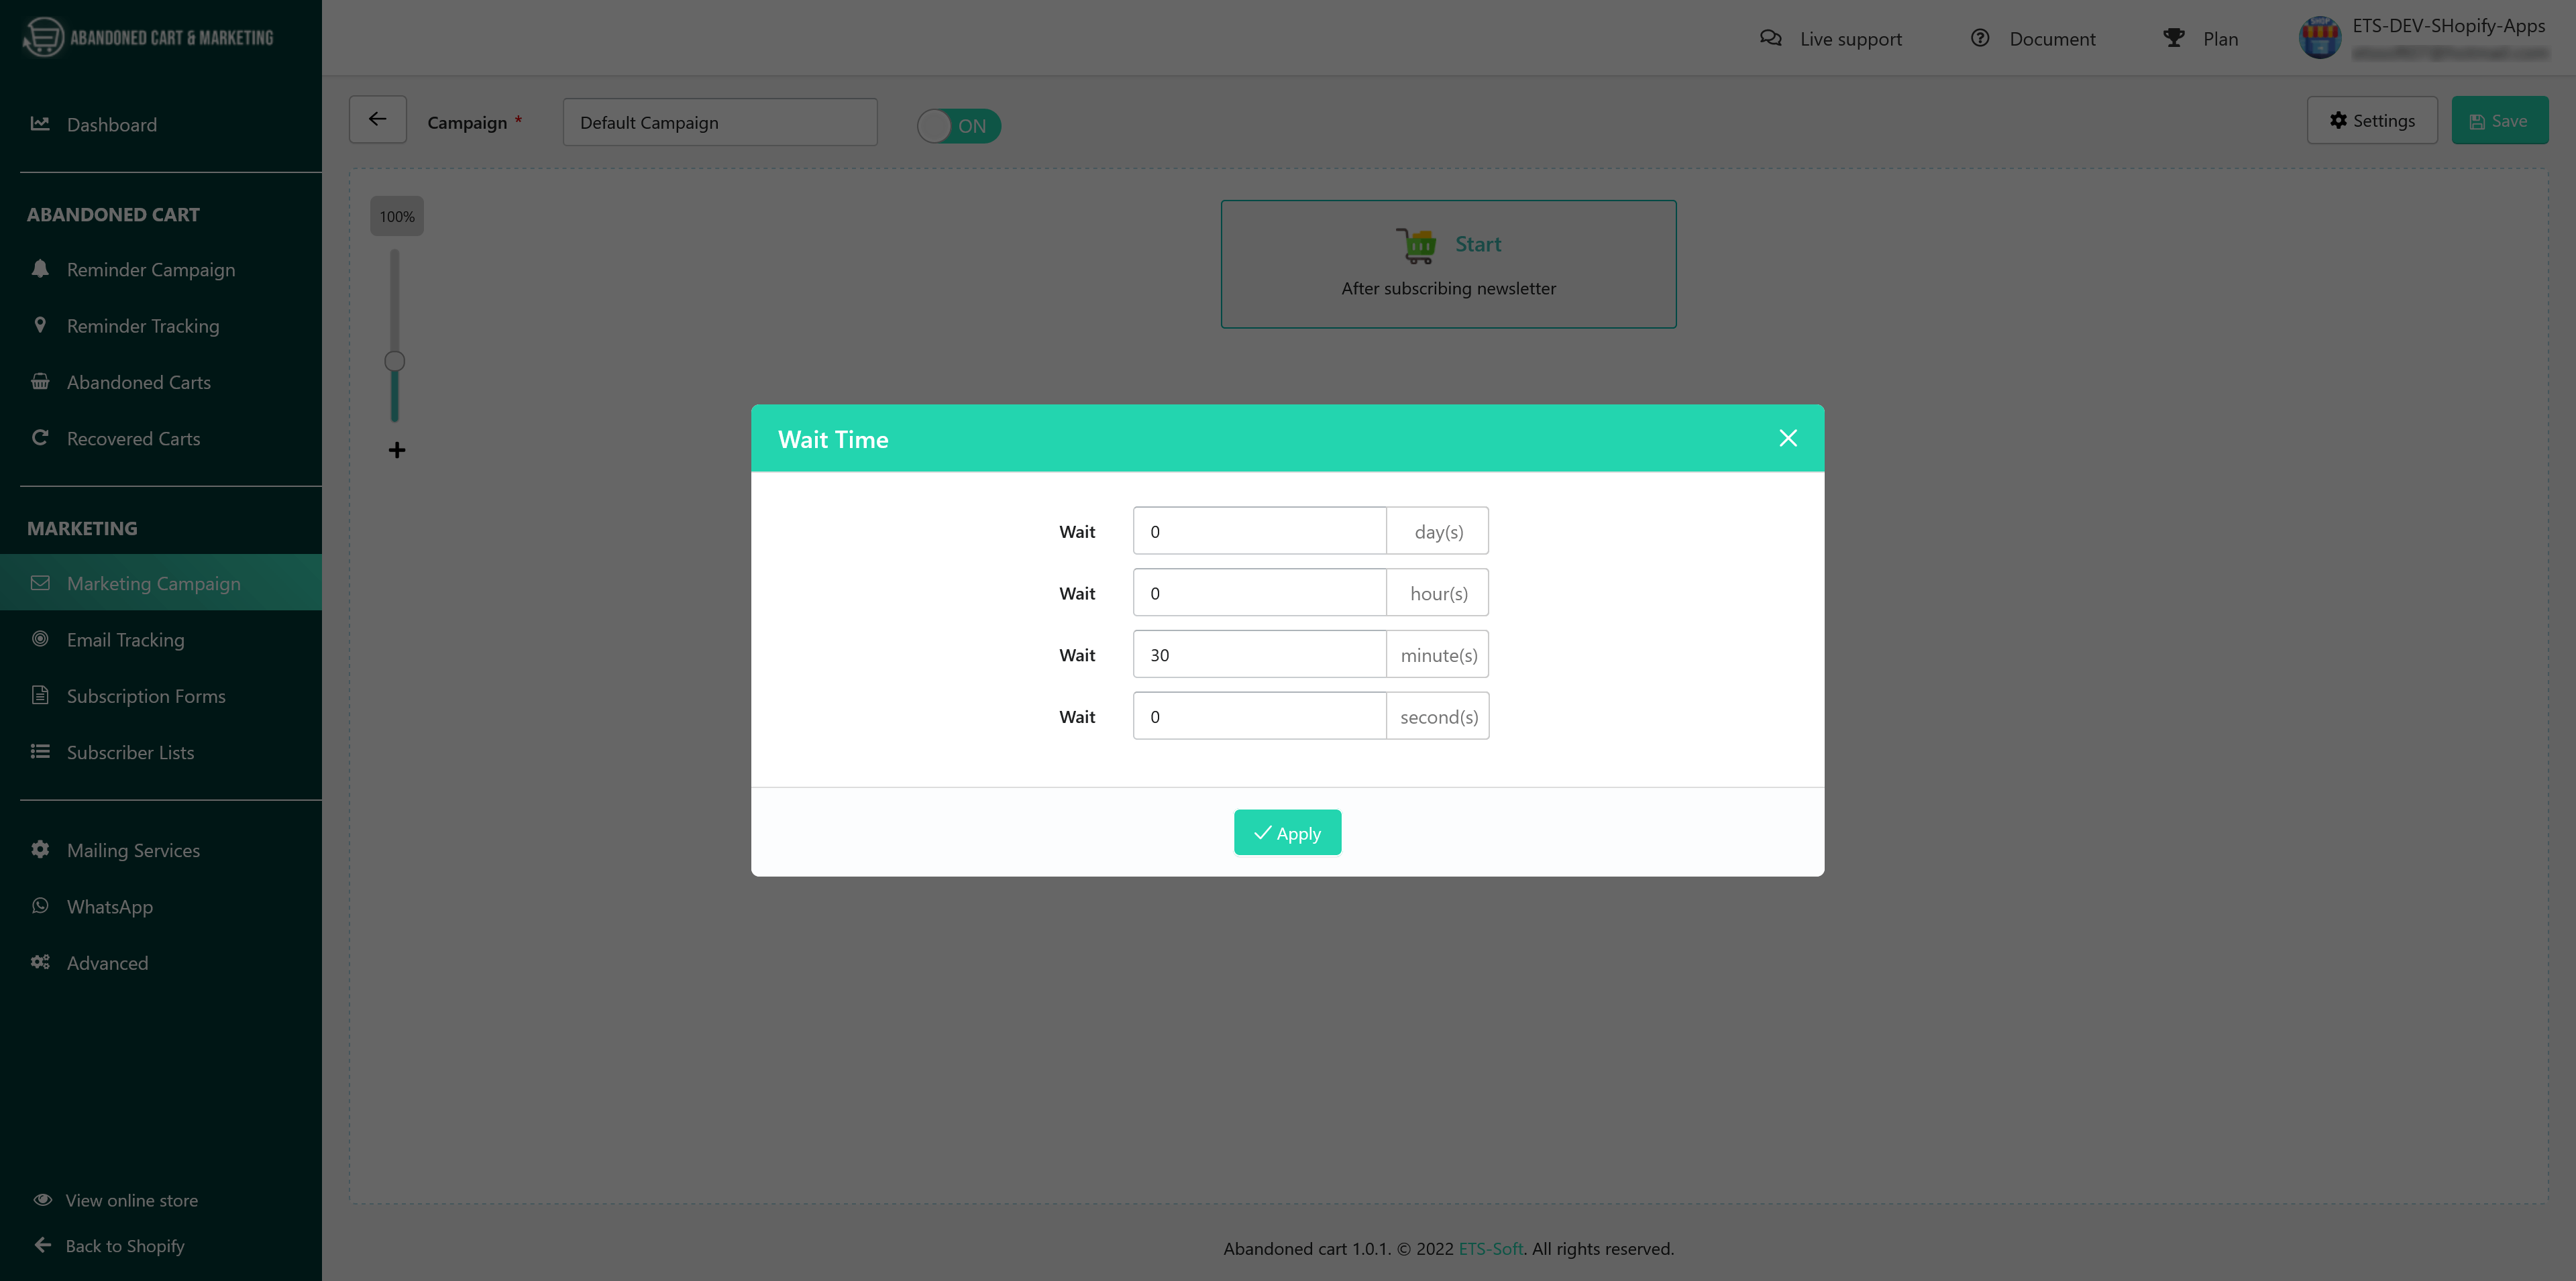
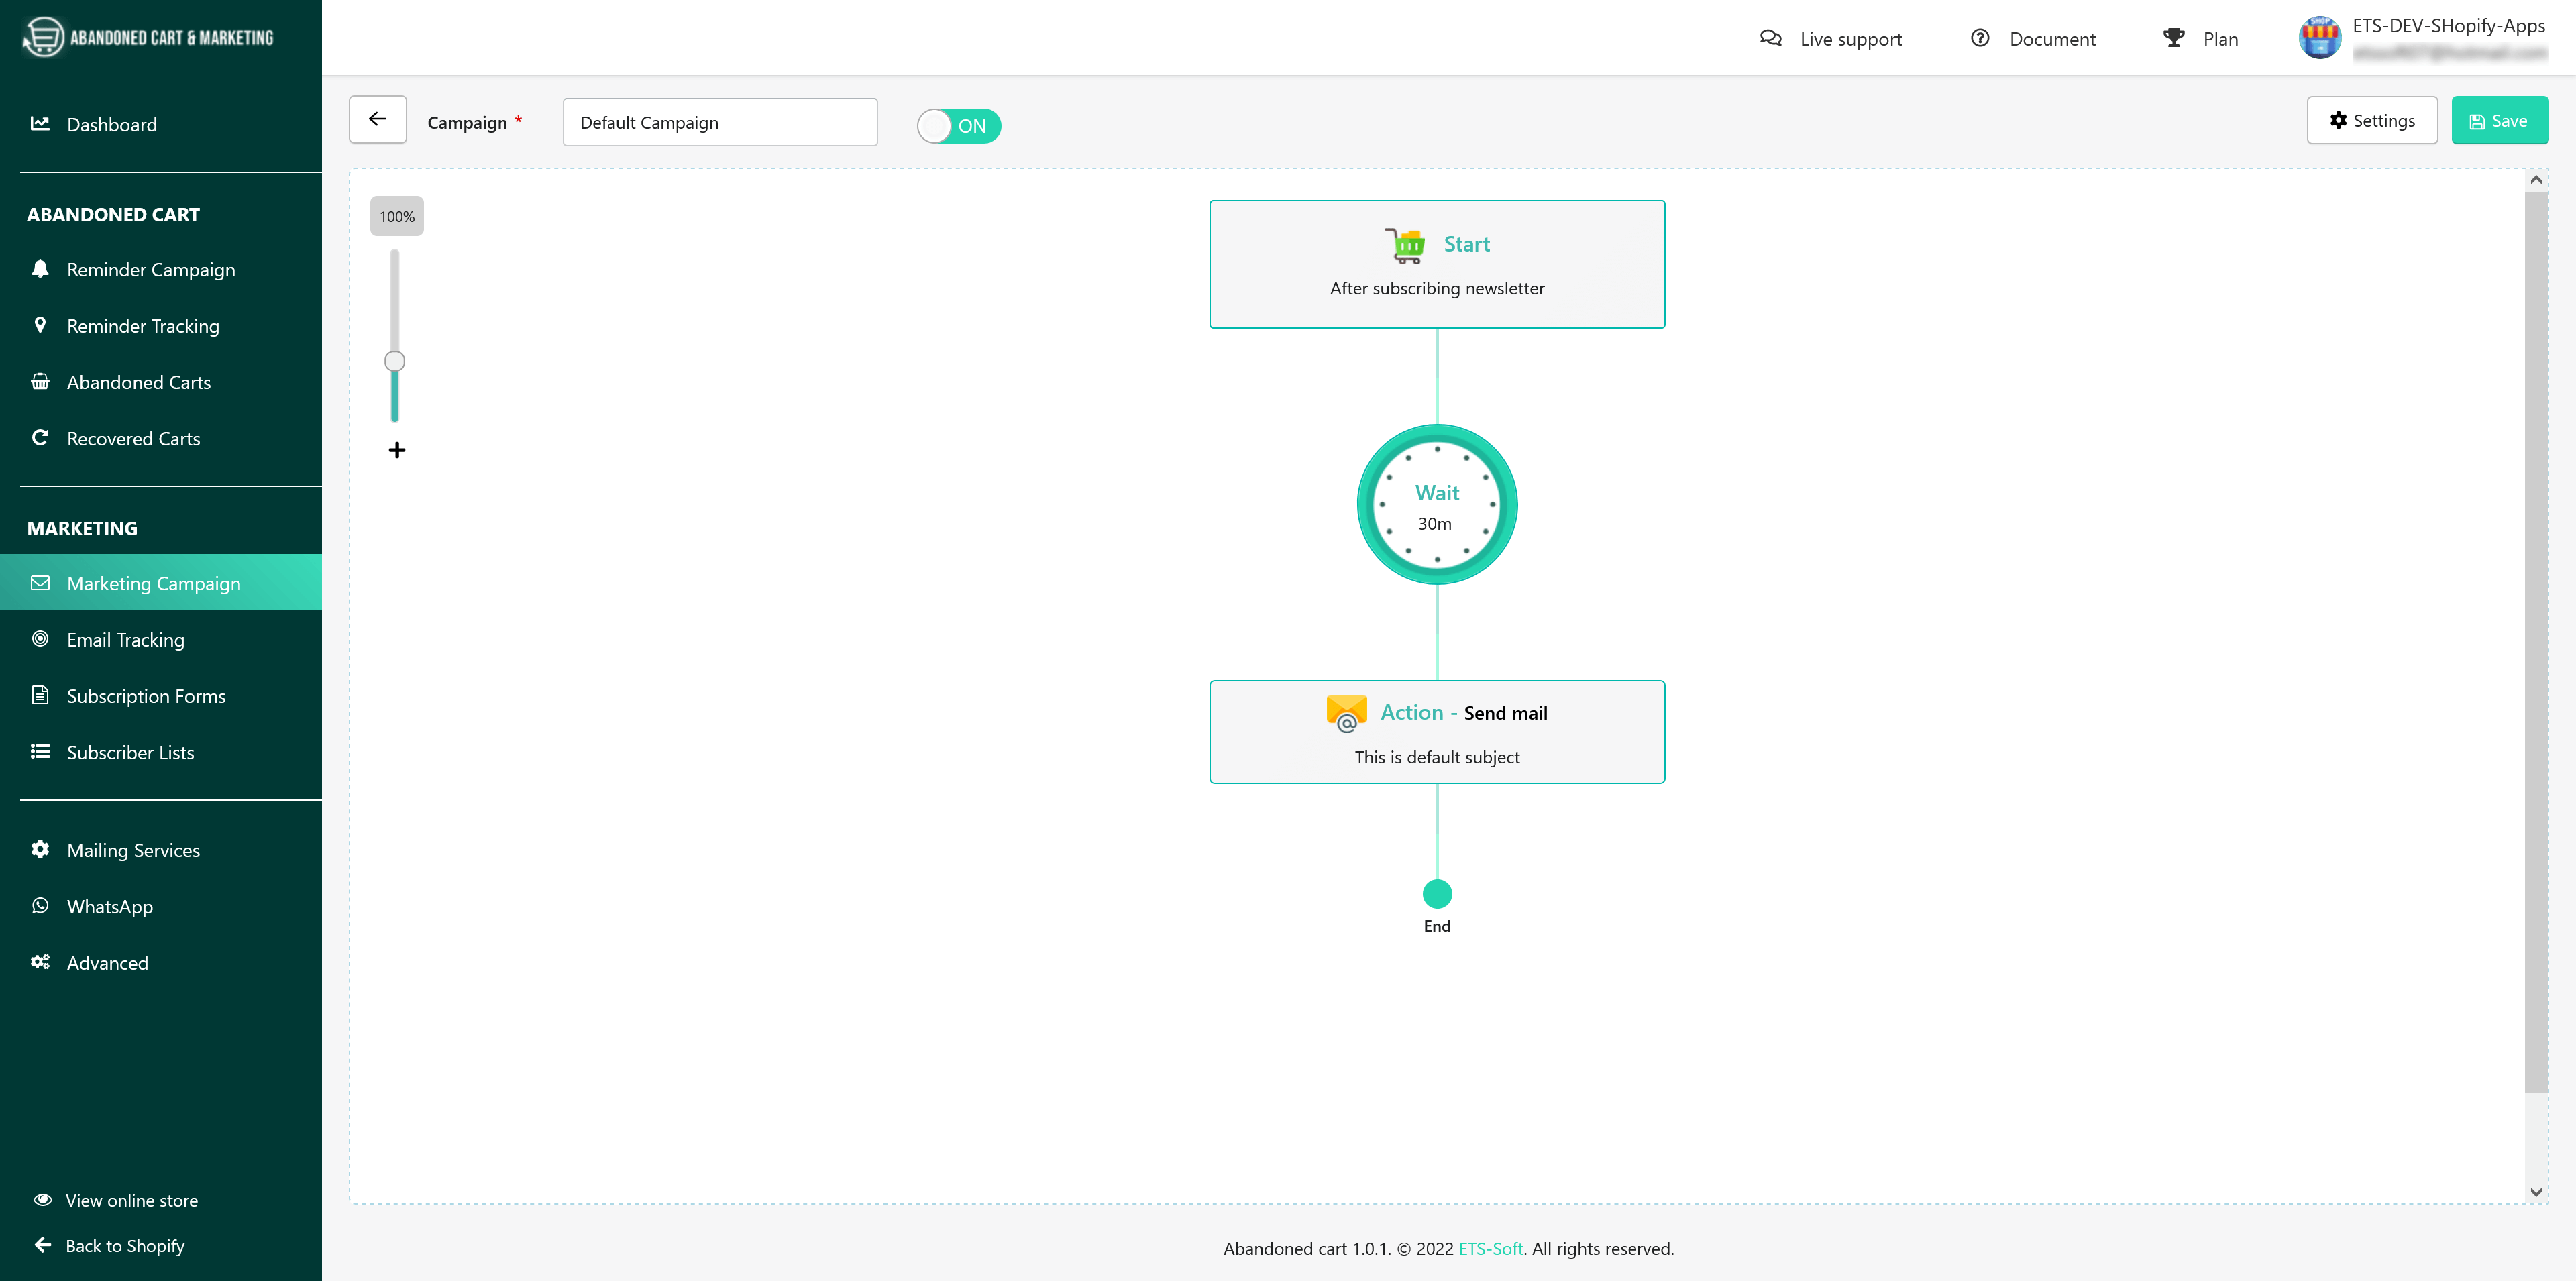
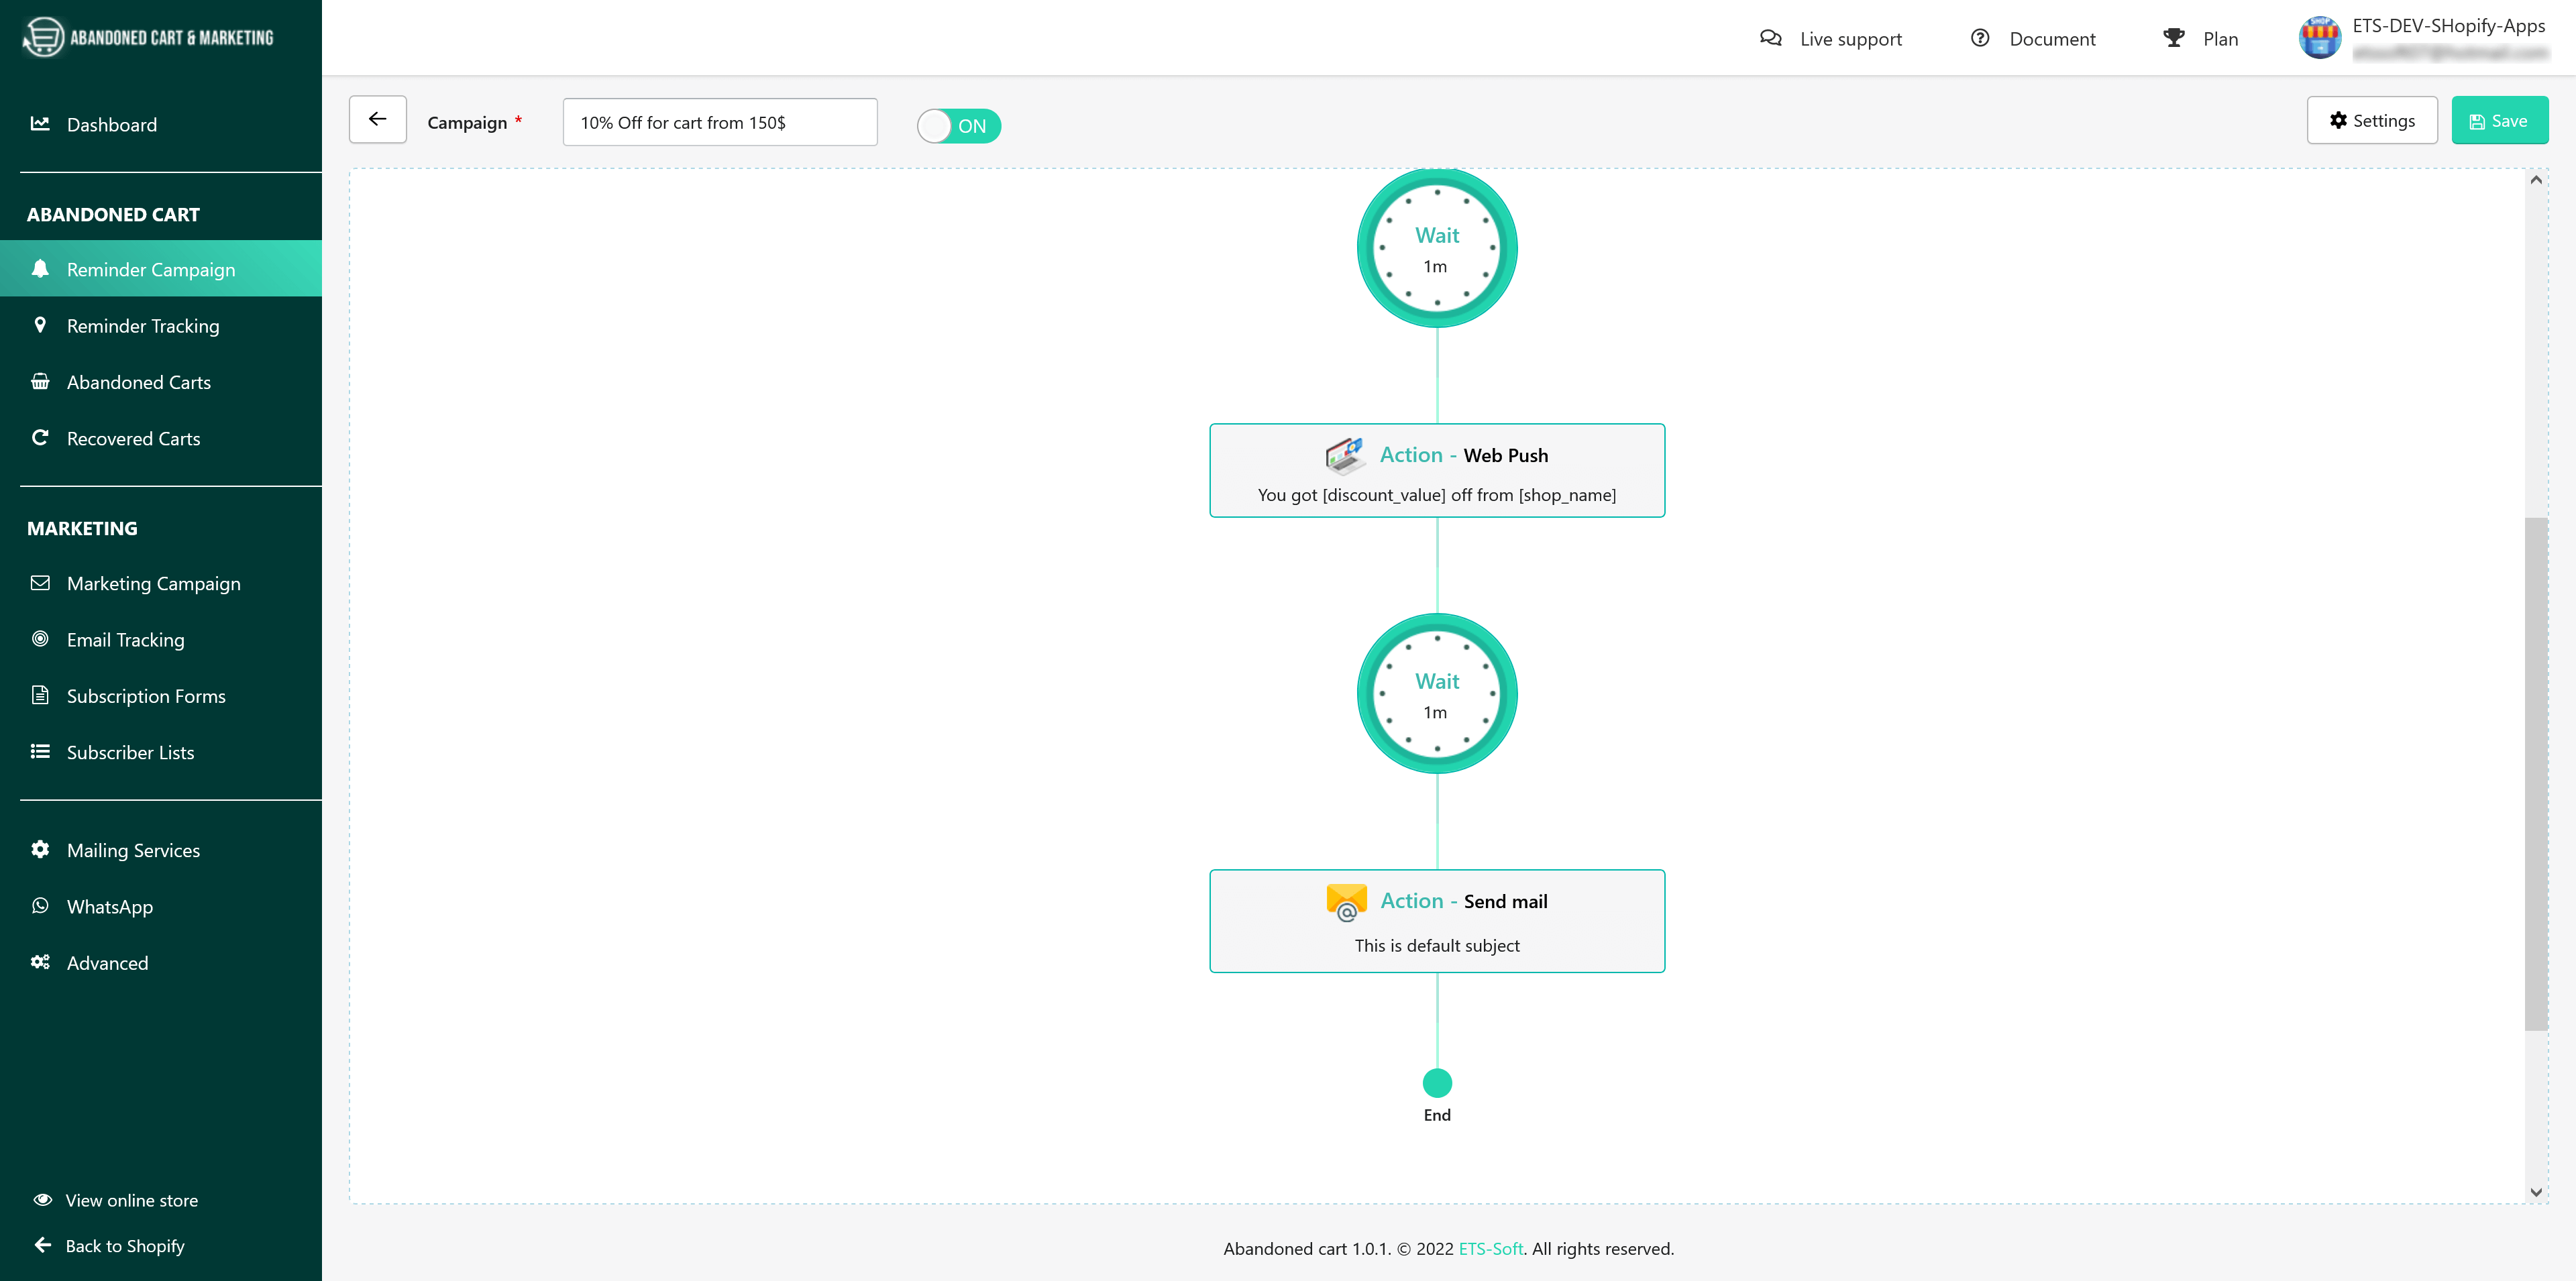
Wait time block
- Click on “Wait time” to set up a reminder campaign time. On the “Wait time” popup, set the time you want by entering in the fields: days, hours, minutes, seconds to send reminder notifications since the customer abandoned the cart.
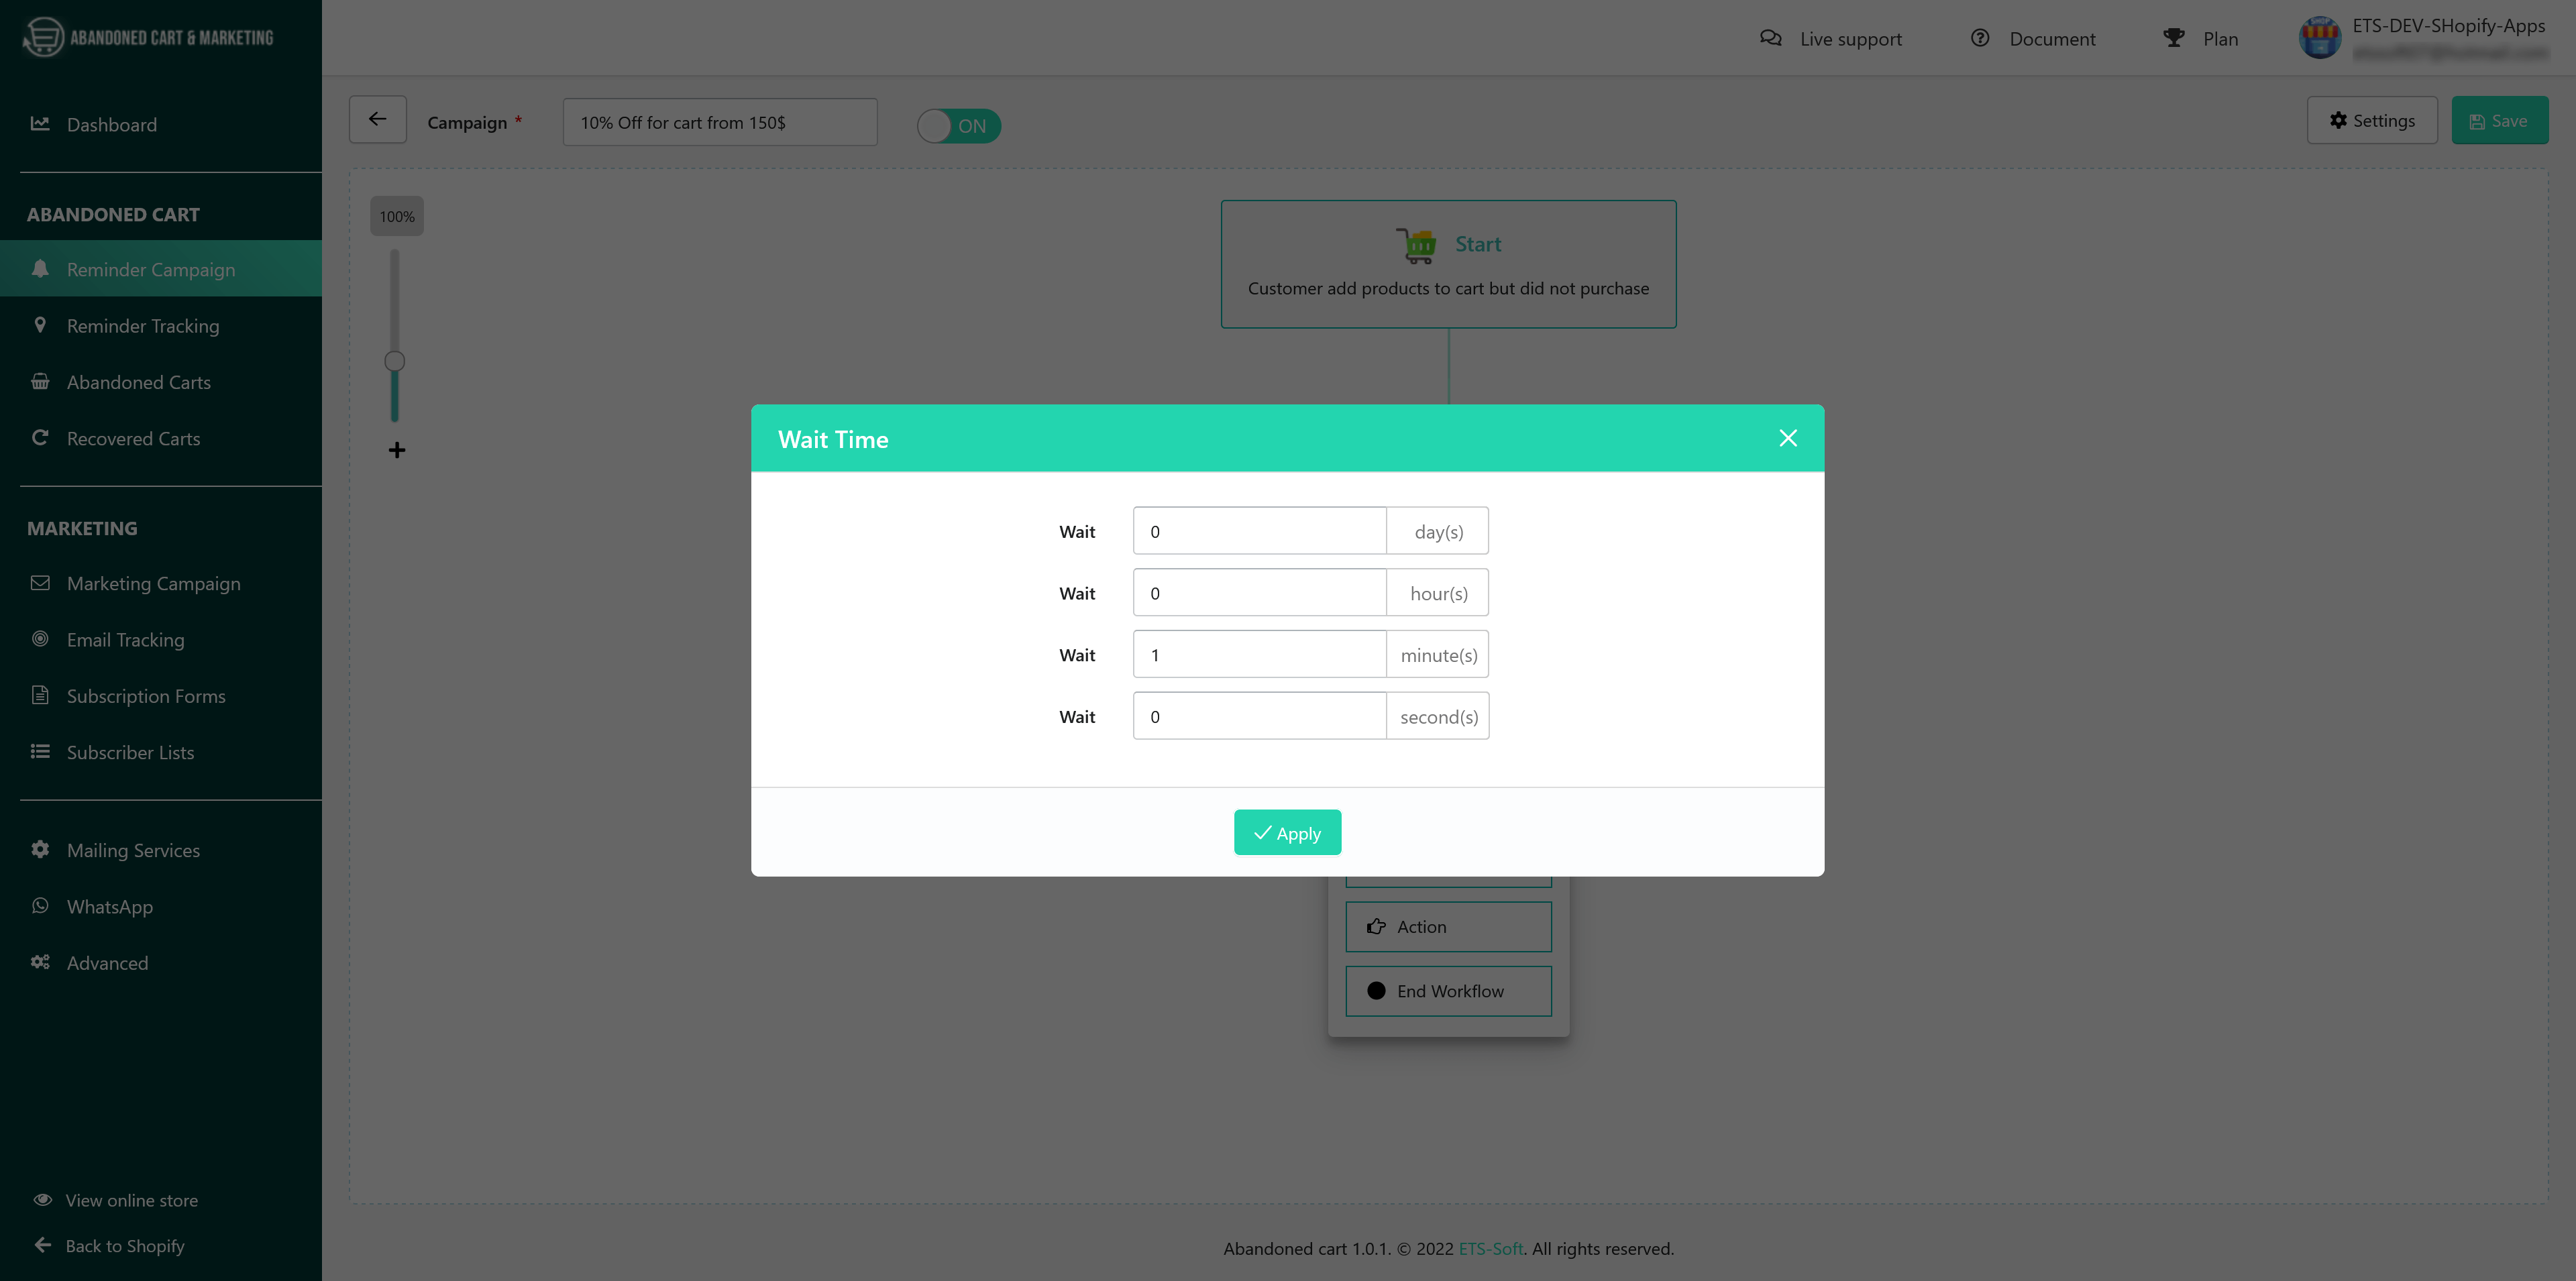
- Click on “Apply” button to finish.
Action block
- Click “Actions” to choose a way to notify customers: Email or Web push
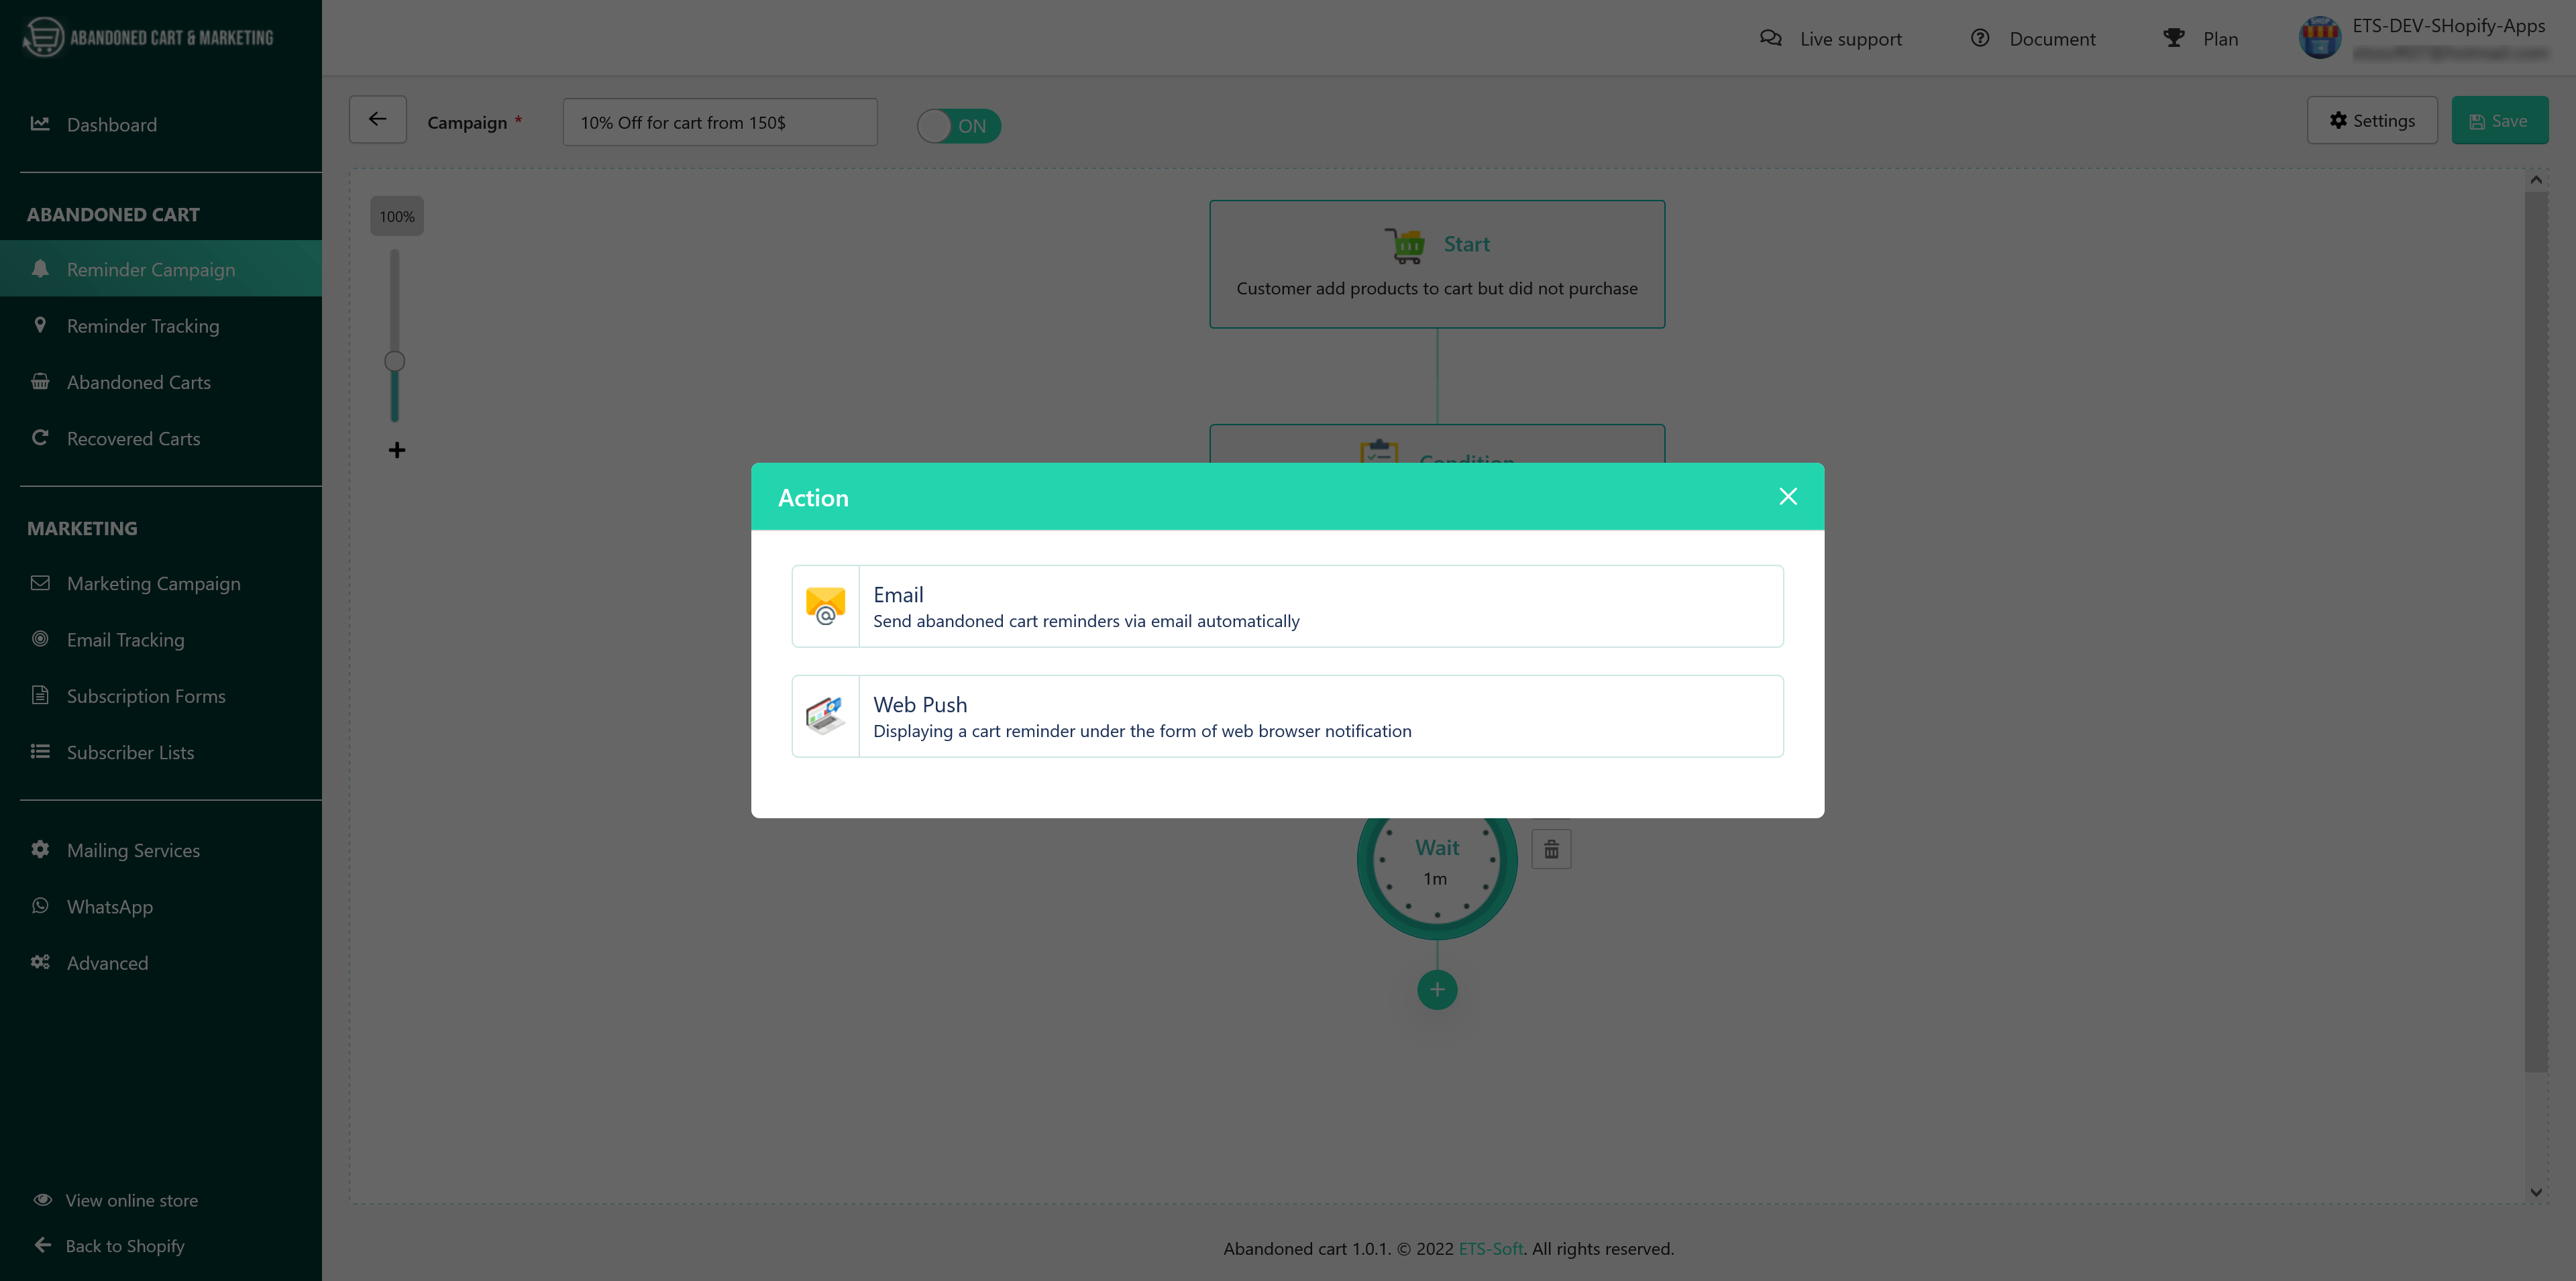
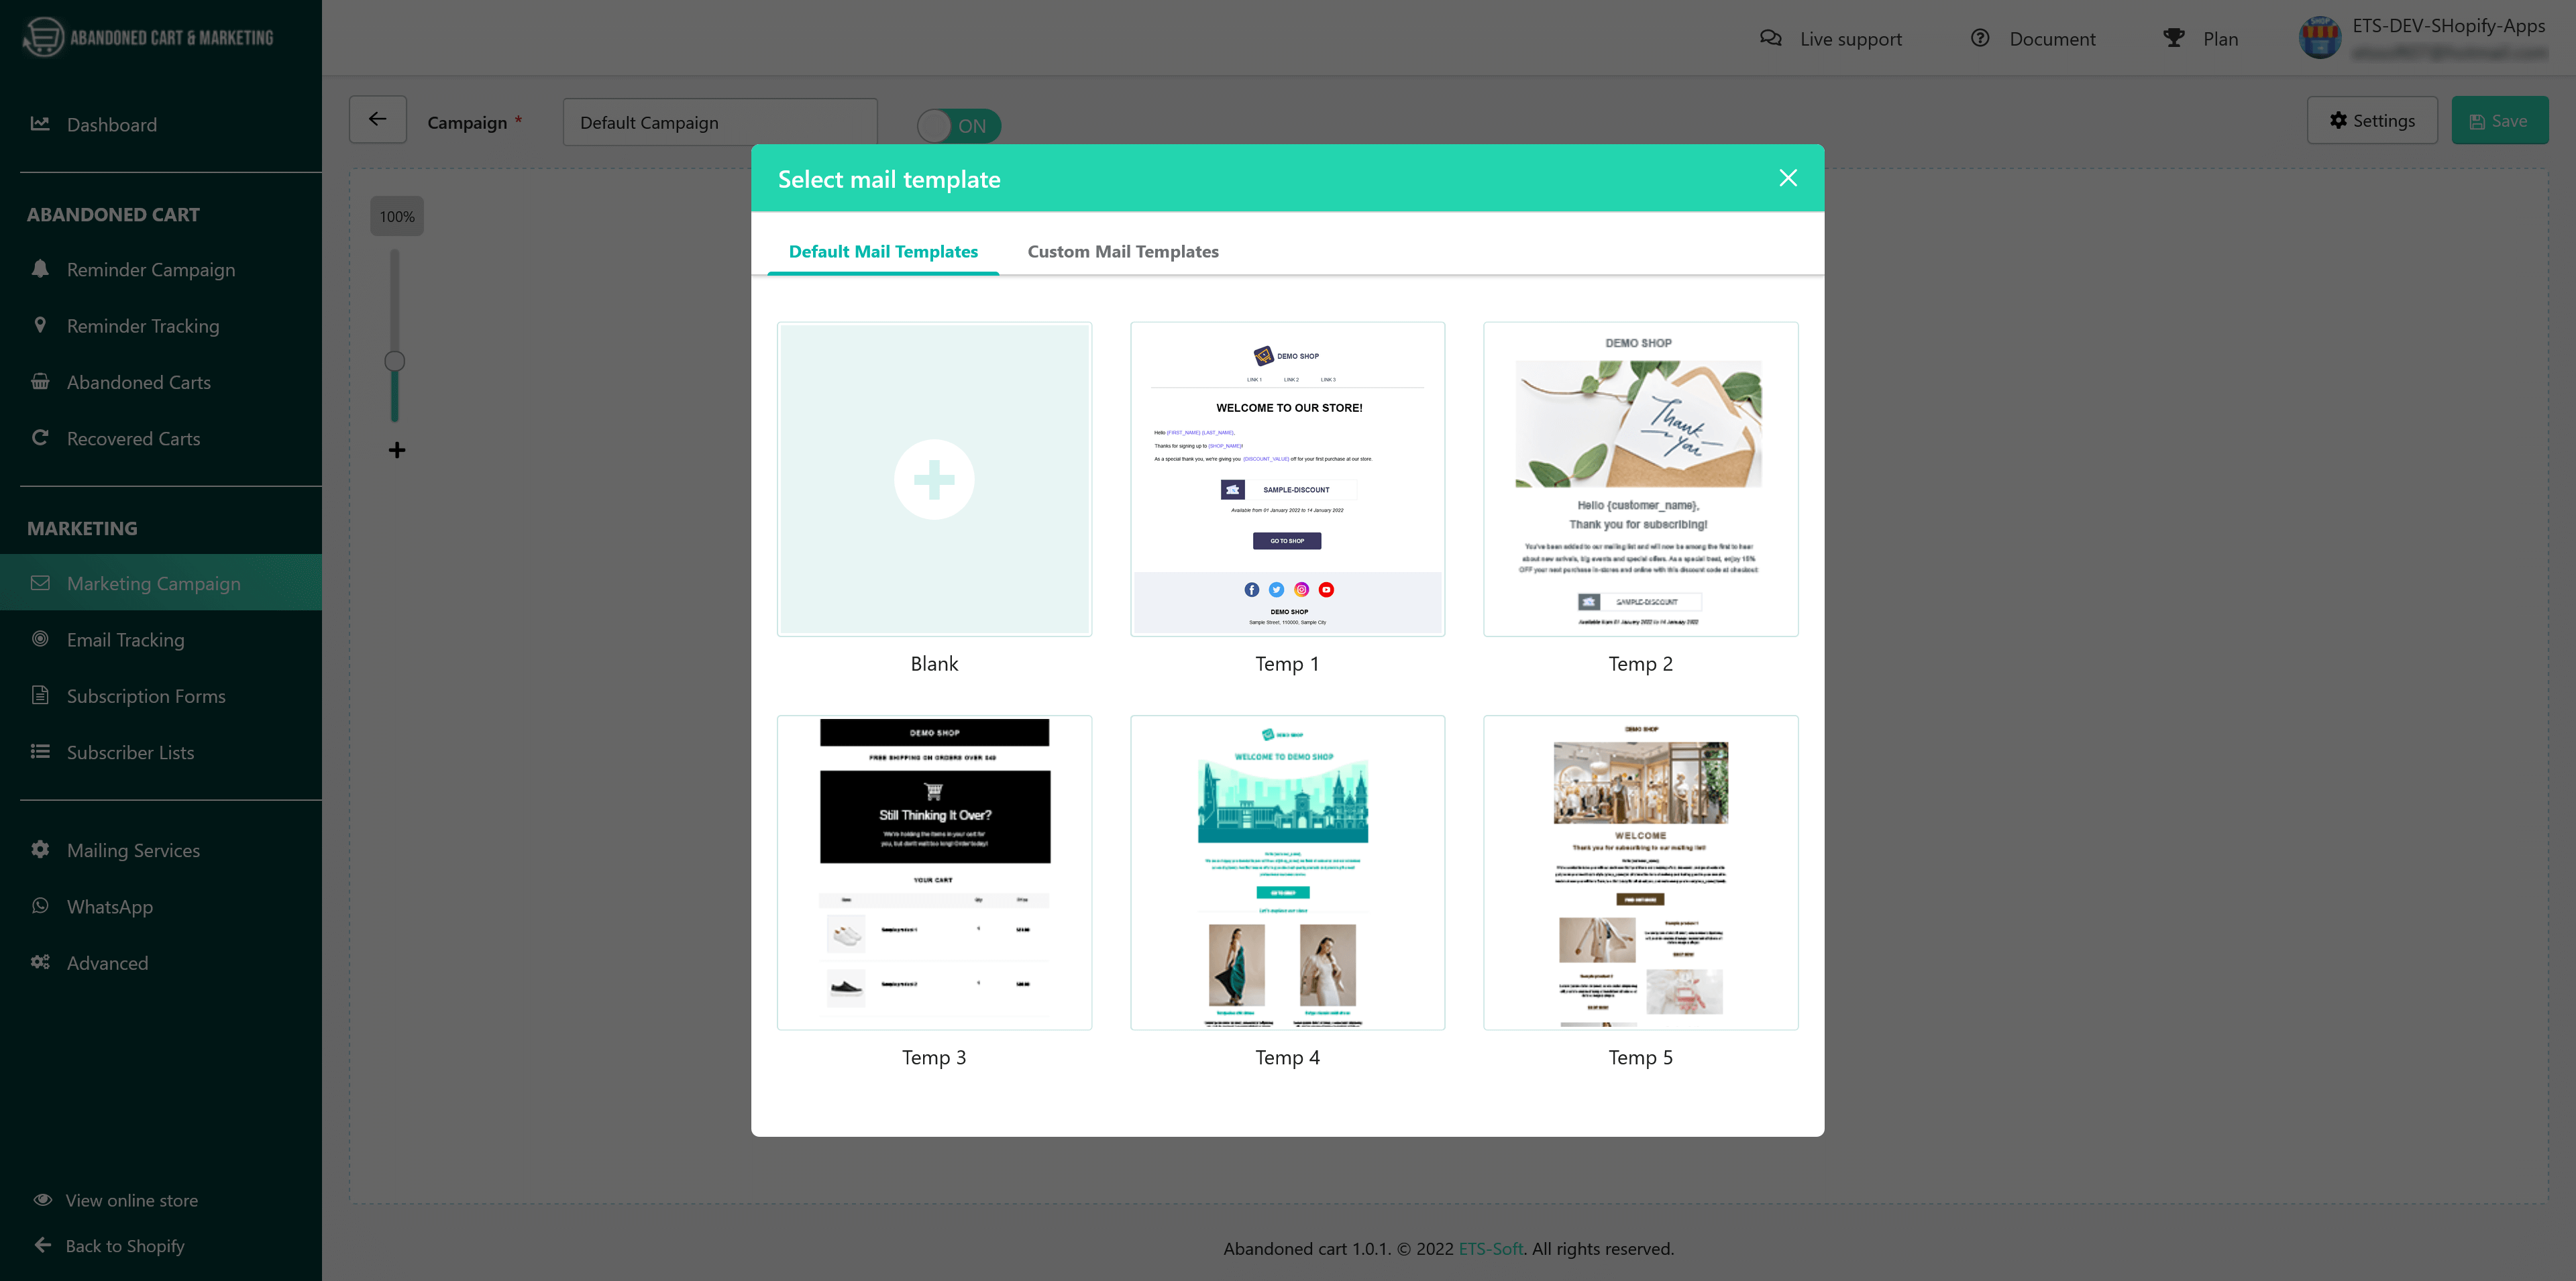
Send abandoned cart reminders via email
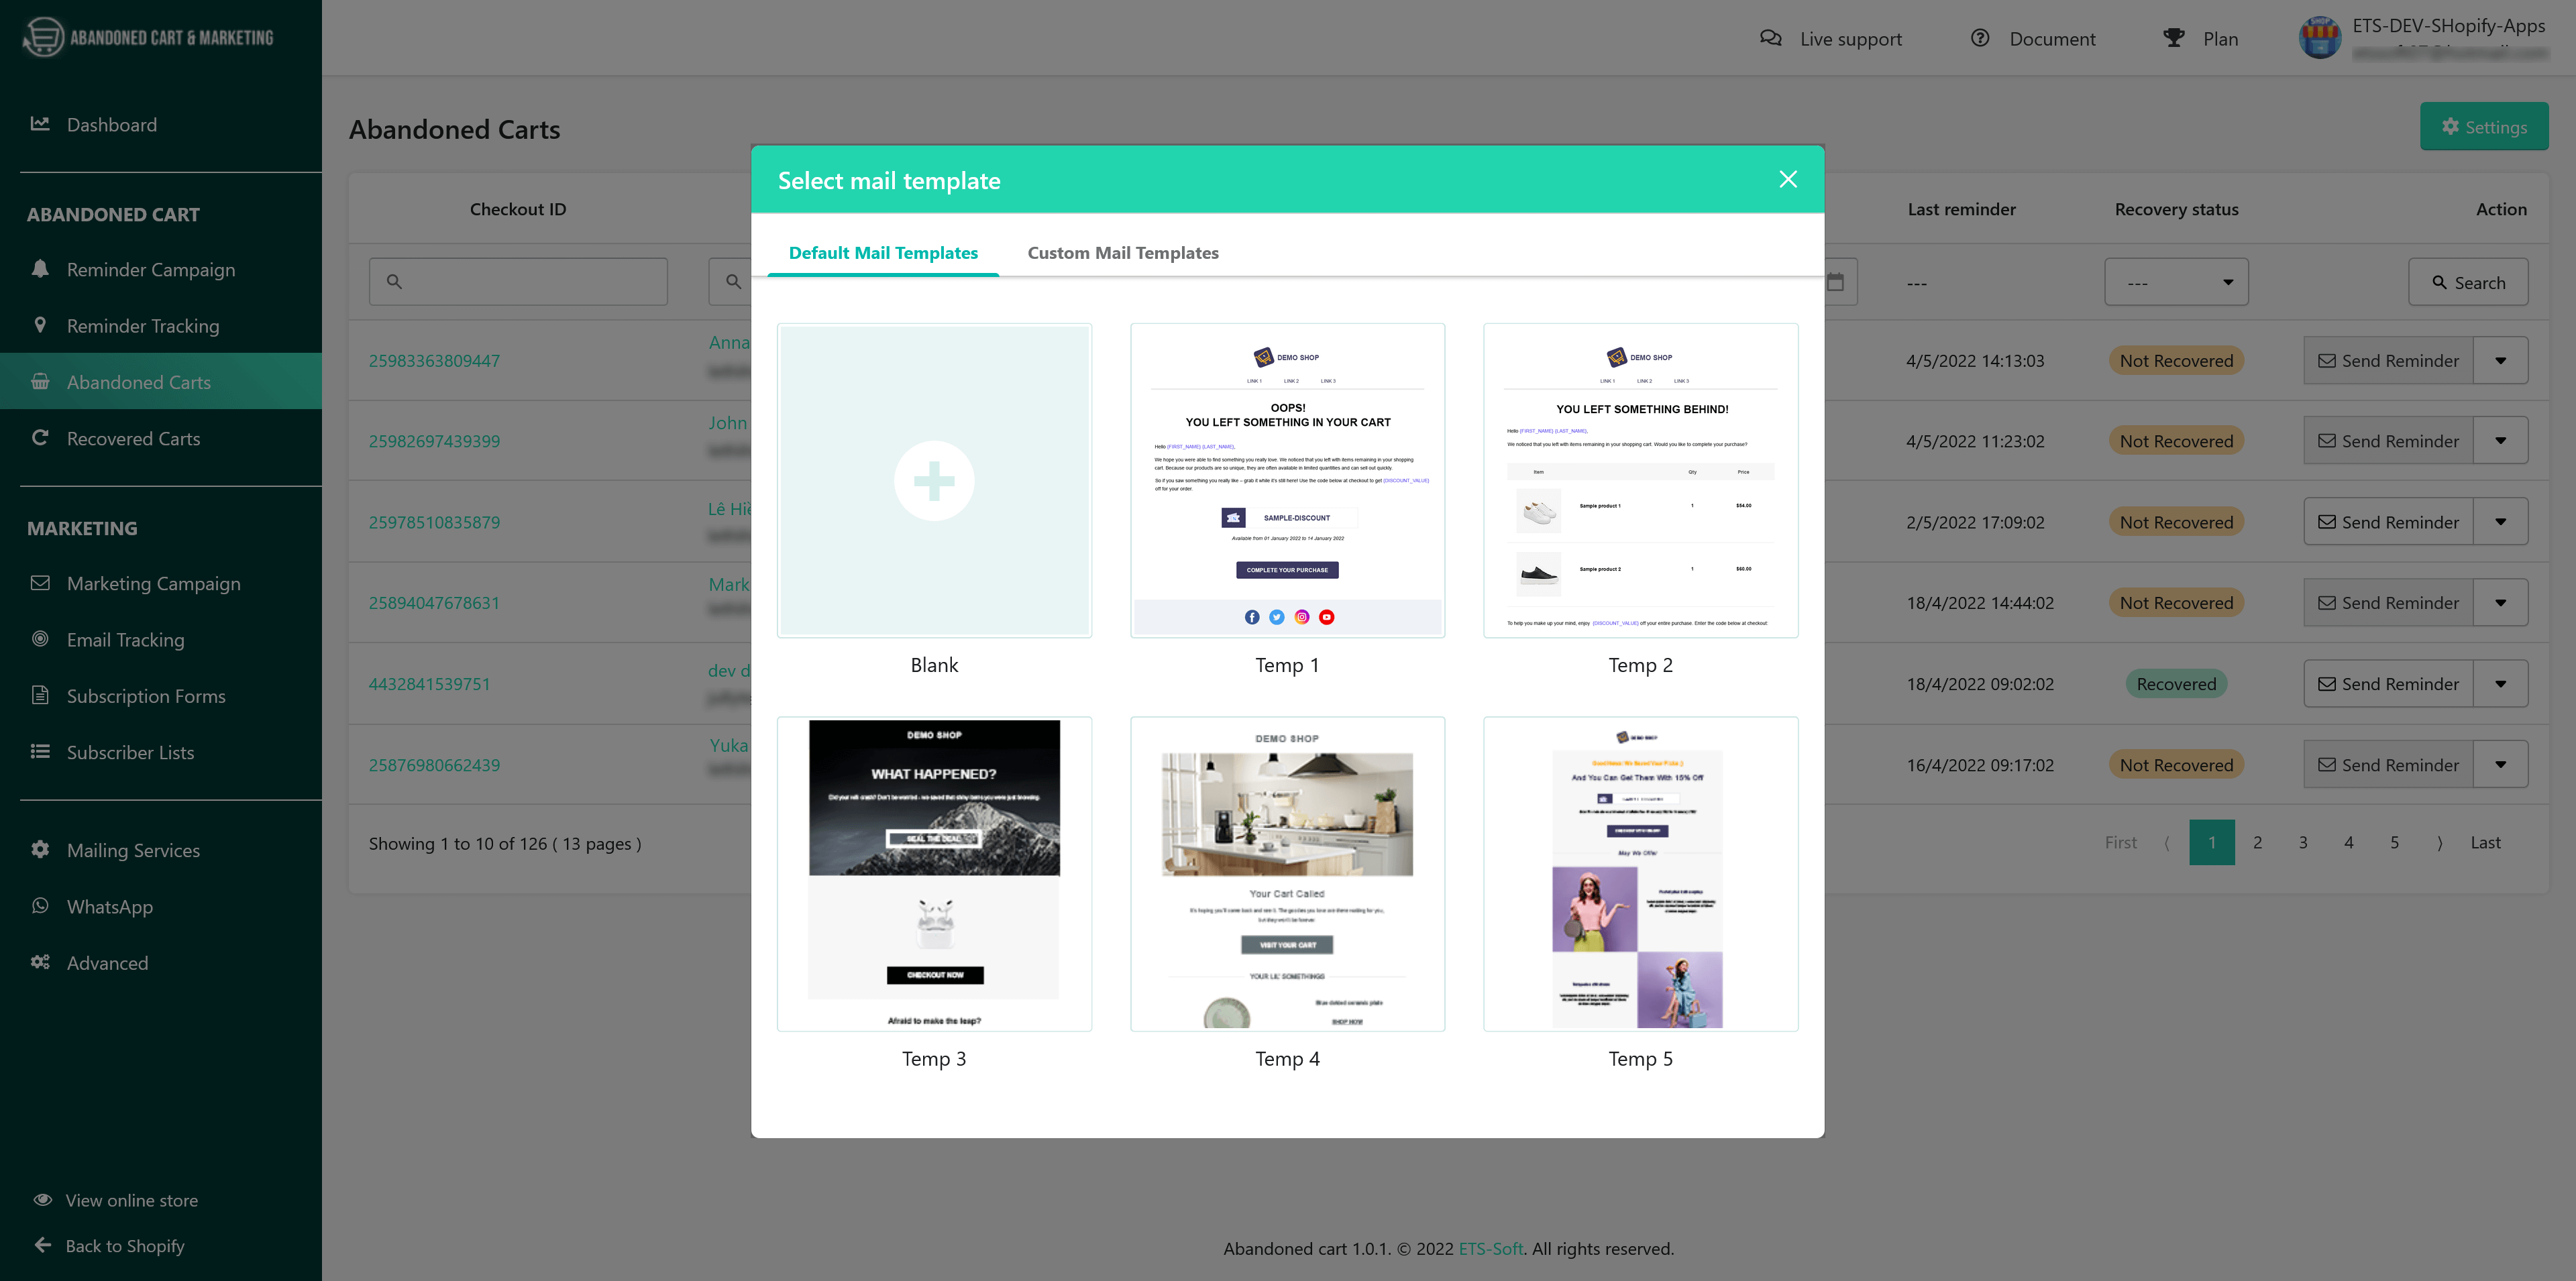
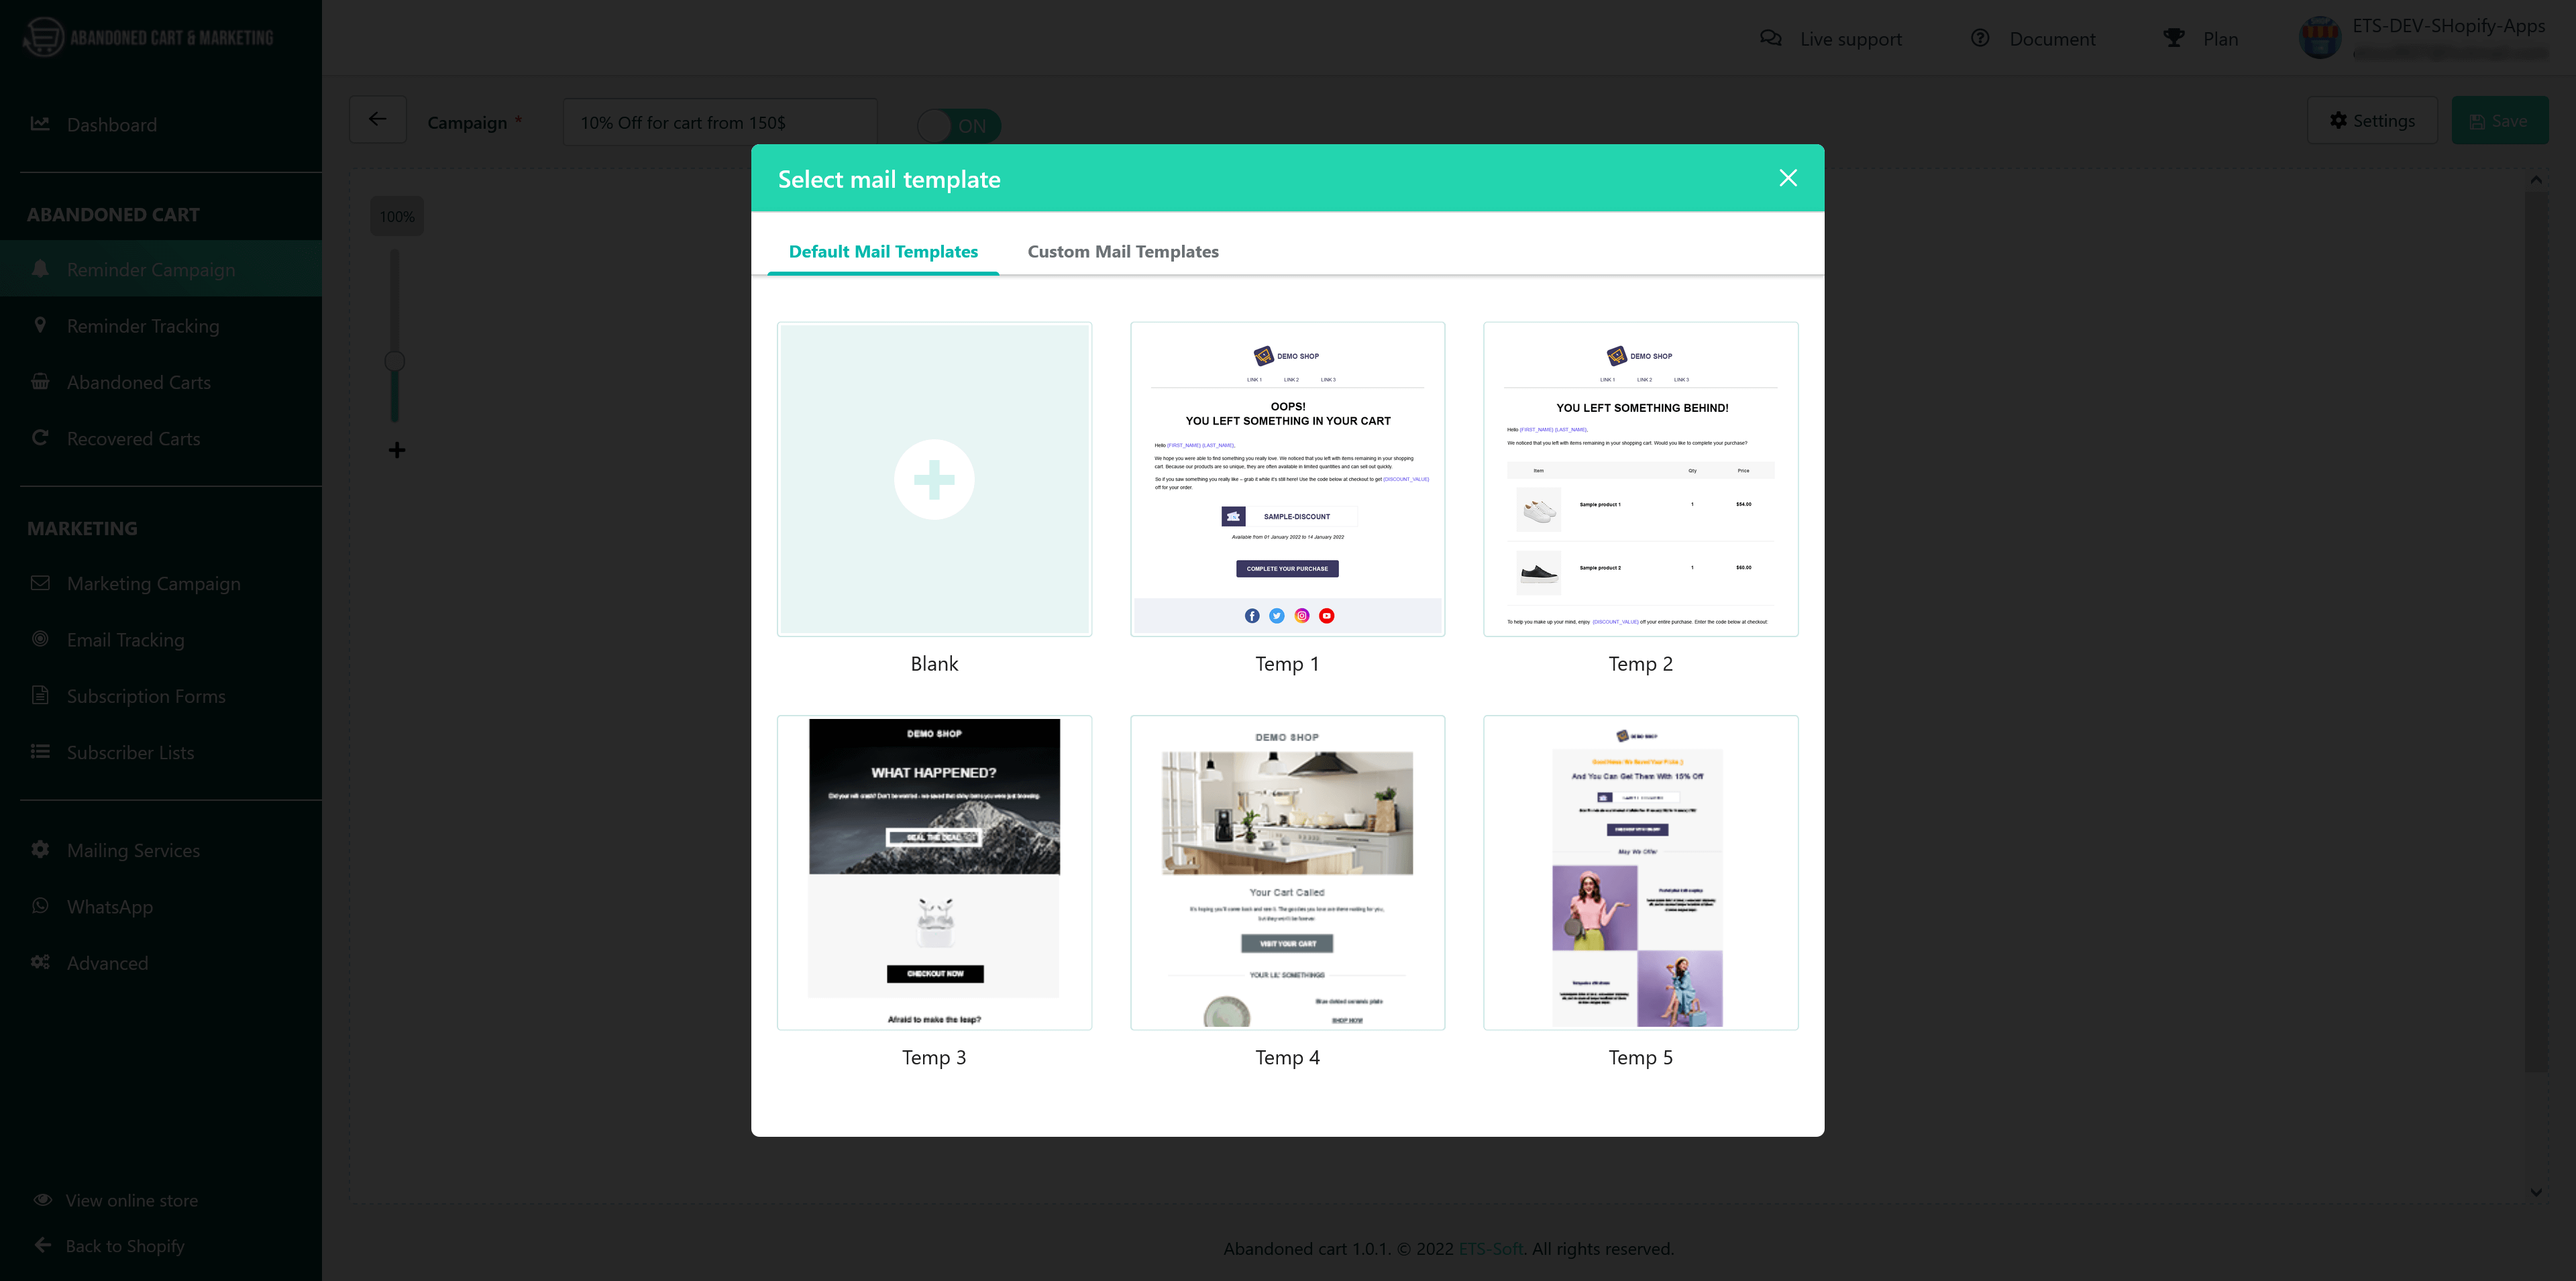
On the “Action” popup, if you select “Email“, then the app will send abandoned cart reminders via email automatically. Our app provides 5 pre-made email templates for you to choose from, you can completely customize the content and elements in the available templates according to your needs. Or you can also choose “Custom mail templates” and create your own custom email.
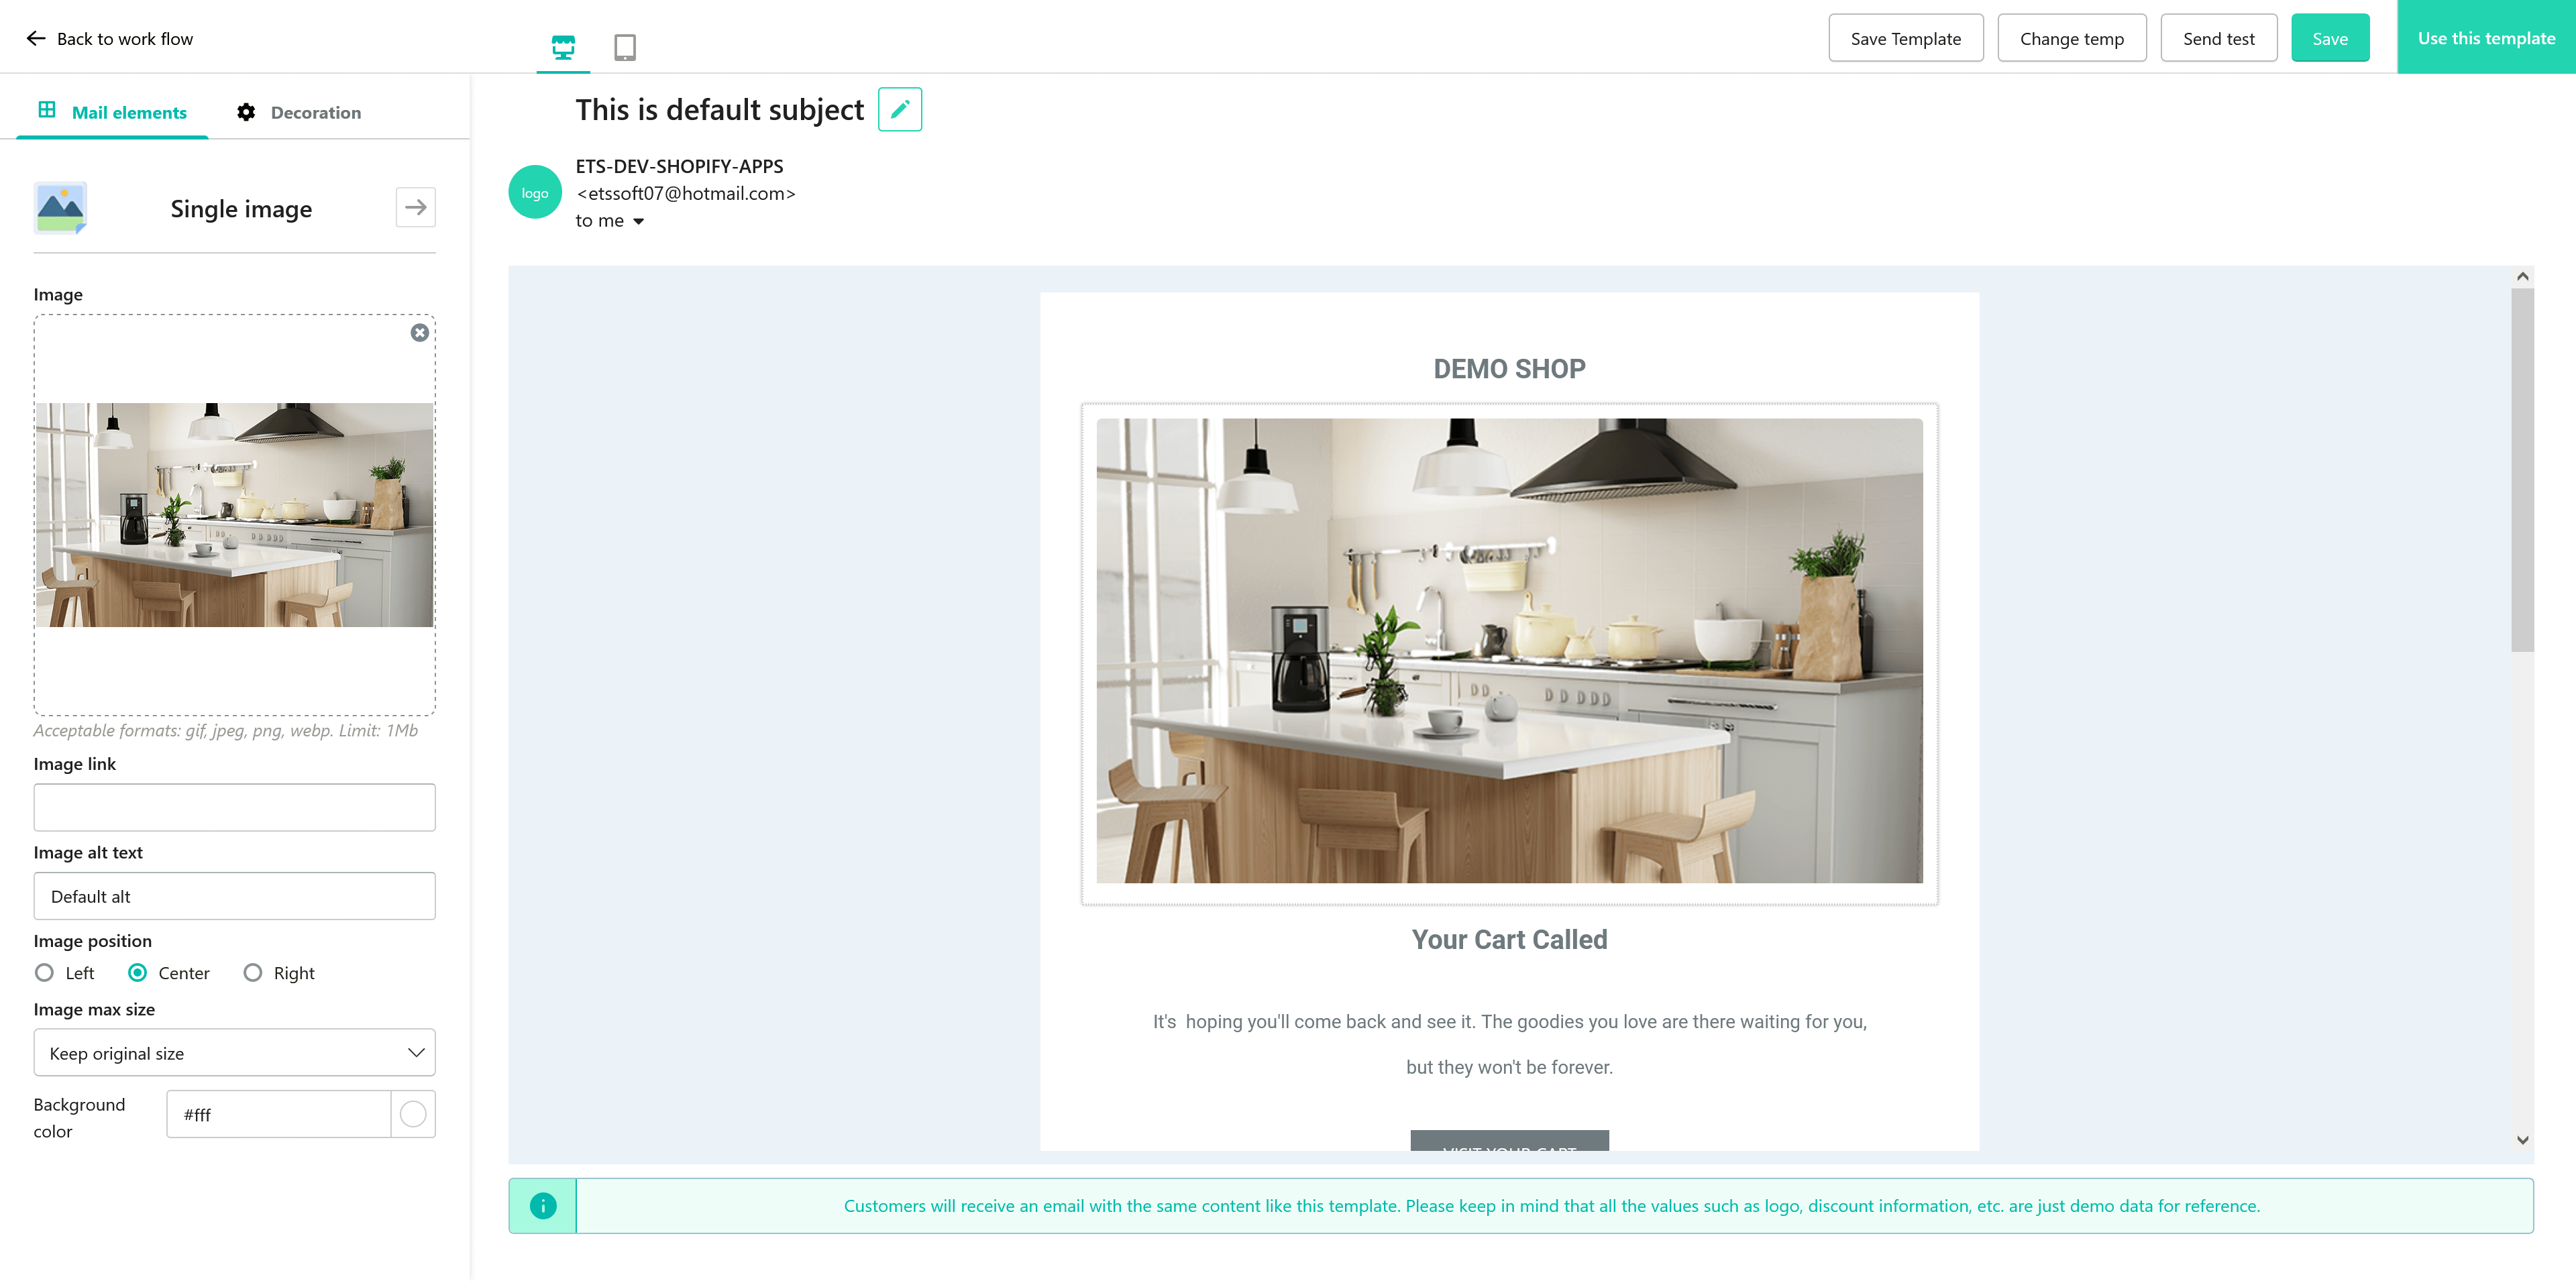
- Mail elements: The app supports 14 types of elements so you can create and customize your email content: title, text, single image, 2 images, image and text, 2 images and text box, 3 images and text box, product list, button, discount, navigation, social networks, space, and divider.
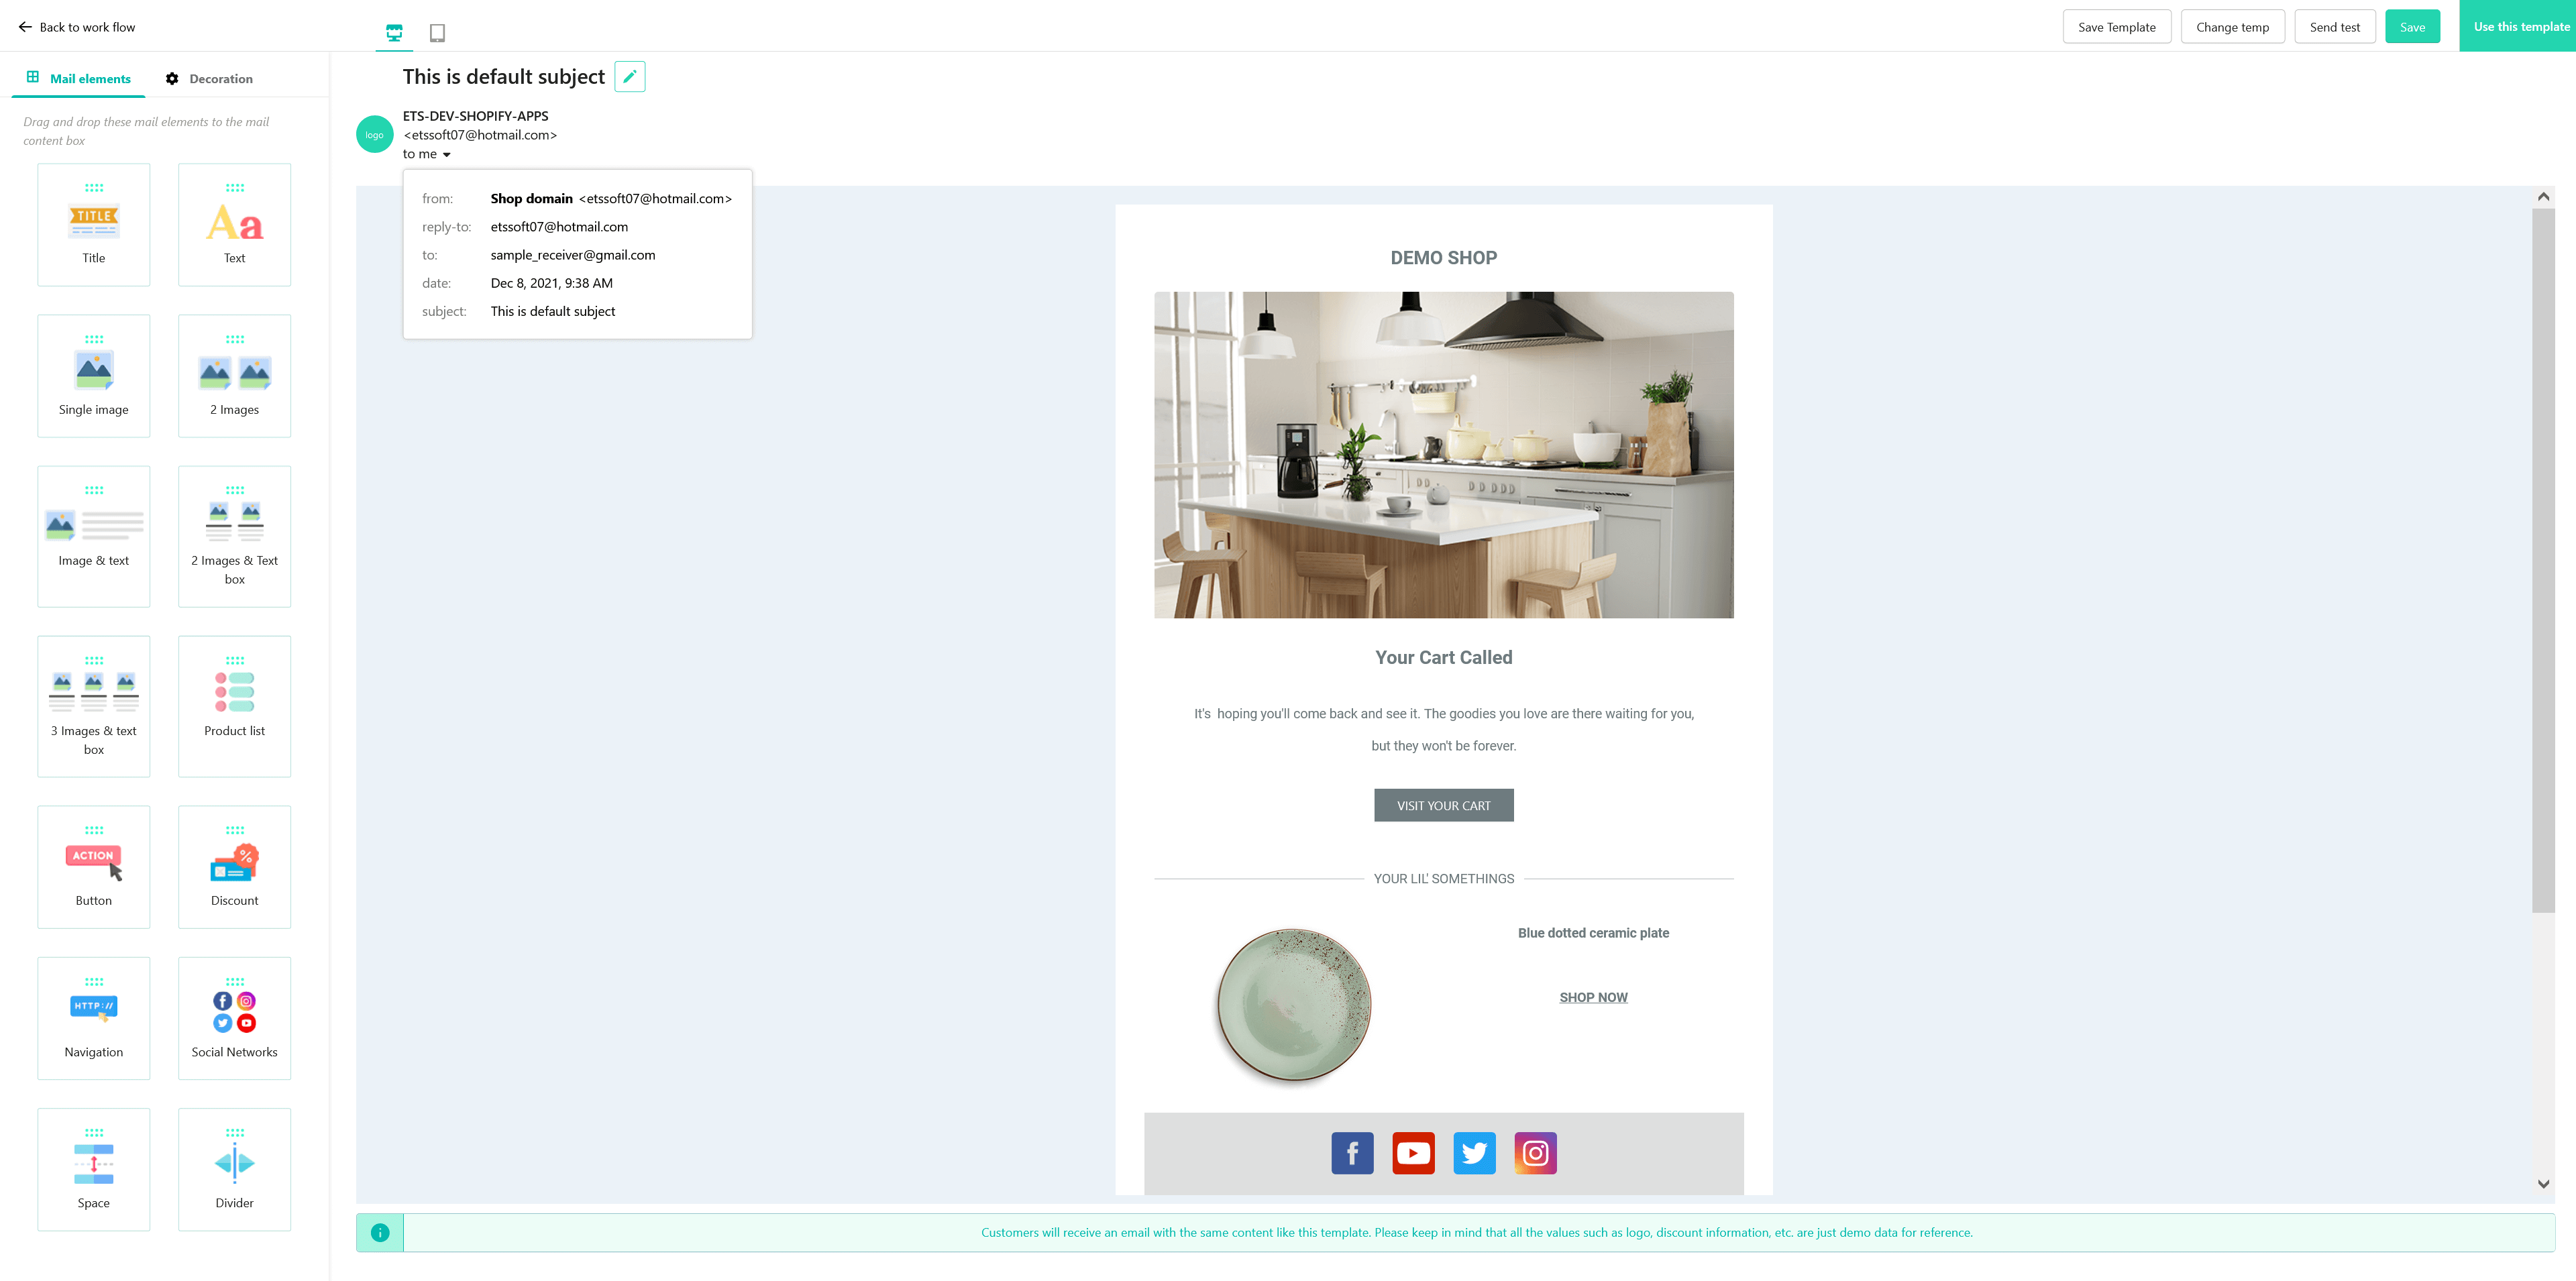
To add an element to your email content, drag and drop the element icon from the sidebar into the workspace. When you hover your mouse pointer over an element, the action buttons will appear. You can edit/duplicate/delete an element.
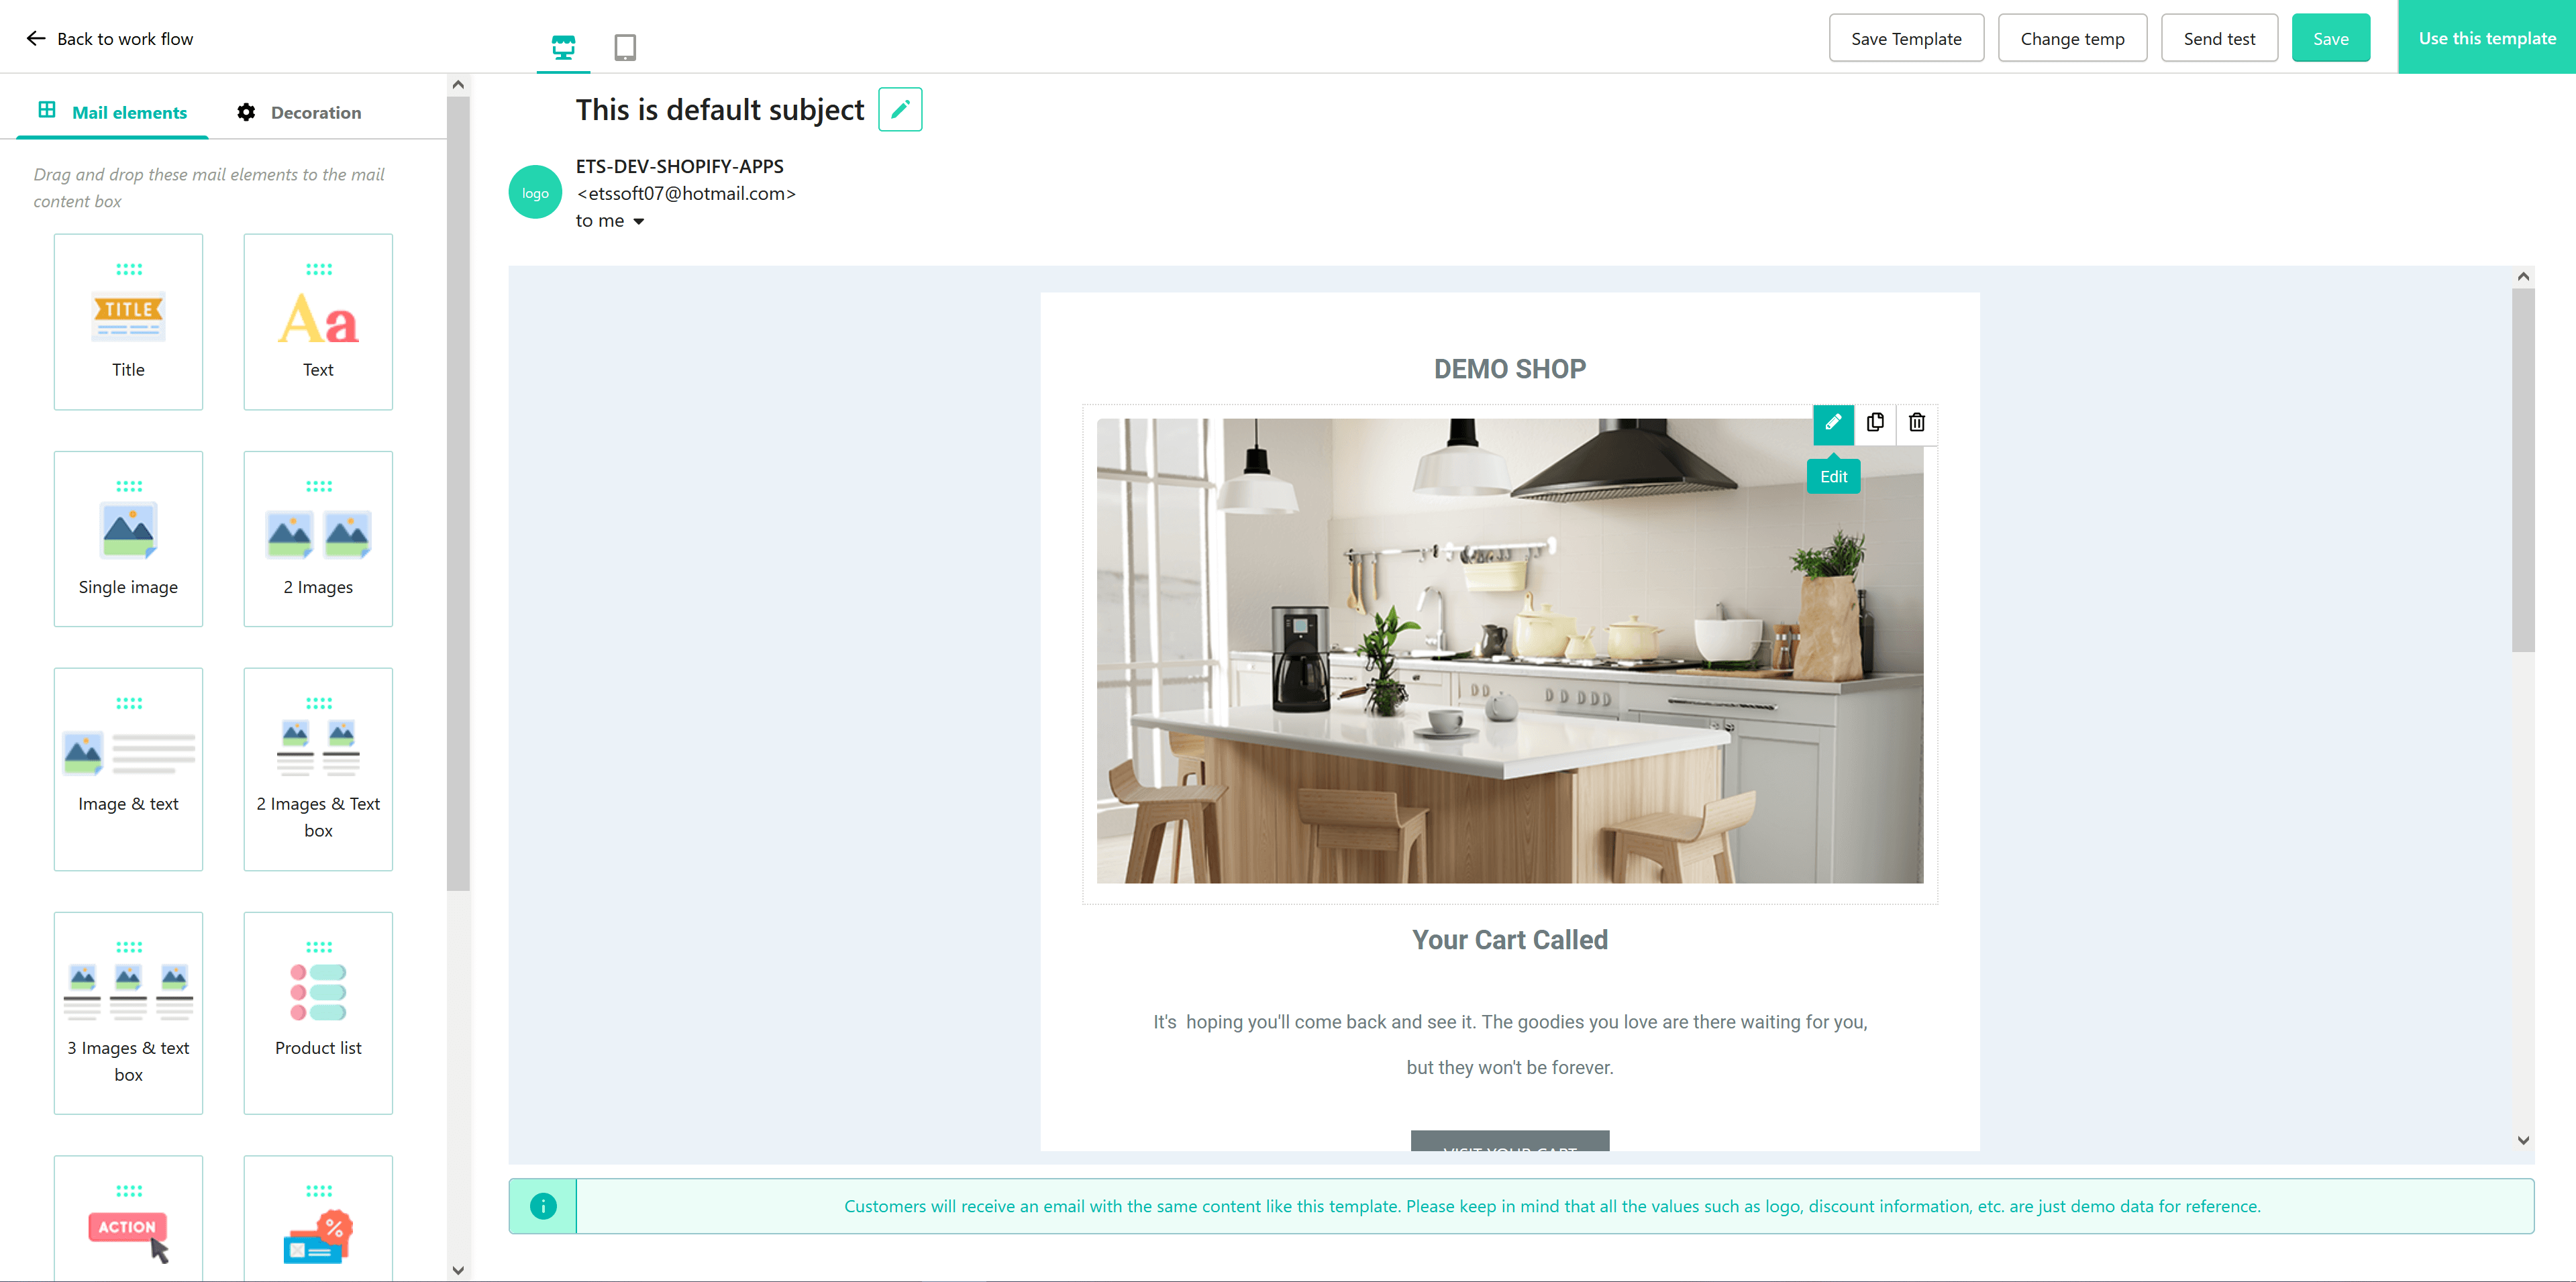
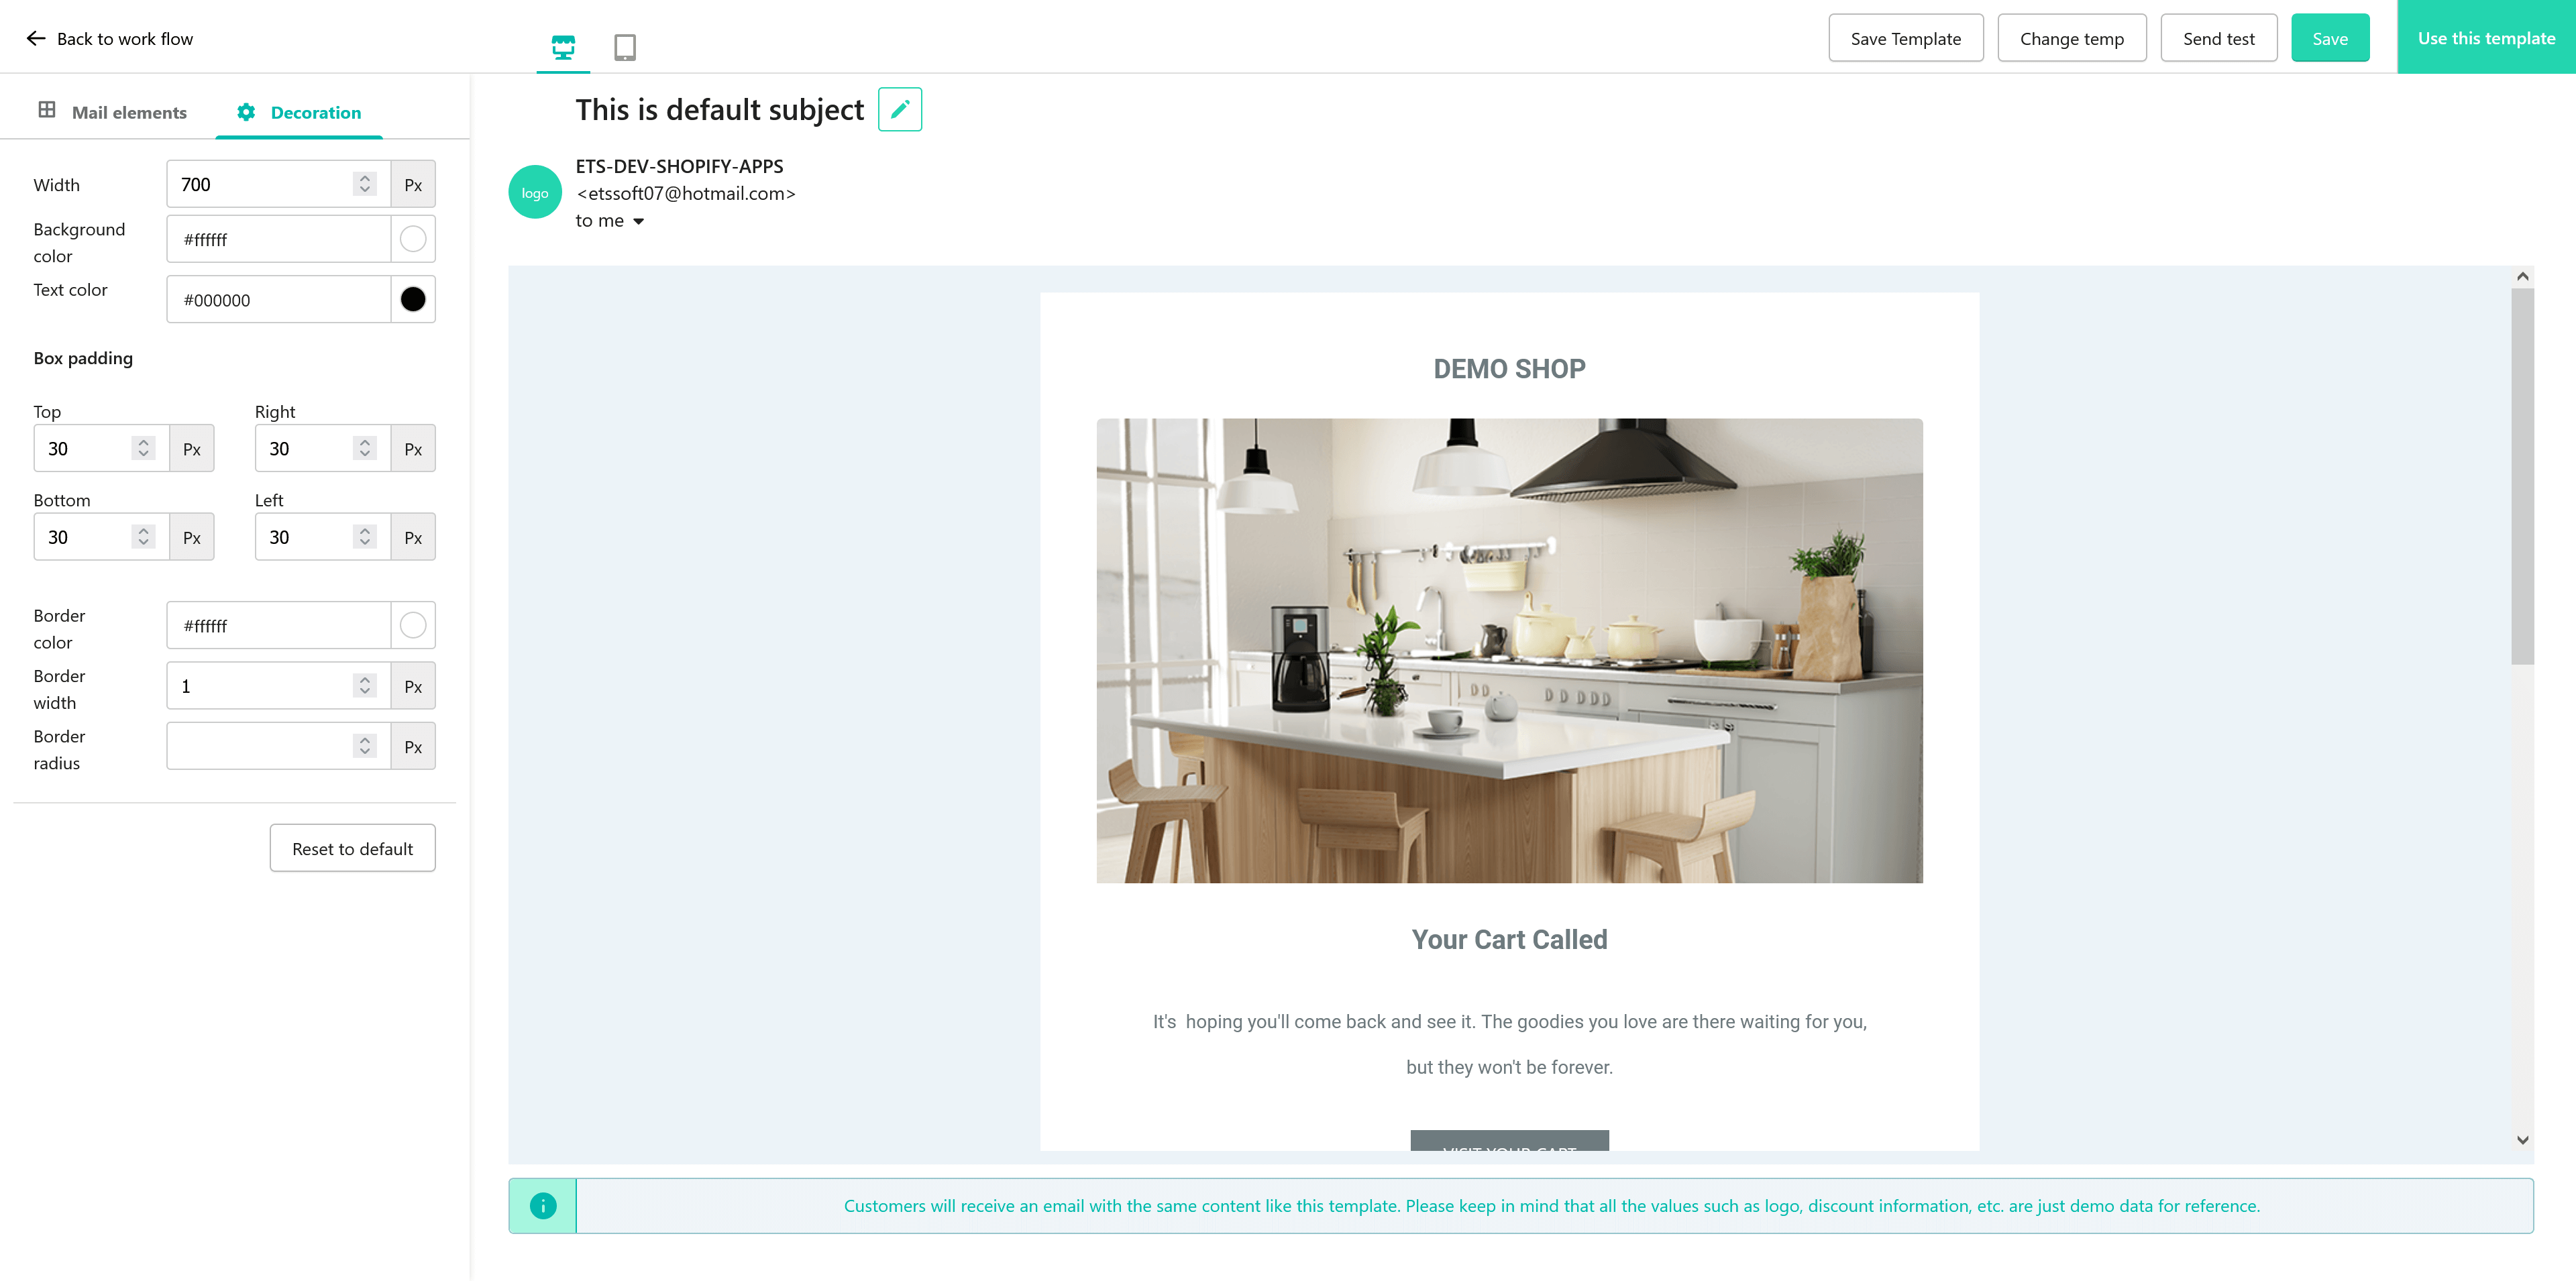
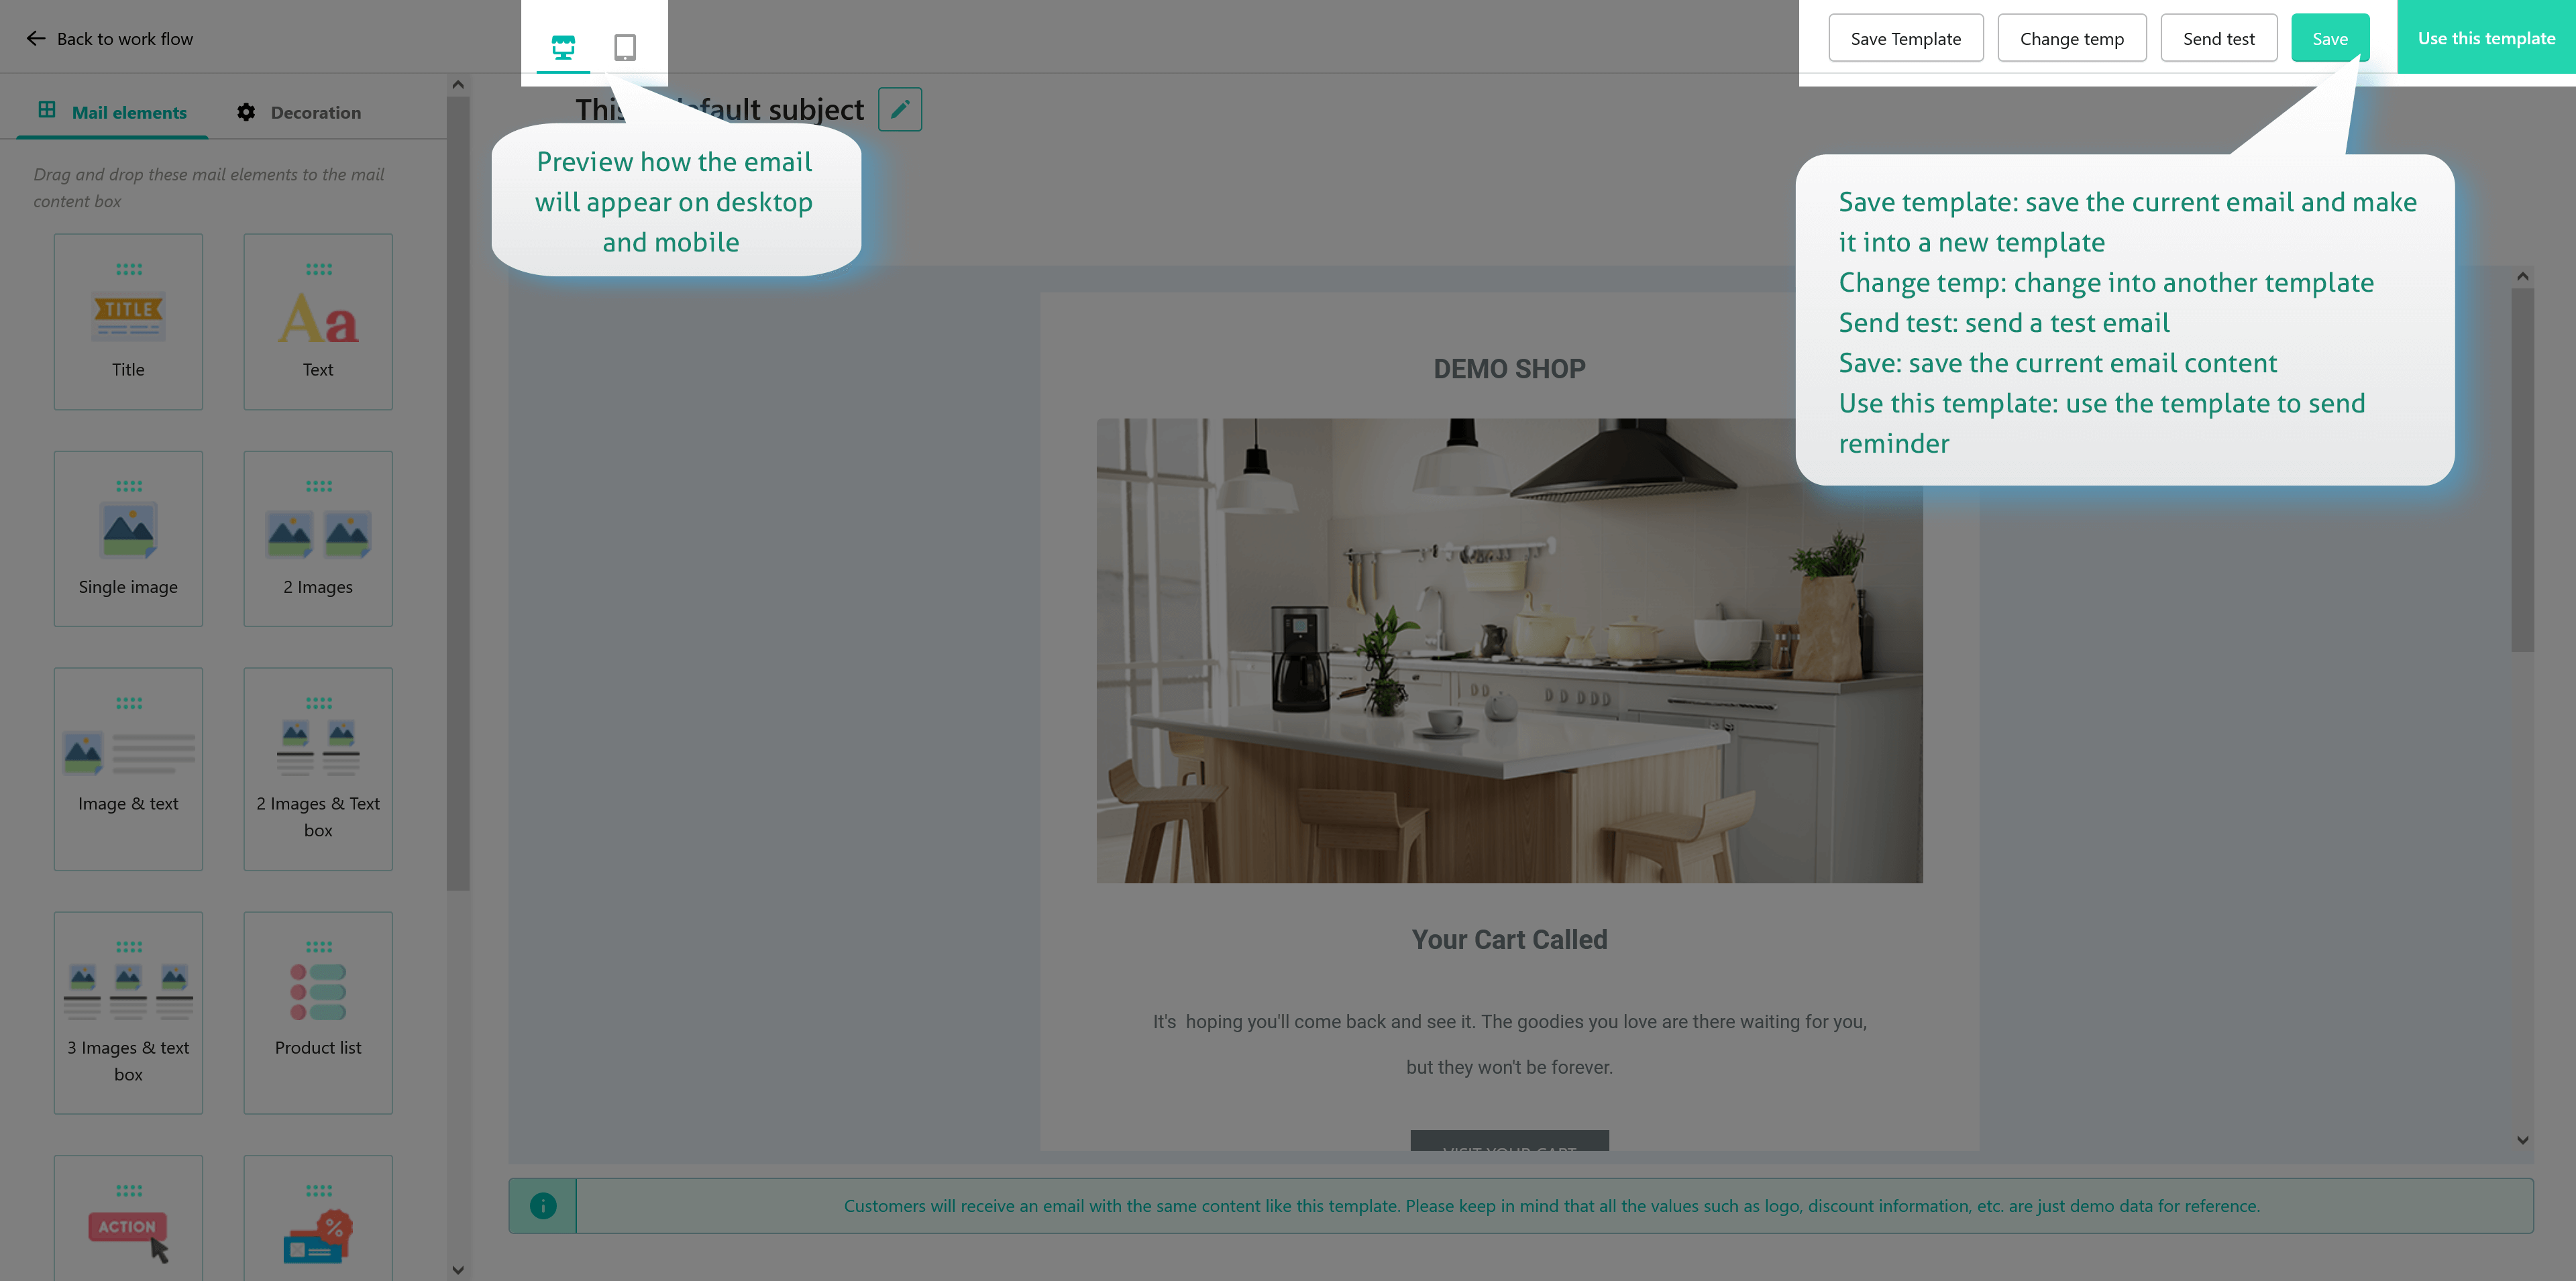
- Decoration: After designing the email content, you can customize/decorate it to make the email look more prominent and eye-catching. You can also preview how the email will appear on desktop and mobile to make appropriate adjustments.
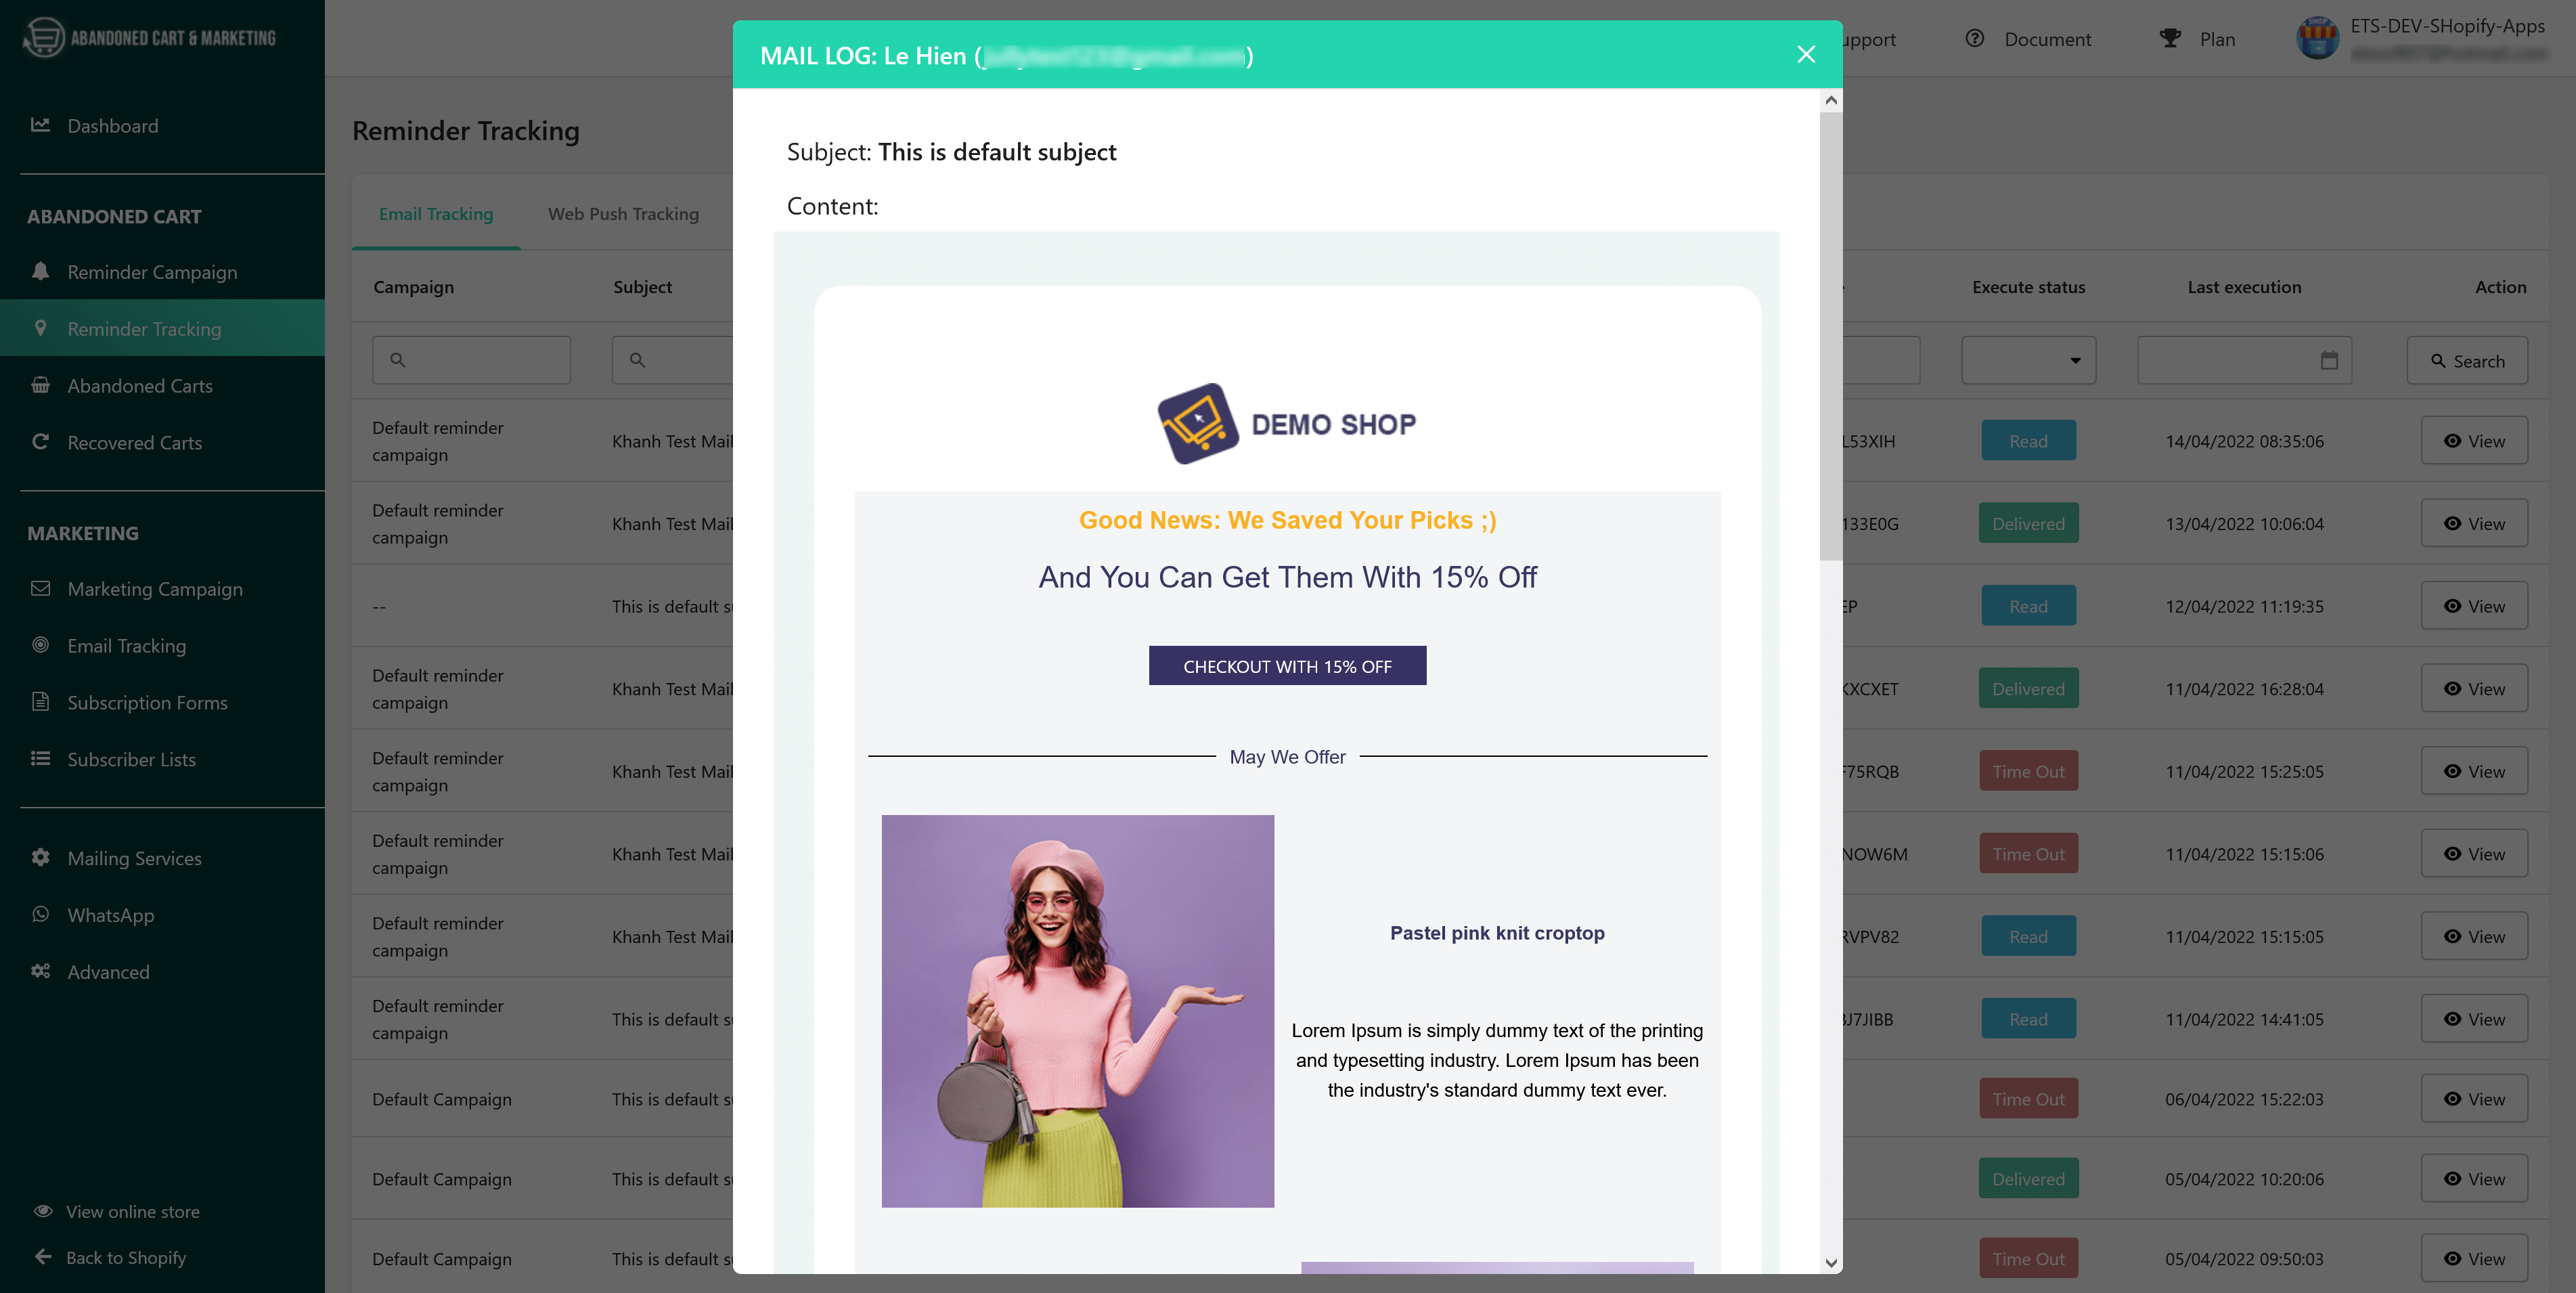
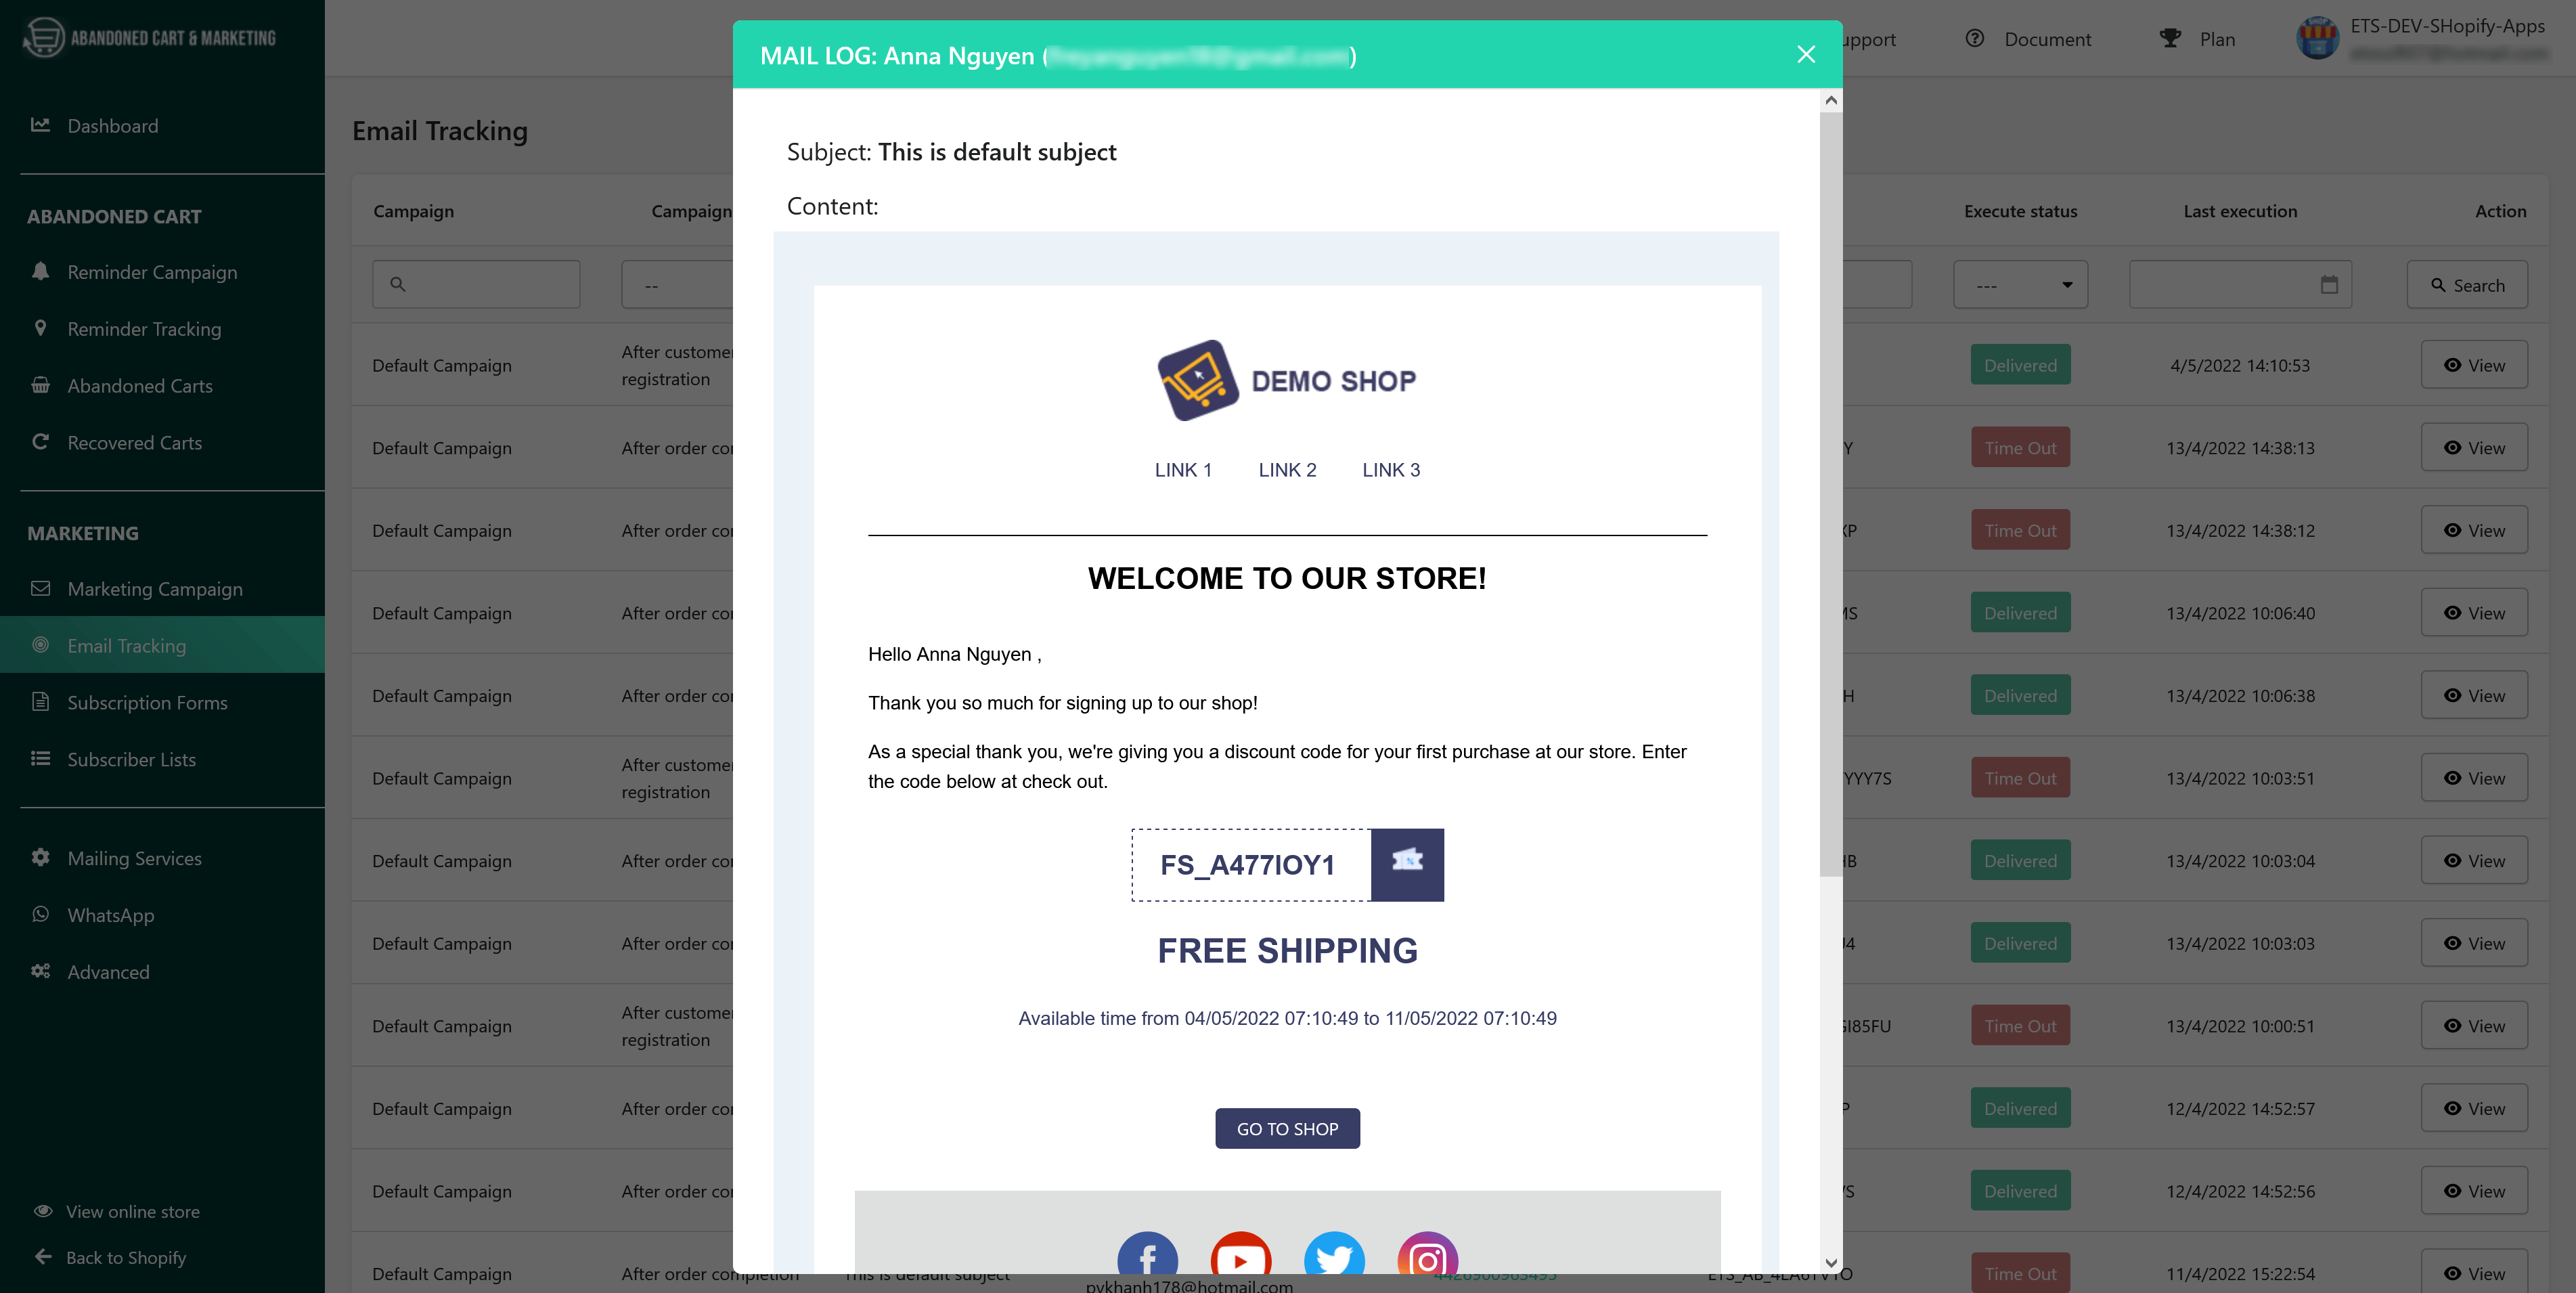
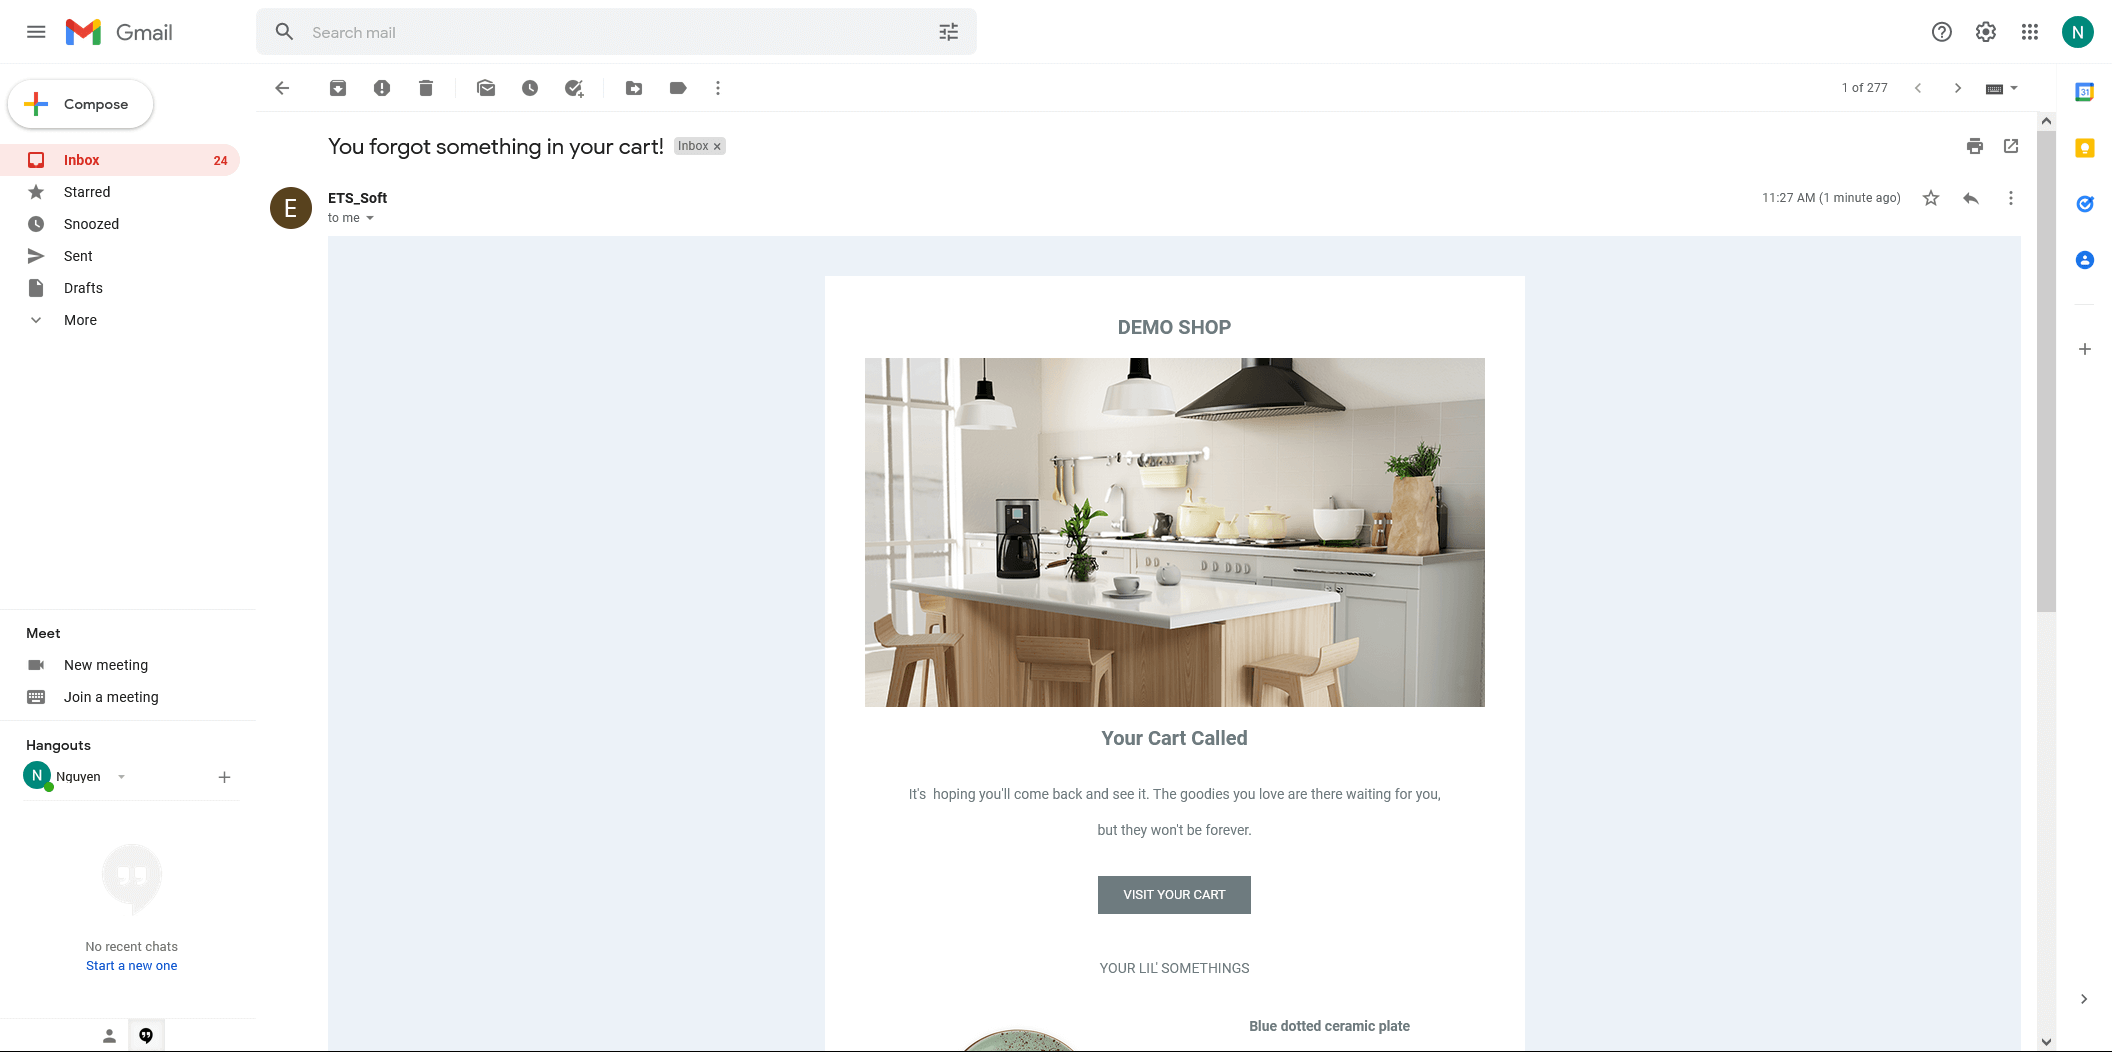
Let’s take a look at an example of an email that customers will receive when they abandon their carts.
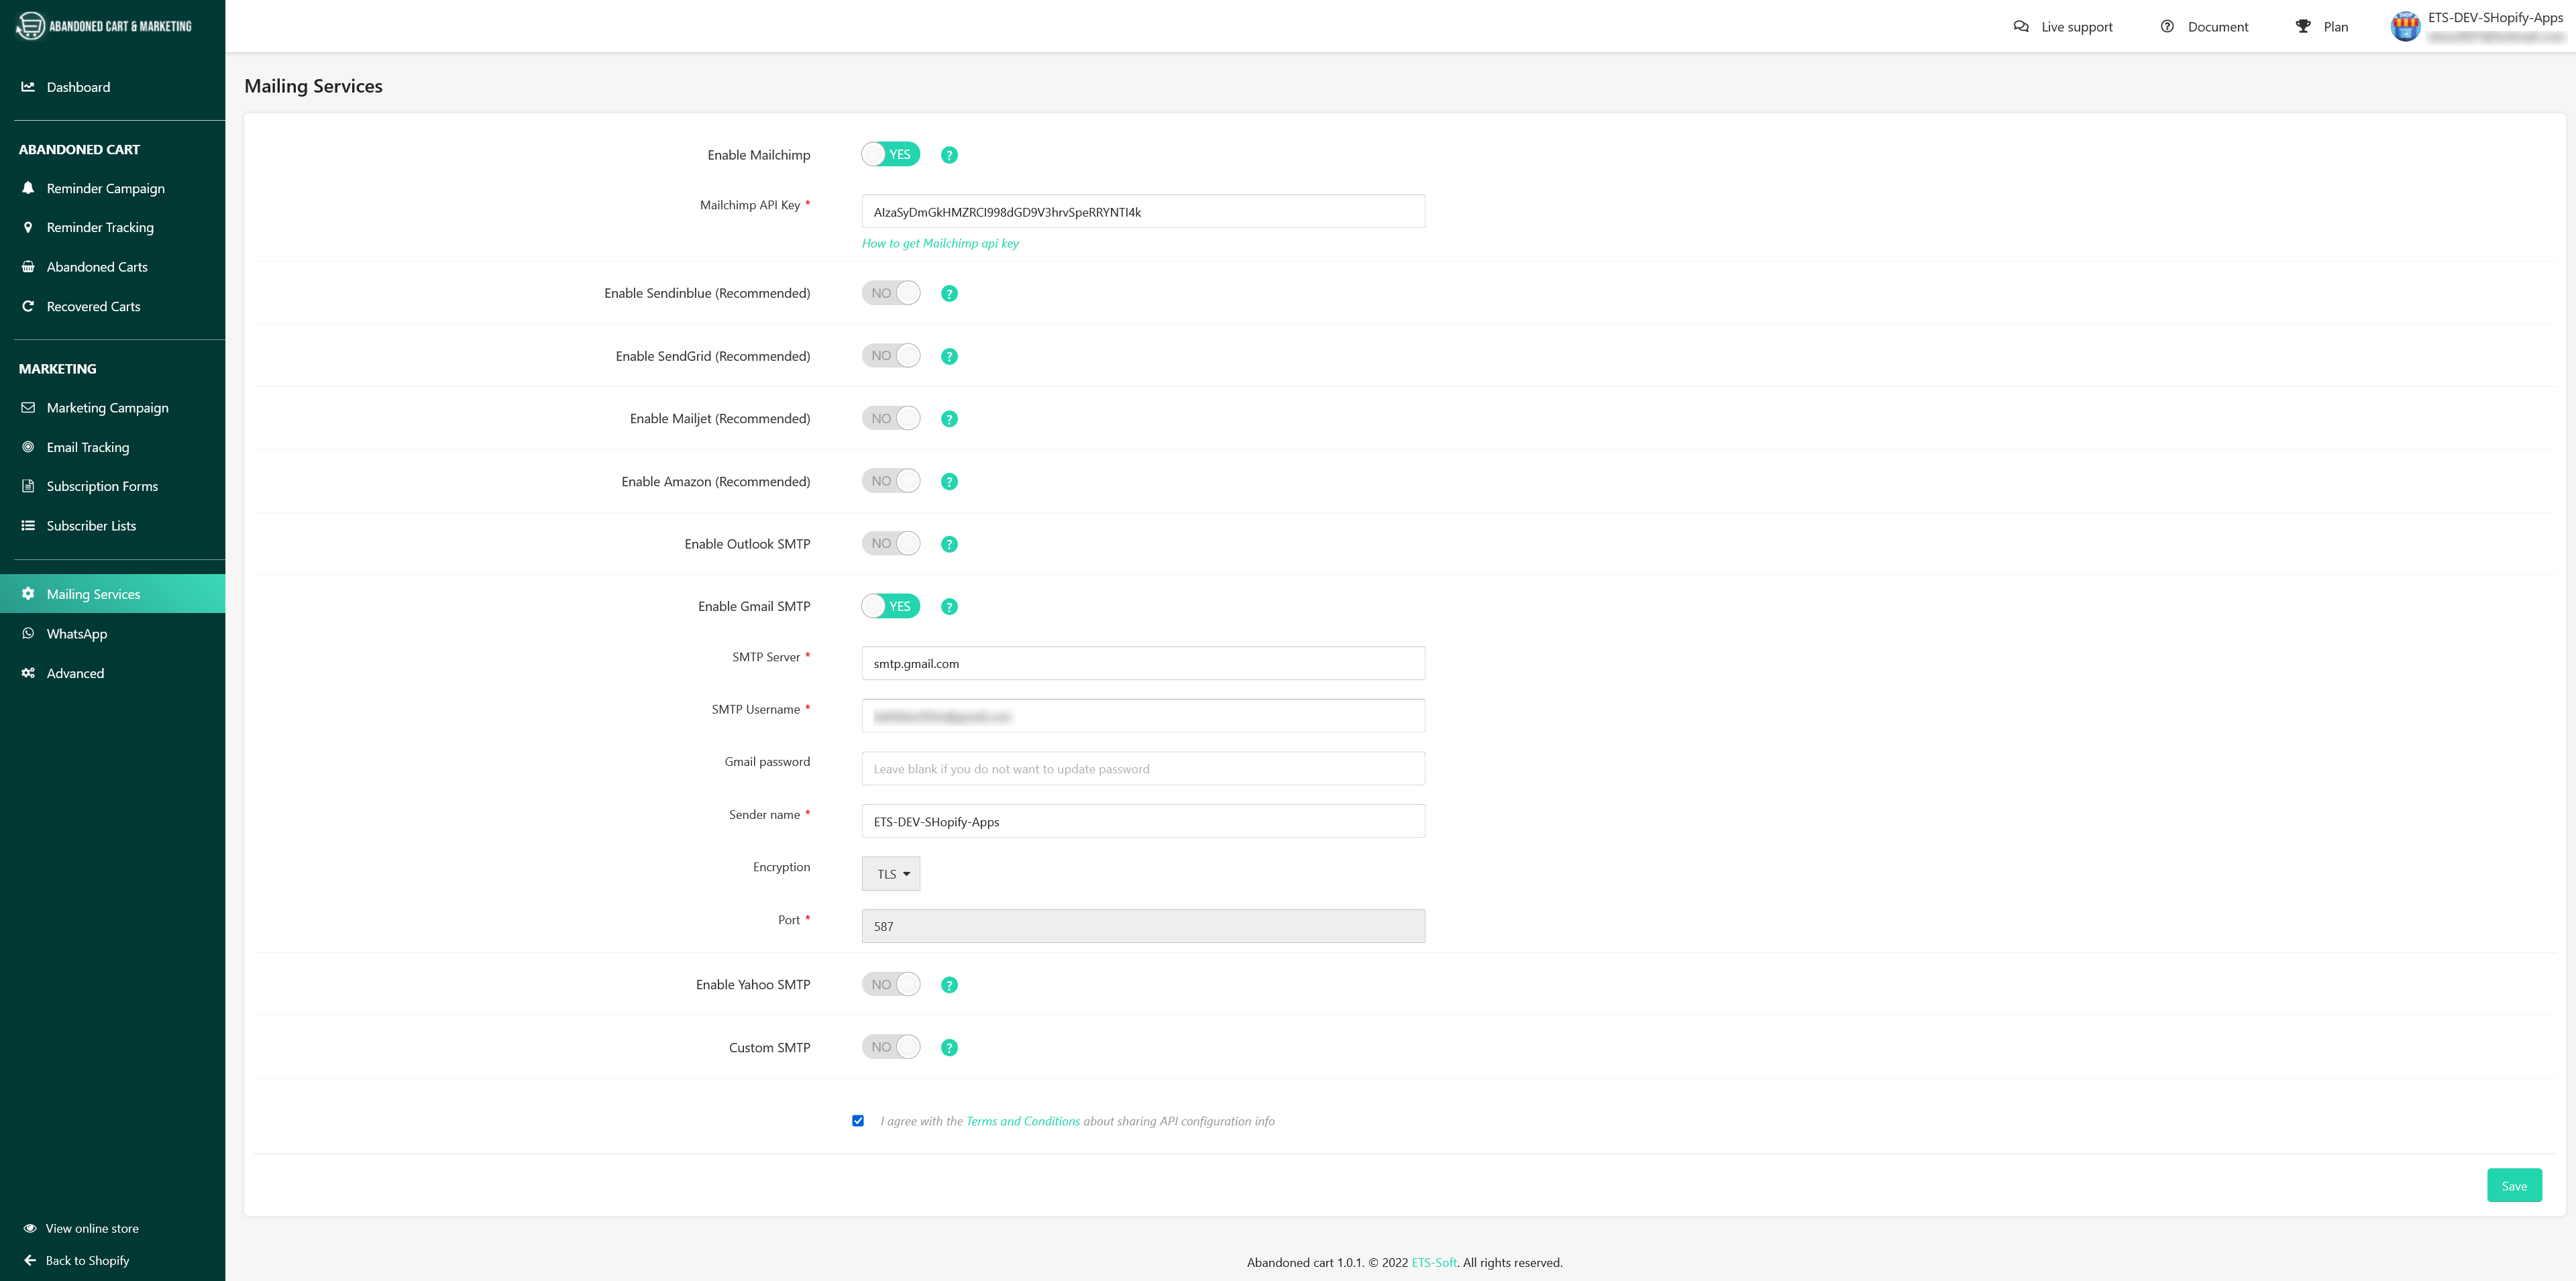
NOTE: Before sending reminder emails you need to select and enable the mail service you want to use. Go to the “Mailing Services” tab and see the instructions in the “Mailing Services” section in this documentation.
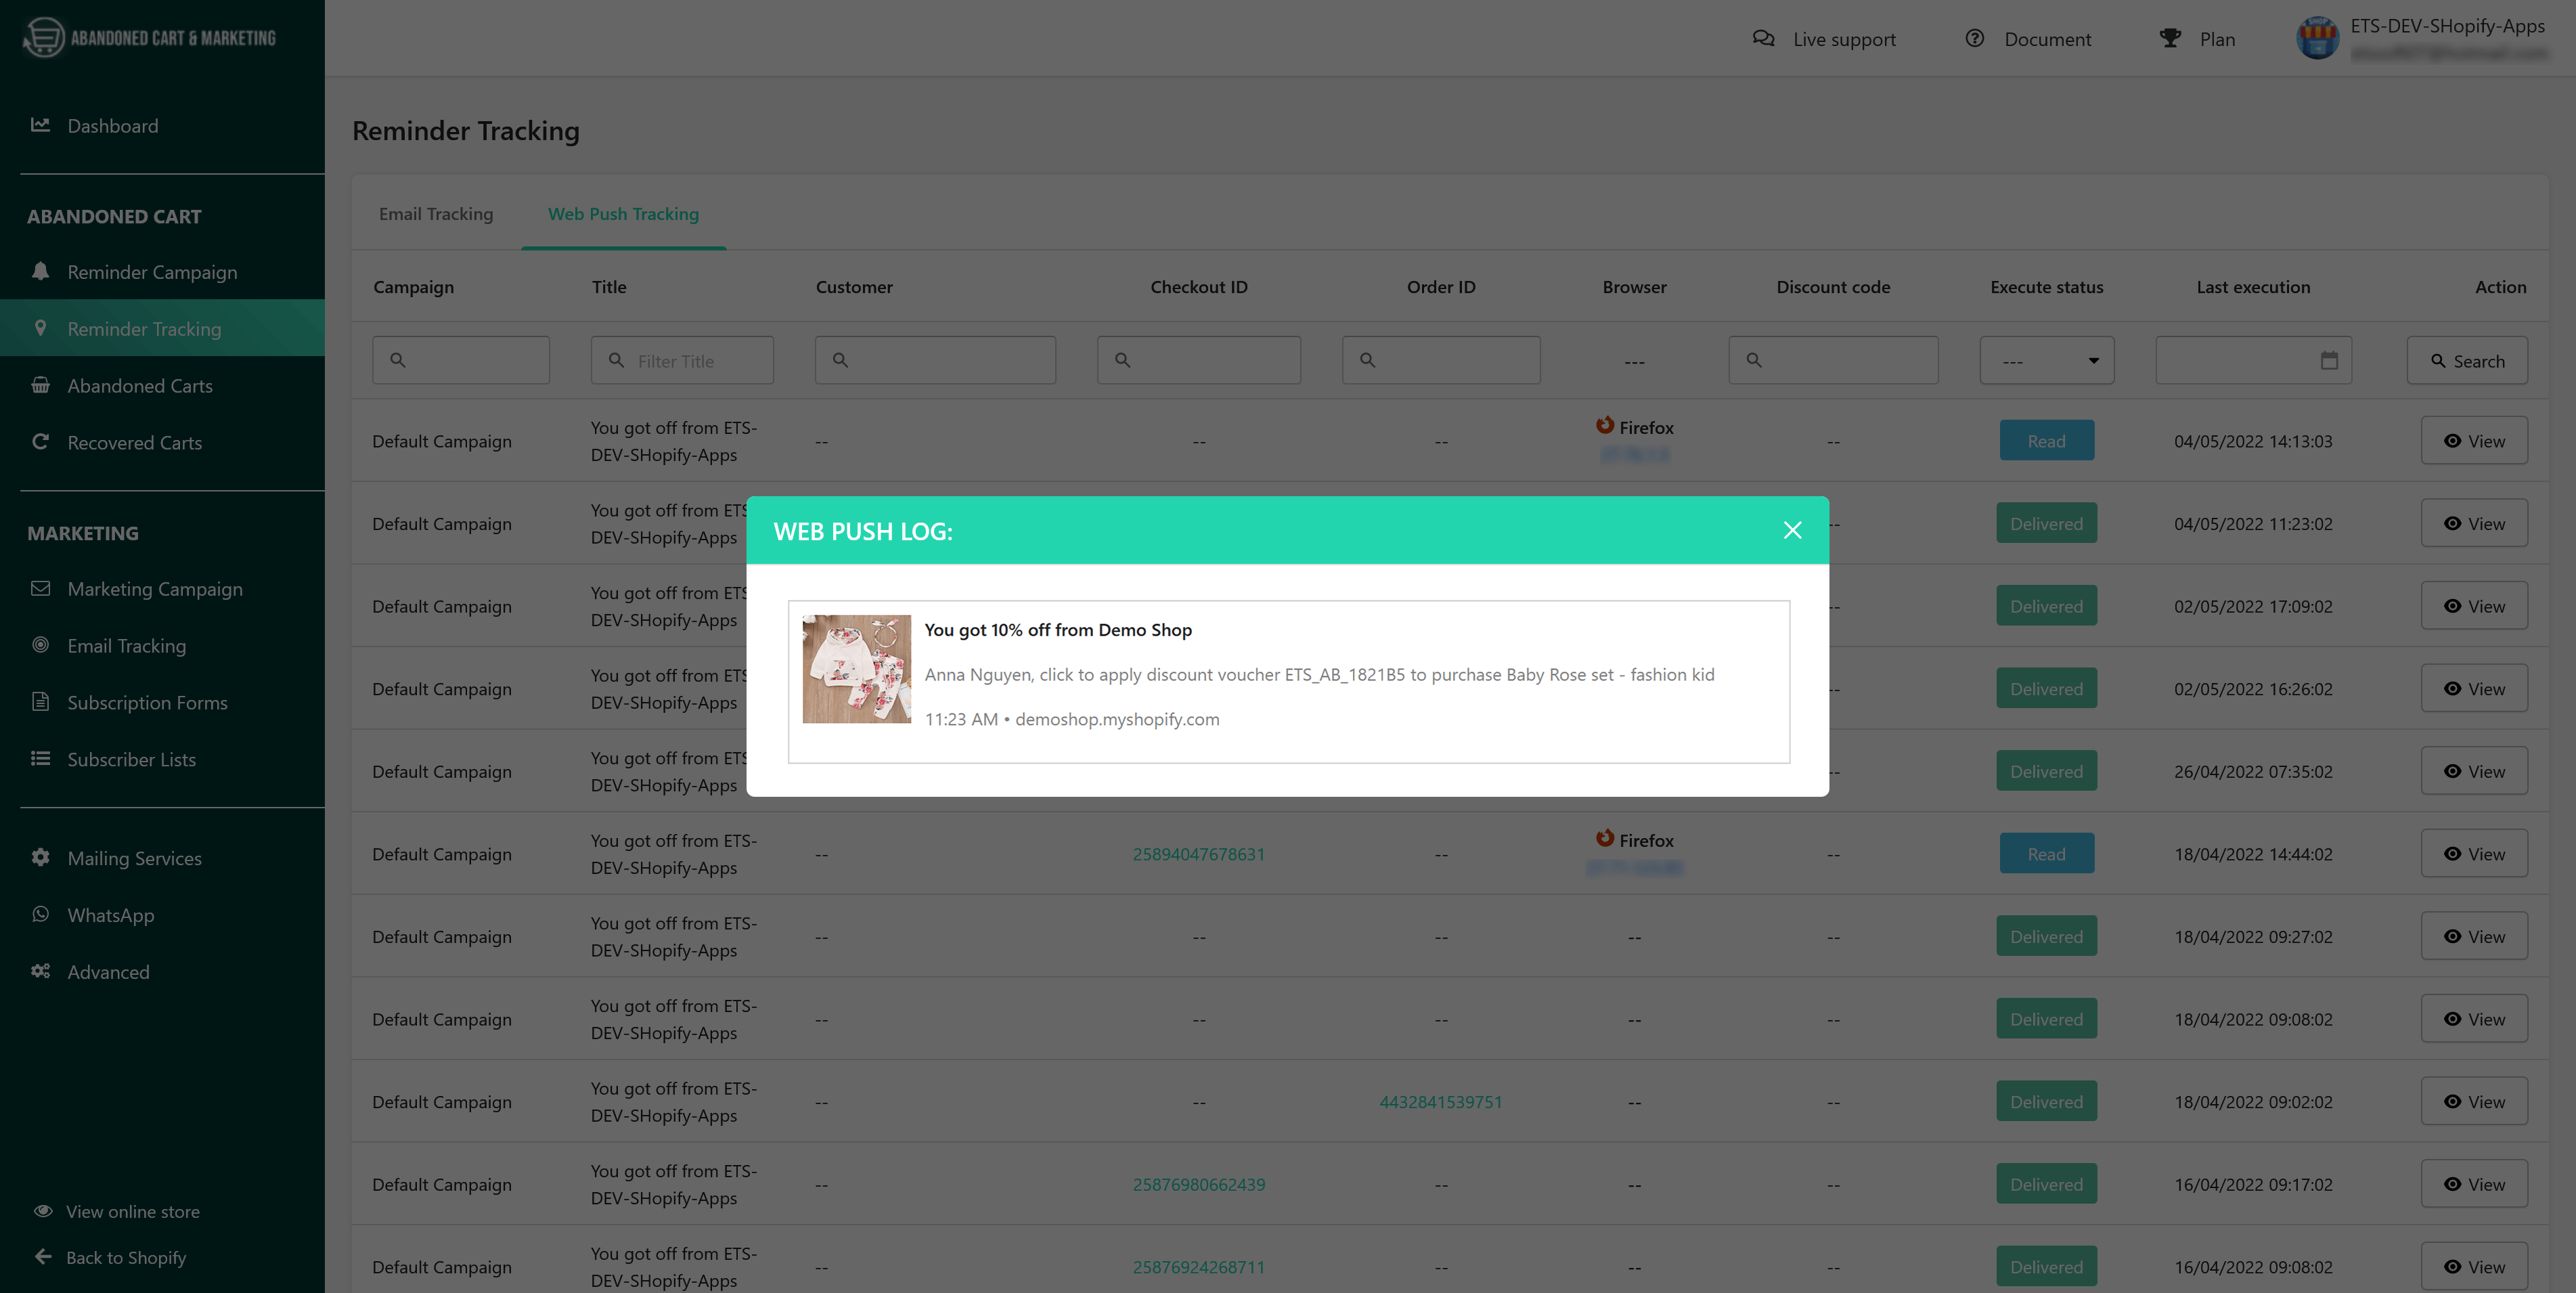
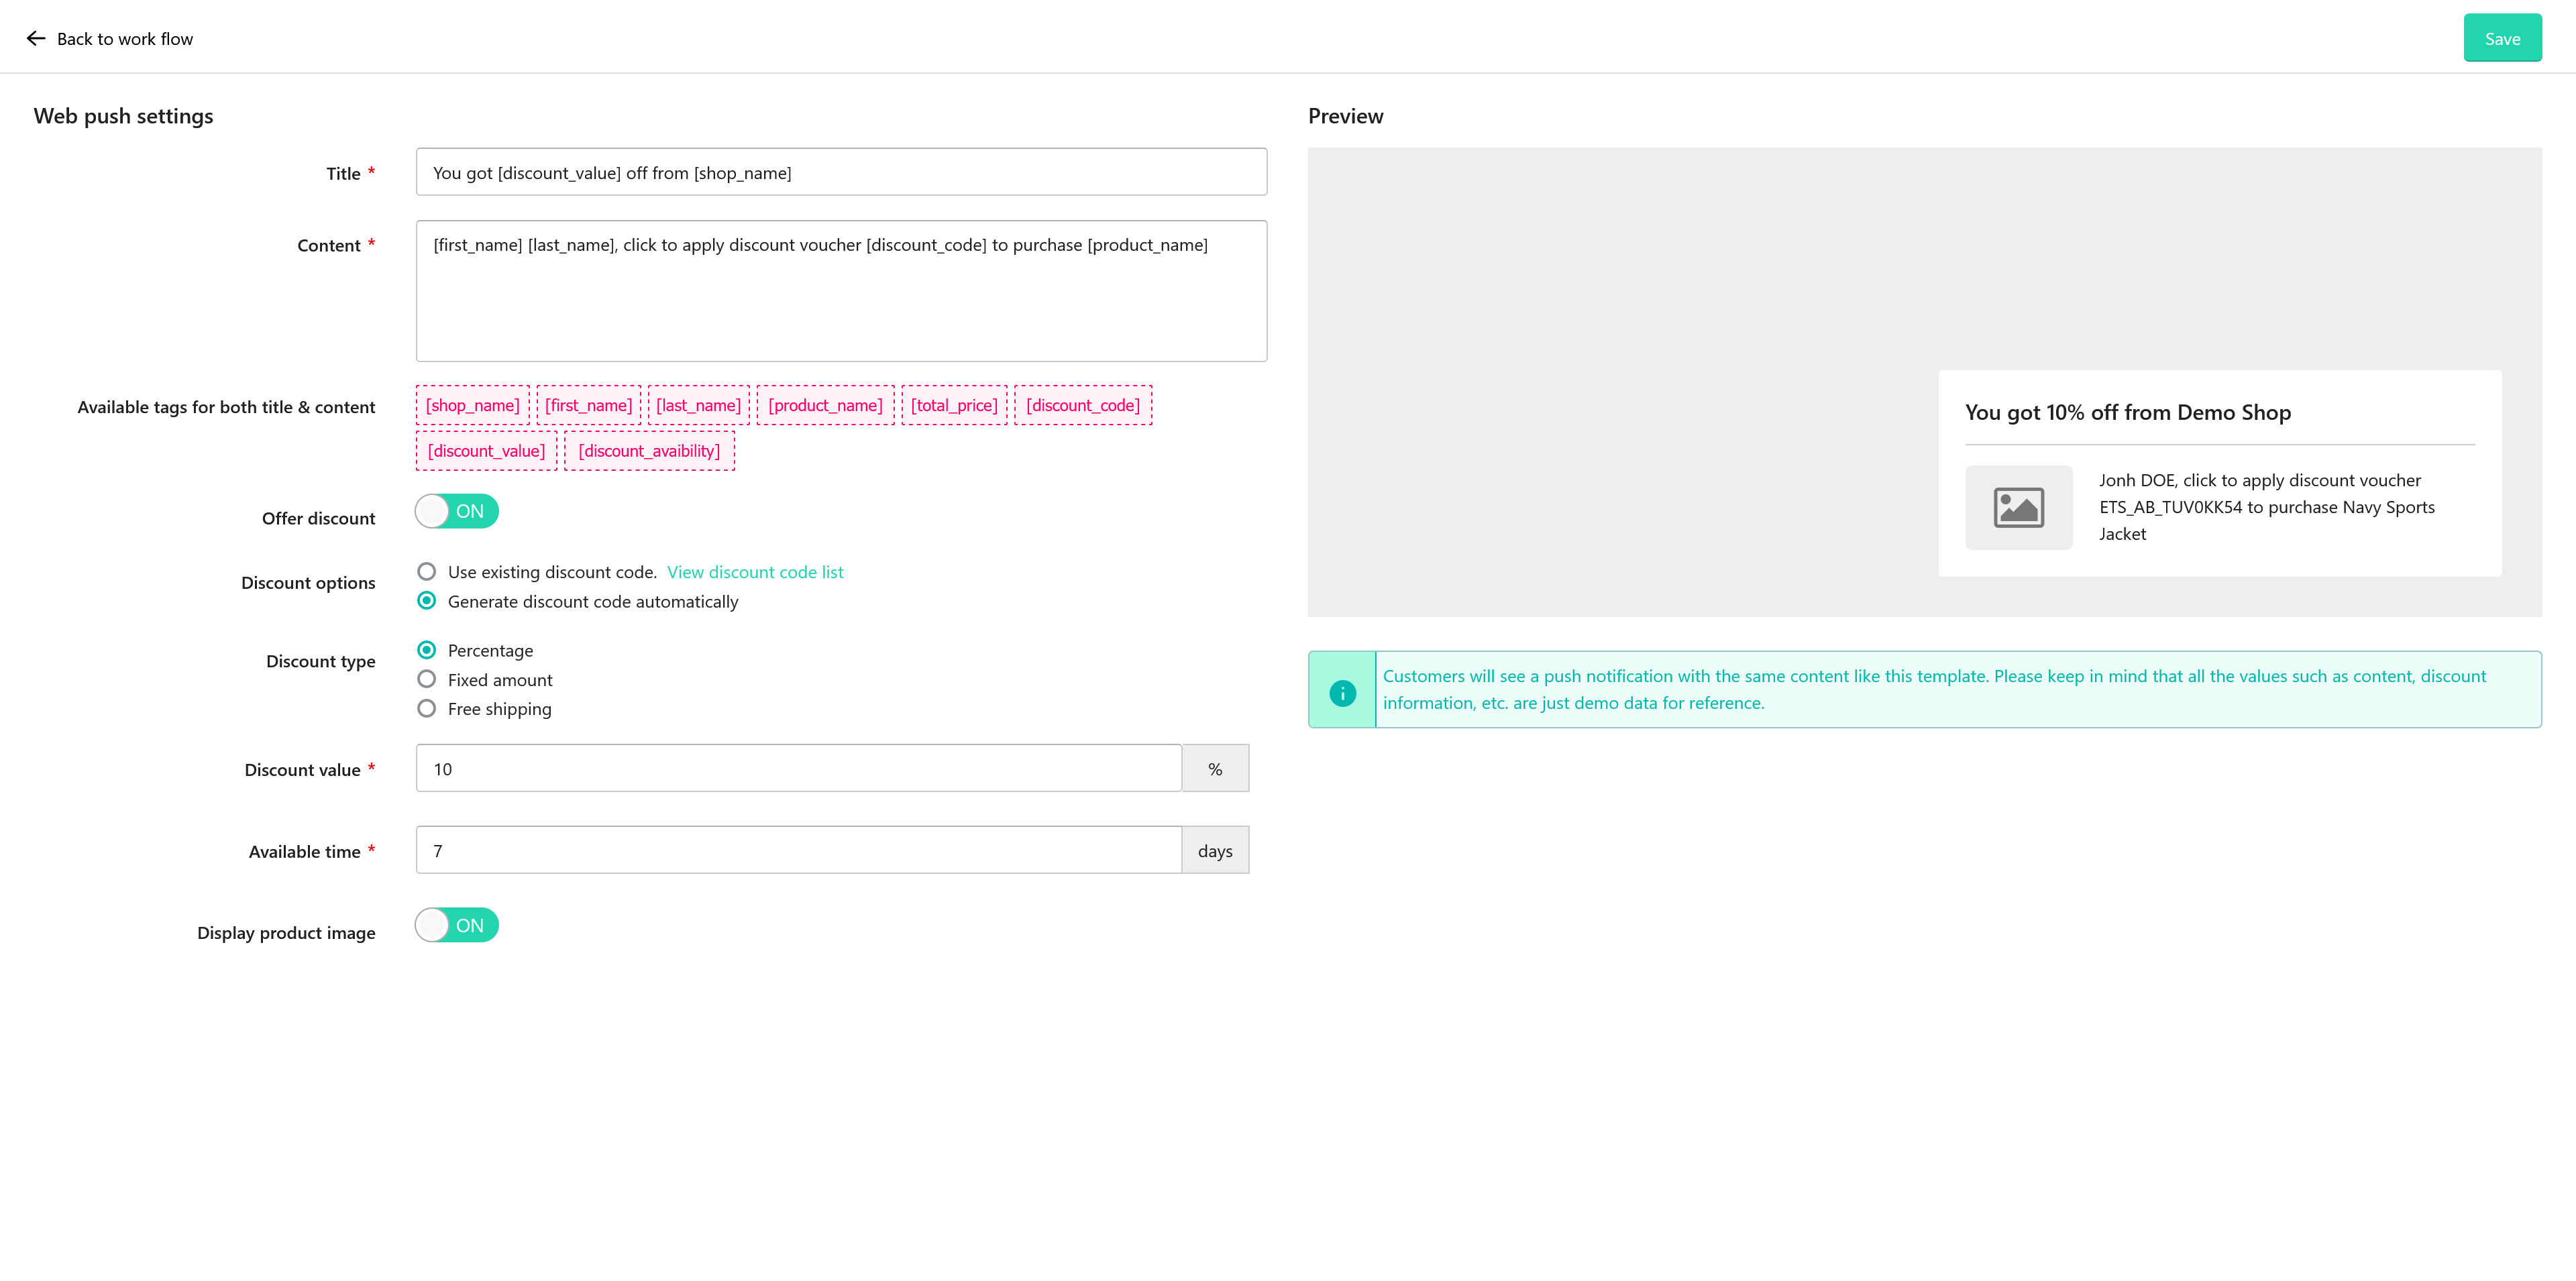
Send reminder via “Web push”
On the “Action” popup, if you select “Web push“, then the app will display a cart reminder as a web browser notification.
- Our app provides available tags for both title and notification content. You only need to copy and paste the tags into the email content if you would like to use them and adjust the notification content accordingly. The tags will be replaced with real information automatically when an email is sent to customers based on their shopping cart and their personal information.
- You can set the elements to display the notification and preview how it will appear in the user interface.
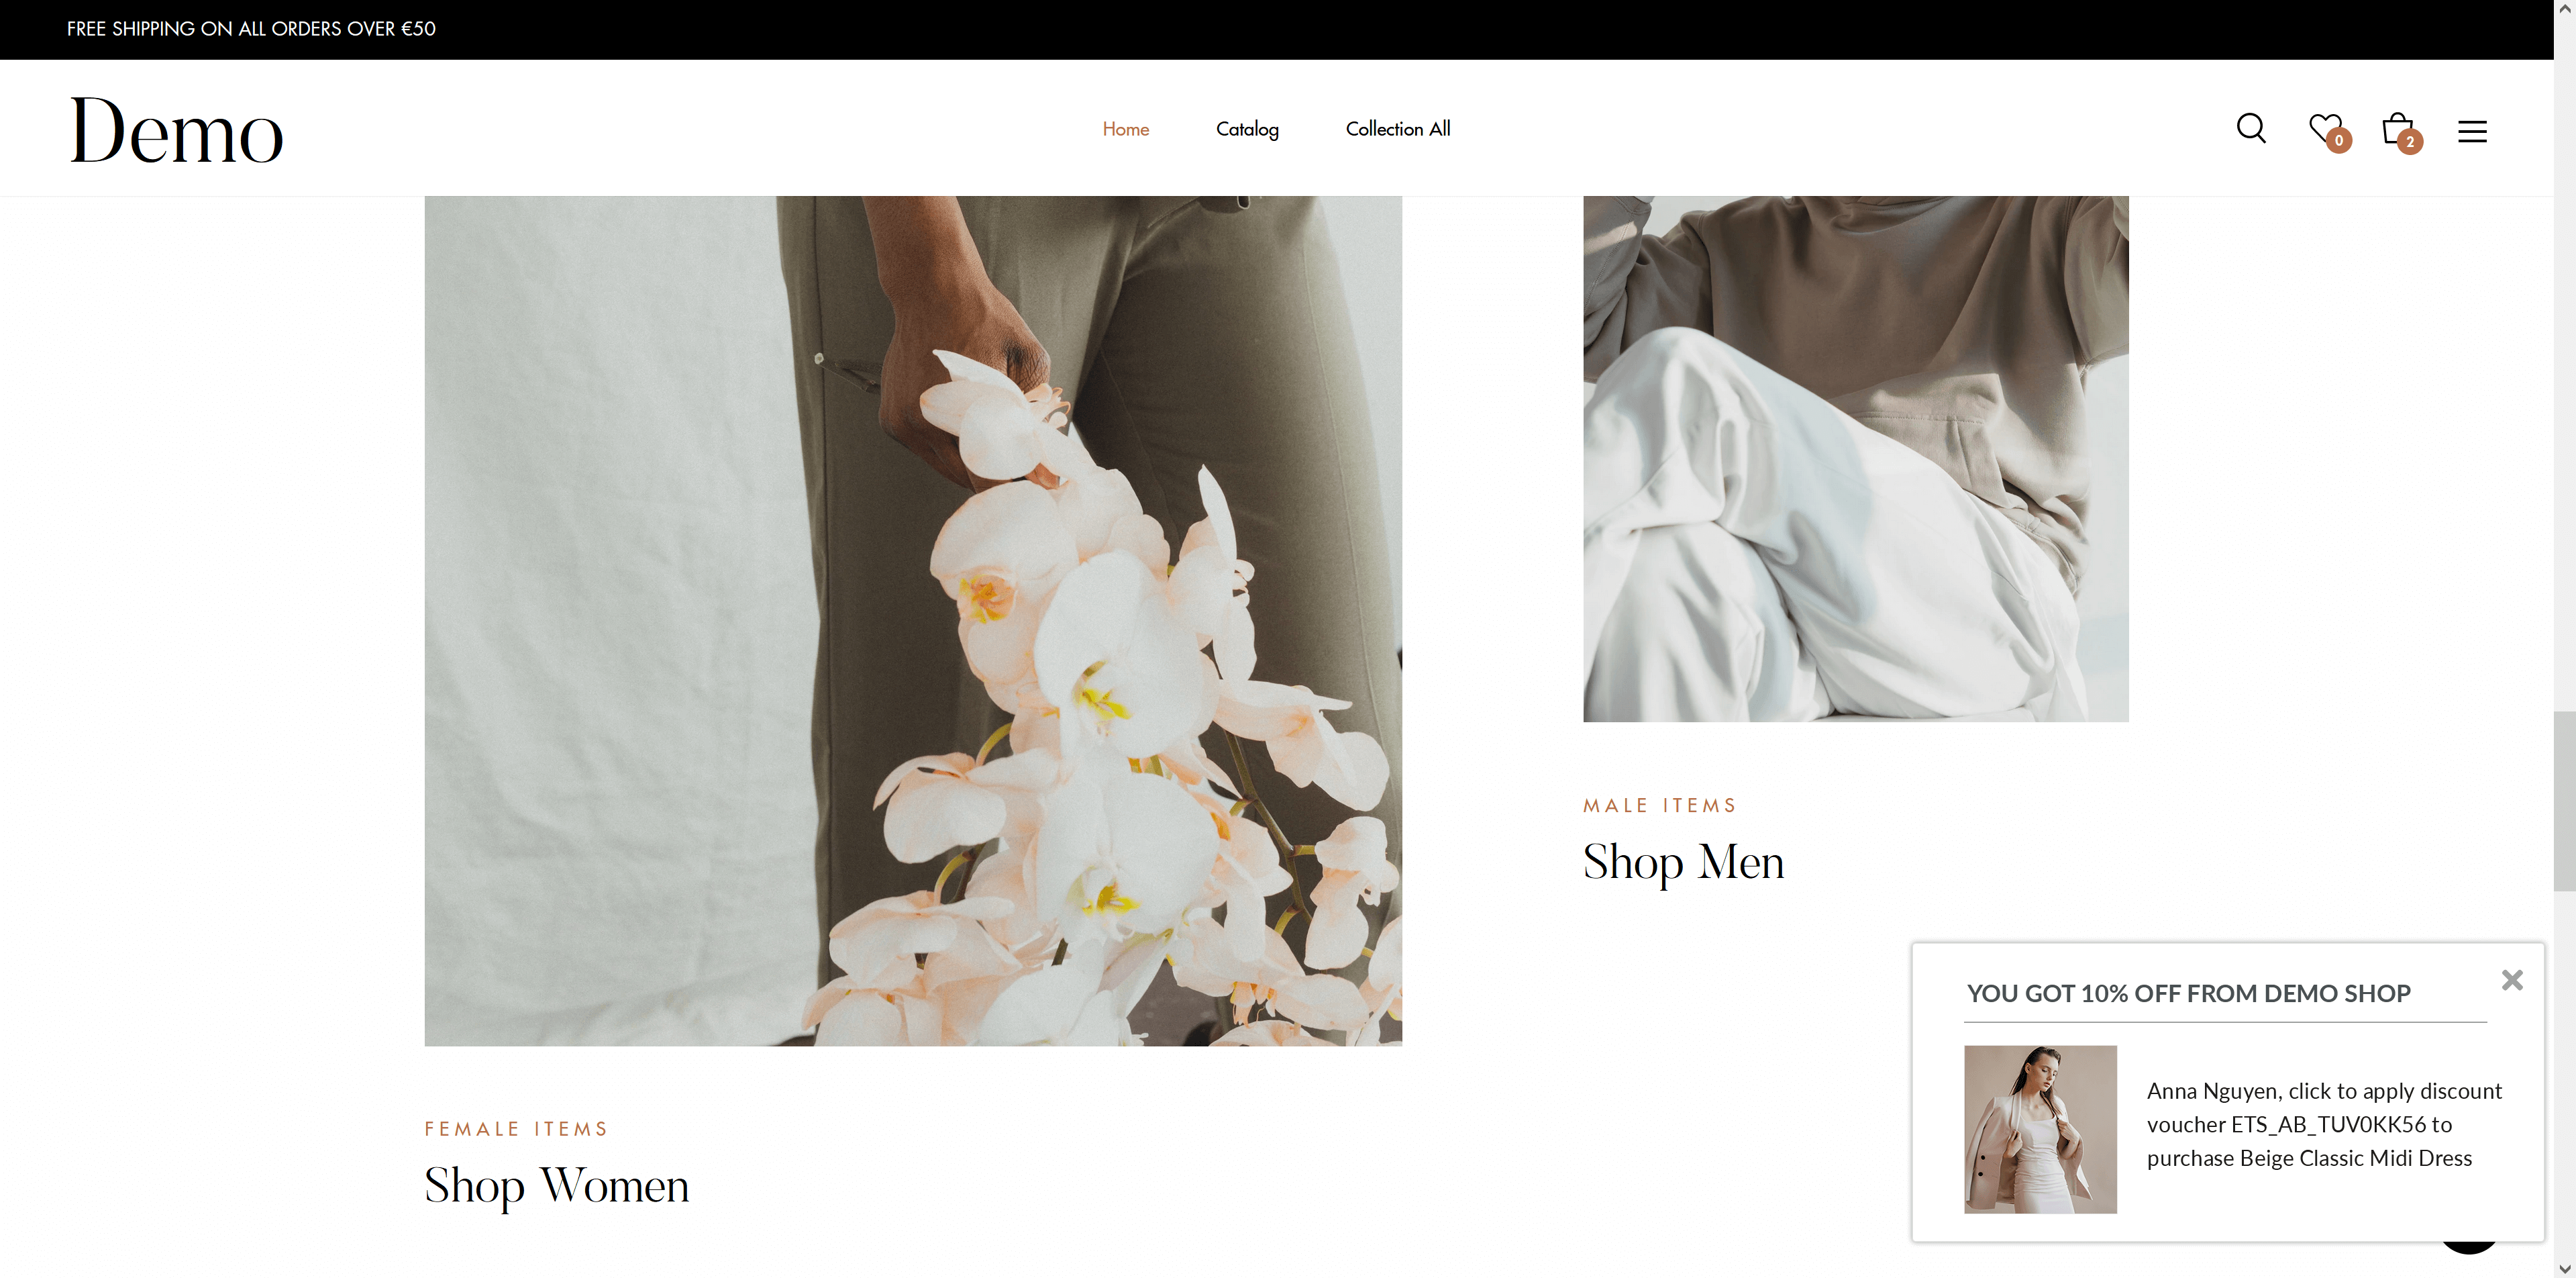
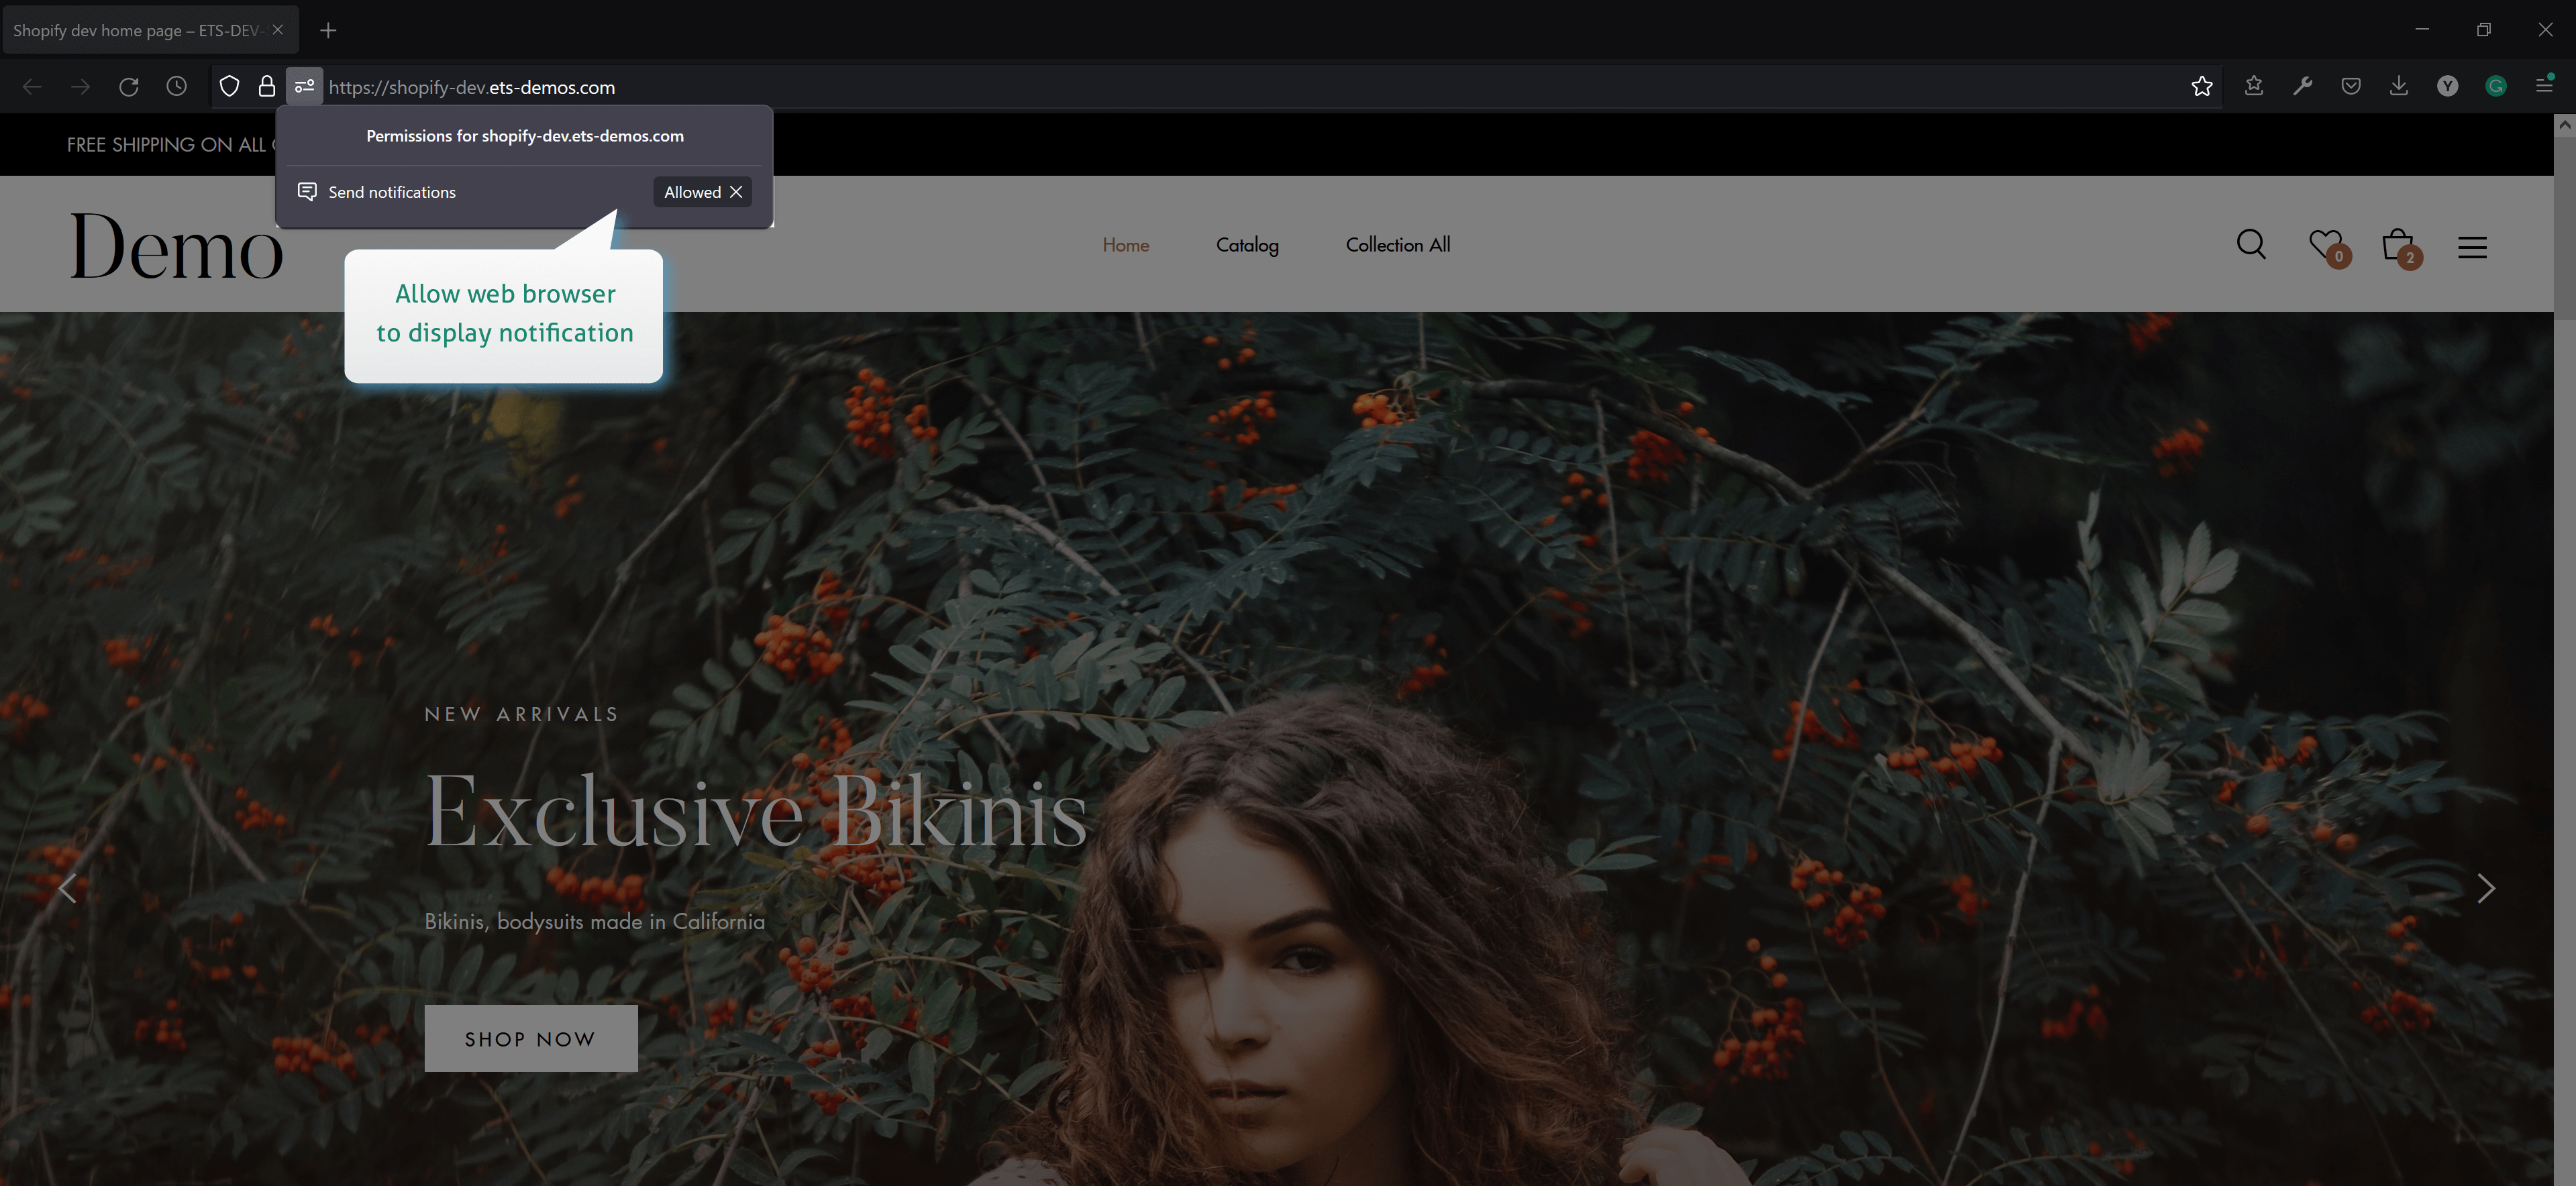
An example of a web push notification on the front office:
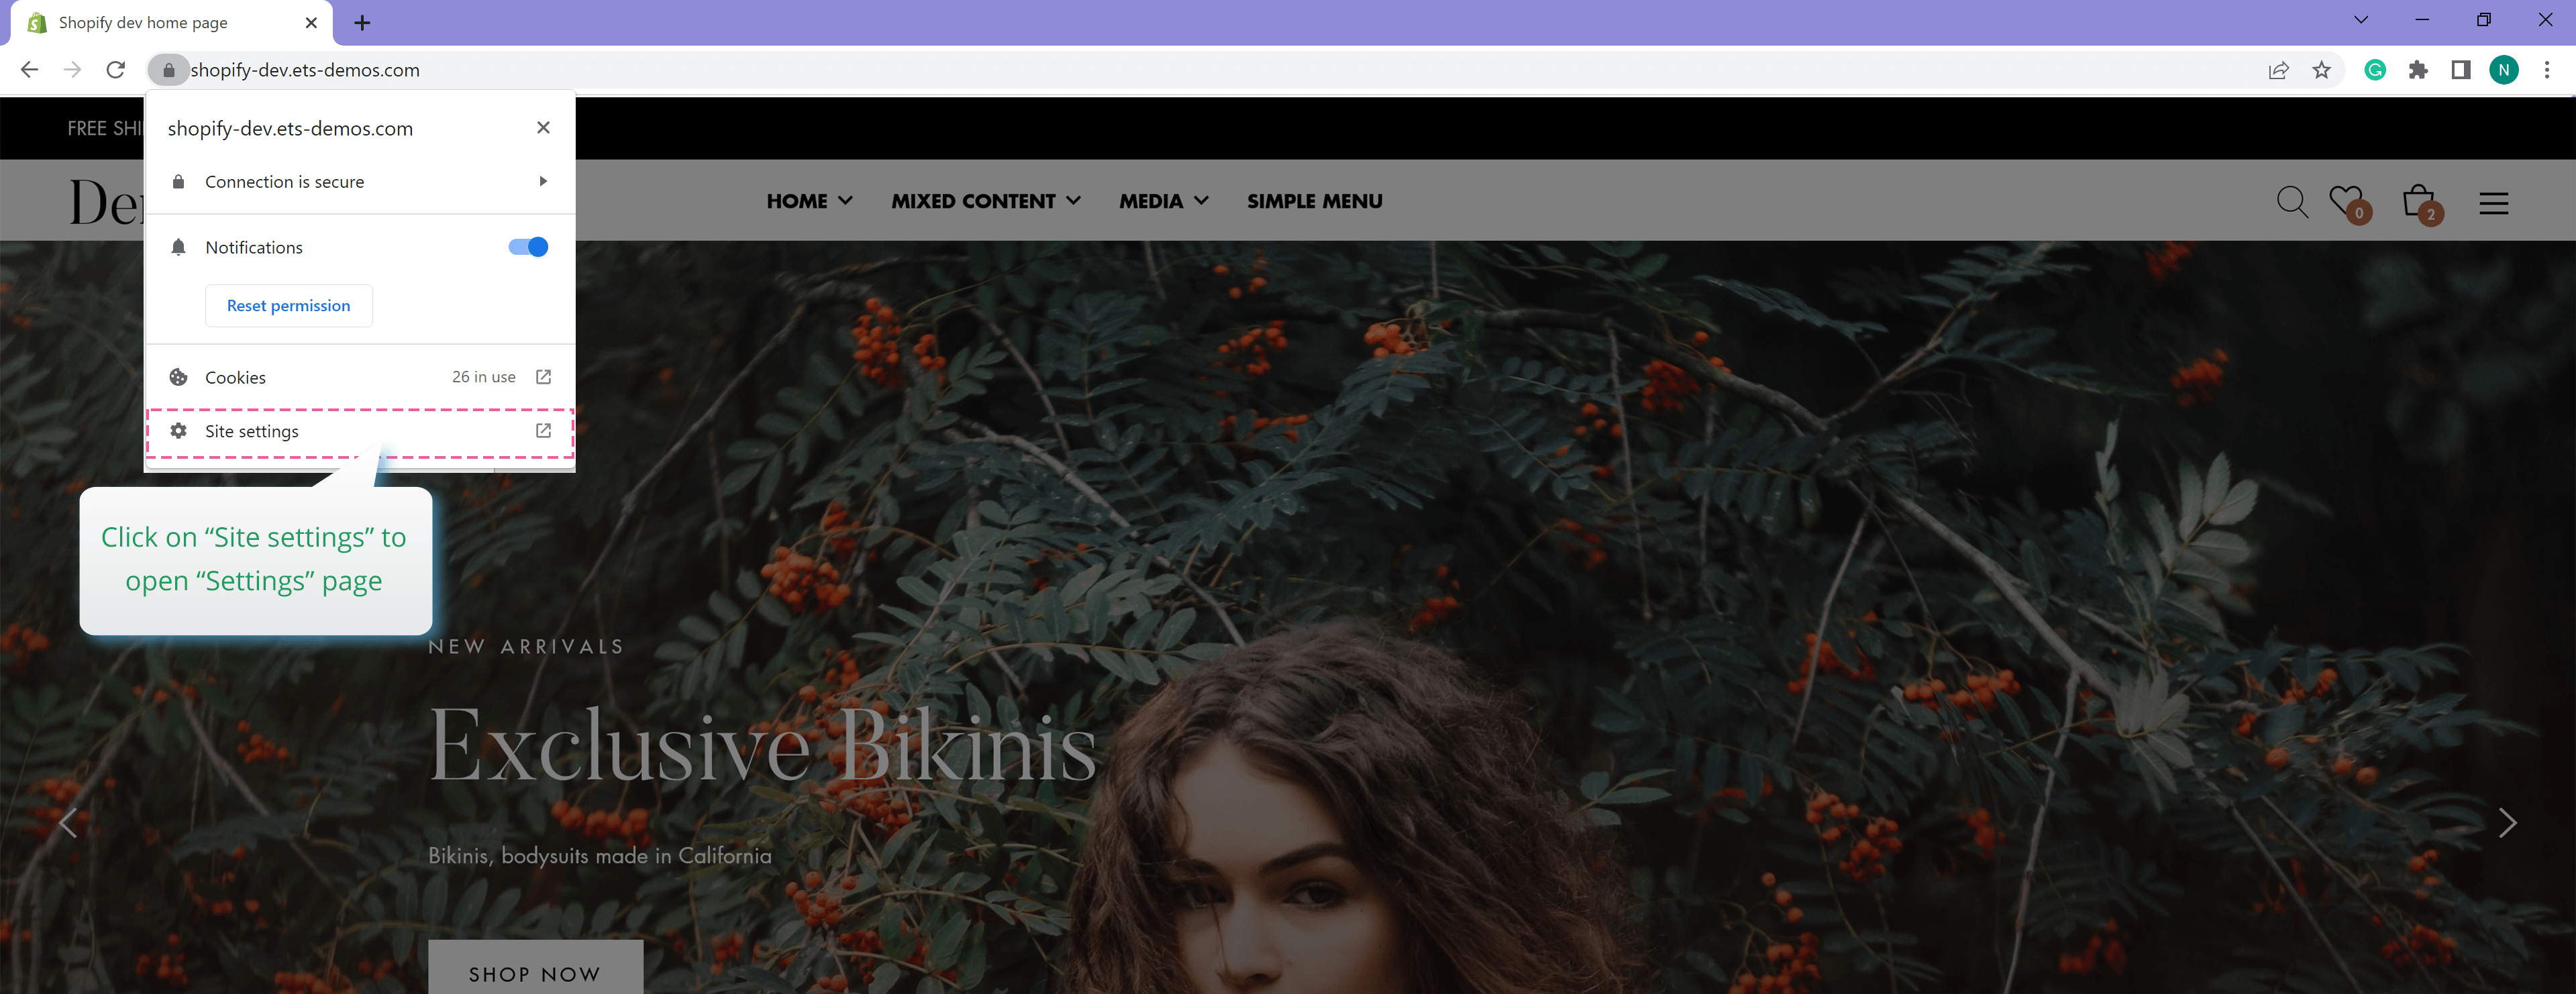
NOTE: Customer needs to allow showing notification on their web browser to see the notification.
- For Chrome users: Click on the locker icon on the address bar > Click on “Site settings” option.
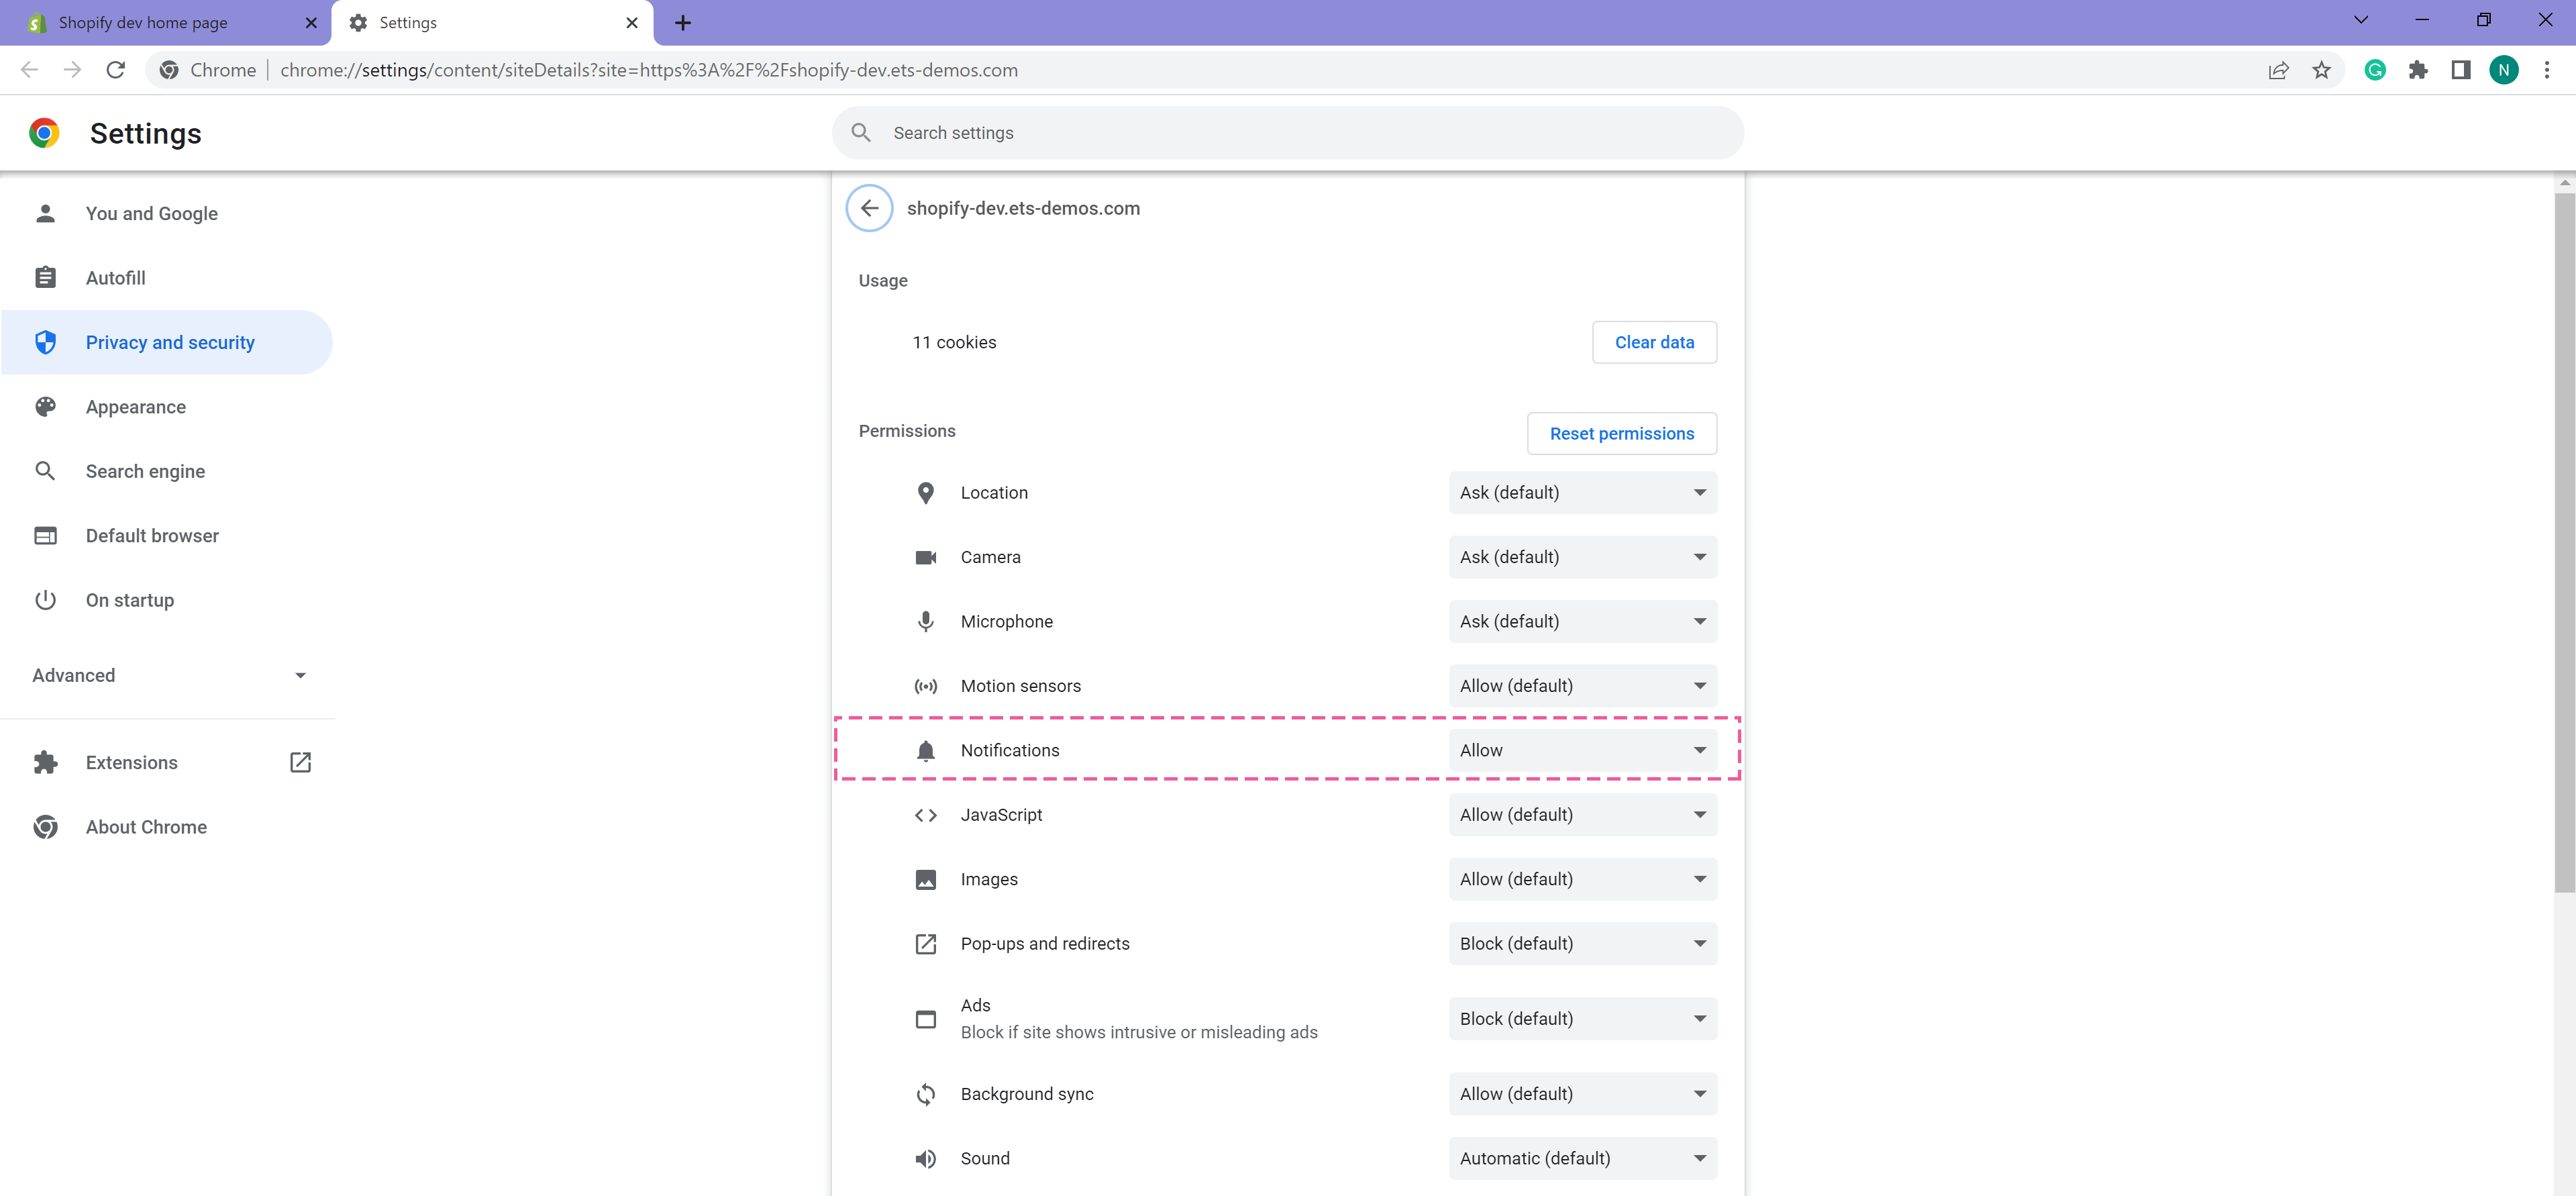
Set the “Notifications” permission to “Allow“:
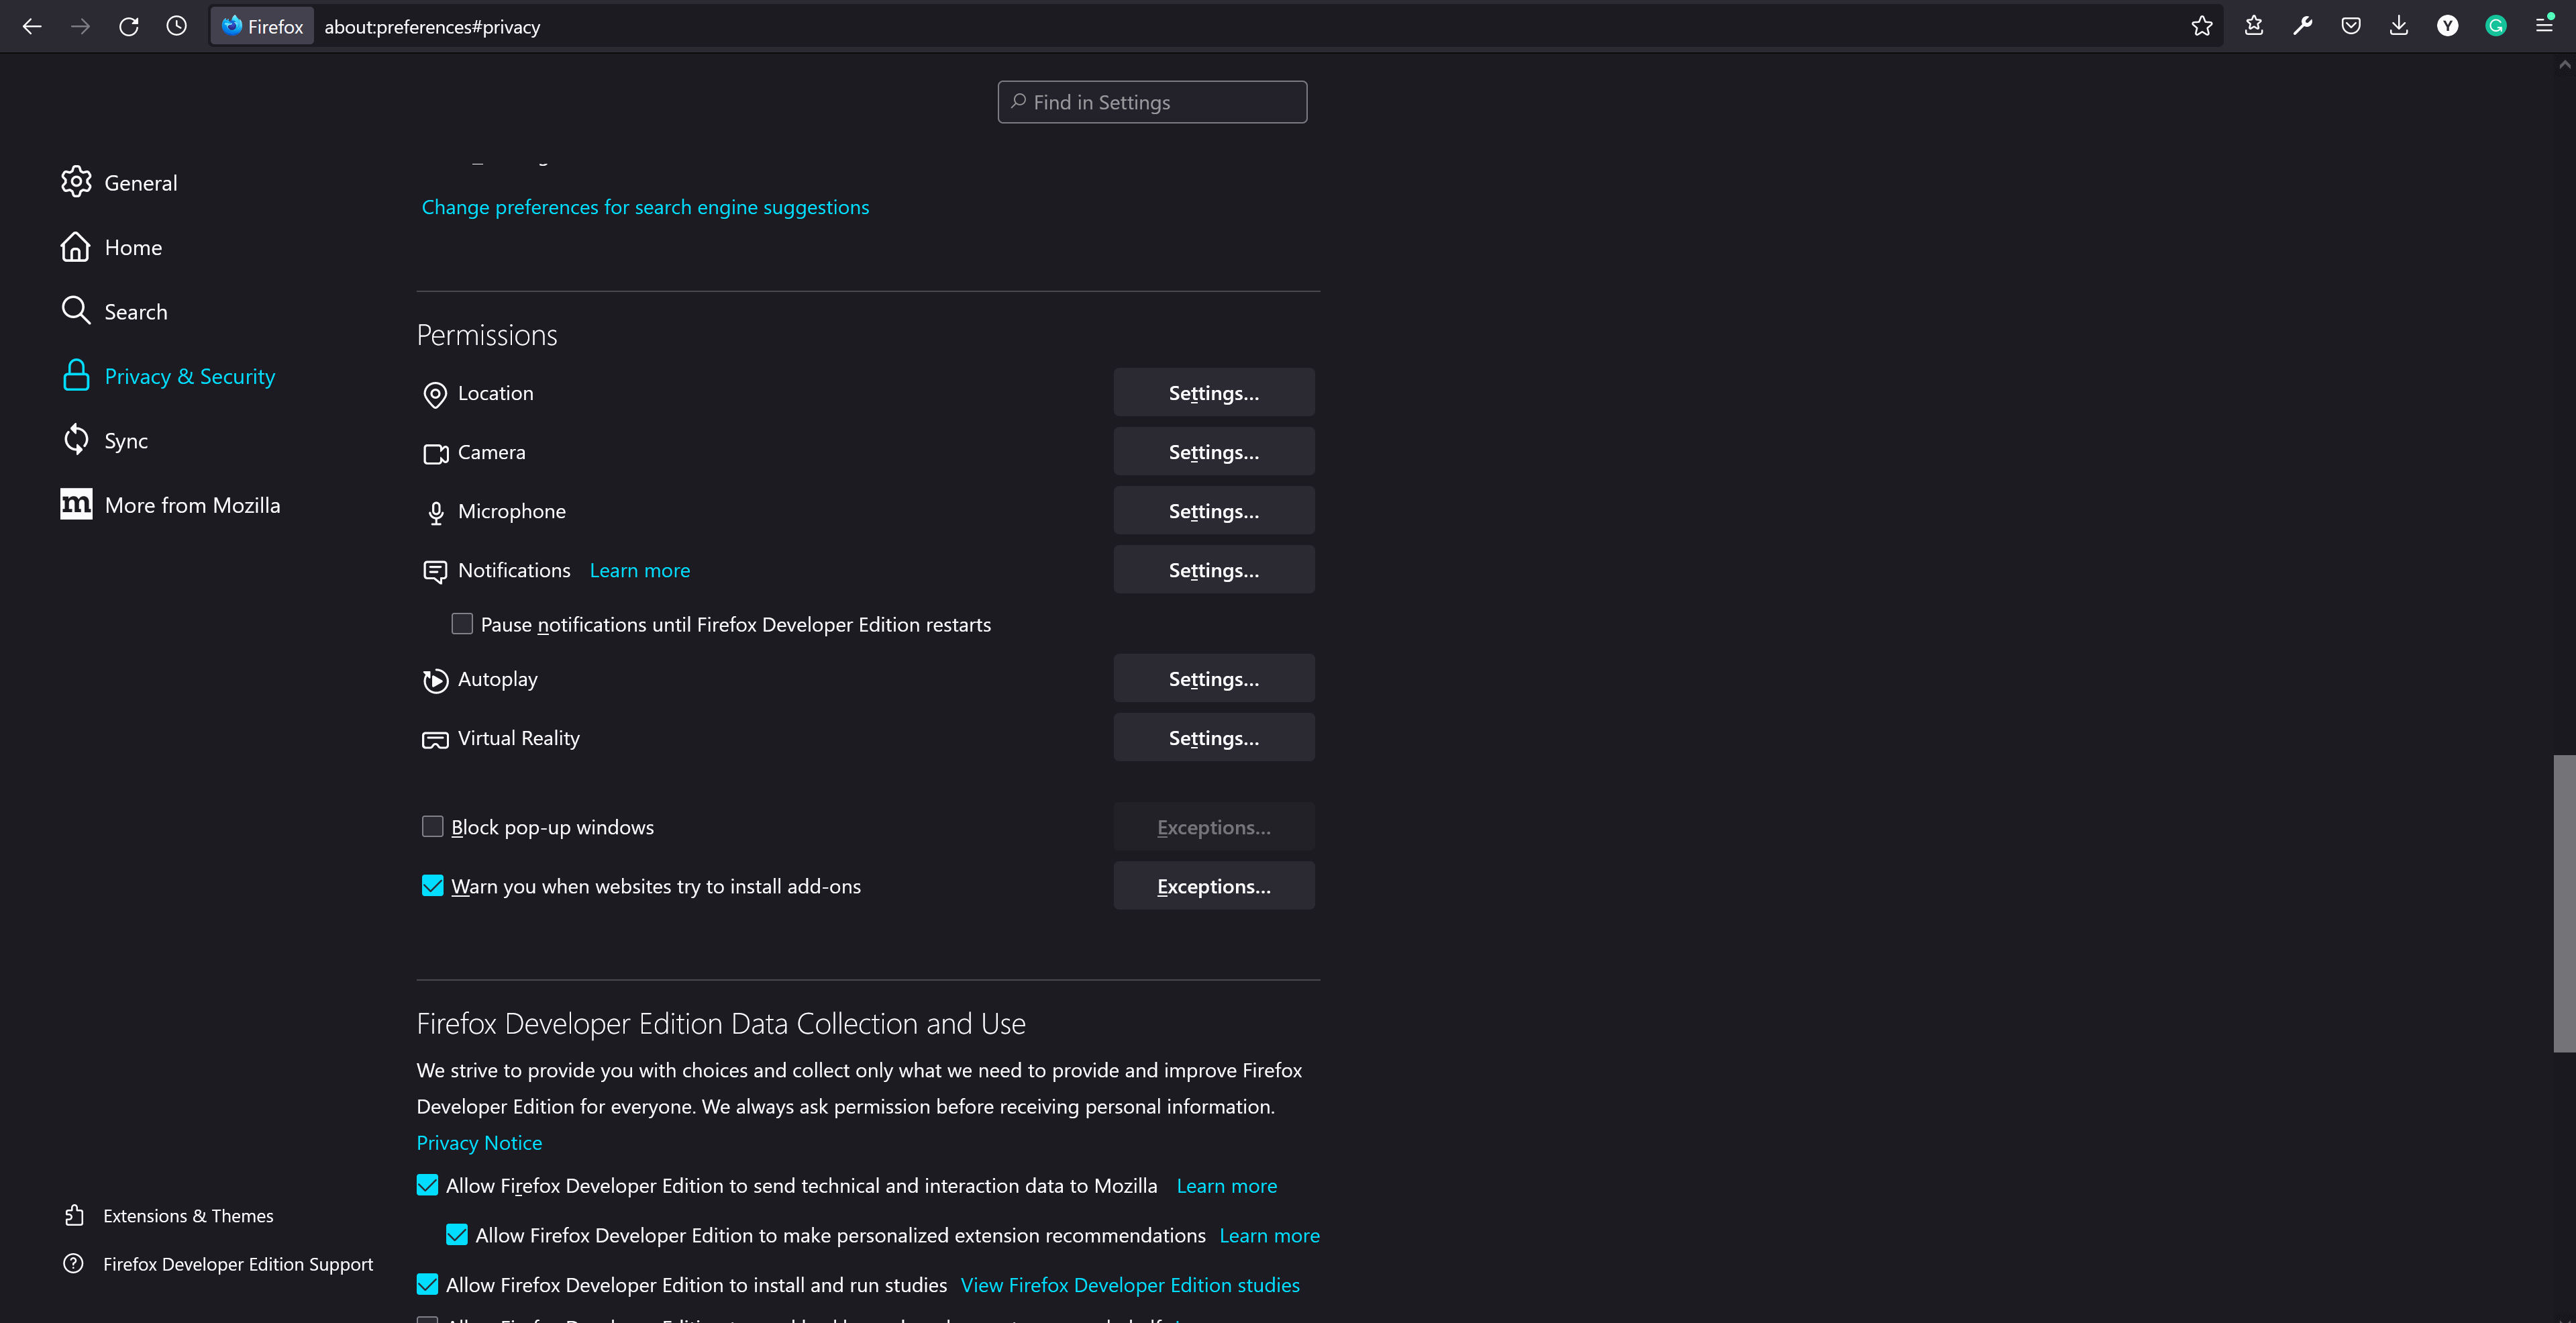
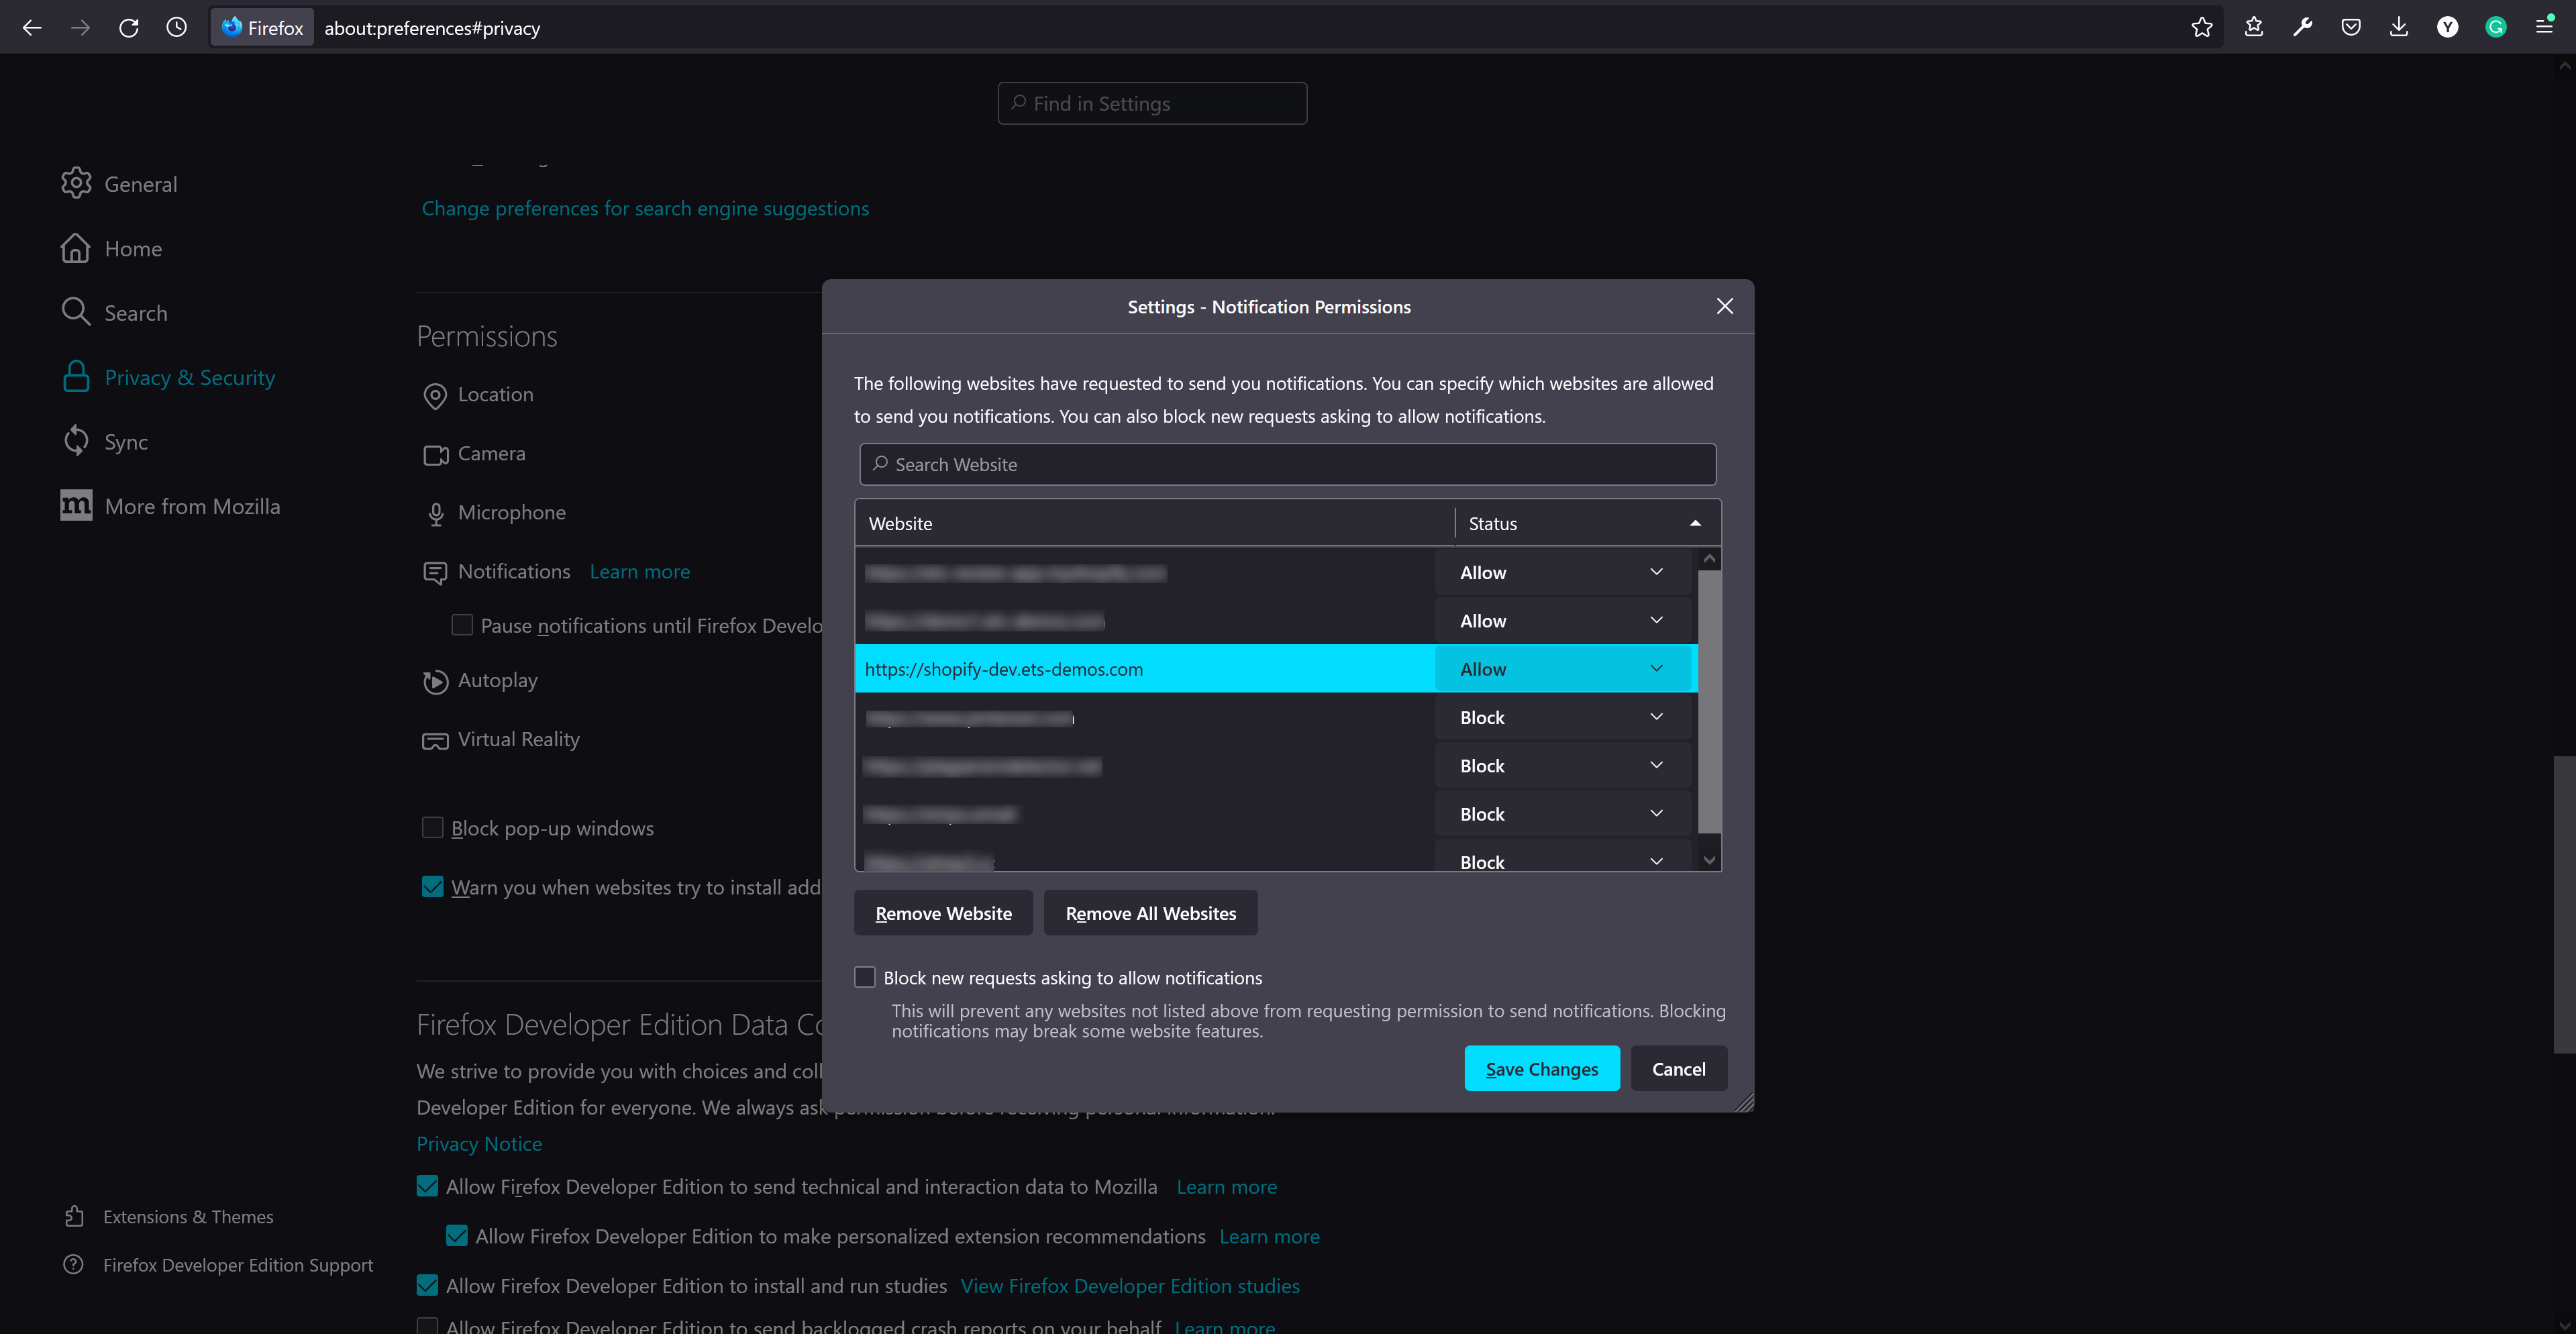
- For Firefox users: open browser settings page > Navigate to “Privacy & Security” > Scroll down to “Permission” section. Open “Settings…” popup for “Notifications“.
Allow notification for your website then save the change.
End workflow block
Click “End Workflow” when you finish adding a new reminder campaign.
Remember to save your campaign after making any changes.
Settings
Click on “Settings” button to open the “Settings” popup, here you can select mail host and set up the valid time for the campaign you’ve created.

Click “Save” to complete your campaign setup.
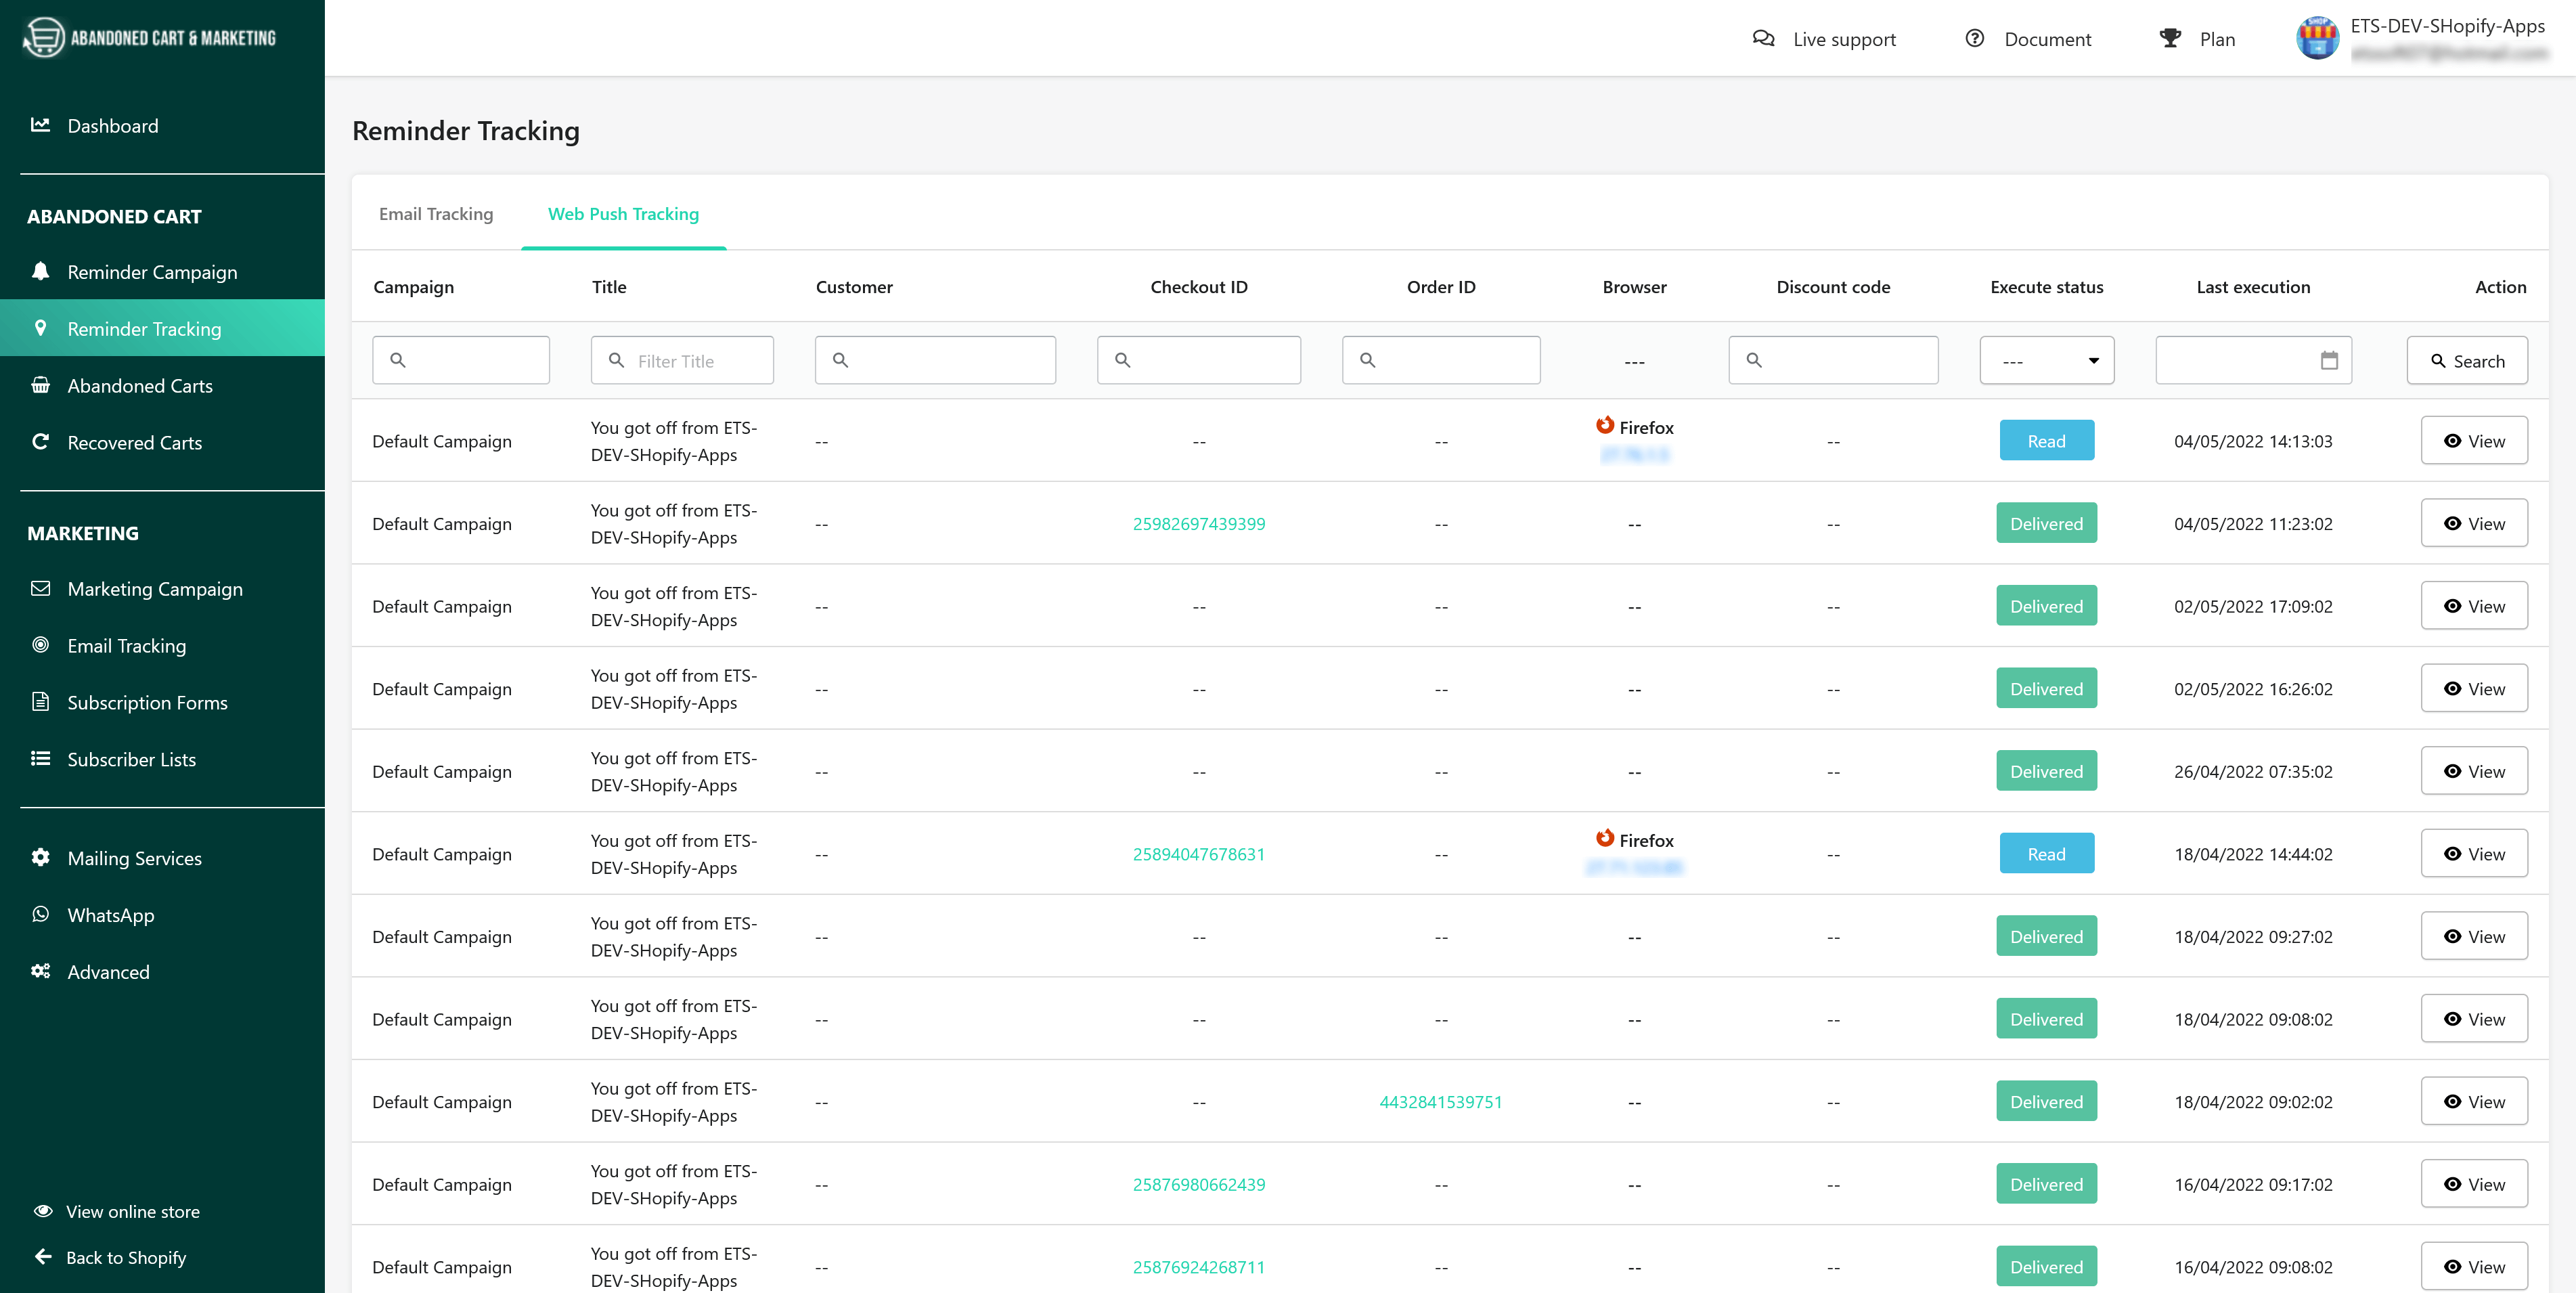
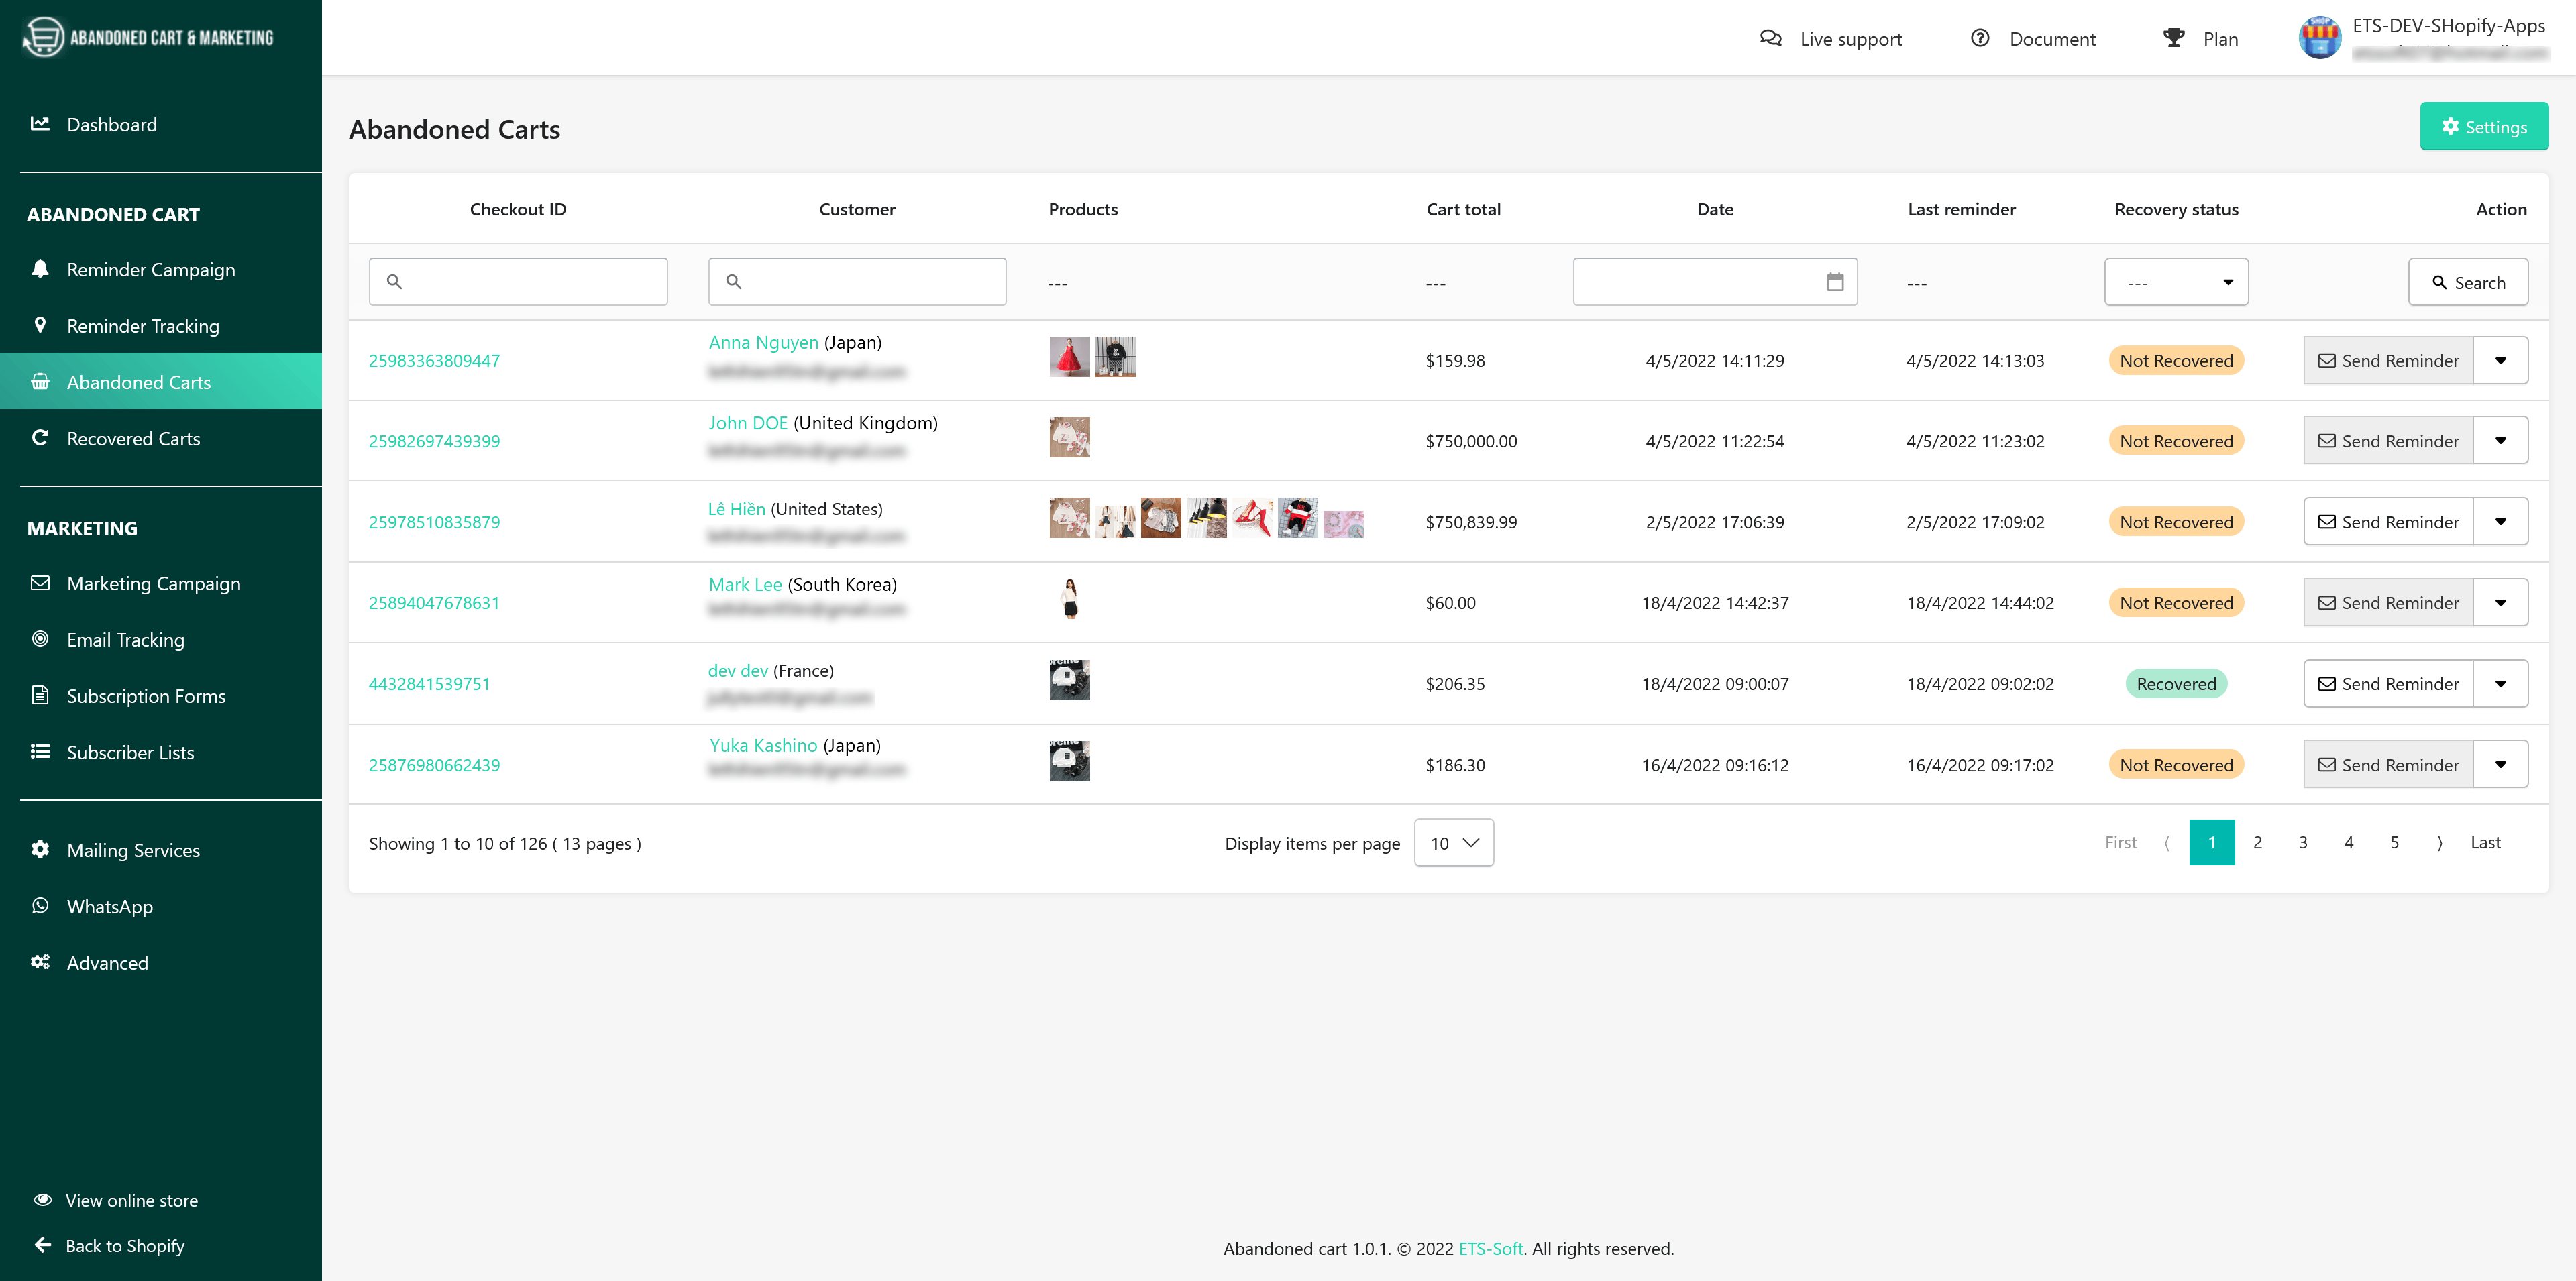
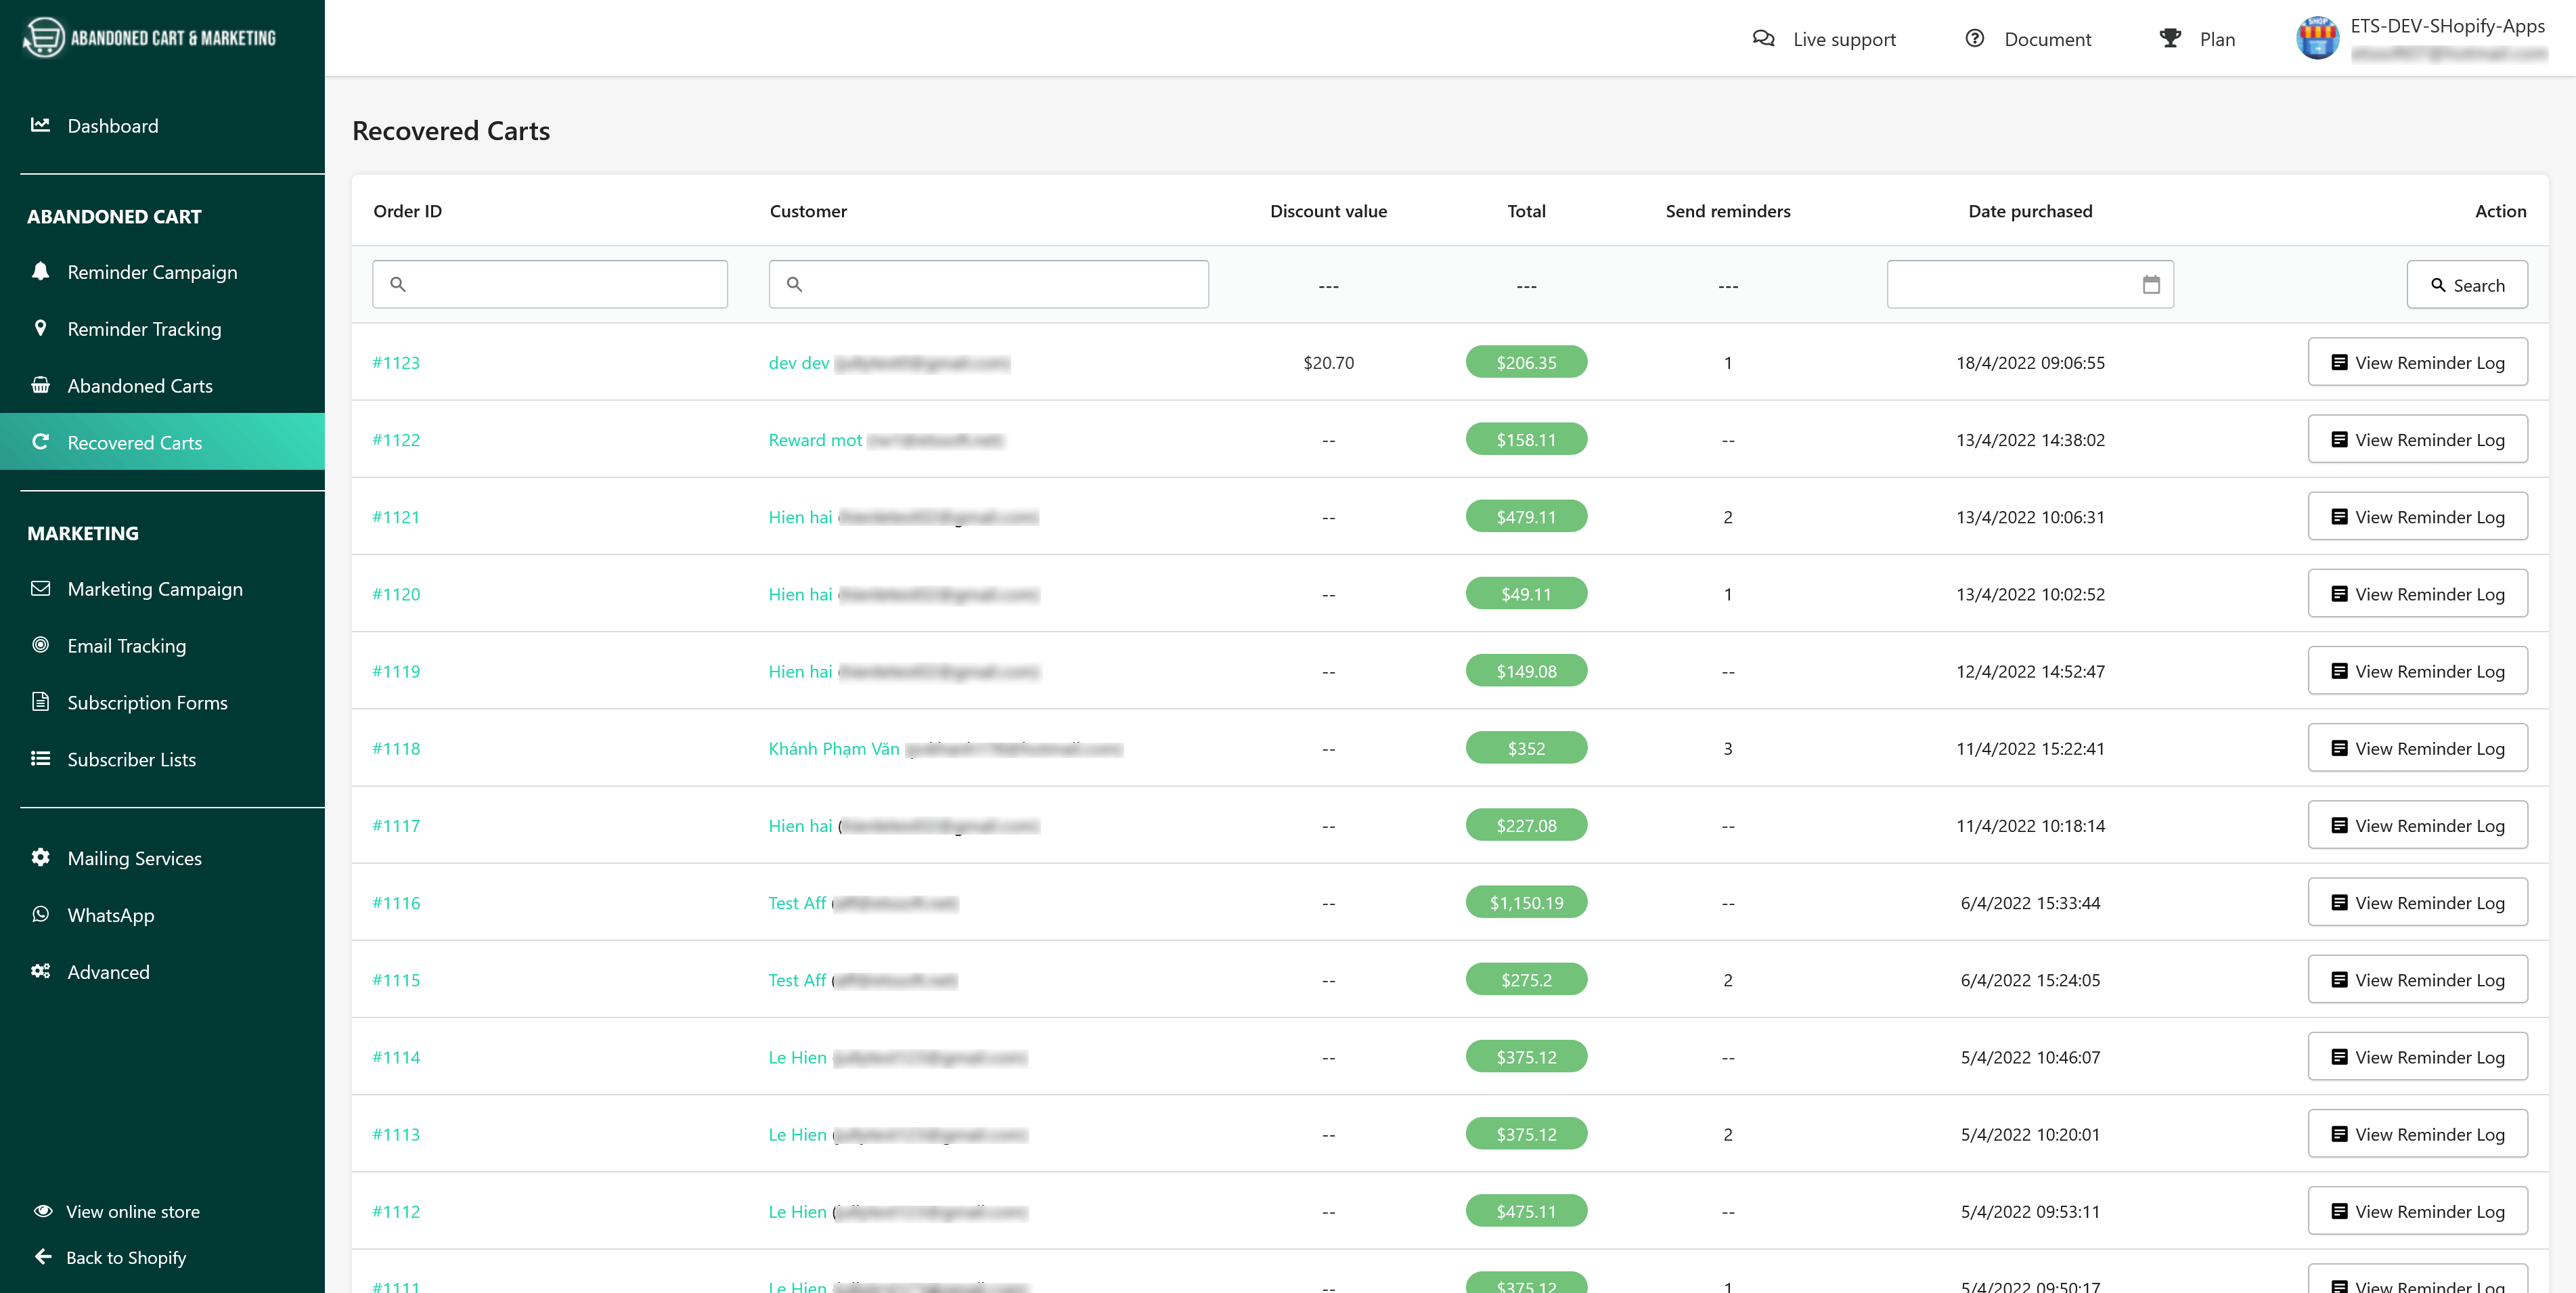
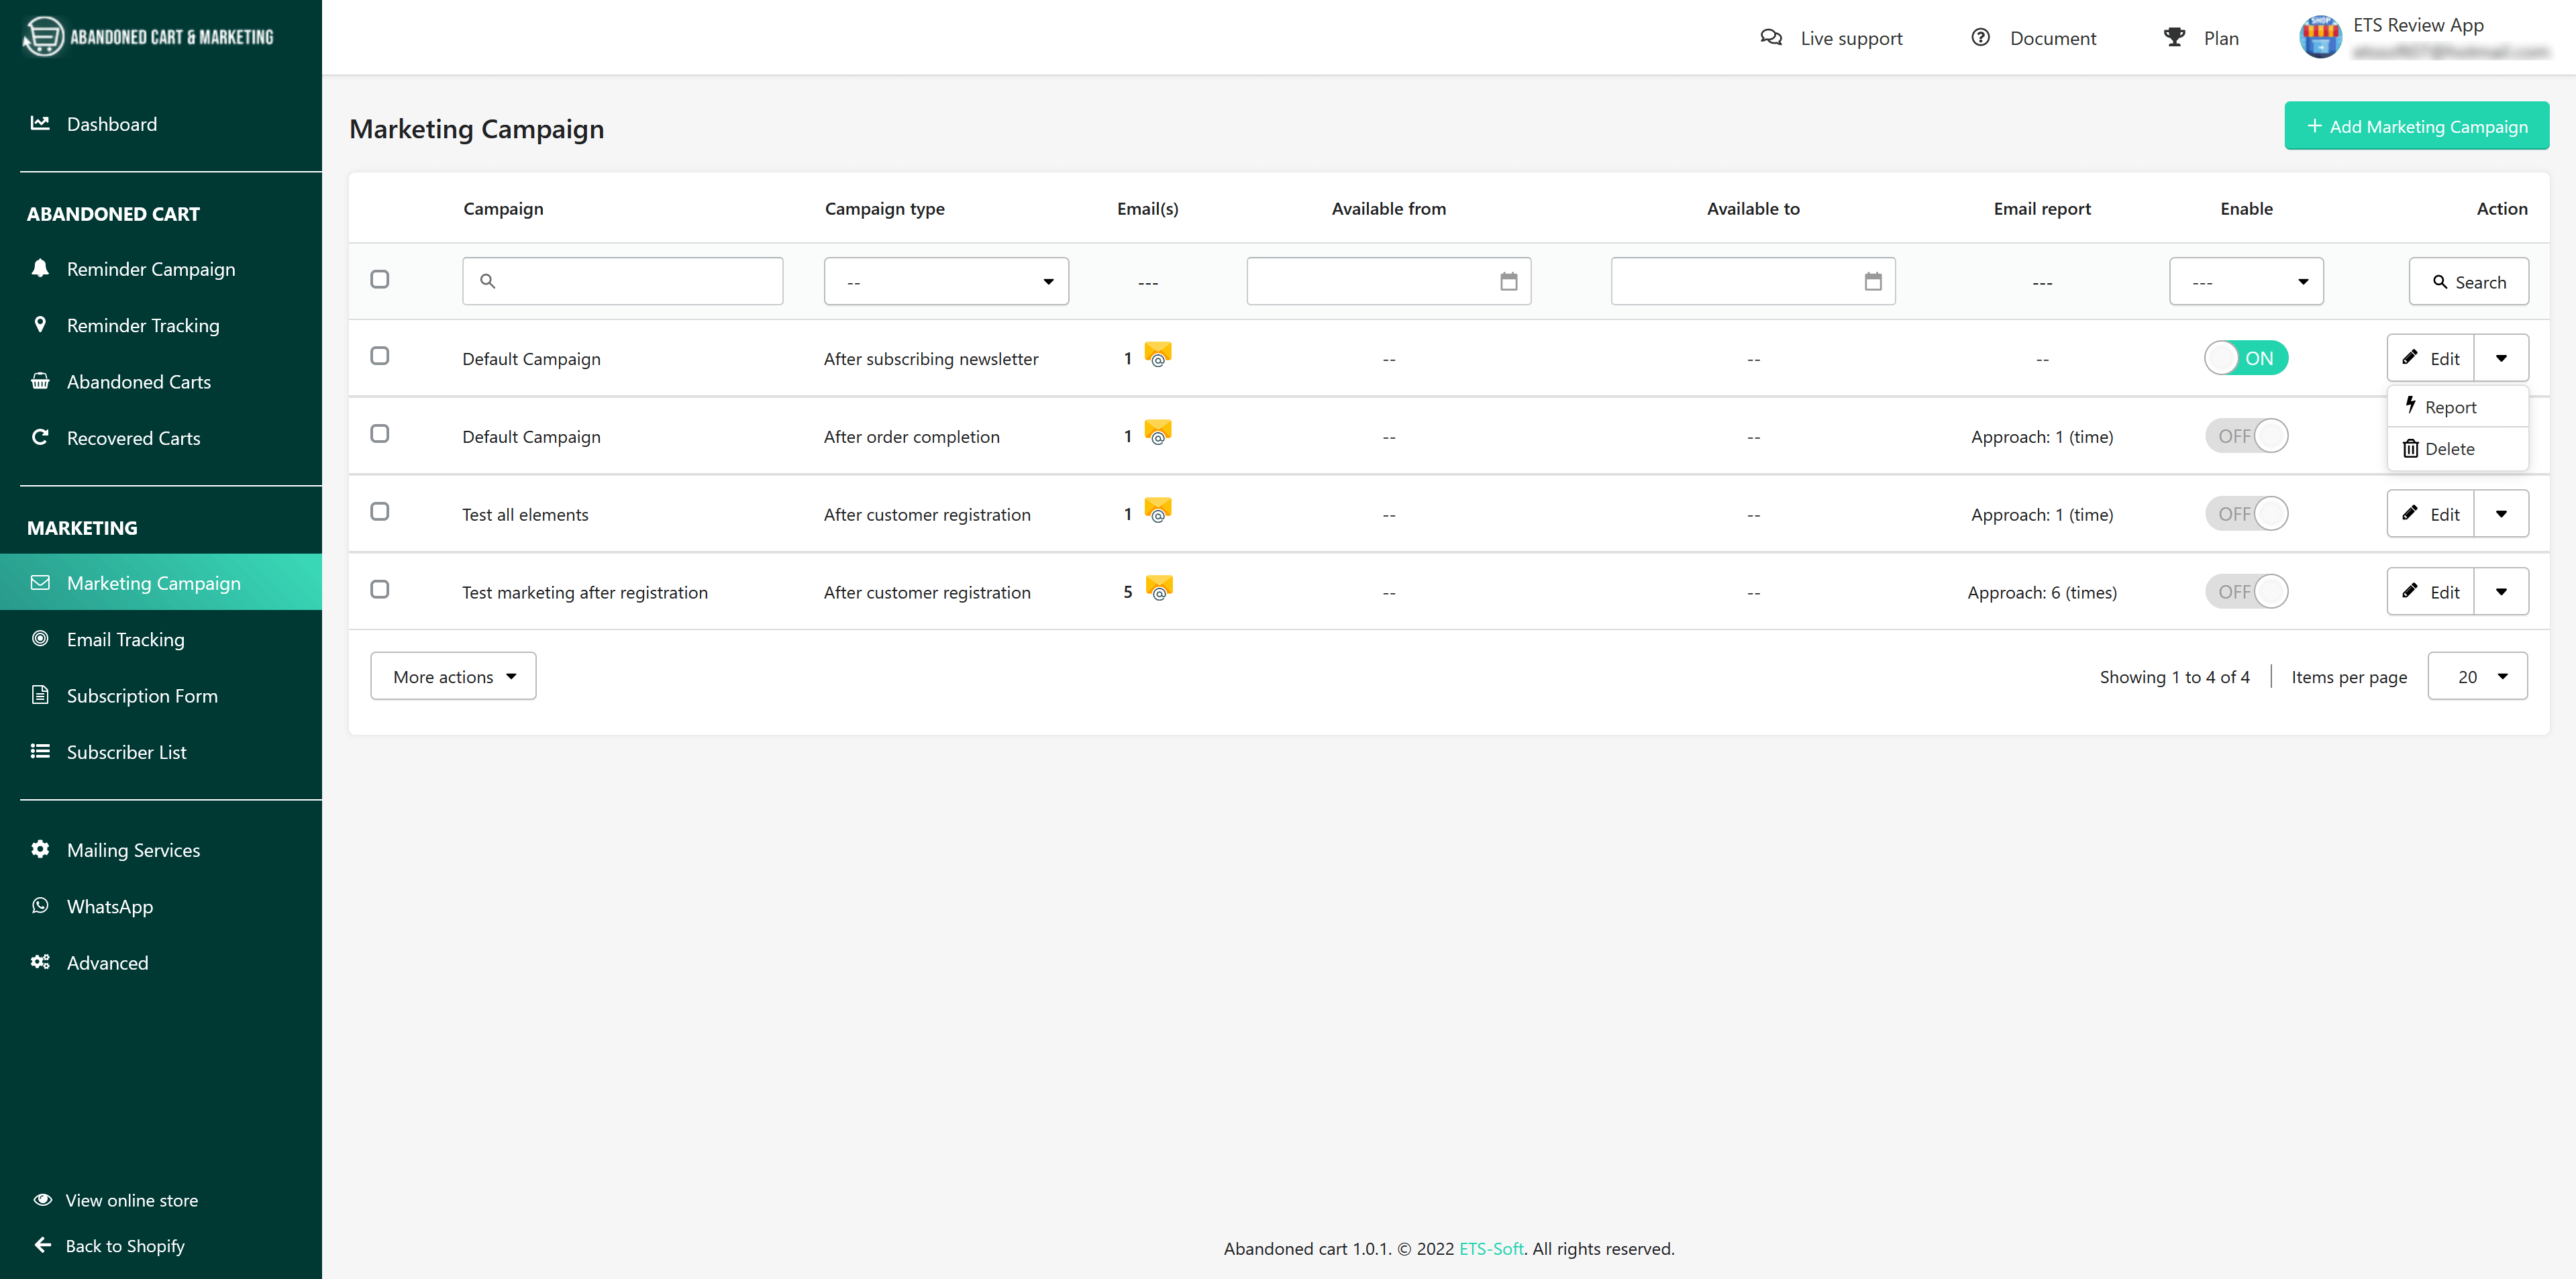
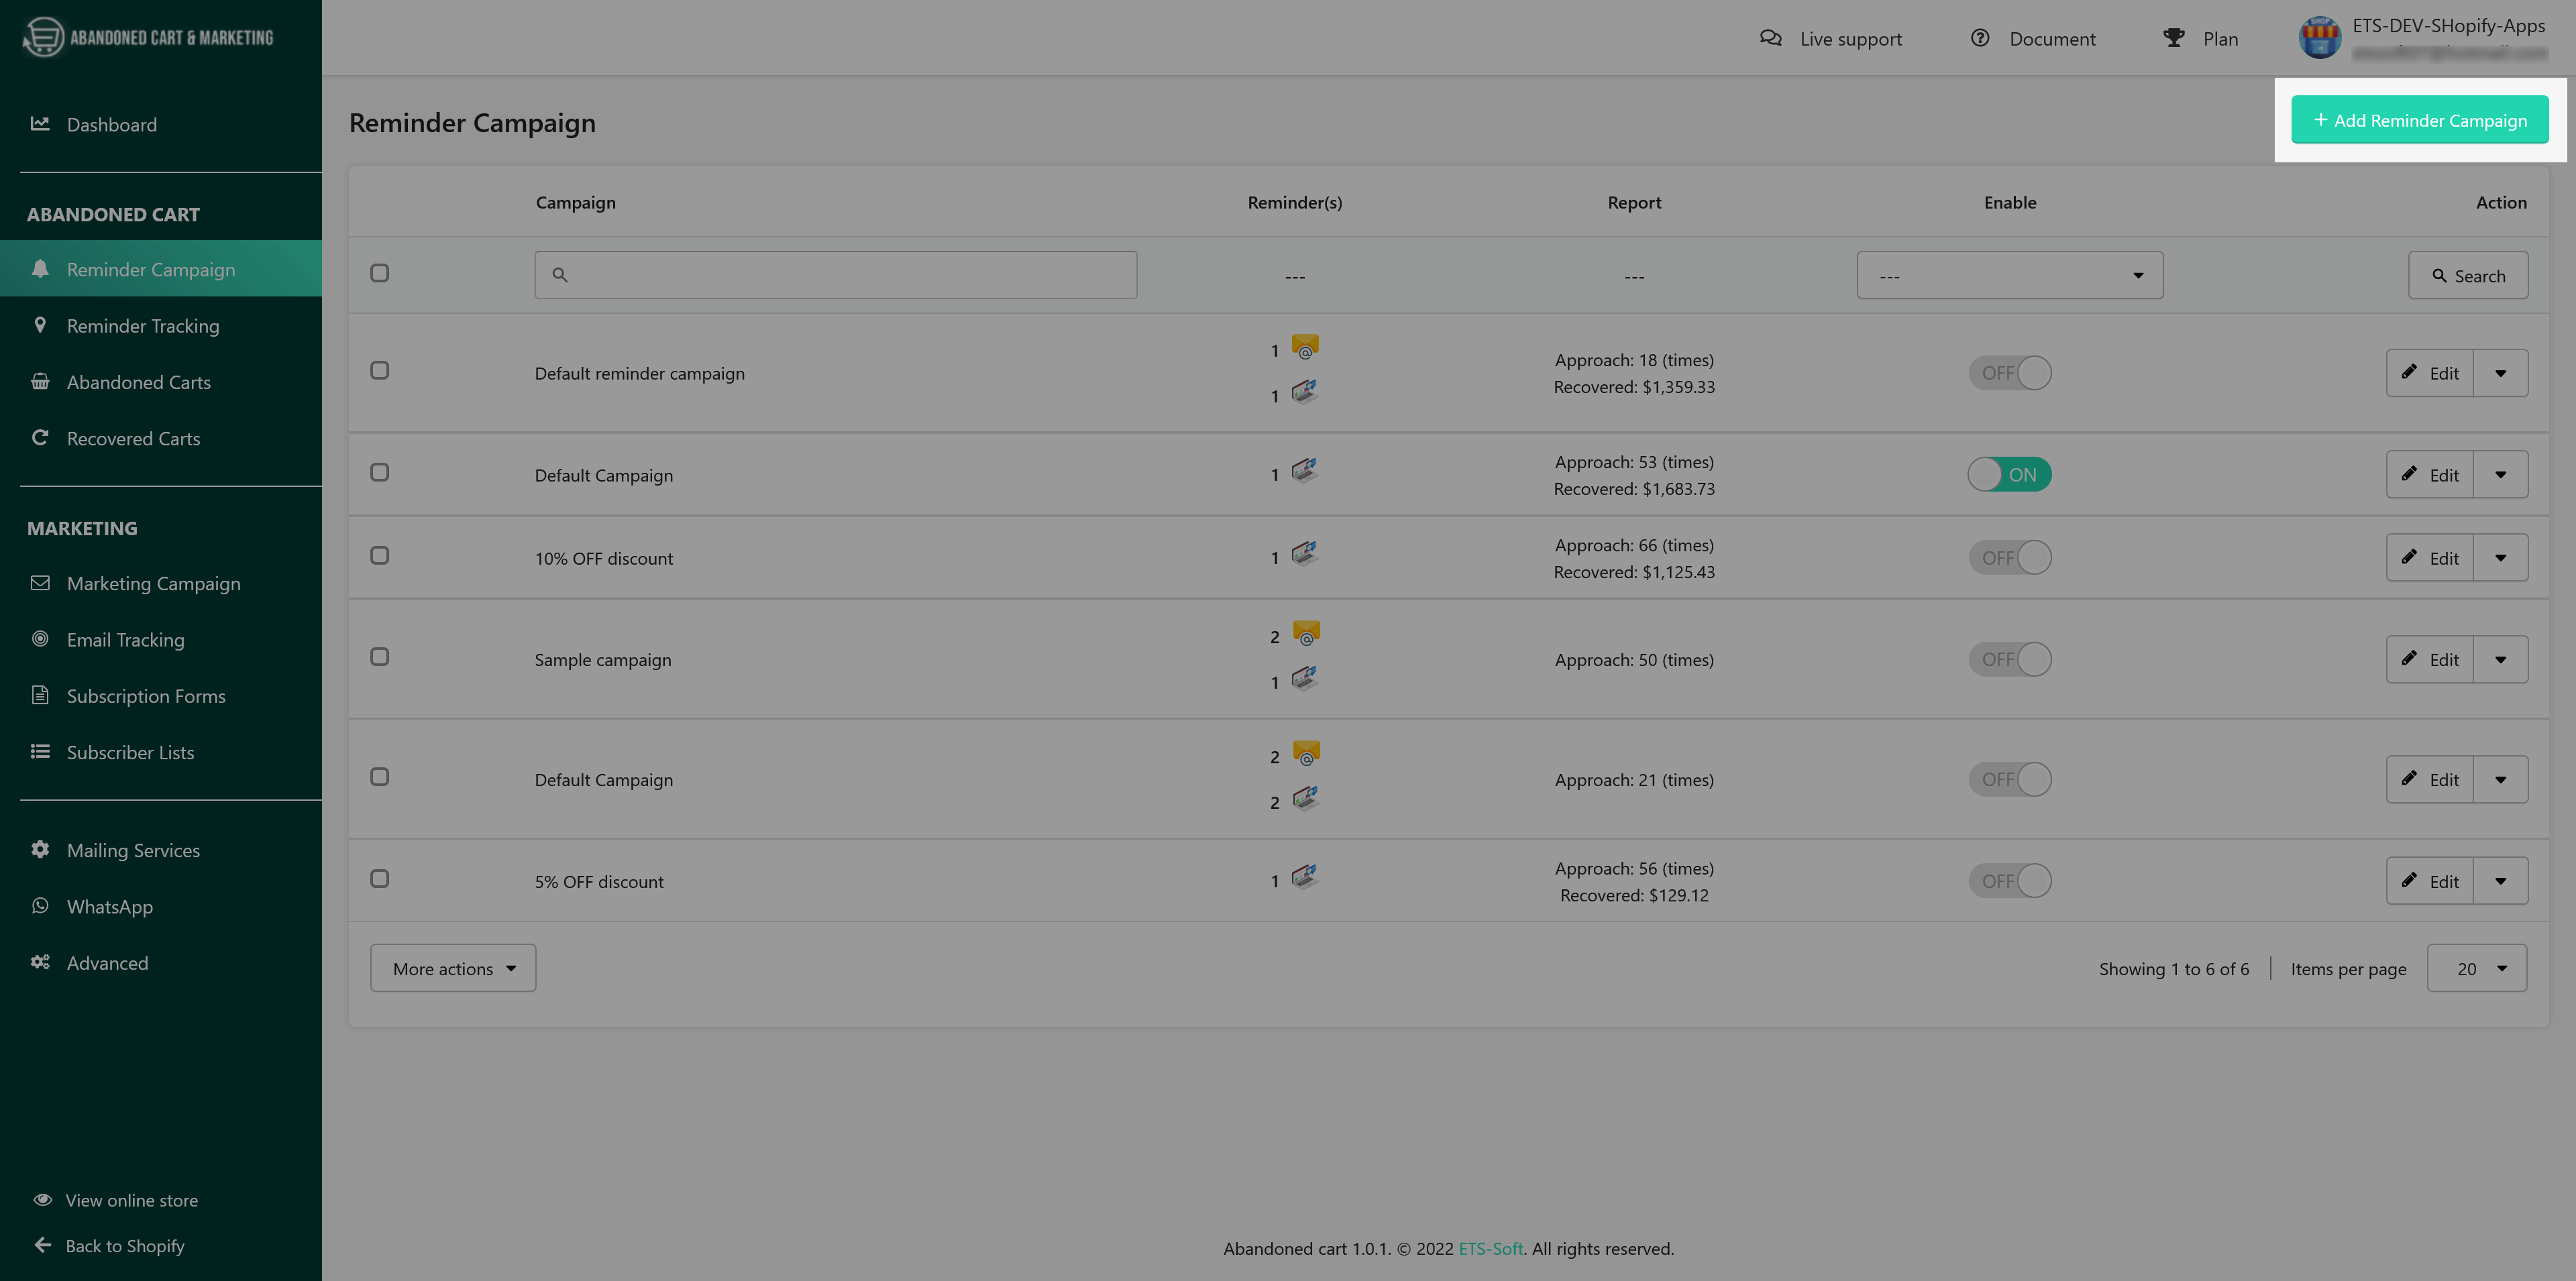
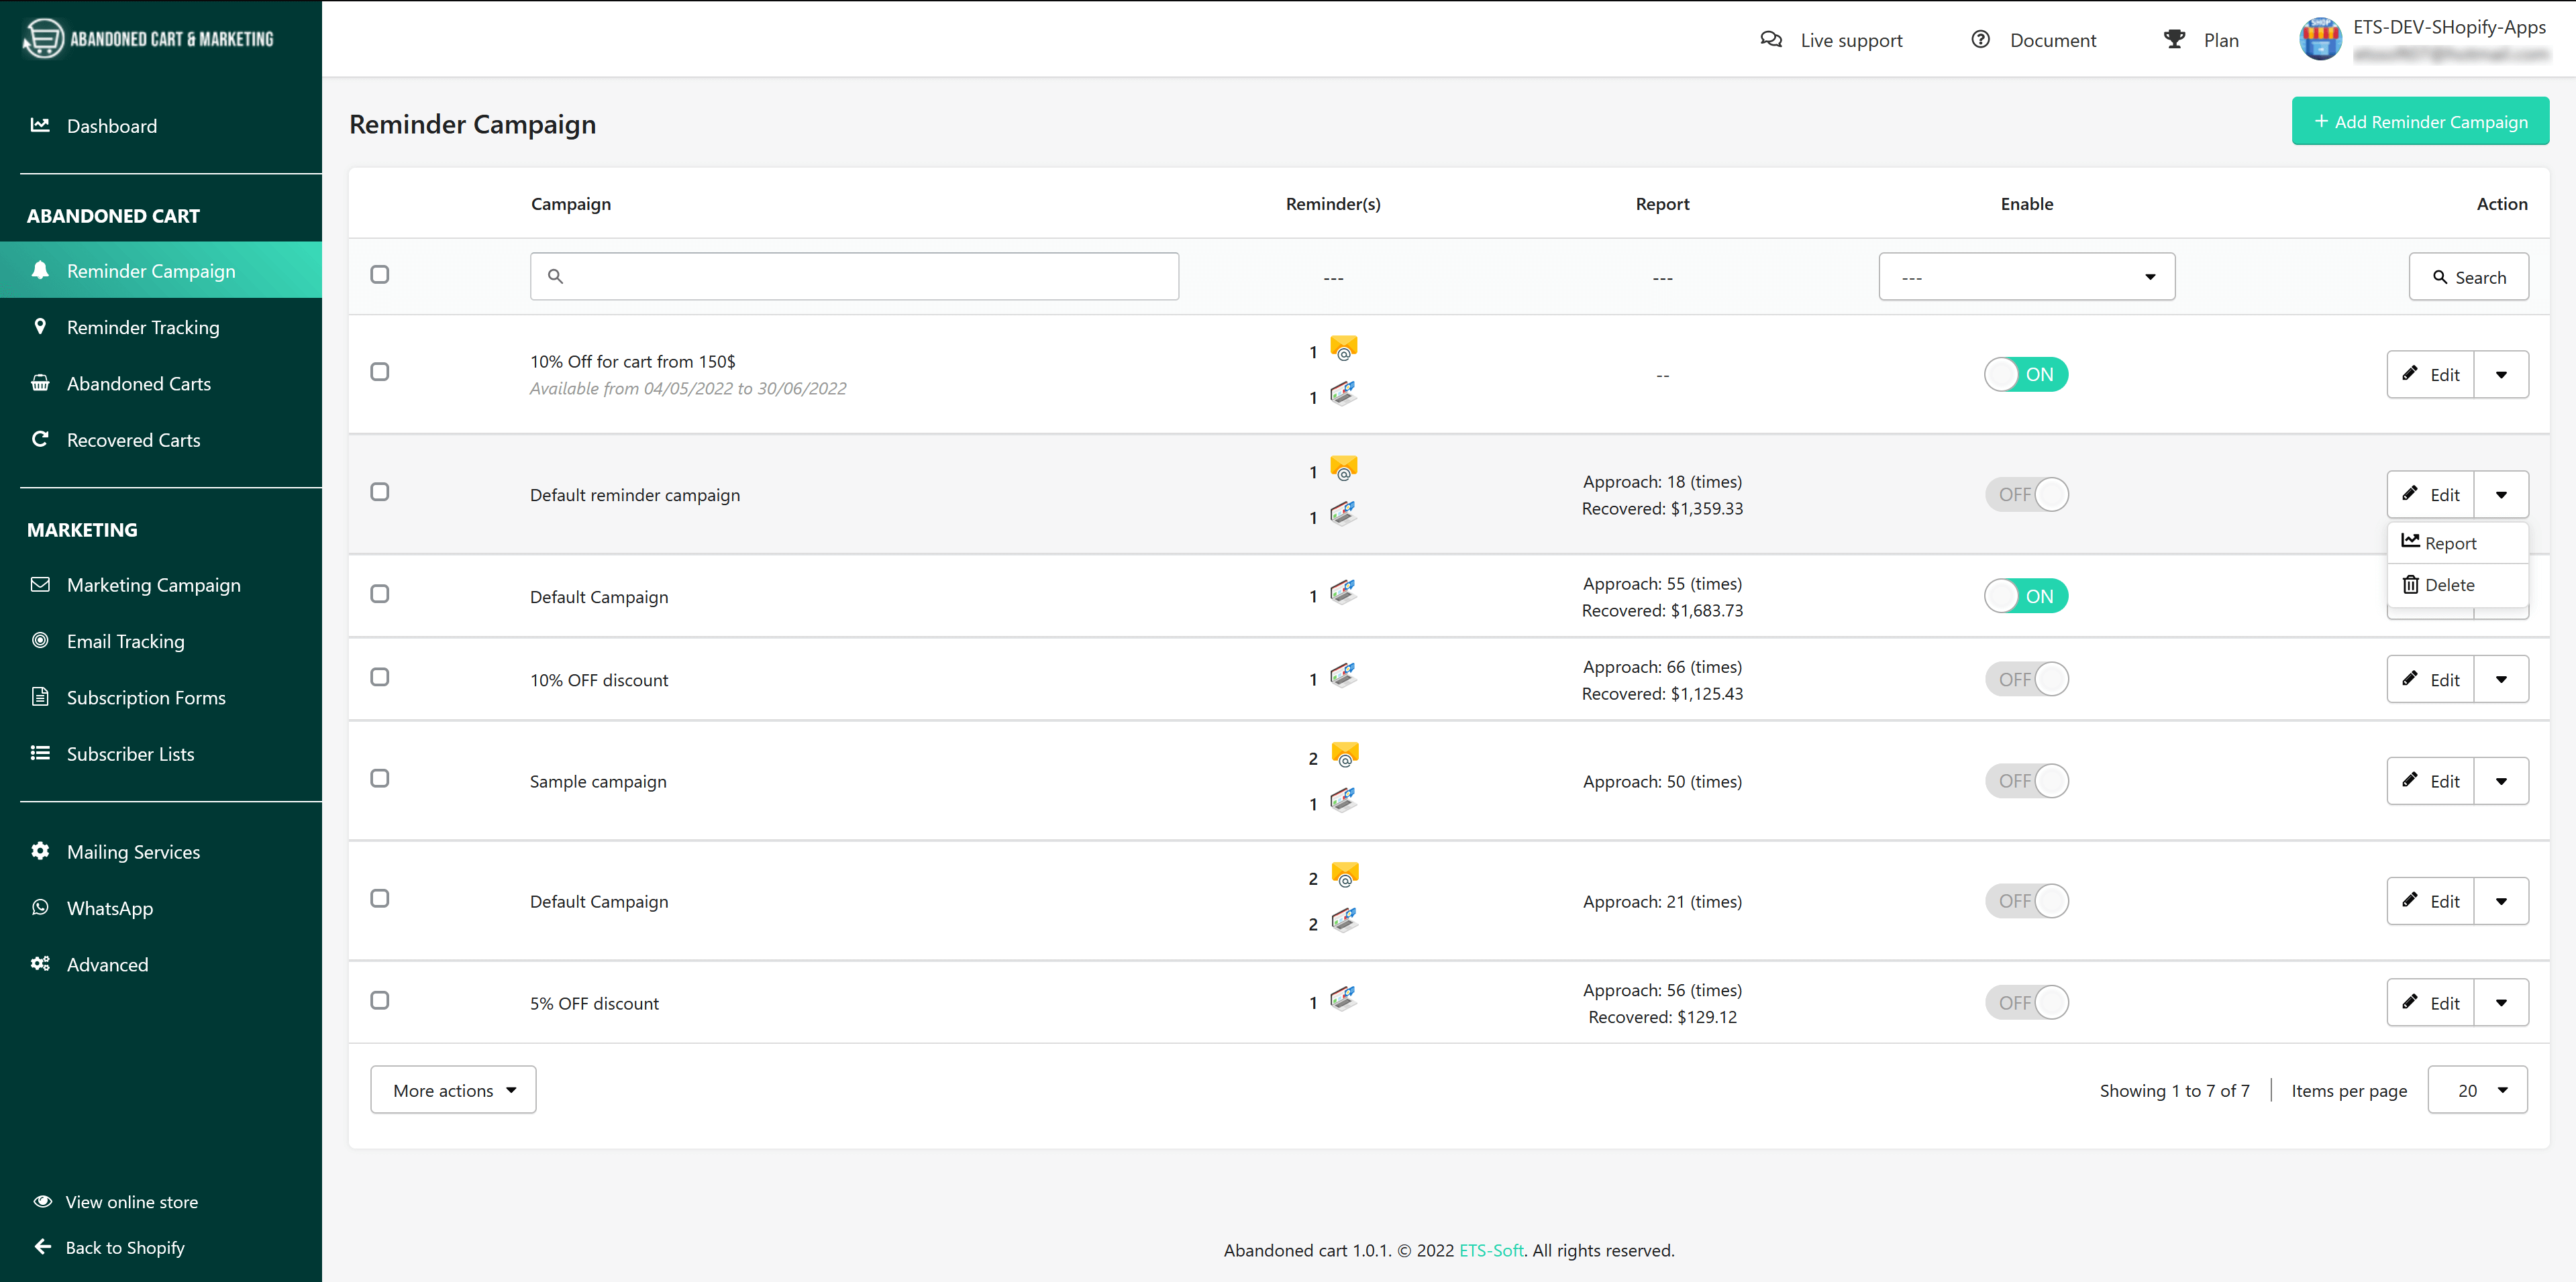
Campaign list
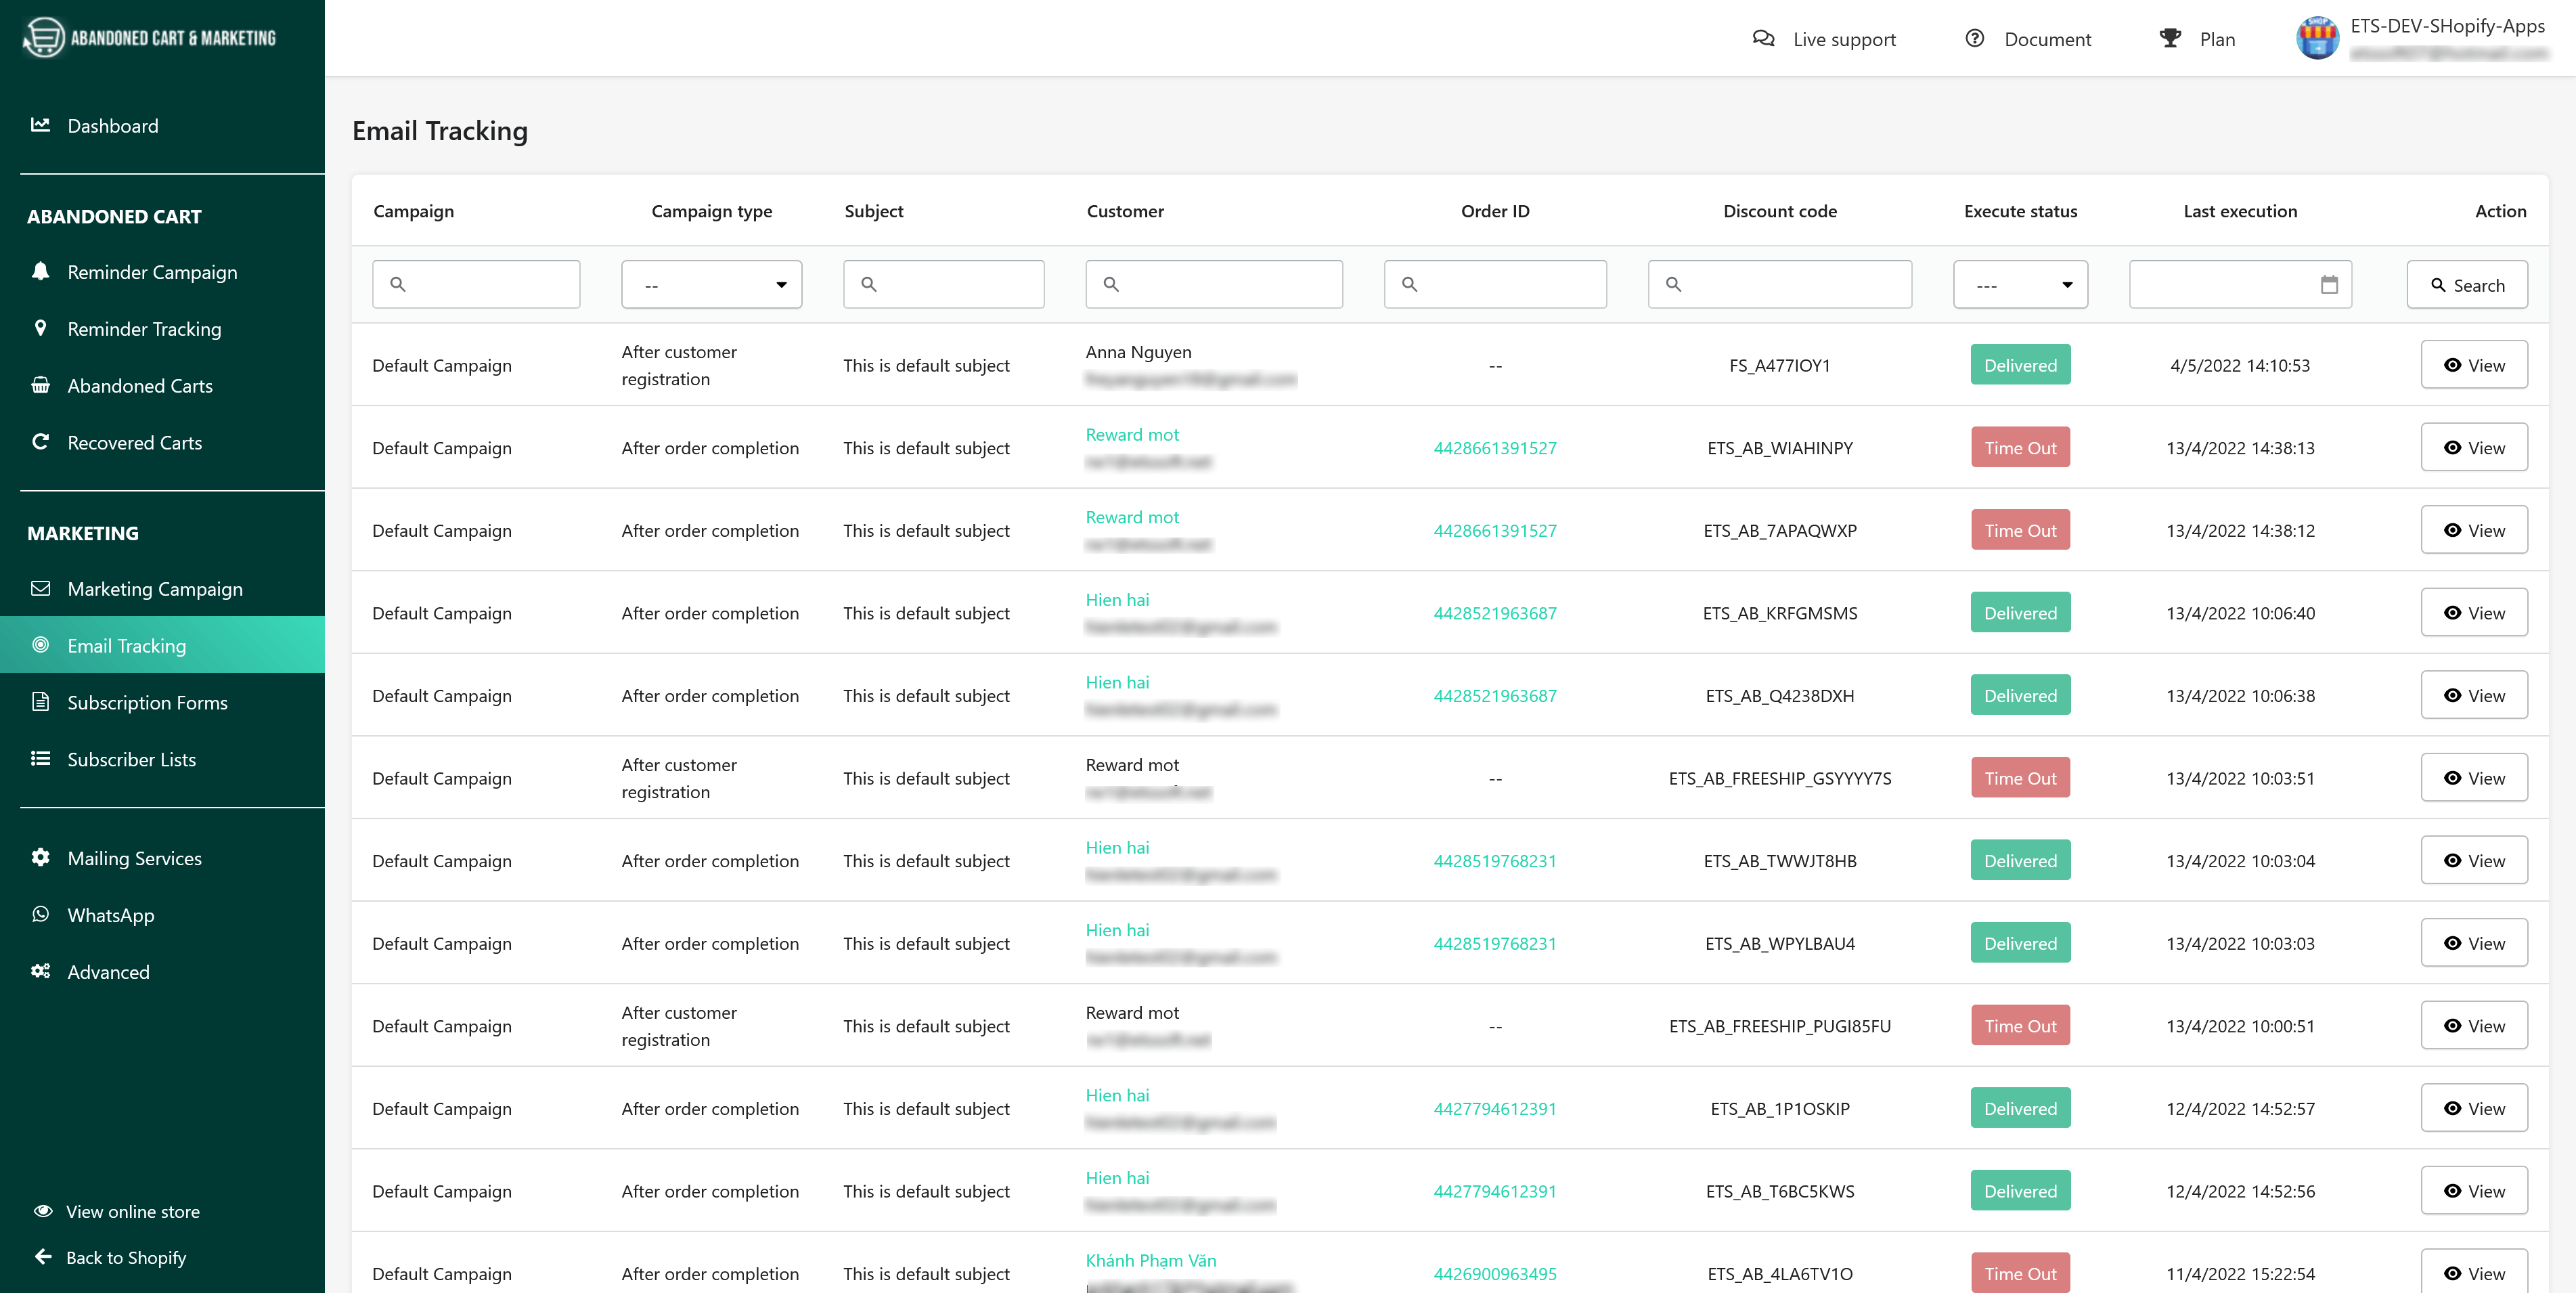
You can manage your reminder campaigns easily from the campaign list page. With each campaign, you can change status (enable/disable campaign), edit, view the report, or delete a campaign.
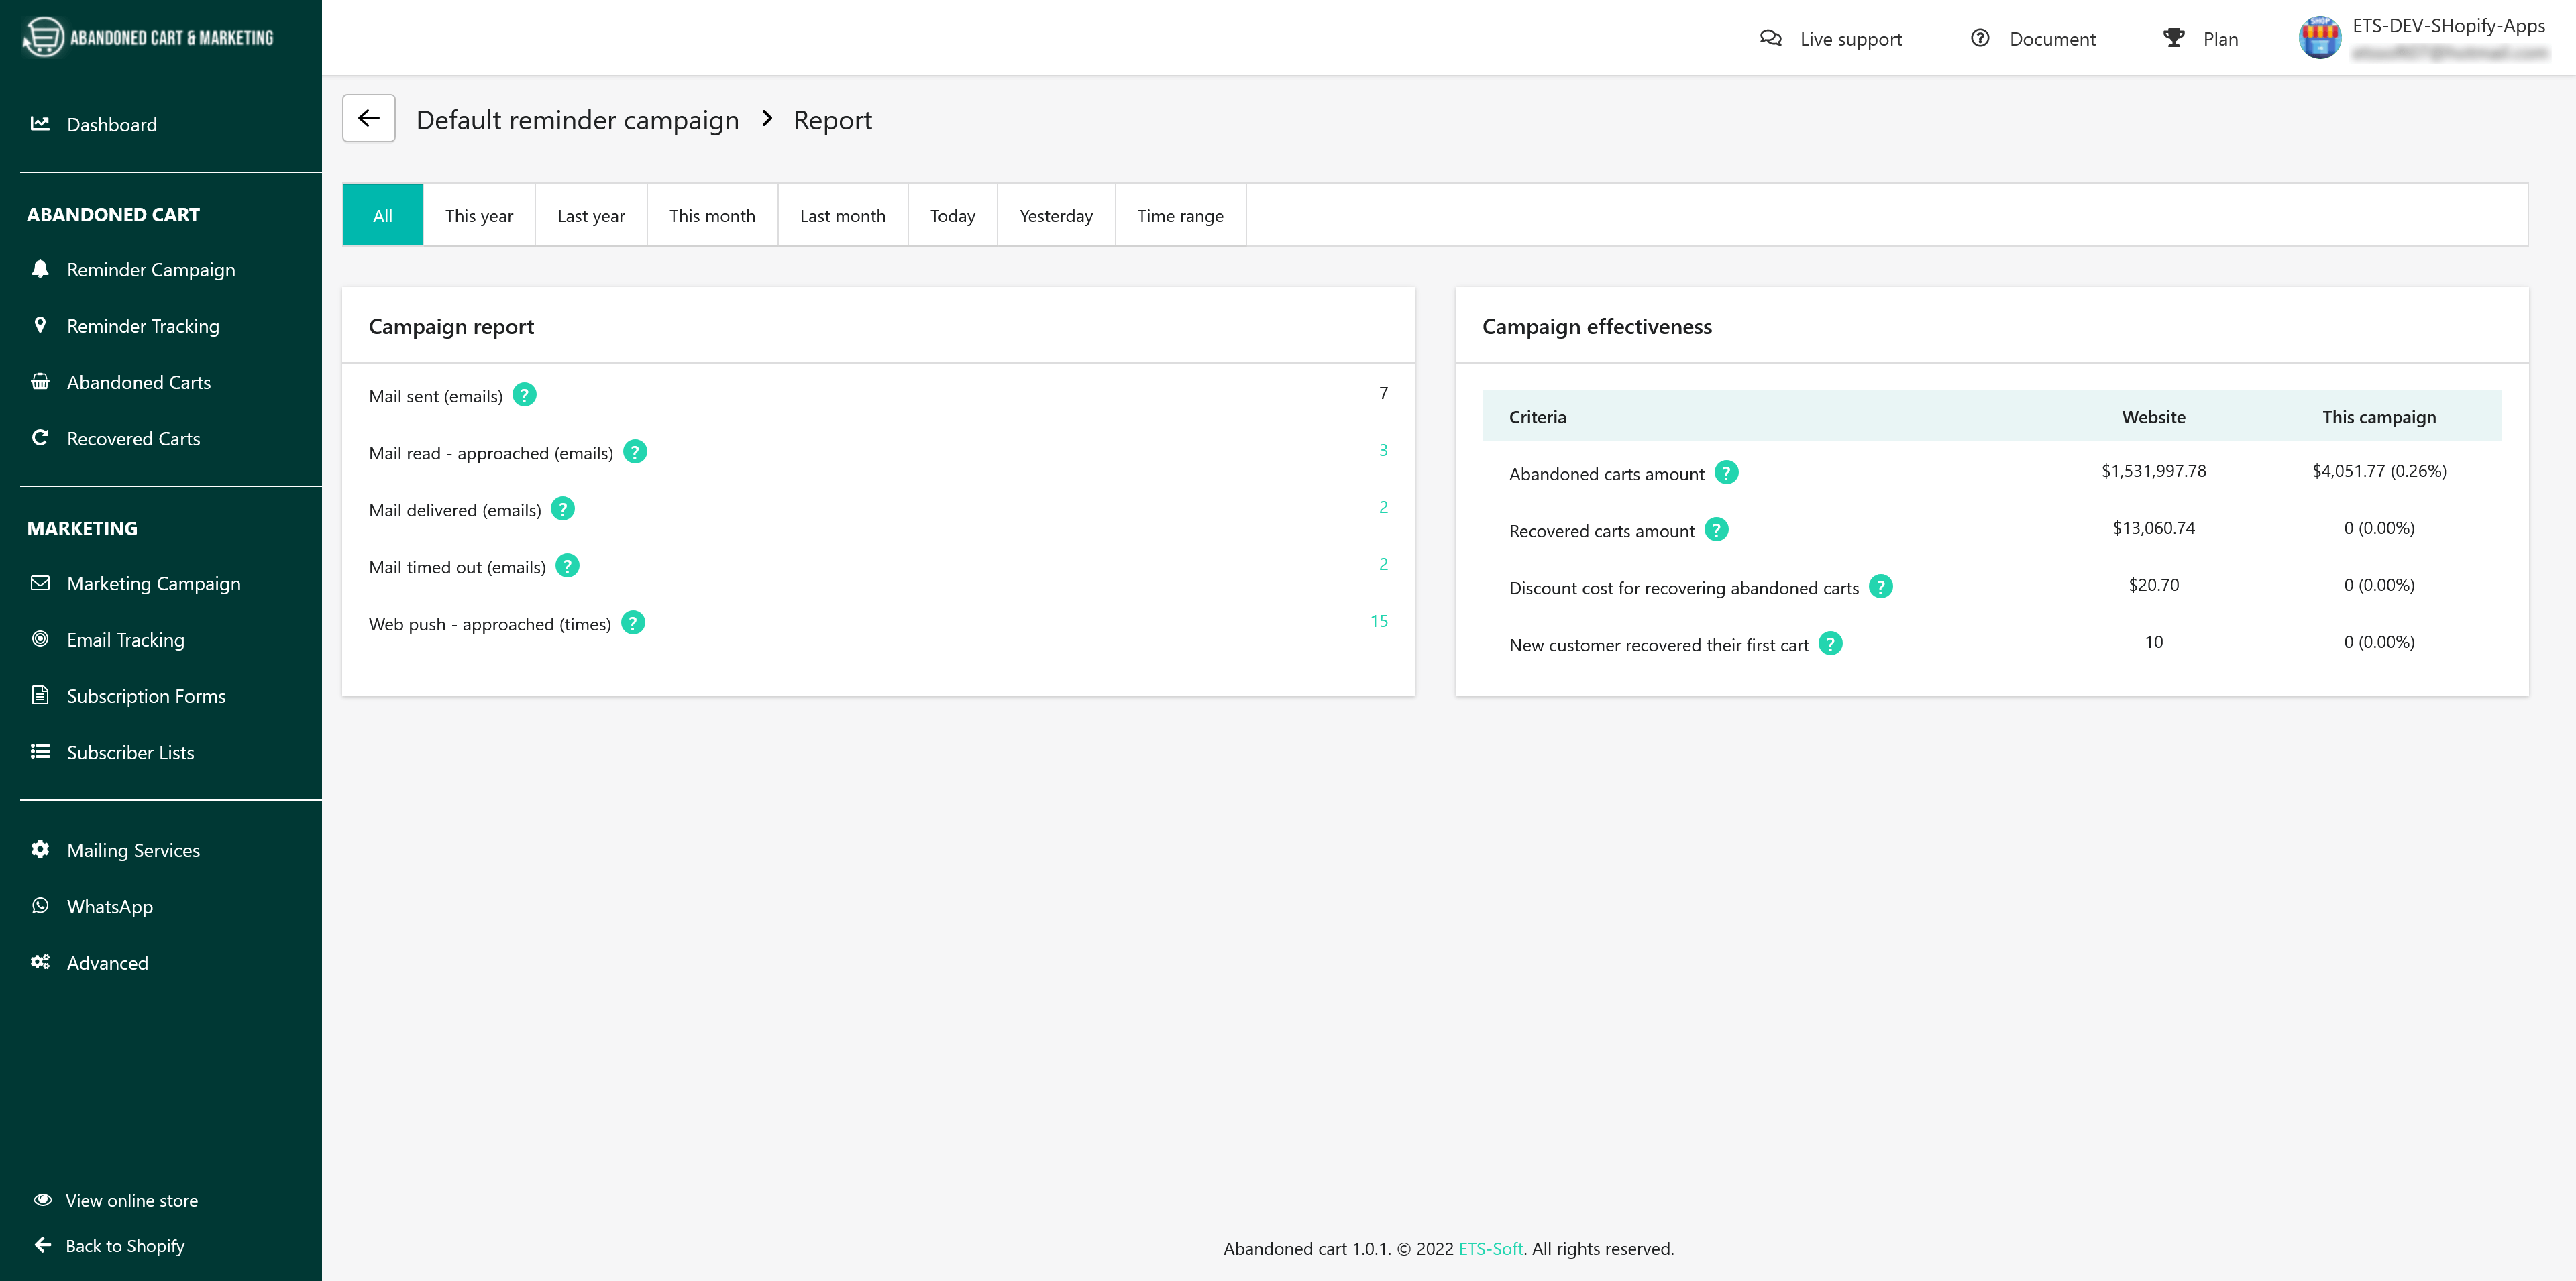
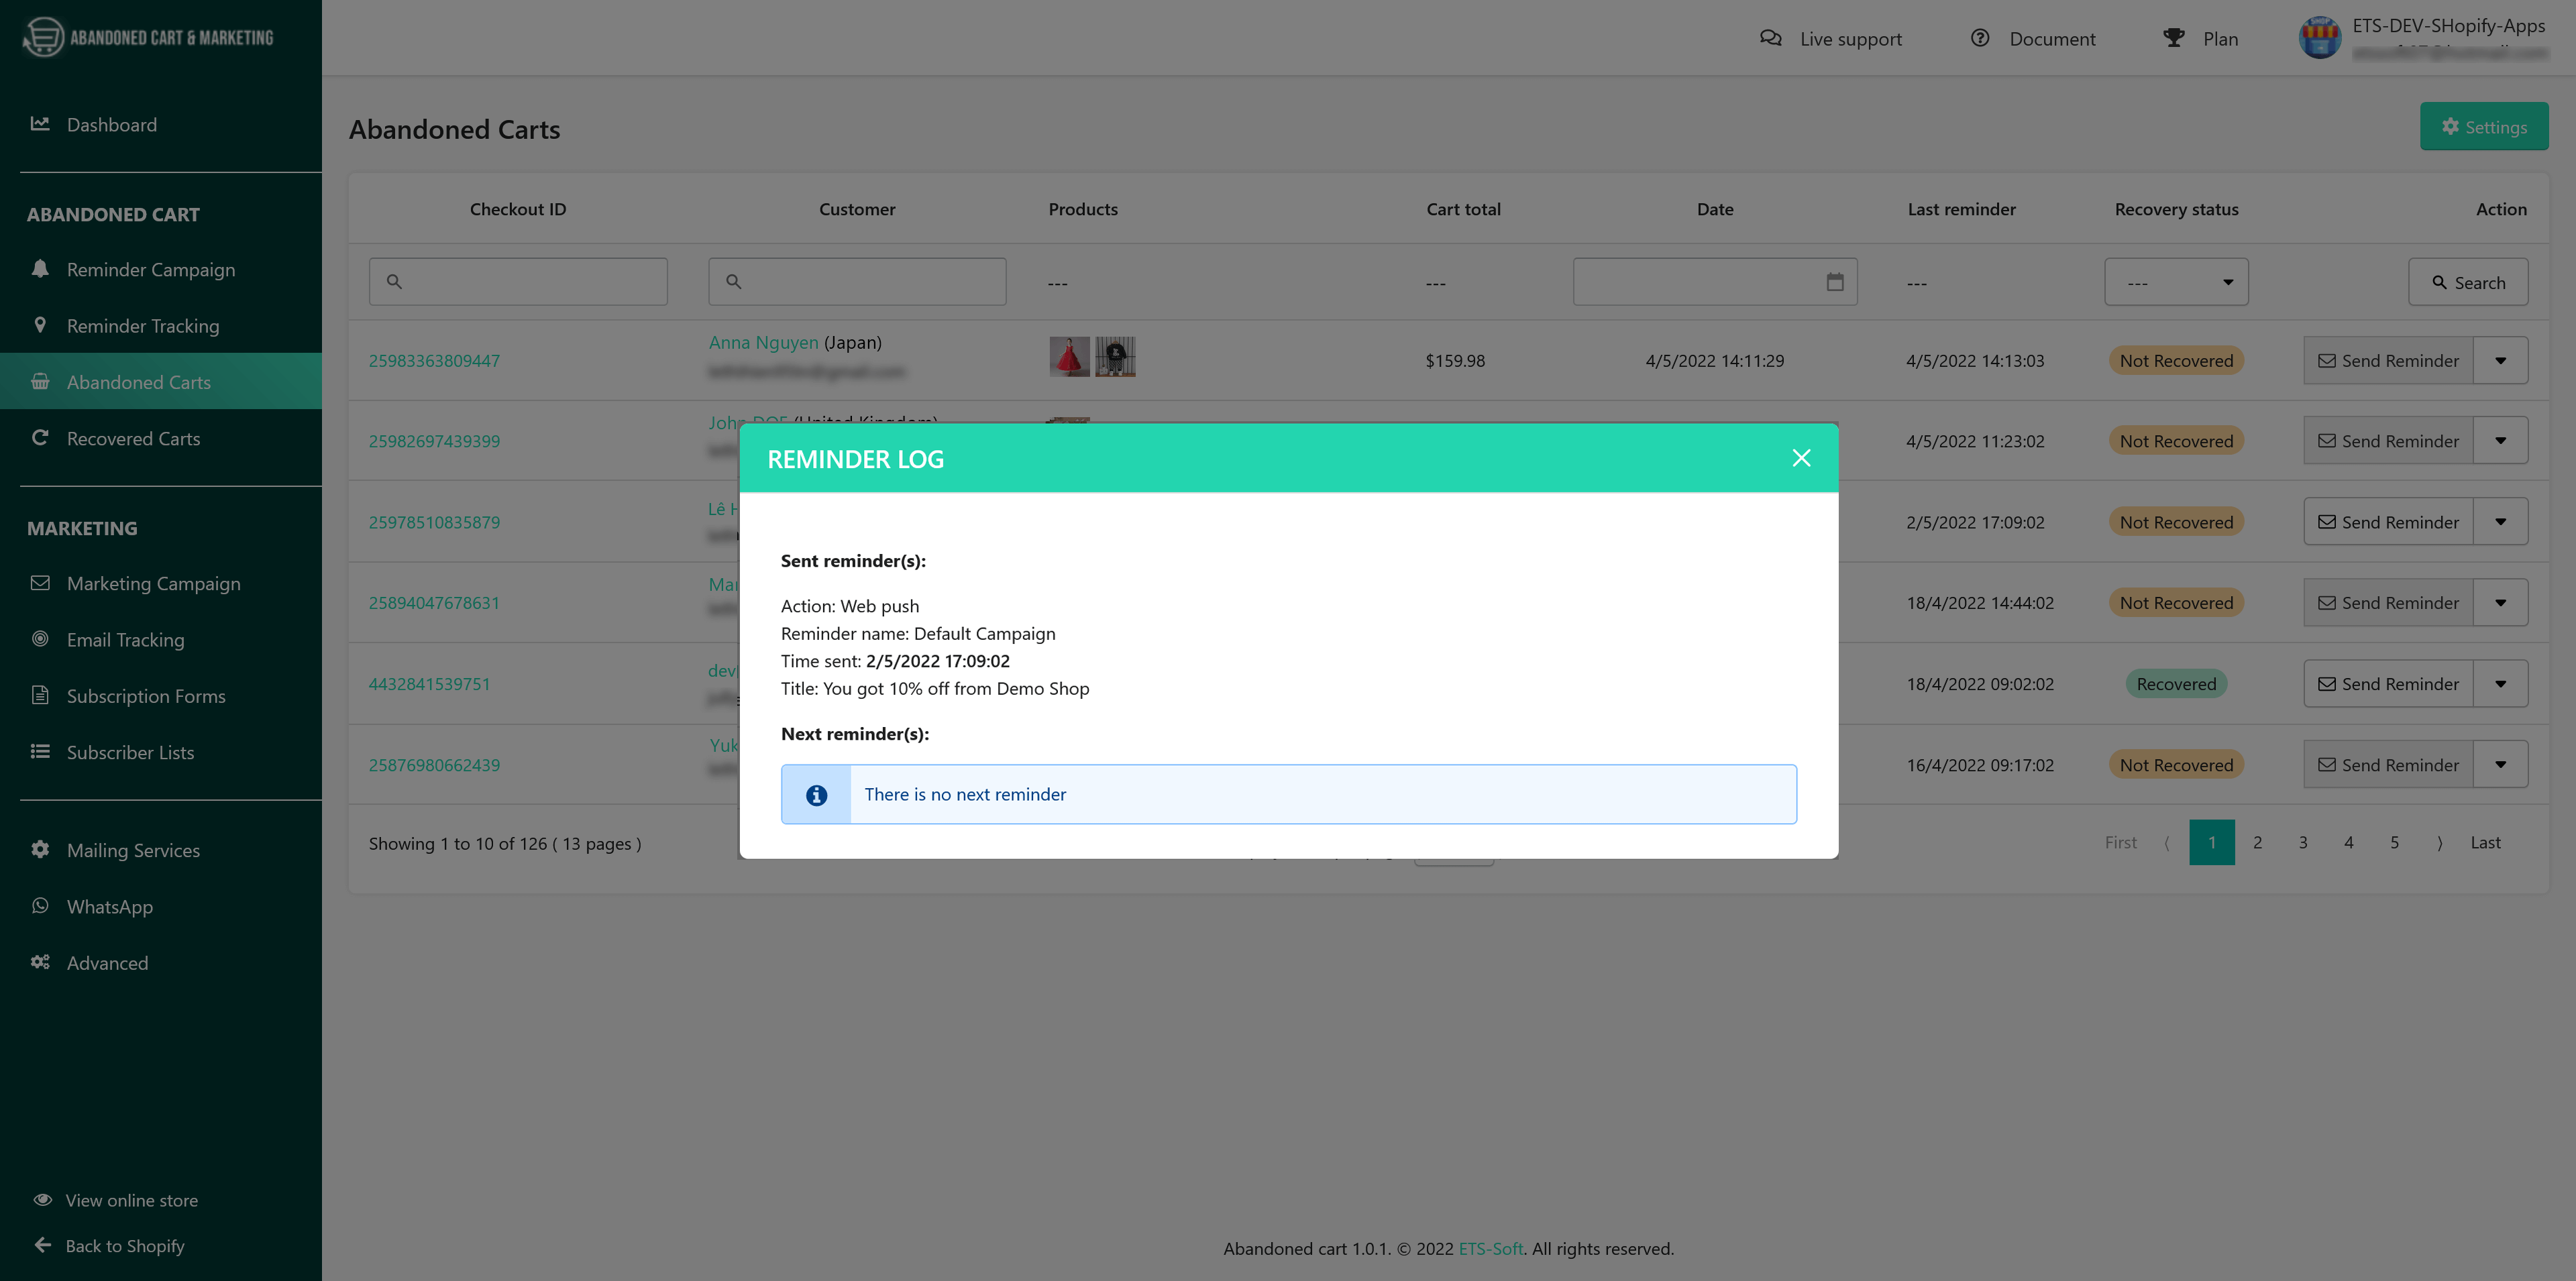
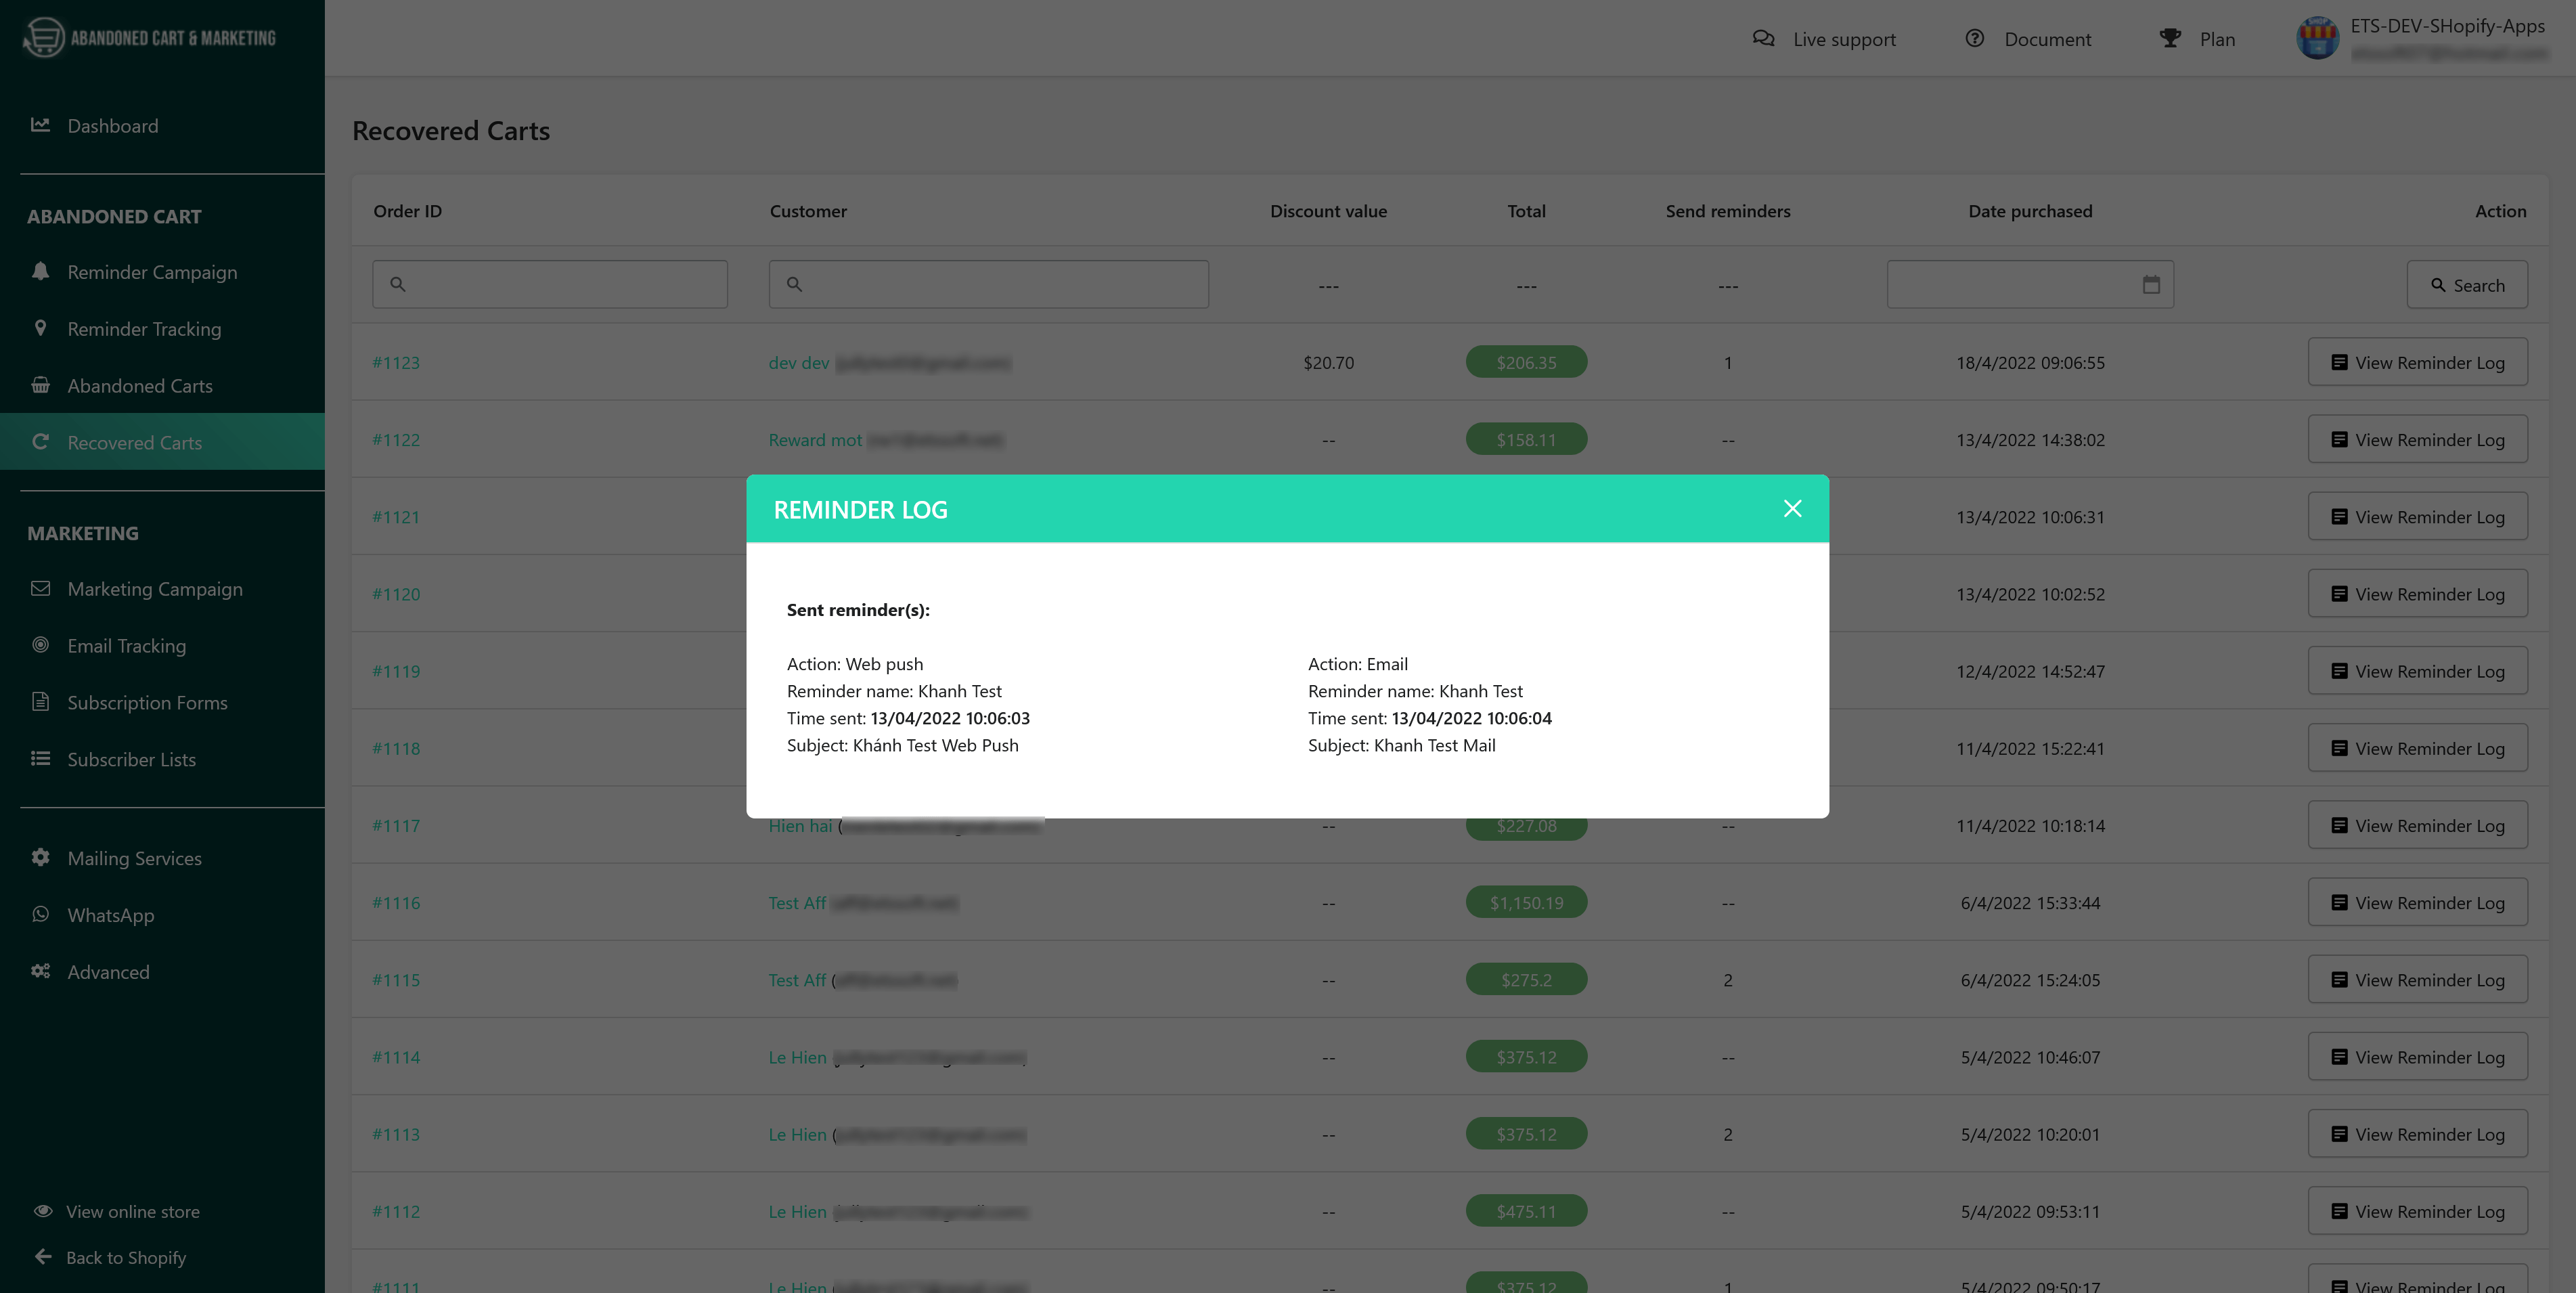
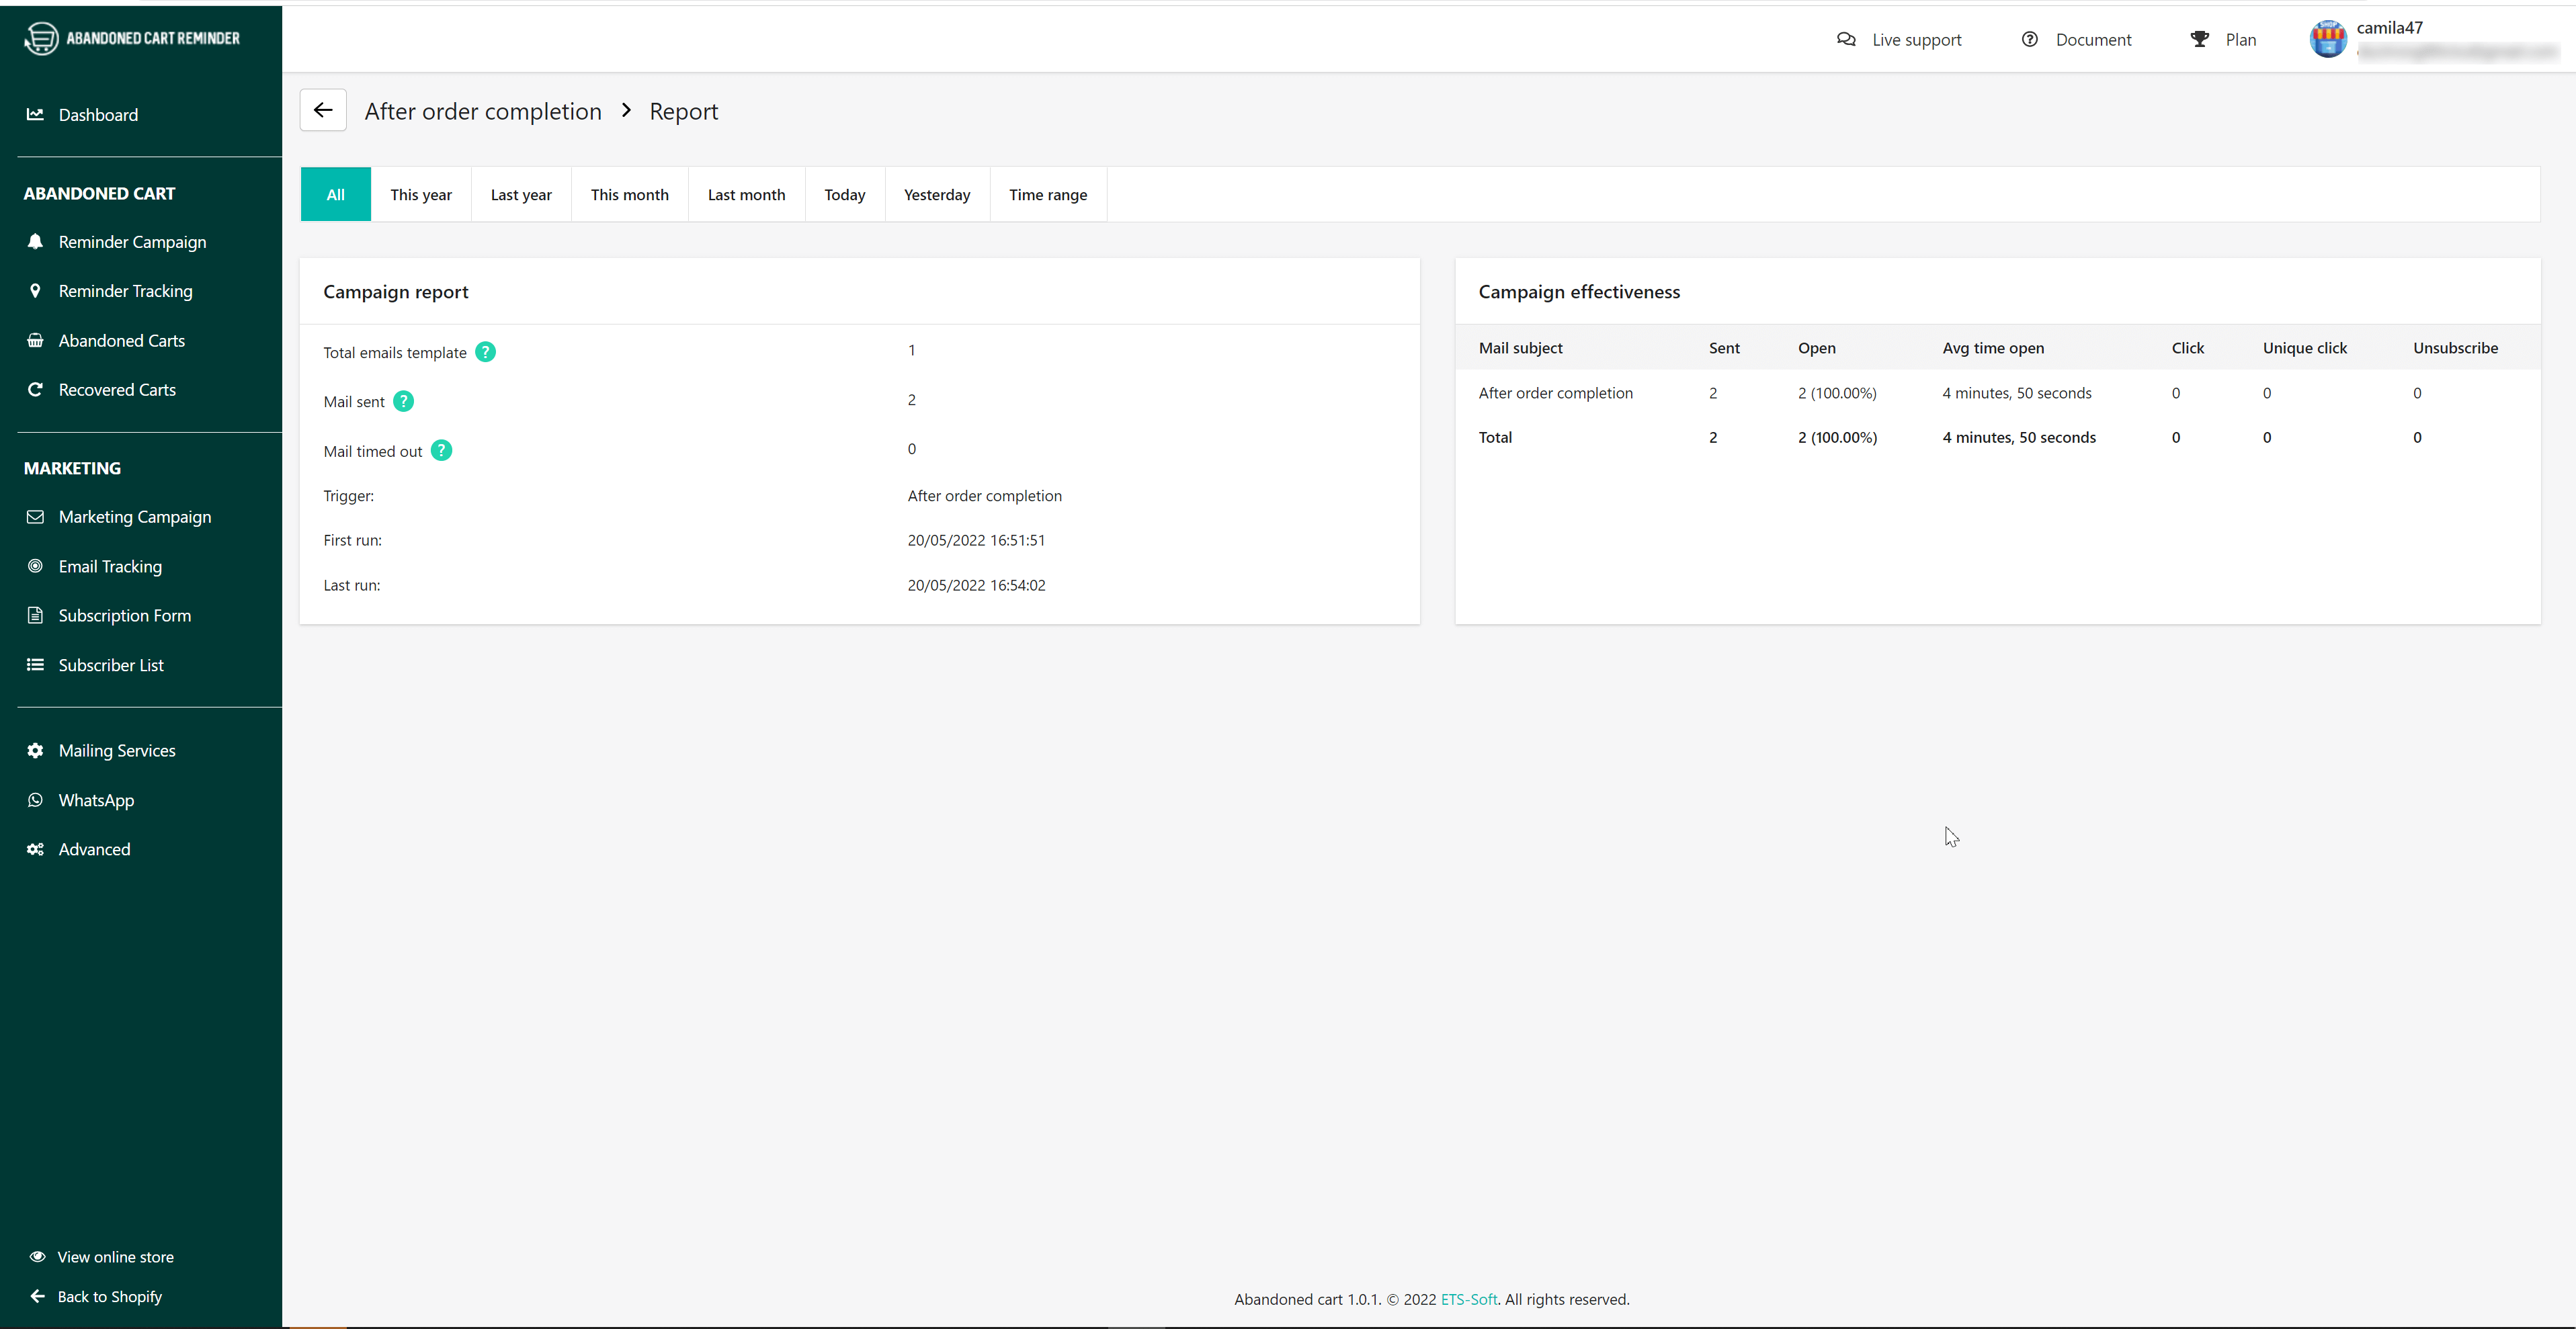
This is a sample report of a reminder campaign: