Welcome to Contact Form Ultimate app

Contact Form Ultimate is an innovative contact form builder module for Shopify. This app supports various form types (Customer contact form, customer survey form, recruitment form, product form, etc.) to help you create unlimited contact forms without writing any code.

Contact Form Ultimate allows you to make any type of form, supports all the necessary input fields for you easy to customize, and is also easy to manage. Thereby, approach customers and understand them better, increase conversion rate and sales.

Within this document, we will describe the installation, creation, and setting up of the Contact Form Ultimate app process.

We did our greatest to create this manual info to be presented in a very straightforward, simple manner. But if you have any questions that are beyond the scope of this documentation, please feel free to contact us via our email address: [email protected]

Install Contact Form Ultimate app

Step 1: Navigate to the Contact Form Ultimate app in the Shopify App Store by clicking on this link: https://apps.shopify.com/contact-form-ultimate.

Step 2: Click on “Add app” button >> Log in to your Shopify store and authorize the app in your Shopify admin.

Step 3: And you’re ready! Your newly installed app will appear in the Apps section of your Shopify Admin.

Create a new contact form

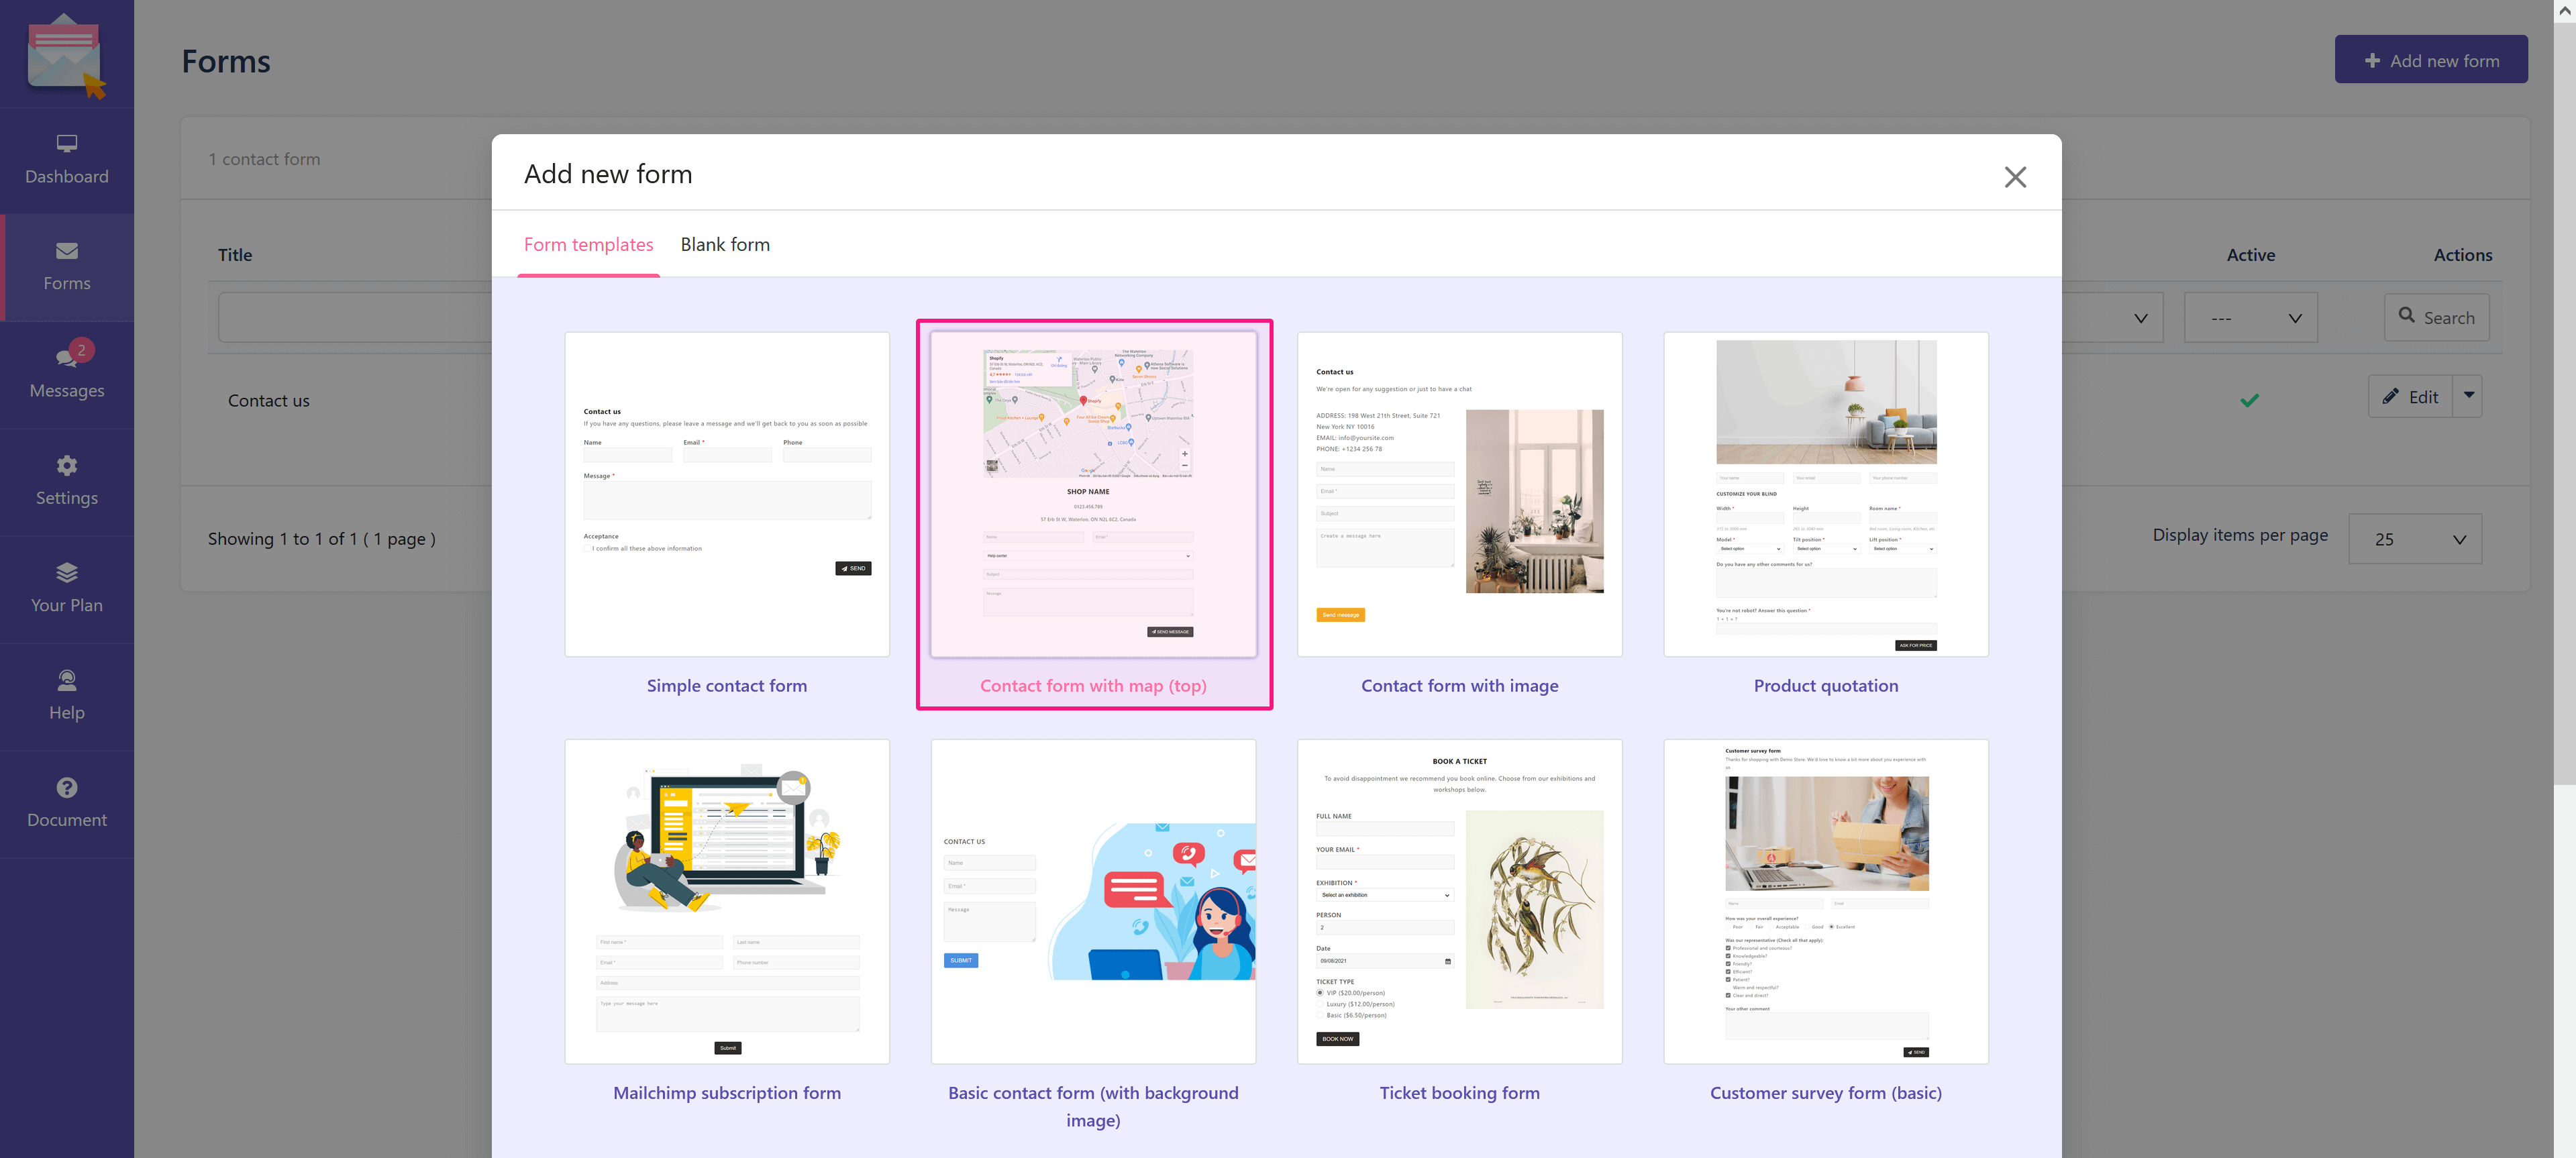
Click on “Form” tab at the sidebar to navigate to “Contact forms” tab. Click on the “Add Contact Form” icon at the top right corner of the page to open “Add new form” popup.

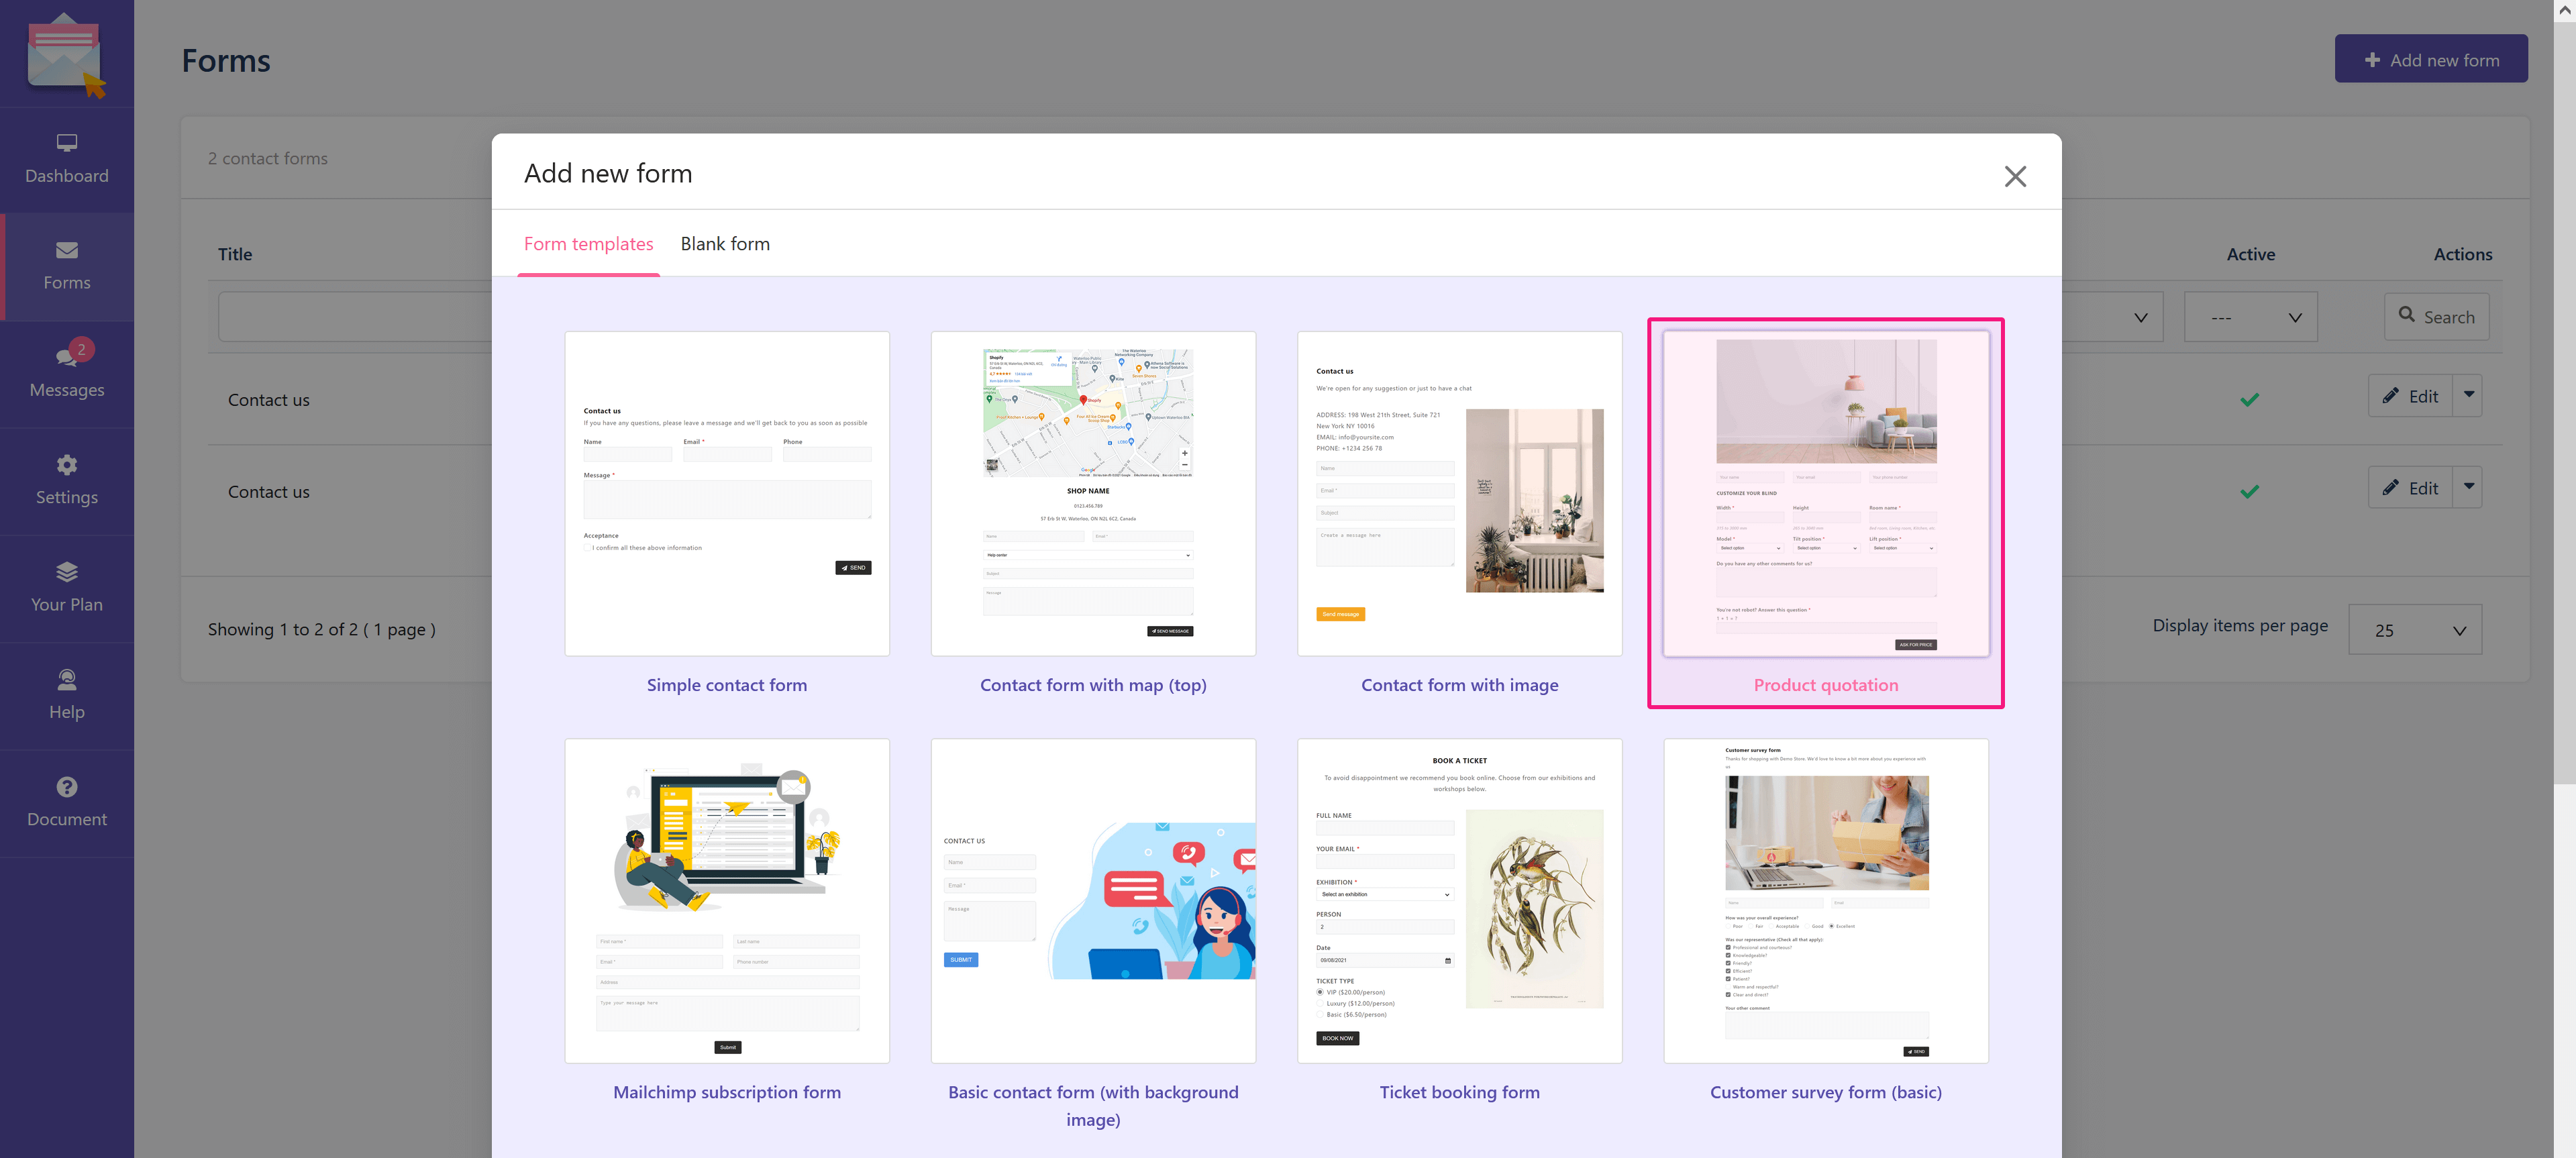
On the “Add new form” popup, you can select “Form templates” tab or “Blank form” tab.

  • “Form templates” tab provides 16 types of pre-made contact forms, which are very eye-catching and convenient, you just need to choose the form type that suits your needs.

  • “Blank form”: the app supports 4 blank form types: Basic contact form, Multiple steps form, Floating button form, and Contact form popup. Let create a new “Basic contact form” for example.

Step 1: Form Builder

(1) Click on the button “Add new row to create your contact form”.

(2) On the “Add row” popup, there are 9 types of rows with different numbers and widths of columns. Depending on your purpose/idea, select the type of row you want.

(3) Add an input field.

  • Click on “Add input field” link to open the “Input fields” sidebar.

  • Select an input field you want (text, text area, email, password, phone, URL, number, date, file, drop-down selection, checkboxes, radio buttons, HTML, quiz, acceptance, reCAPTCHA, image, countries, rating).
  • You can delete, duplicate or edit the input field as you wish.
  • Add rows and input fields until you complete your contact form.
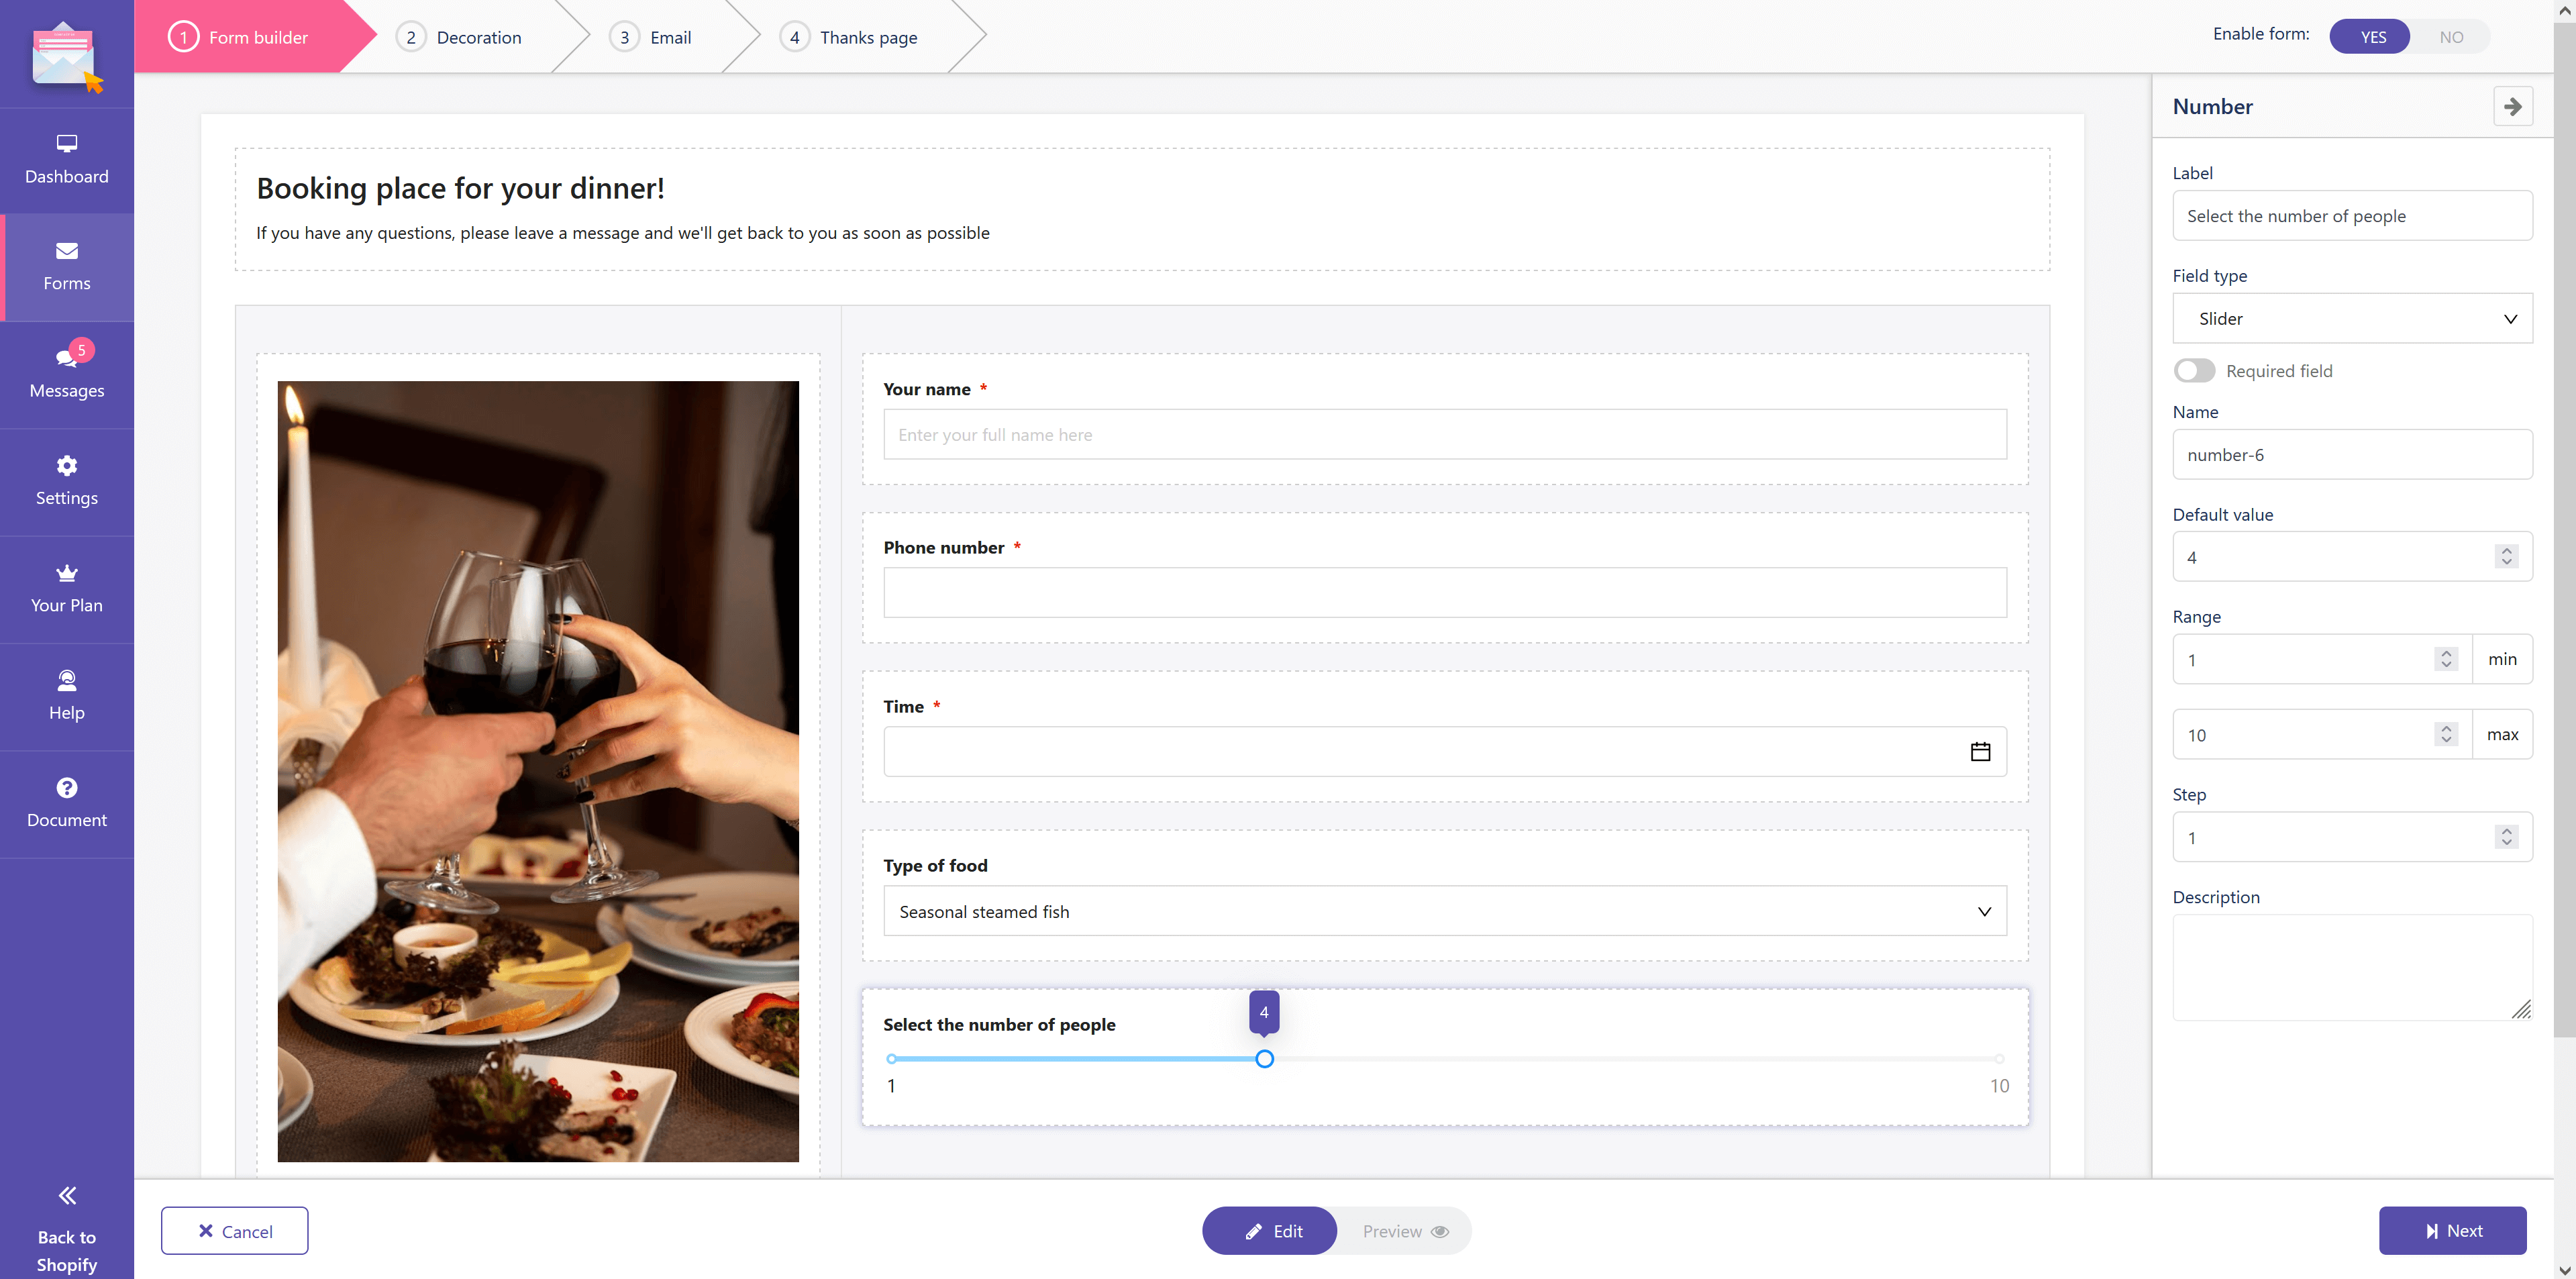
  • Click “Next” to move to the next step.

NOTE:

To add the reCAPTCHA input field, you need to enable reCAPTCHA first. Find and read the instruction to activate reCAPTCHA feature on Settings page of this documentation.

When your contact form is spammed, this app may delete spam data/messages. Therefore, we recommend you use reCAPTCHA for all contact forms to prevent spam and increase security.


Step 2: Decoration

You will see the new contact form you have just created at the center and its setting sections on the right.

You can set up and freely customize each element in the form such as colors, form width, form padding, upload background image, choose the position for submit button, etc.

Click “Next” to move to the next step when you finish decorating.

Step 3: Email settings

Contact Form Ultimate app supports an email system sent to both customers and admin.

1. Email sends to the customer:

As soon as the customer fills in a contact form and presses the submit button, an automatic confirmation email will be sent to the customer. Field content such as subject, message body can be edited.

You can see 2 sections of the “Email send to customer tab”: the email options section and the “Field values” section.

Field values” are provided from the “Name” of every input field you added. To make field values easier to remember, you should set reminiscent “Name” for input fields such as [email-customeremail], [name-customername], [text-firstname], etc.

2. Email sends to admin:

Similar to customers, you need to set up the email send to your store administrators when there is a new contact form submitted. You also can use the field values provided and paste them into any configuration fields of the “Email to admin” to get the form field value.

You can add multiple admin email addresses to receive notifications emails when there are messages from customers submitted.

3. SMTP:

There is a list of SMTP services that this app provides, you can choose the SMTP service you want to use.
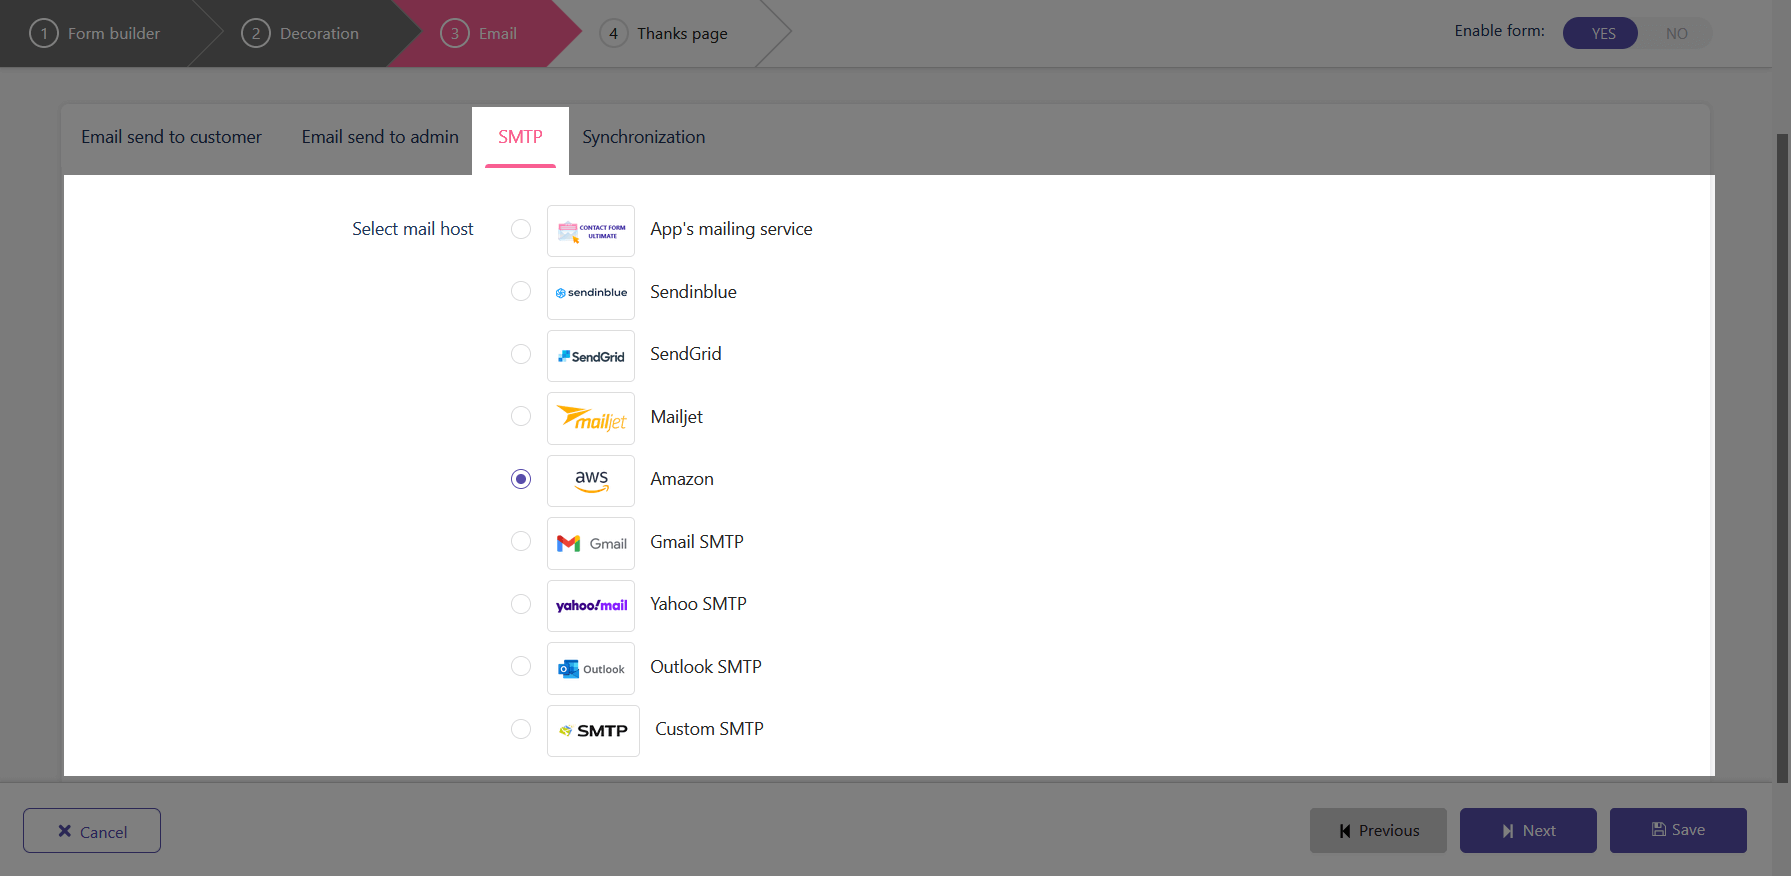
NOTE: you need to configure the SMTP service before choosing. To configure SMTP services, you need to go to the “Settings” tab. See how to configure the SMTP service in the Settings section in this documentation.


4. Synchronization:

Options allow you to synchronize data you collect through contact forms with contact data of mailing services. Enable the options with which you want to sync customer data.

Step 4: Thanks page

You can set up a “Thanks” page to send a confirmation message to customers after they submit a form. Fill ill the message content and enable the “Hide form after submission?” option if needed.

Finally, click on “Save” button to finish.

You can import contact forms into your current form list or export a specific contact form for backup purposes.

Click on “Import” button to upload a .json file including your contact form.

How to display contact form on the store front

Examples:

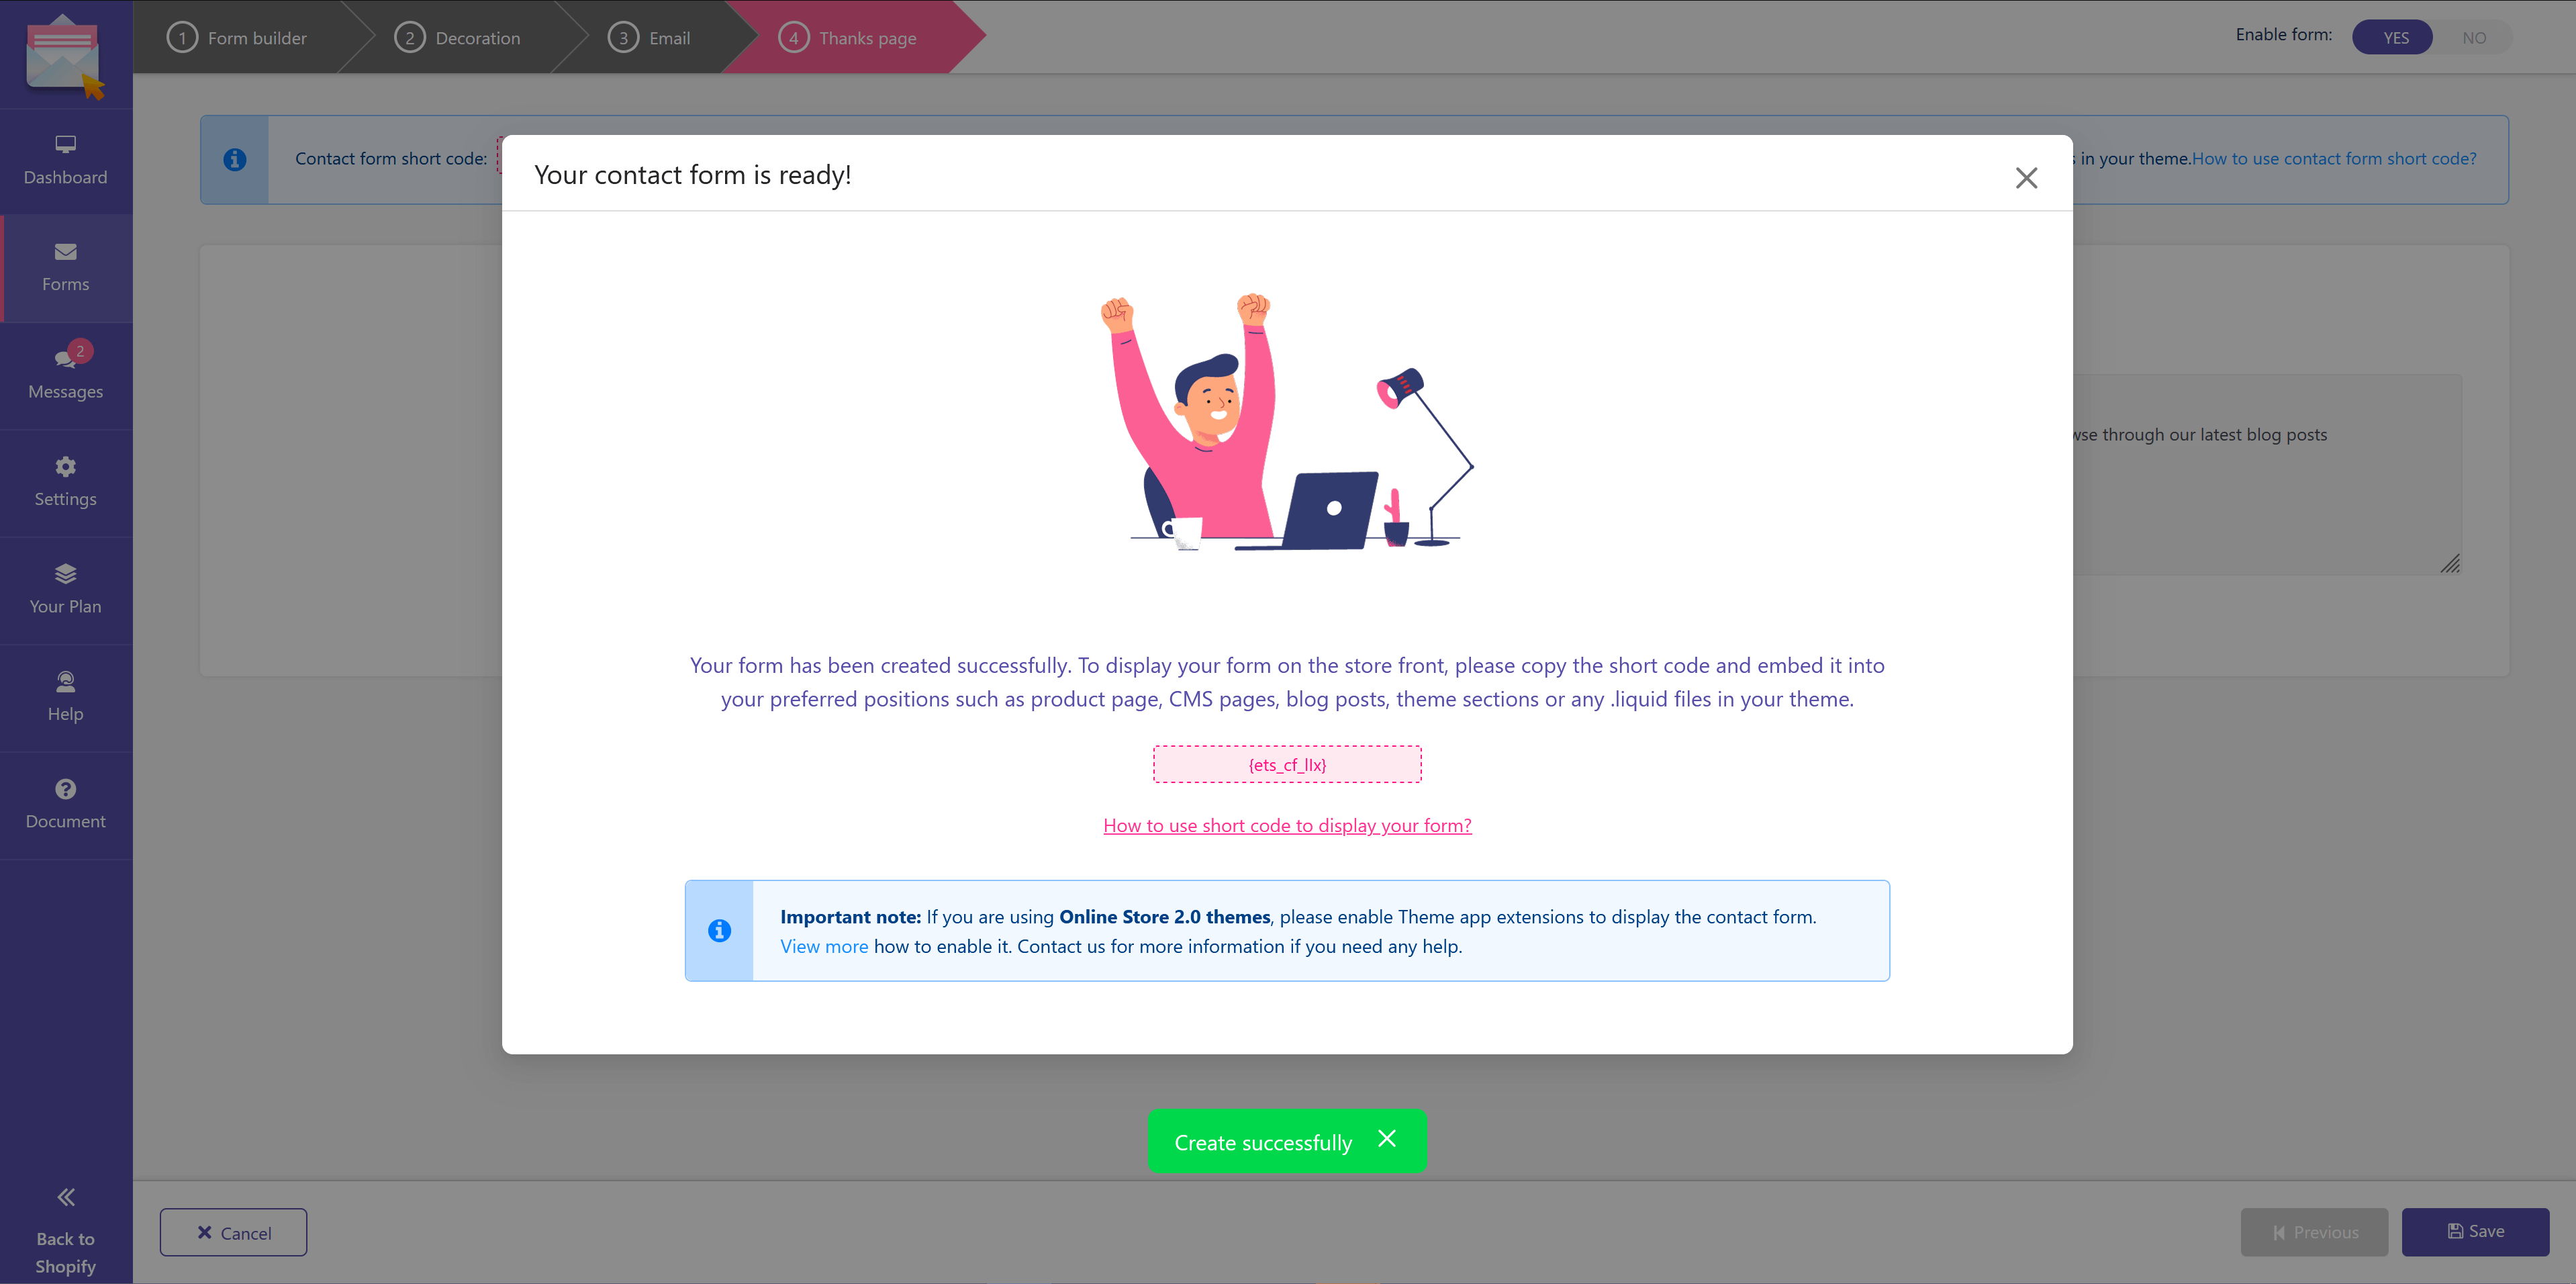
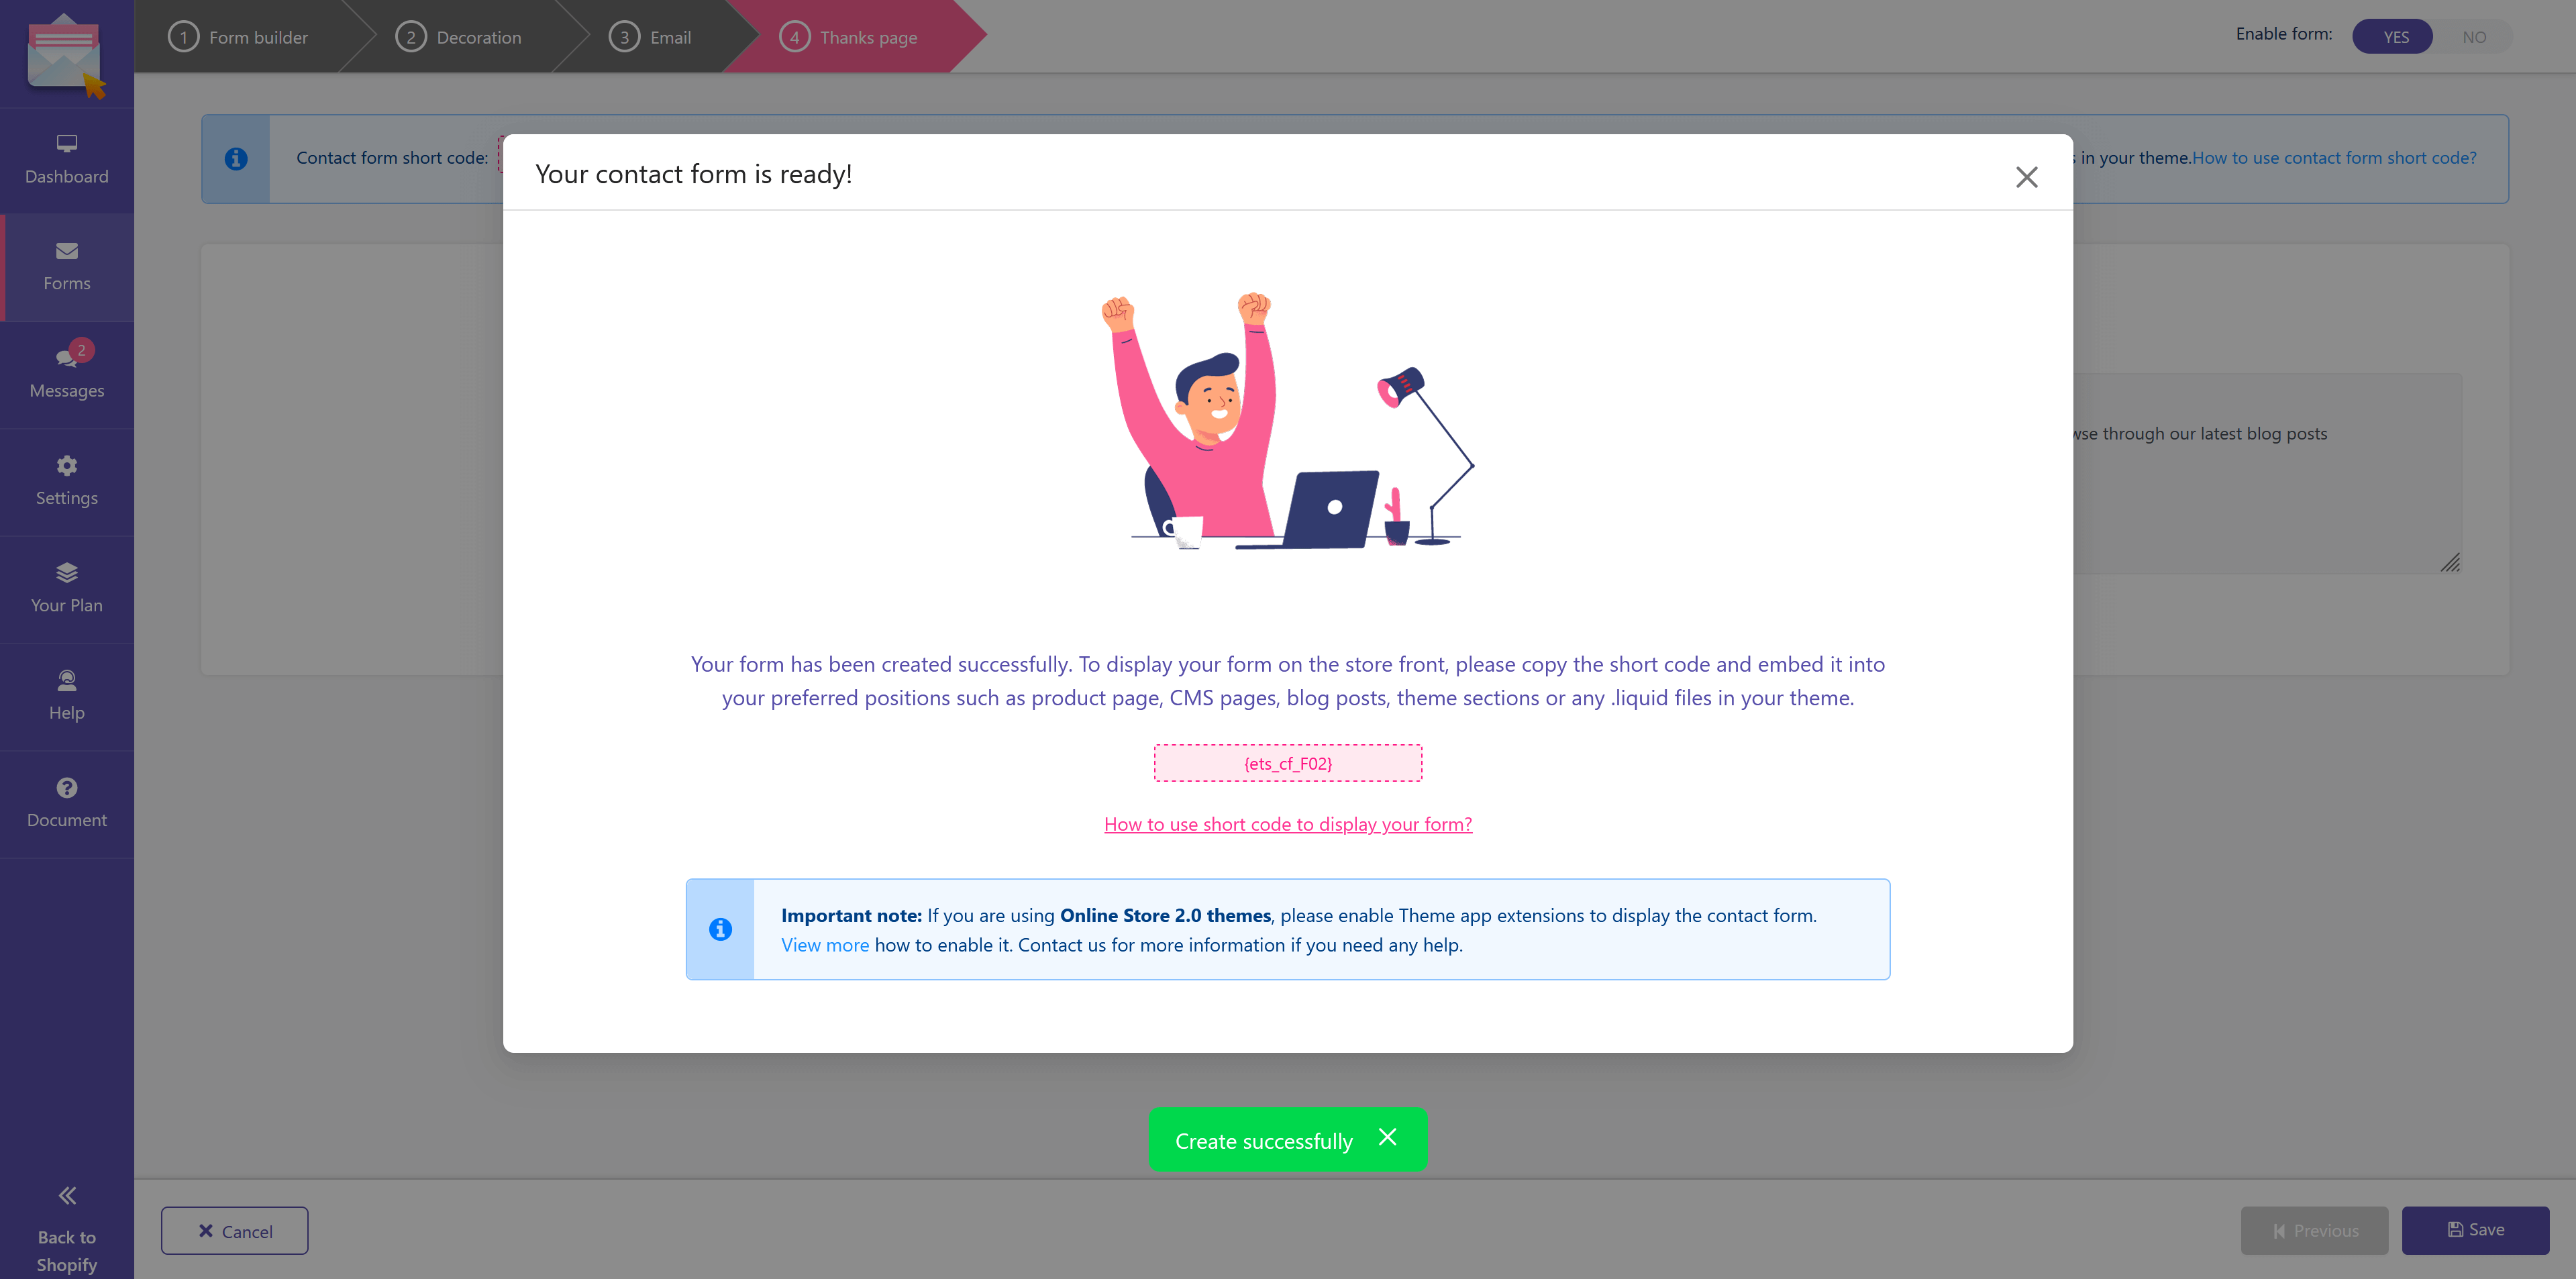
Now you’ve finished adding a new form. You will see it in the contact form list with a shortcode.

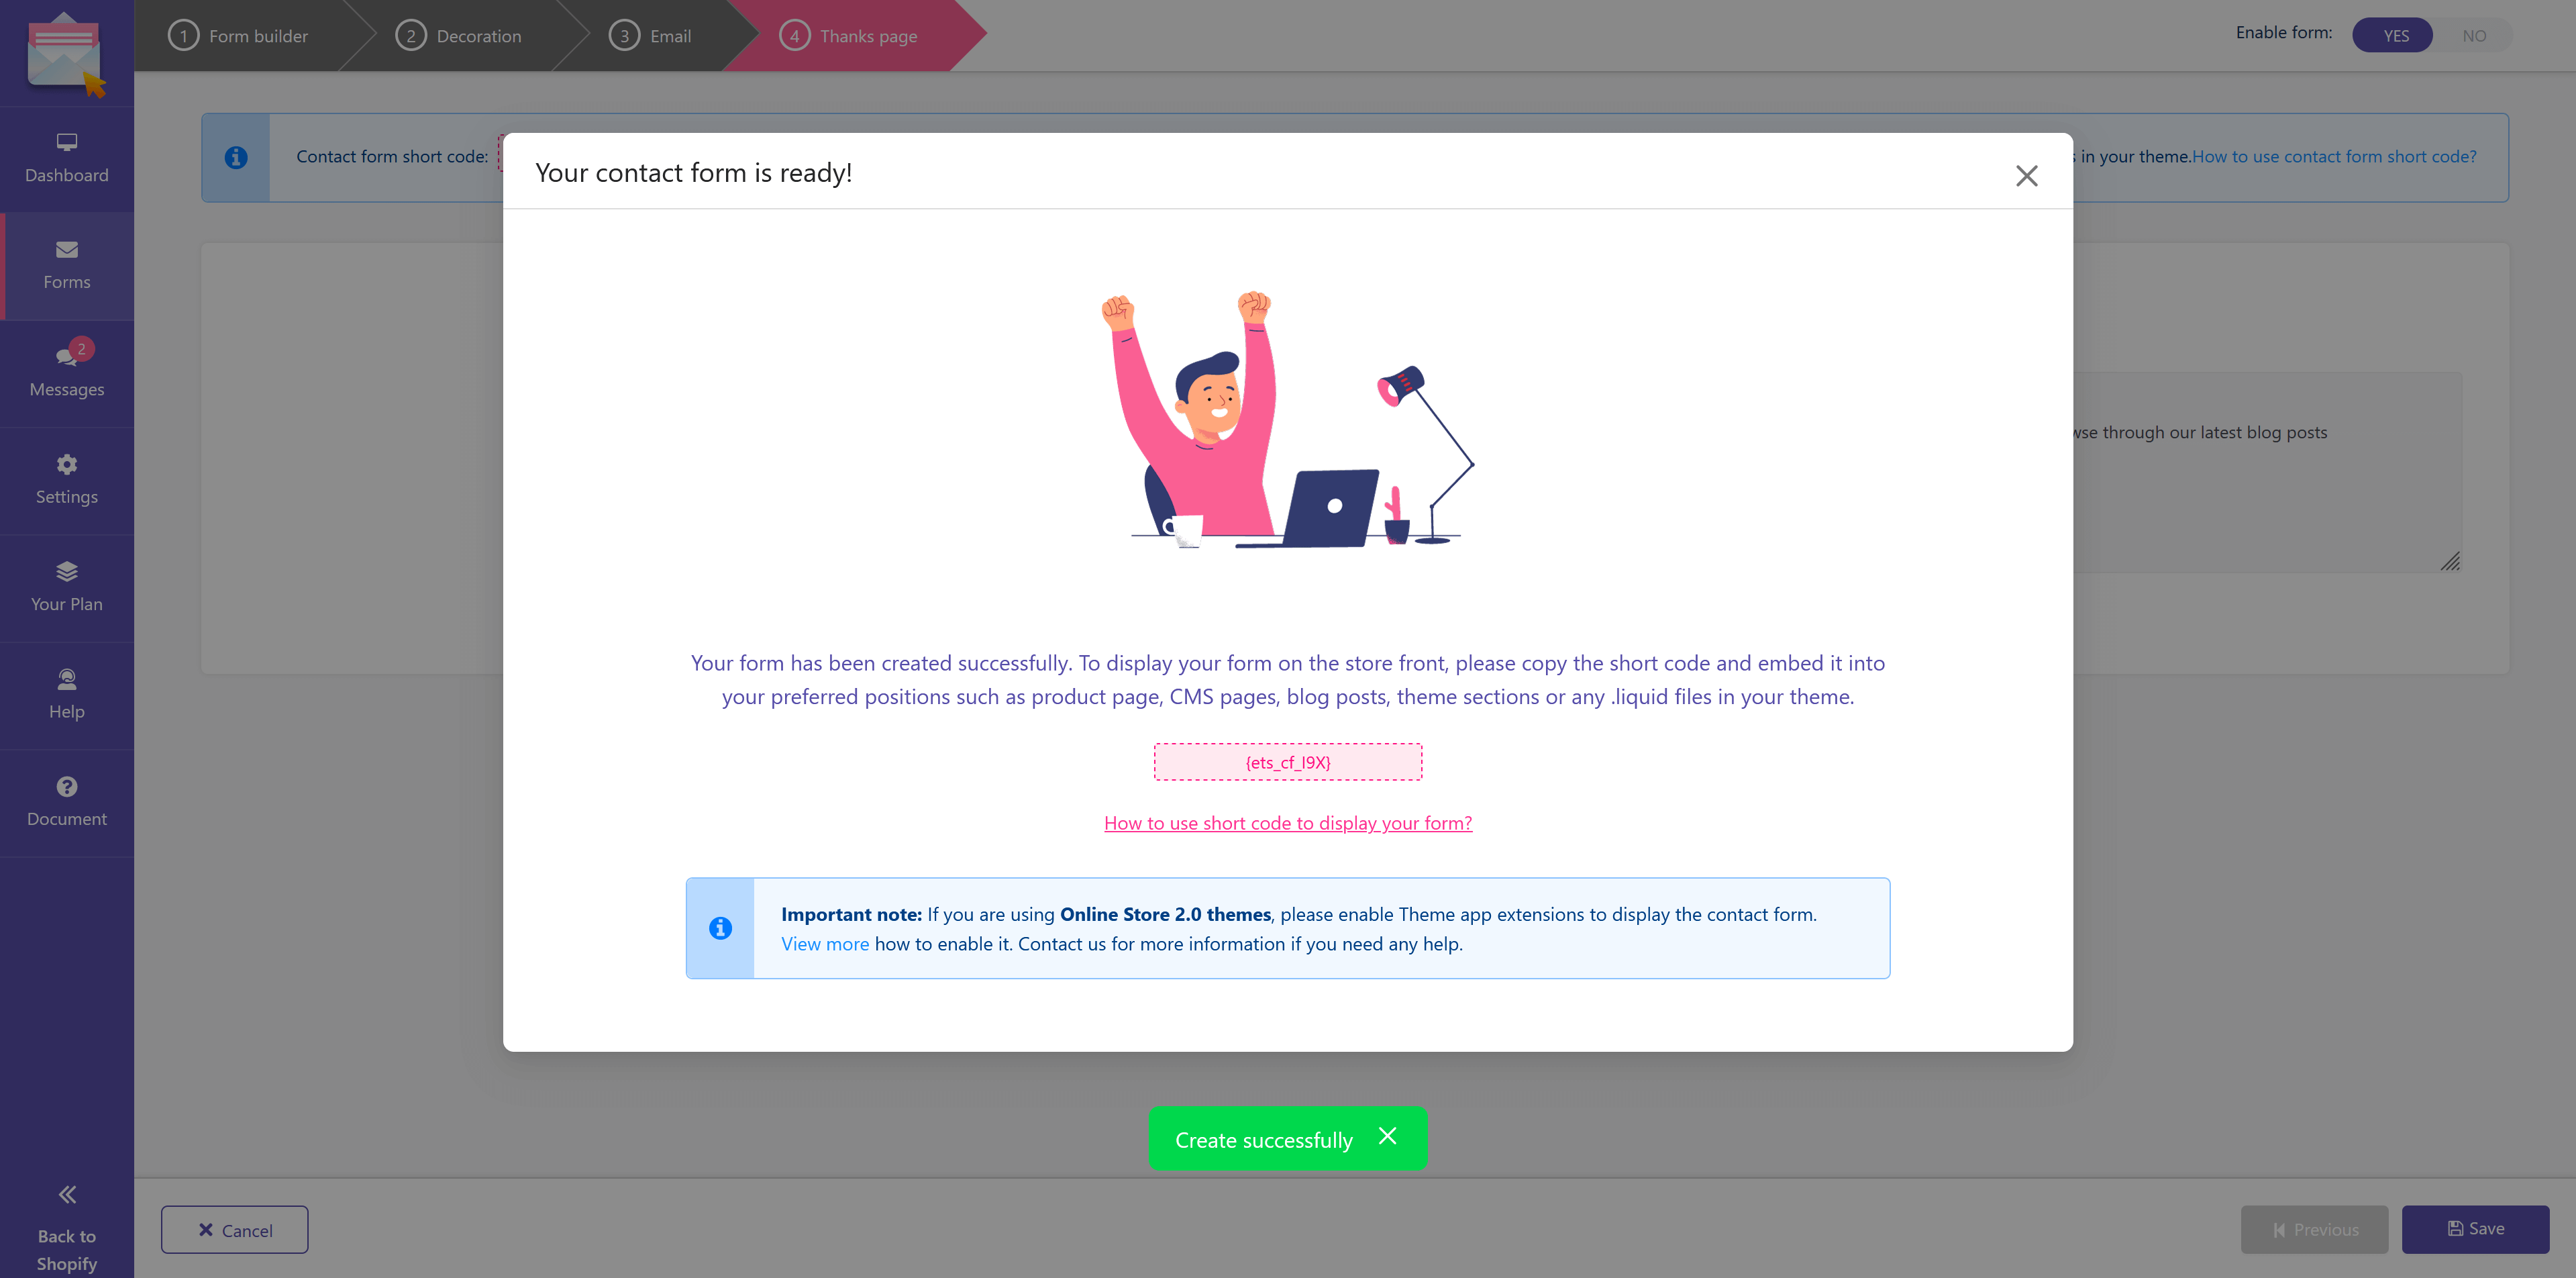
After creating the form, the app will provide a shortcode for each form. You can copy this shortcode and embed it into your preferred position to display the form wherever you want.

Below are some examples of displaying contact forms built with Contact Form Ultimate app on the storefront.

Contact form with a map on “Contact us” page:

Step 1: Create a new form using “Contact form with map (top)” template.

Step 2: Copy the shortcode of your newly created form.

Step 3: Open your “Contact us” page. Click on “Show HTML” button to switch to the HTML code view. Paste the shortcode of your form. Save your changes.

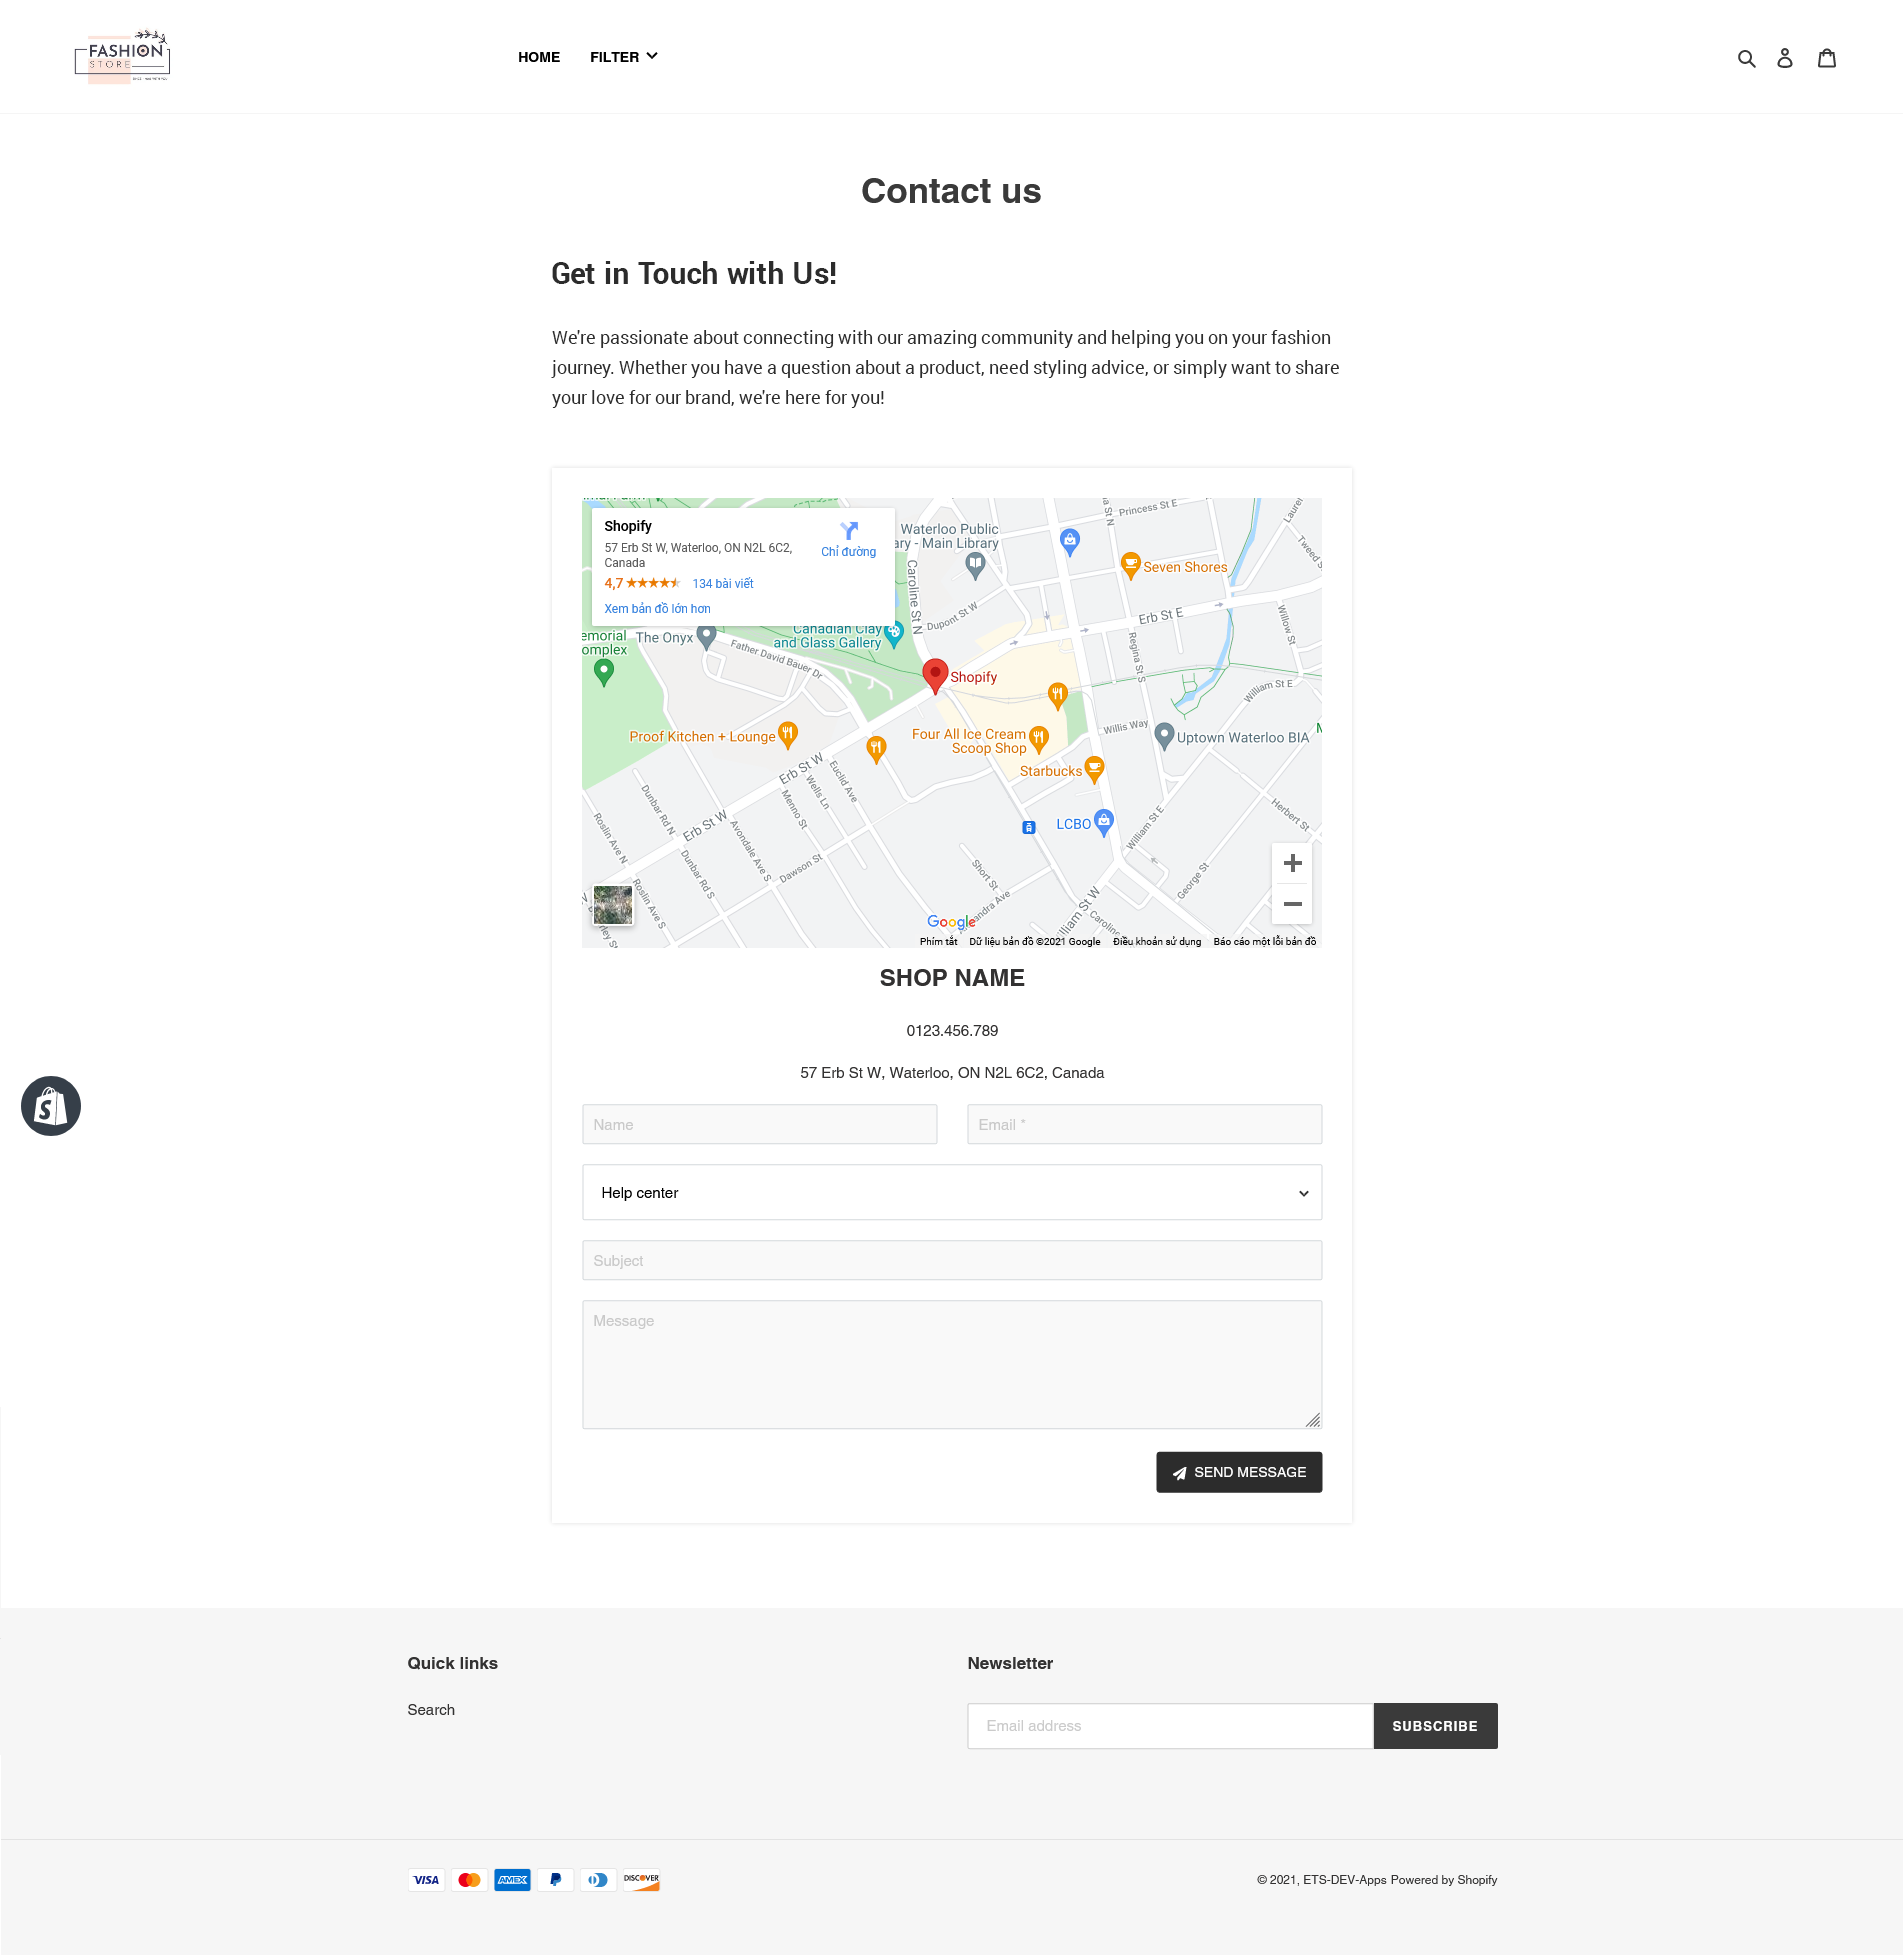
Step 4: Now we have a “Contact us” page like this:

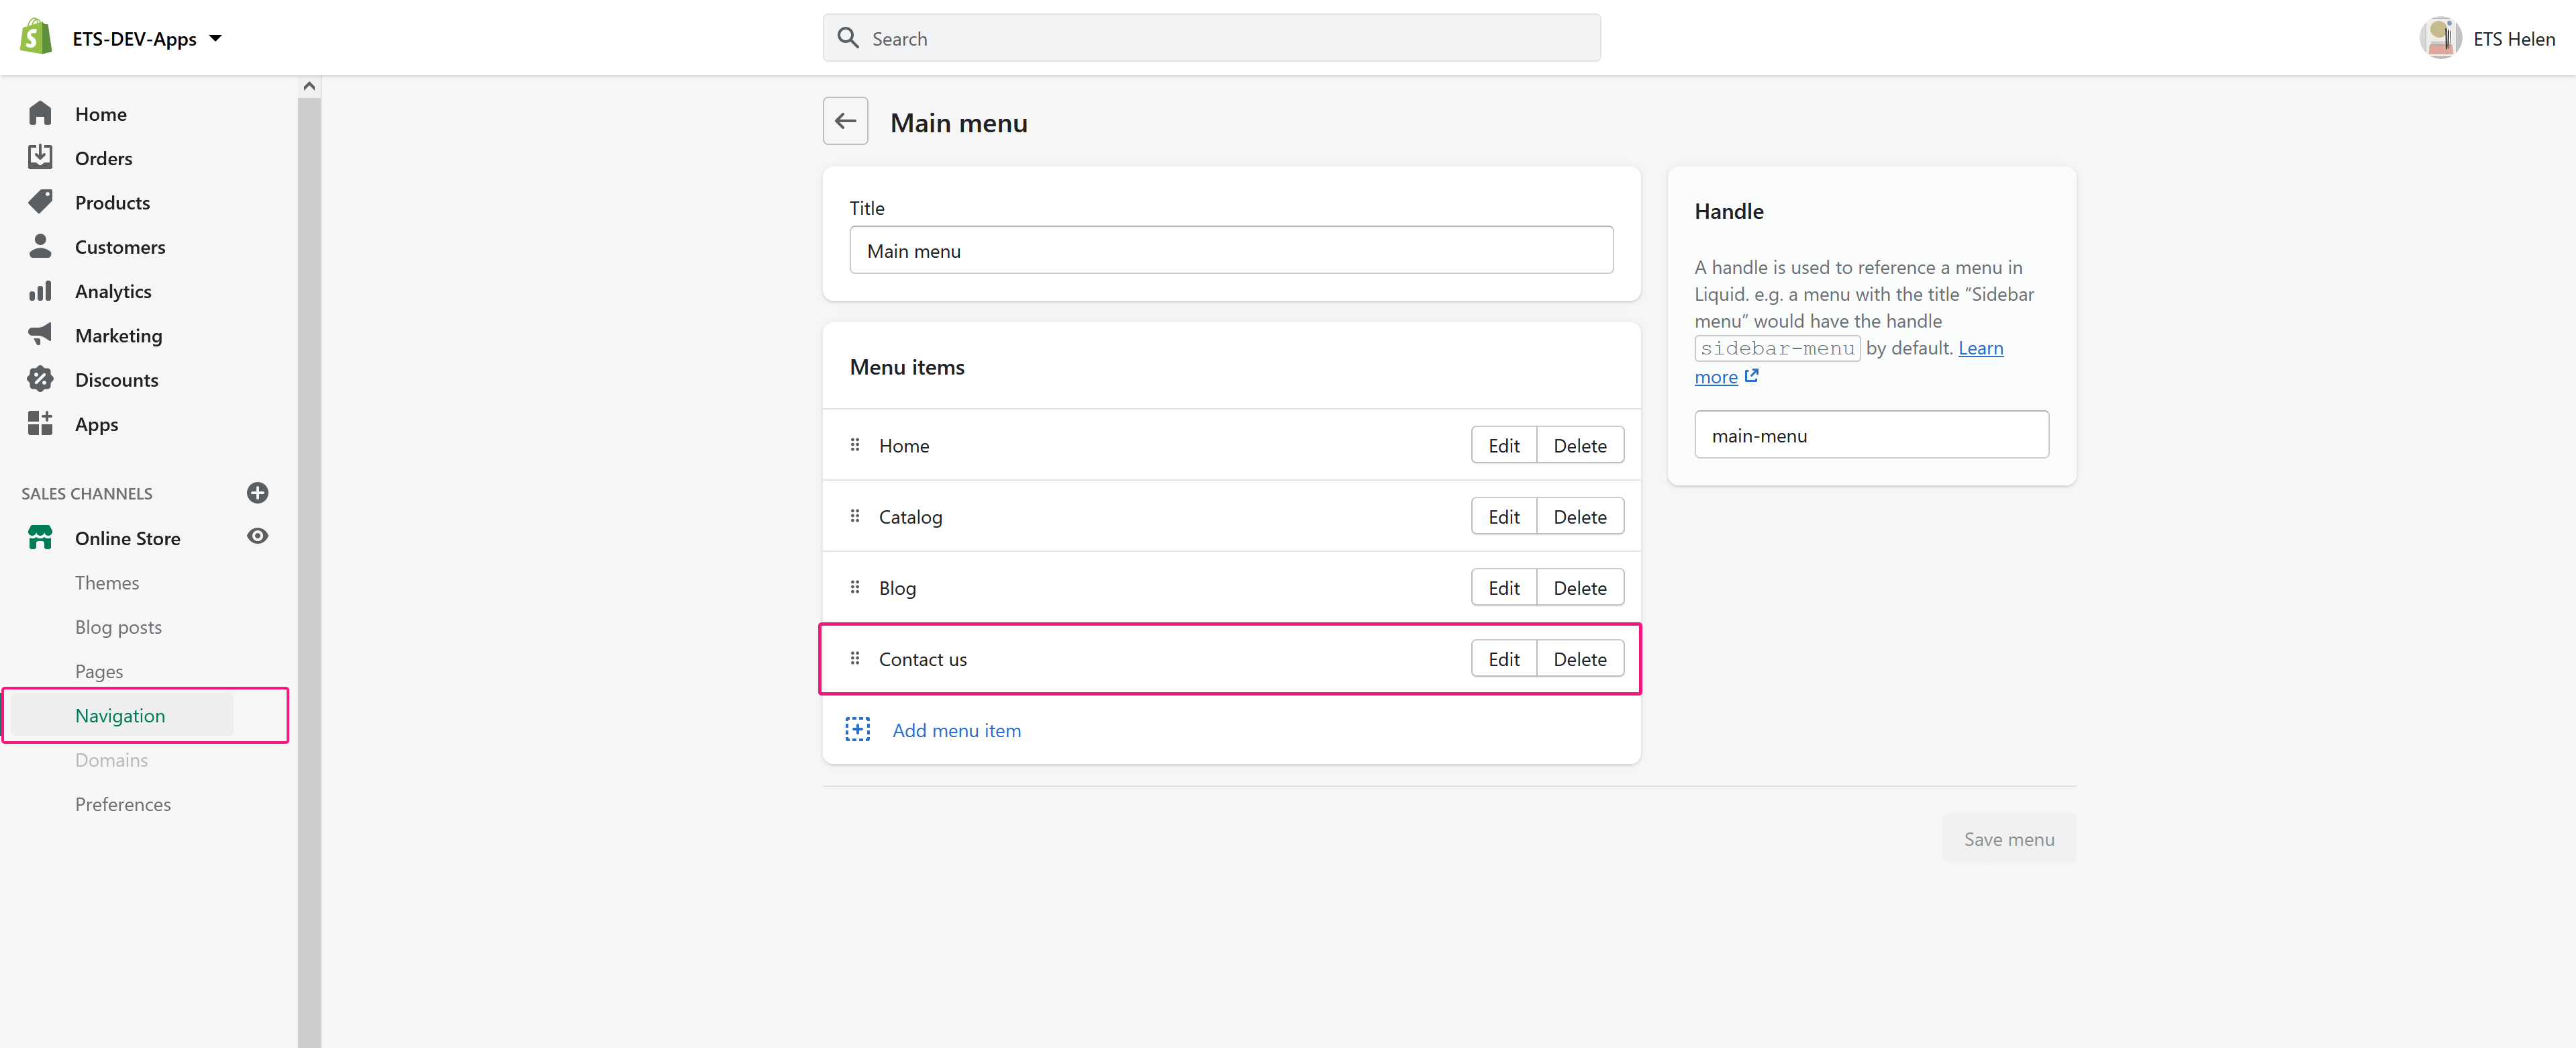
You can add the link to “Contact us” page to the main menu or the footer menu of your website:


Product quotation form on a product page:

Step 1: Create a new form using “Product quotation” template.

Step 2: Copy the shortcode of your newly created form.

Step 3:

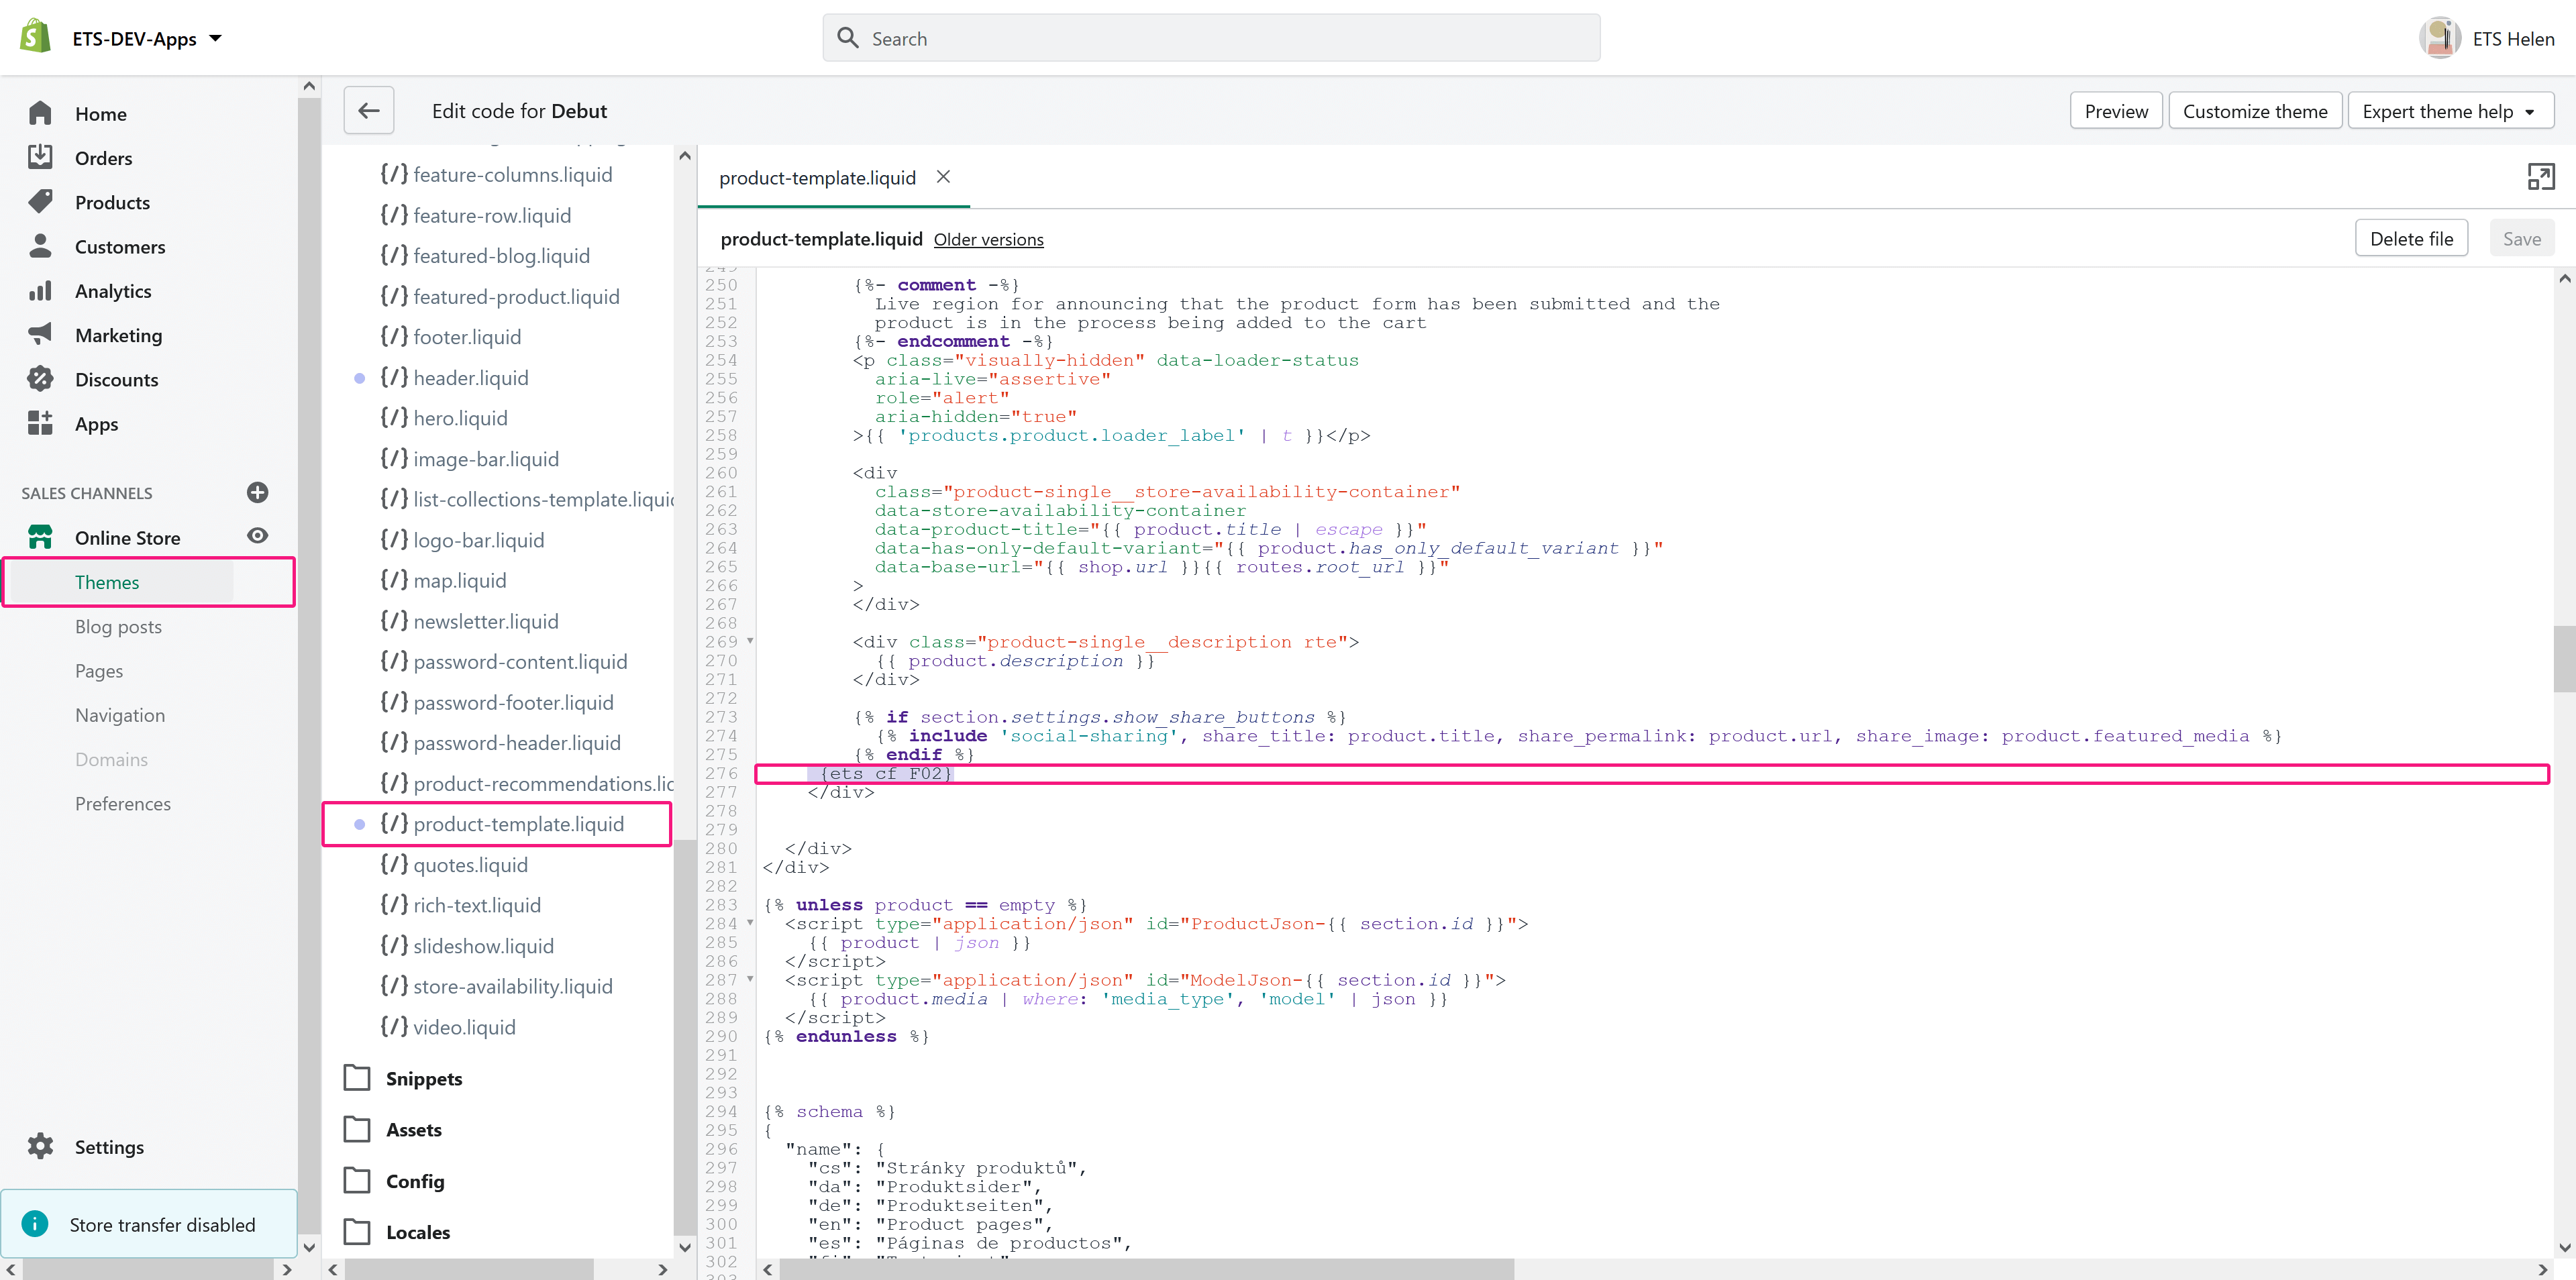
(1) Navigate to “Online store” > “Themes“. Select your current theme and click on “Actions” > “Edit code“.

(2) Find “product-template.liquid” file. Add the shortcode to the position you want. In the example below, we added the shortcode under the social sharing buttons. Save your changes.

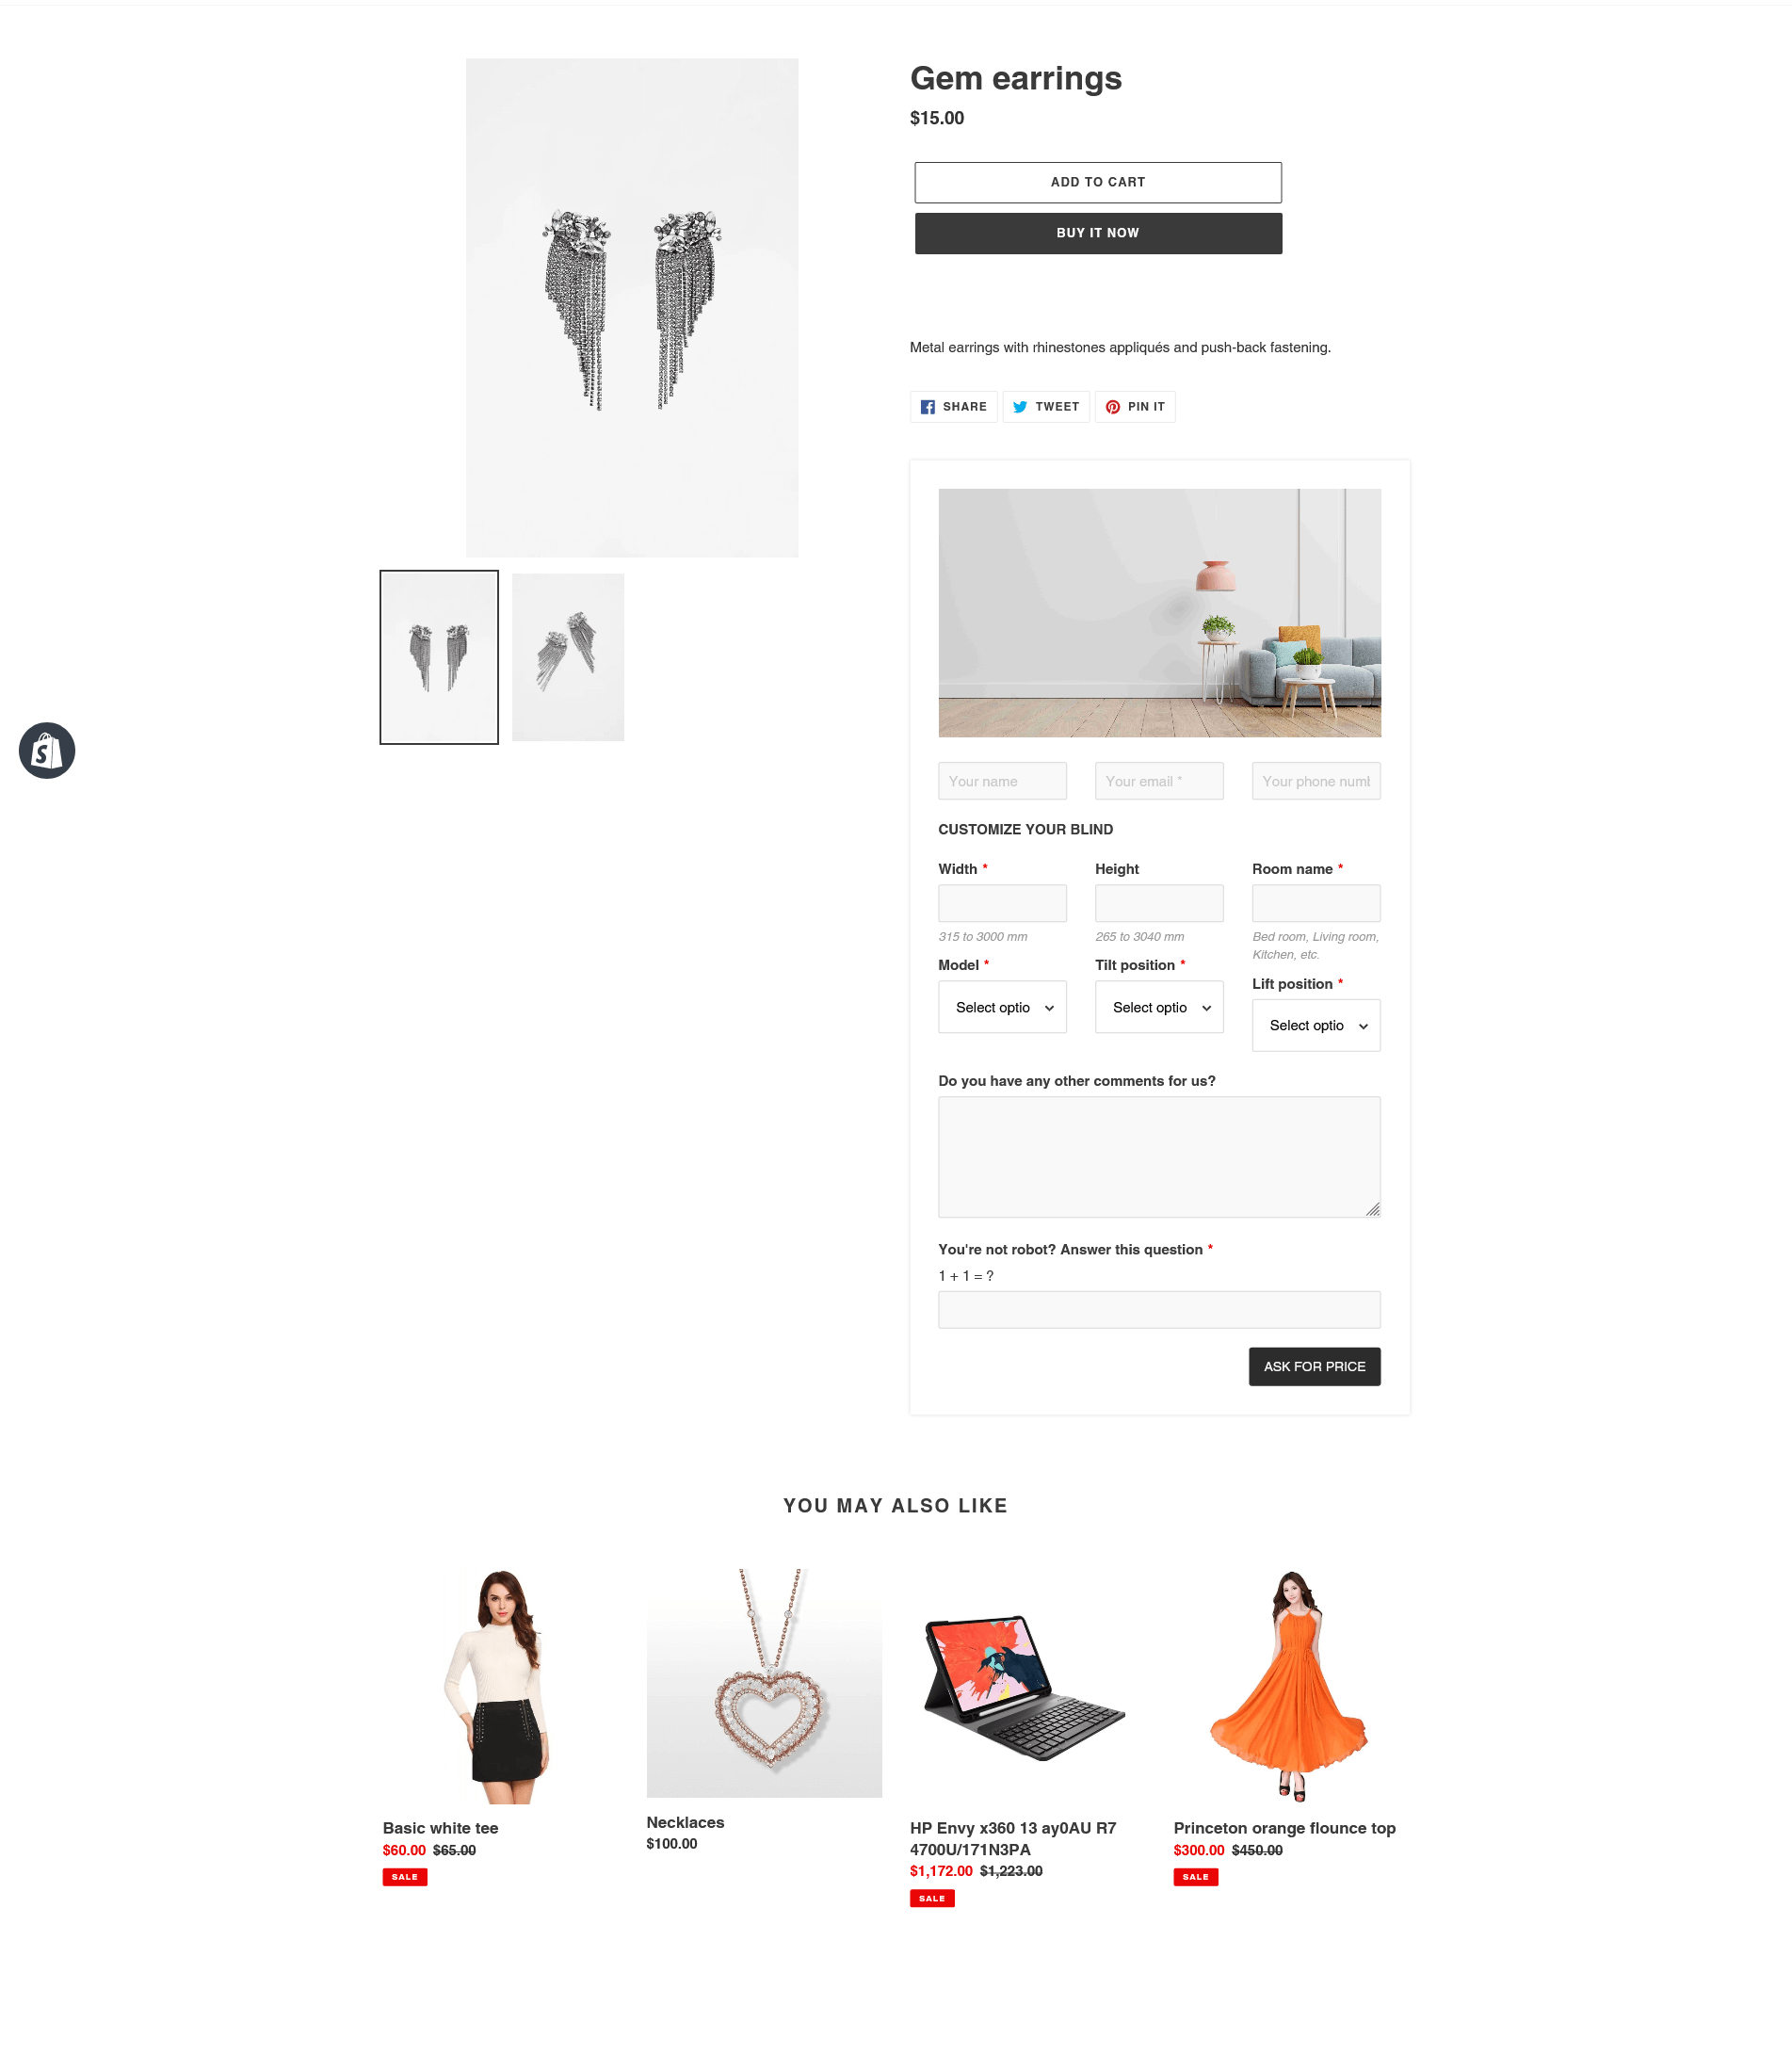
Step 4: Now we have a product quotation form on the product detail page like this:


Ticket booking form on home page:

Step 1: Create a new form using “Ticket booking form” template.

Step 2: Copy the shortcode of your newly created form.

Step 3:

(1) Navigate to “Online store” > “Themes“. Select your current theme and click on “Customize“.

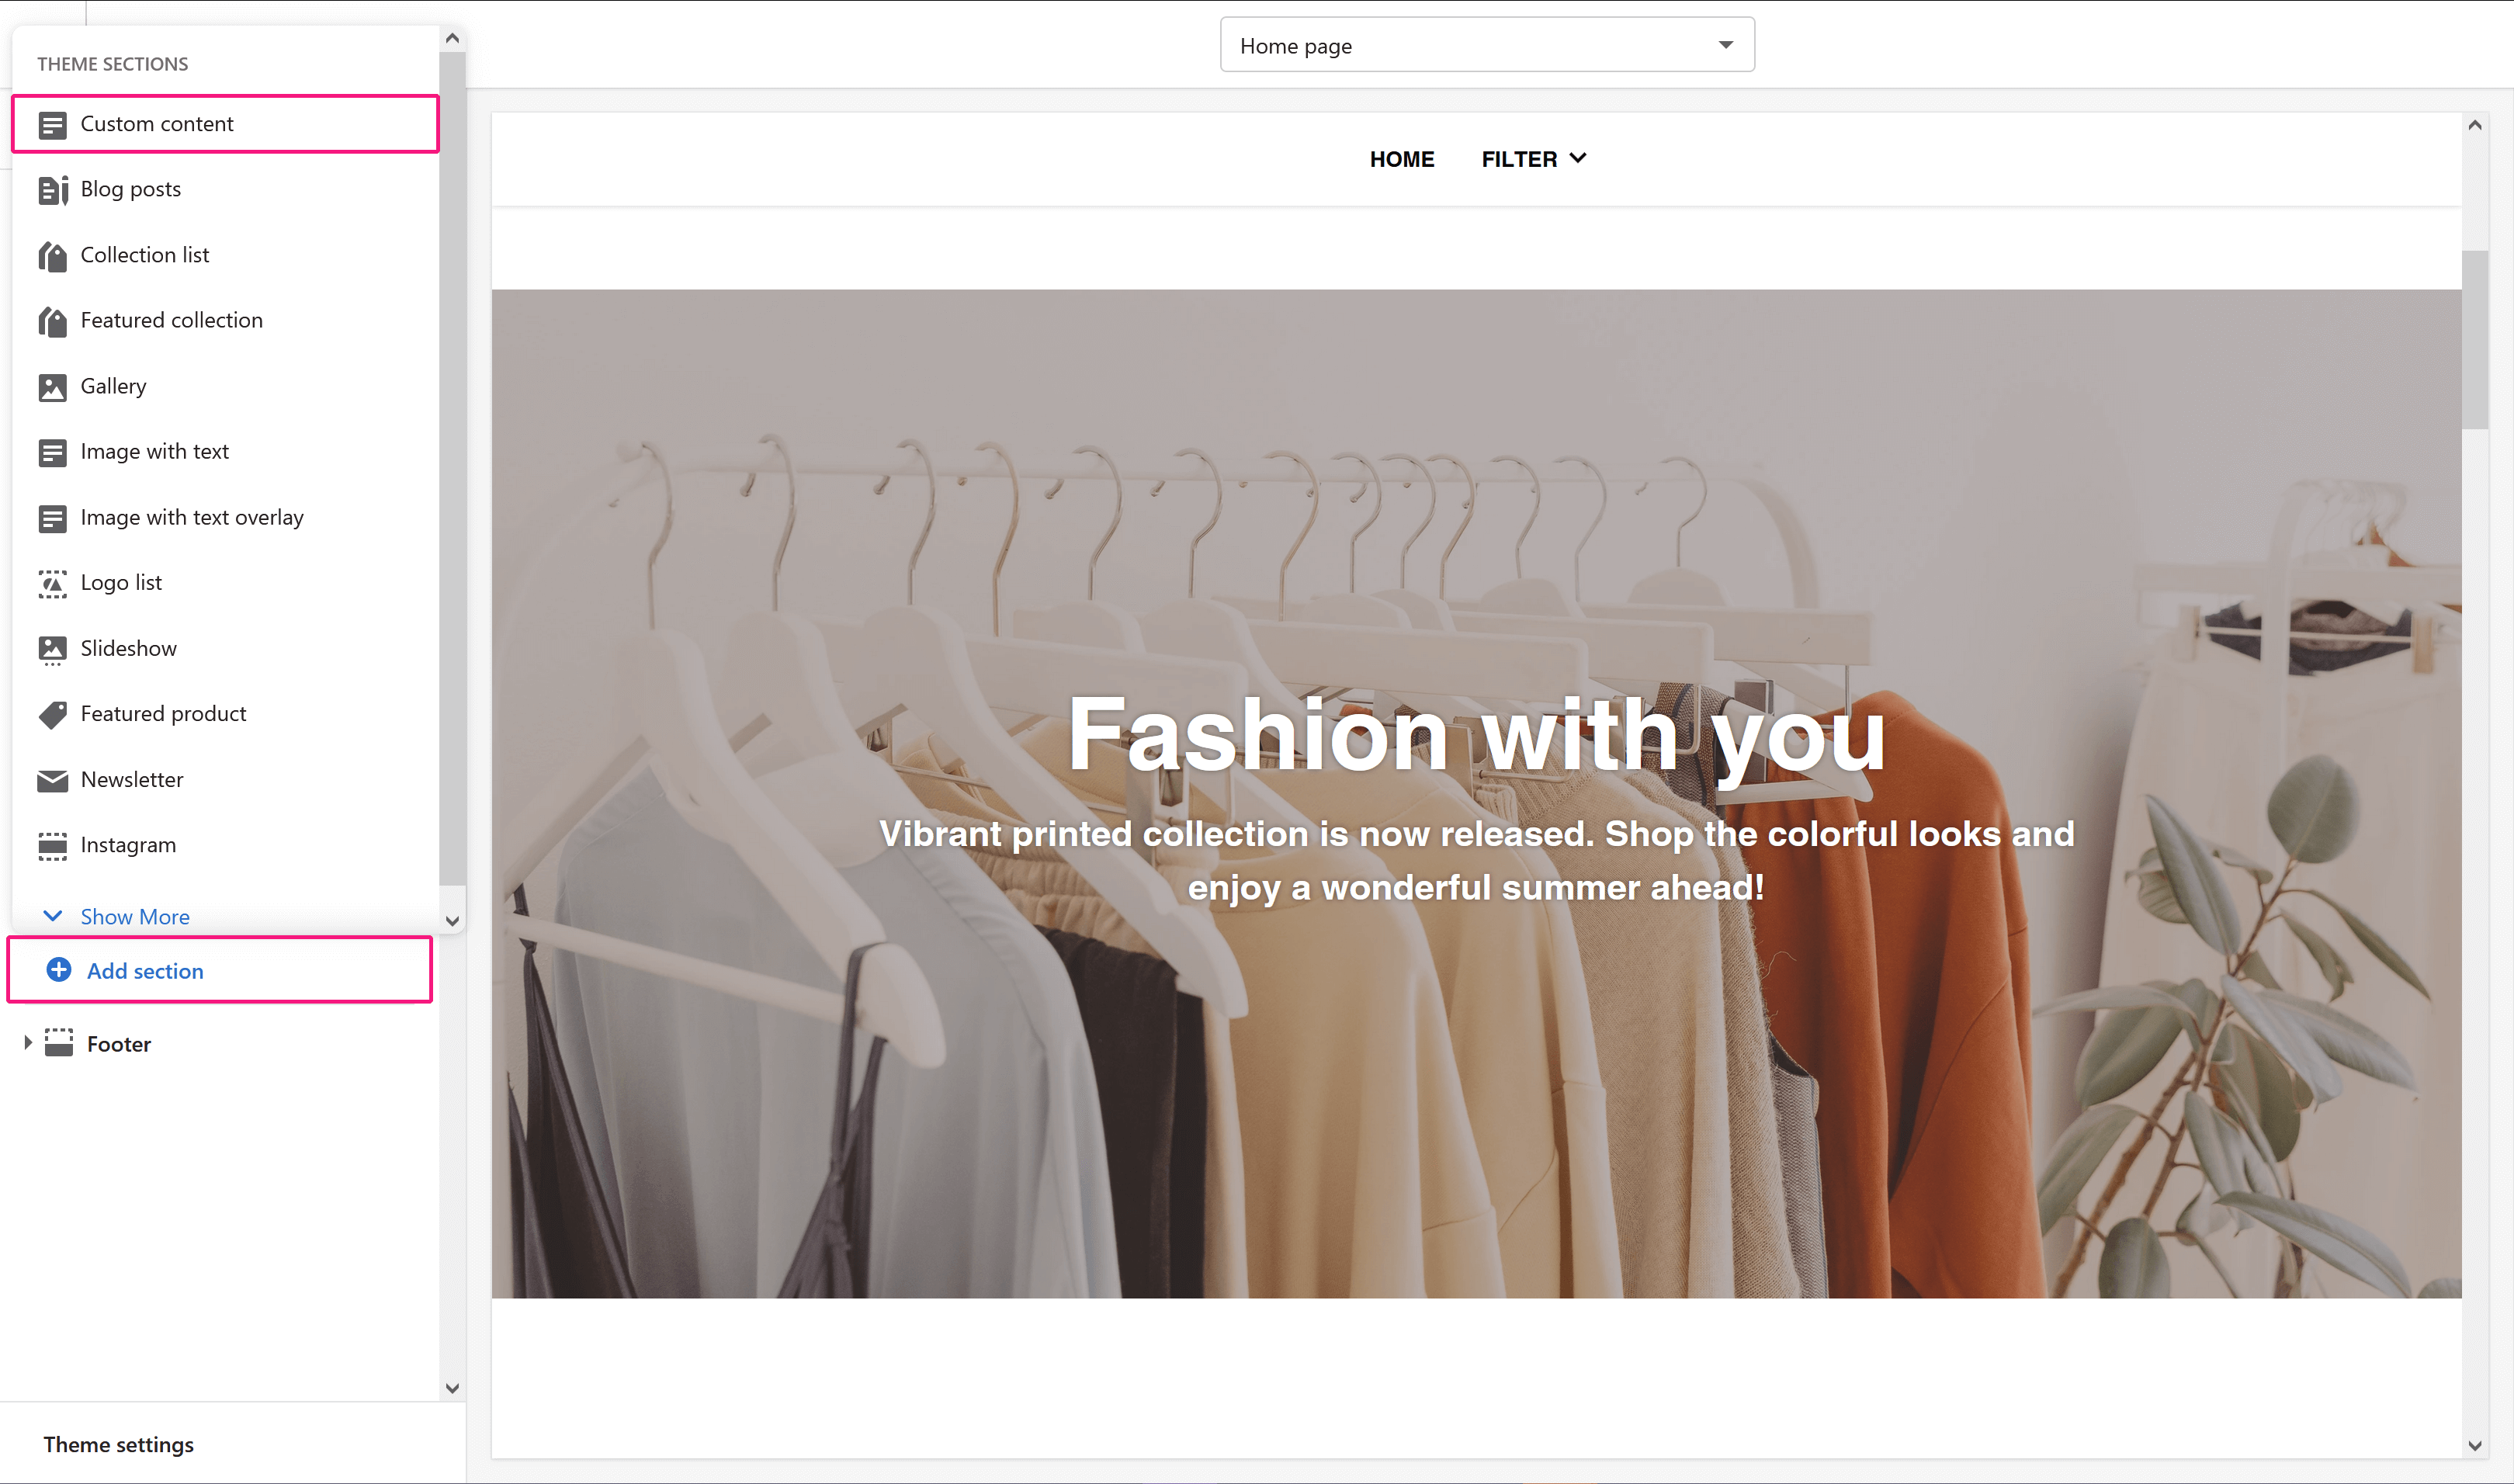
(2) Click on “Add section” link. Select “Custom content“.

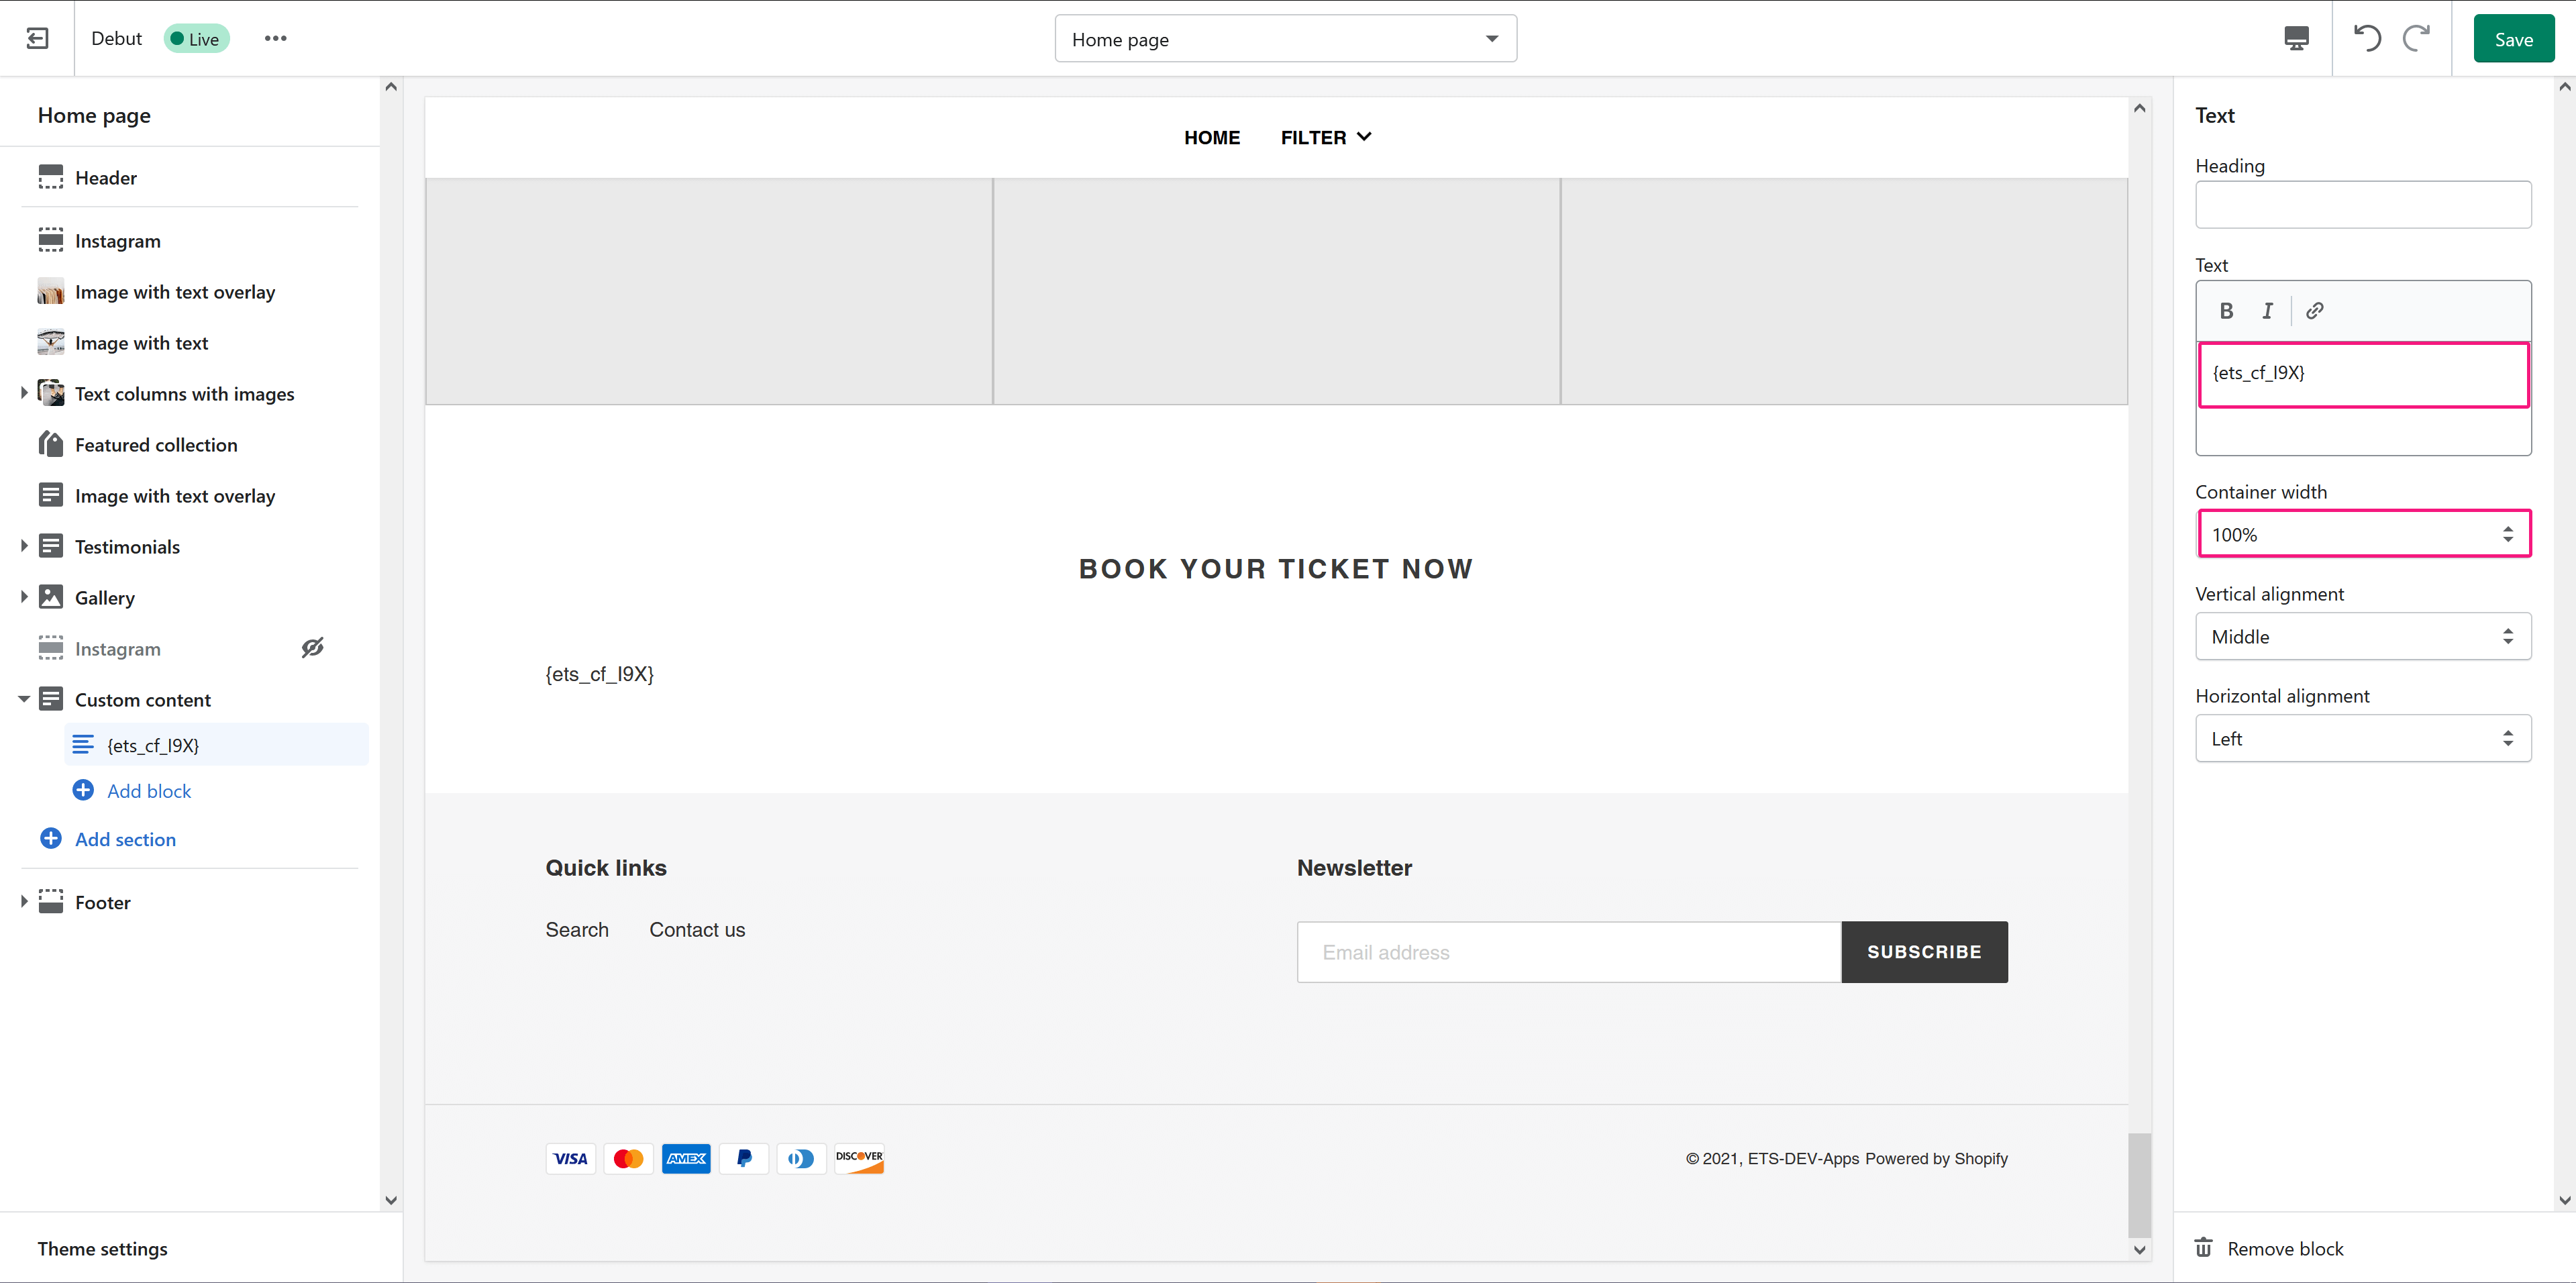
(3) Add the copied shortcode into “Text” field. And set the container width to 100%. Save your changes.

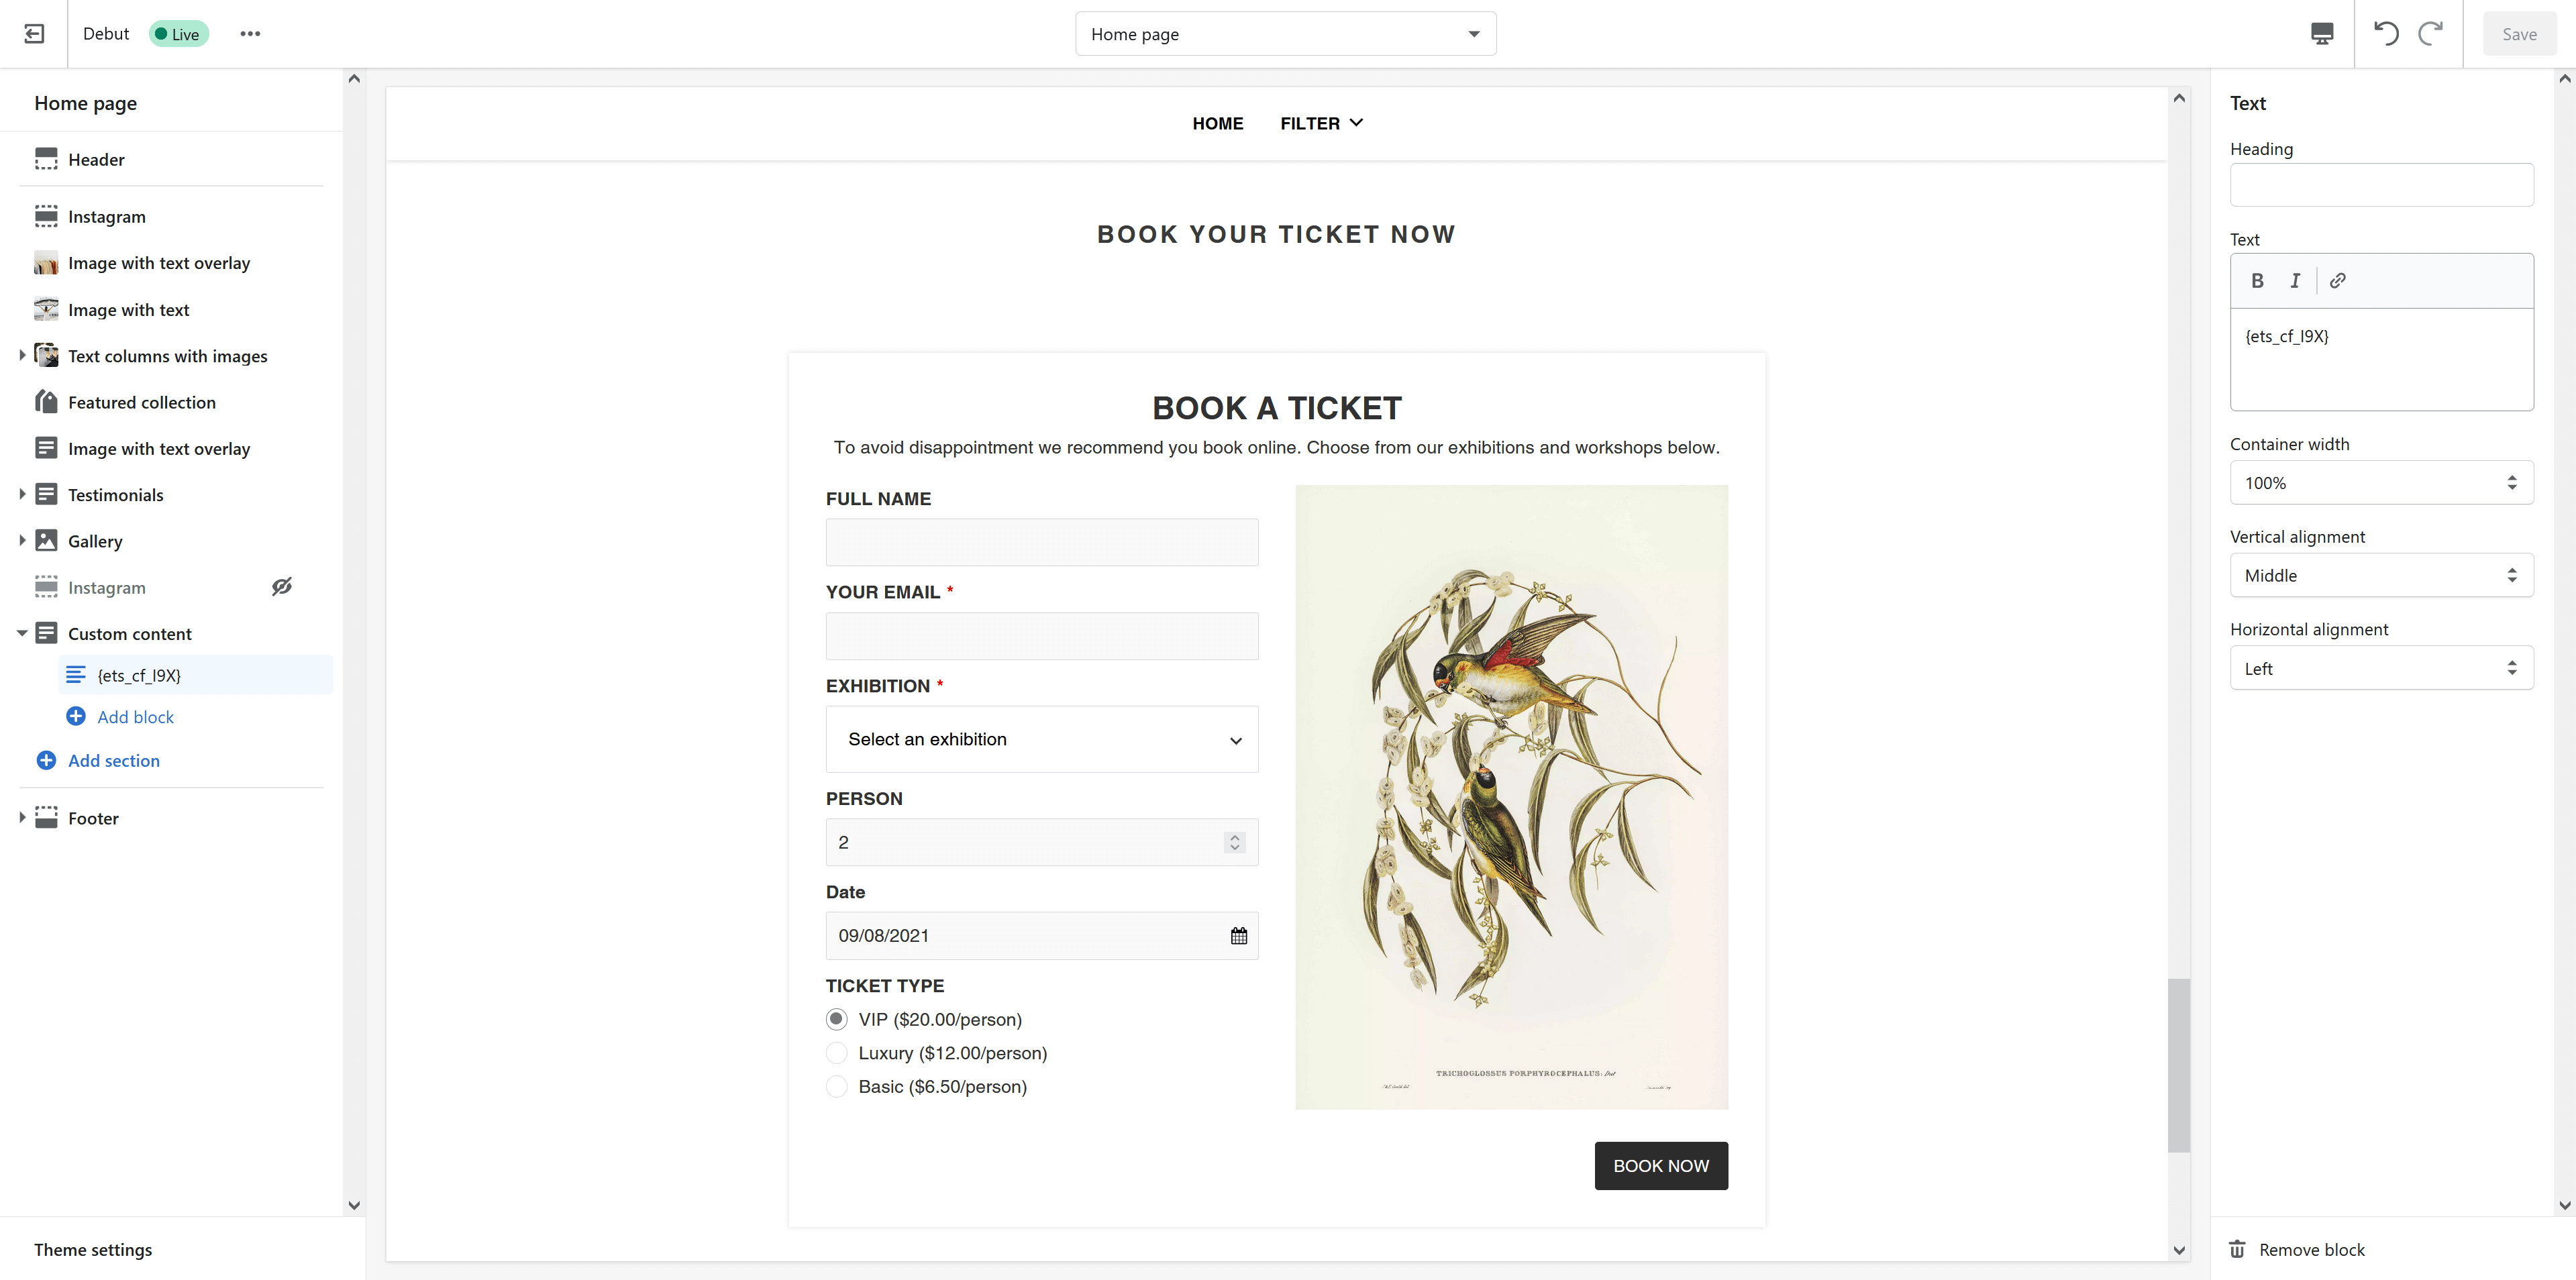
Step 4: Now we have a ticket booking form on the home page like this:


Display a form using its shortcode

You can also copy the shortcode of each form on the contact form list or on the form editing page. Paste the form’s shortcode anywhere on the .liquid file to display the contact form.
  • Go to “Online store” in your Shopify Admin Panel > On your “Current theme” select “Actions” -> “Edit Code”.
  • Open the “.liquid” file you need, then find the position you want to display the contact form and paste the shortcode there.

If you don’t want to display the contact form in selected positions anymore, just remove the shortcode and save your changes.


IMPORTANT NOTE:

You need to enable the Contact Form Ultimate app to display it on the storefront. Here are the instructions to enable the app:

  • Go to “Online Store” in your Shopify Admin Panel > On your “Current theme” select “Customize”.

  • In the bottom left corner of the screen select “Theme settings” > click “App embeds”.
  • Enable “Contact Form Ultimate” and “Save”.

After enabling the contact form block, you can display your contact form wherever you want using shortcode.

Messages and message tags

Contact Form Ultimate saves all messages from customers sent via contact forms to your website back office.

To view messages sent by your customers, navigate to “Messages” tab. In the back office, you can view and manage the messages easily with a professional message management tool which provides a lot of helpful features such as message filter, mark messages as “Read” or “Unread”, star a message, bulk actions, reply a message, export messages to .csv file, etc.

Click “View” to read customers’ detailed messages and reply to them.

You can also see the number of messages received by each contact form in the “Contact forms” tab.

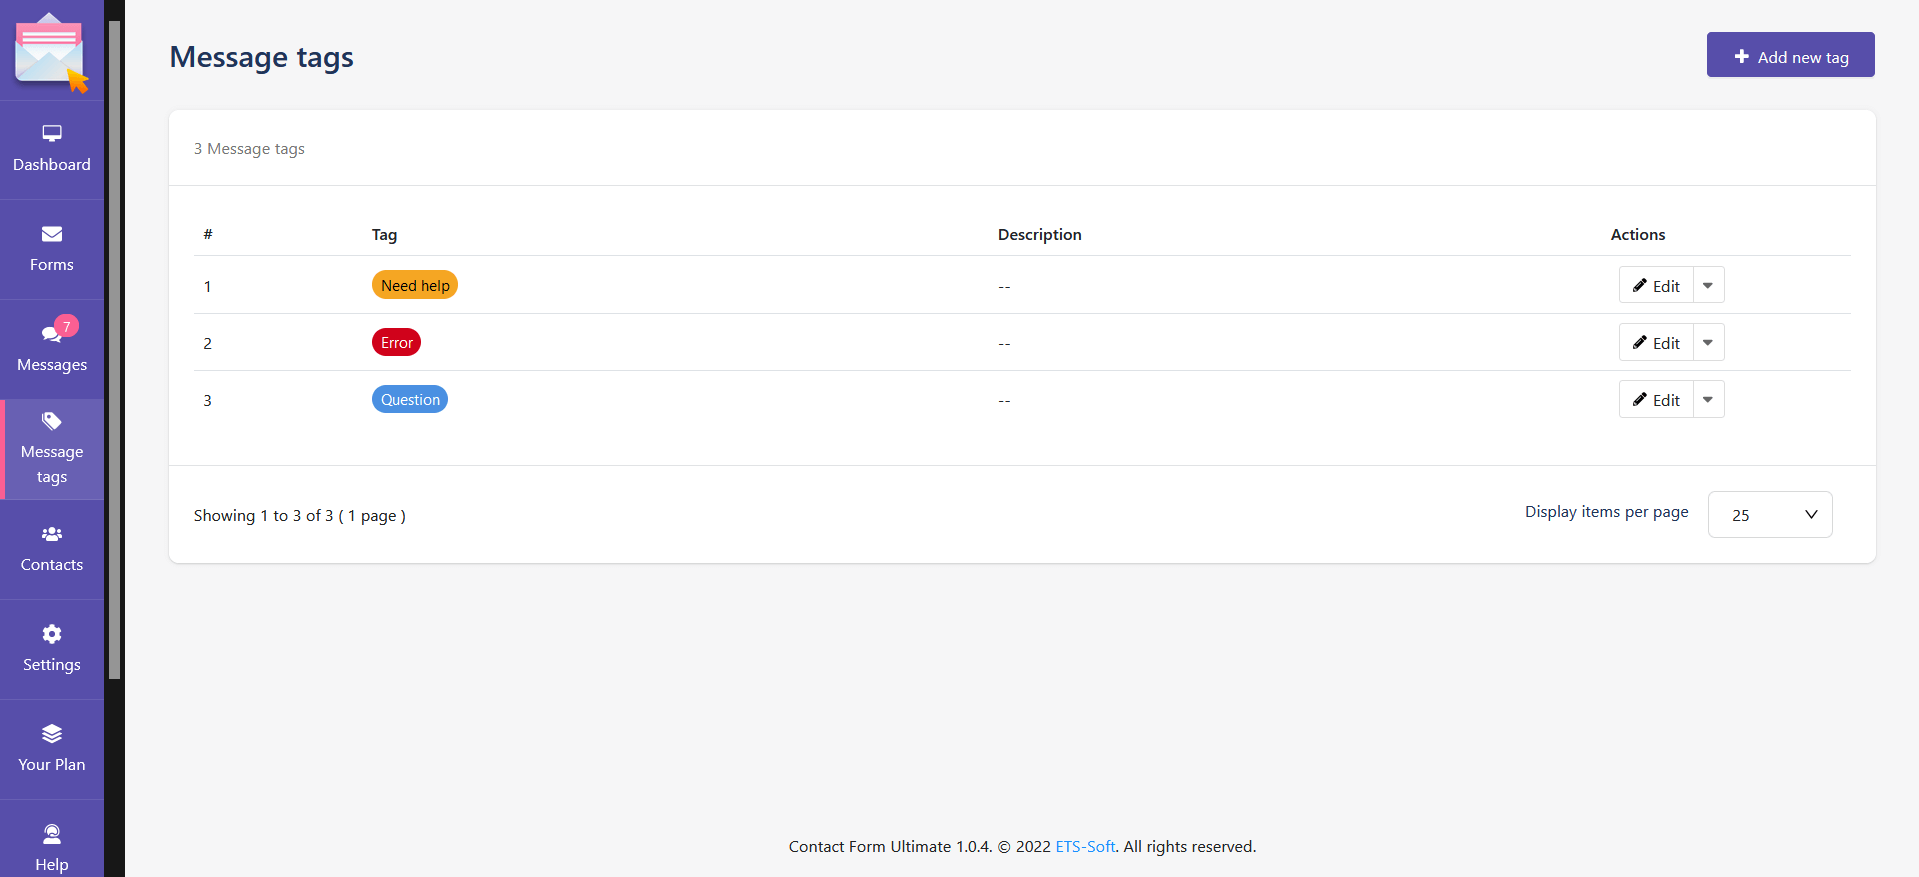
Contact Form Ultimate app also allows you to create tags (labels) to organize your messages. Add as many tags as you want to a message.

Click on “Add new tag” button to create a new message tag. Enter the label, description and pick a background color for your message tag.

Back to “Messages” list and open a specific message that you want to add a tag. Click on the dots at the top-right corner to open the dropdown menu, select “Tag” option.

Select the existing tag(s) you want to add. Then click on “Save” button.

Contact list

With “Contact” list, you can see the list of all visitors/customers that have sent messages via your contact forms. For each specific user, you can view all messages submitted by him/her by clicking on “View messages” button.

You can use the filter tool to search for the contacts that satisfy your conditions.

Settings

1. Mailing services

Contact Form Ultimate app is fully integrated with famous SMTP services such as Gmail, Yahoo mail, Sendinblue, Mailchimp, SendGrid, Mailjet, Outlook. You can also send email via the app SMTP service or your own SMTP service.

  • Enable the mail services you need and fill in the field required.
  • Save all your changes.

2. reCAPTCHA

  • Enable reCAPCHA input field for your forms and choose the type of reCAPCHA you want.
  • Click on the “How to get site key and secret key” link and follow Google’s instructions to get the key.
  • Fill in the required fields (Site key, secret key).
  • Select the language and then save your changes.

3. Translation

You can edit notification messages used in various situations here.

4. Mail notification

Enter your email here to get the notification/report email about the number of messages received each day.

Other settings

1. Pricing plan

Depending on the purpose of use, you can choose the appropriate plan. We offer both free and premium plans.

With the free plan, there will be some limitations on the types of forms, mail services or the number of attachments stored, etc. And the premium plan will support all the features that we have just introduced in this document.

Alternatively, you can choose Annually Premium or Monthly Premium. With Annually Premium, you can save $12.

The terms and conditions of each version are clearly listed in the “Plan” section. Navigate to “Plan” on the sidebar to get more details.

2. Help

If you have any problem using the app, you can navigate to “Help” on the sidebar to contact the web developer. We are happy to support you solve the problems related to this app whenever you need it.

3. Document

Click on “Document” to open this app documentation when needed.

Dashboard

In this tab, you can see a statistic chart of messages and replies received through your contact forms. Besides, you can also quickly view classified messages: all messages, unread messages, or view STMP services, attachments, and the last visits (with messages).

On the top right corner of the chart, you can select to view the chart by month, year, or all time.

Uninstall app

Installation of our Contact Form Ultimate app automatically injects certain code snippets into your Shopify theme in order to make the installation process fully automatic and make our app work fast and smoothly. Moreover, during your usage, some shortcodes may be pasted into the “.liquid” file to display the contact form on specific positions.

Unfortunately, when you uninstall Contact Form Ultimate, we lose programmatic access to your store, thus we cannot remove the code snippets that we injected automatically and the shortcode you pasted into “.liquid” file.

Although these code snippets that we add do not harm your store even after the uninstallation process, you might want to remove them anyway, the following guide will walk you through this process.

Step 1: Go to “Online store” in your Shopify Admin Panel > On your “Current theme” select “Actions” -> “Edit Code”

REMOVE CODE SNIPPETS

Step 2: In the “Assets” folder: delete any file that has “ets_cf_” prefix.

REMOVE EMBEDDED CODE

Step 3: In the “Templates” folder:

  • Open the “.liquid” file which contains shortcode you used to add.
  • Remove the shortcode.