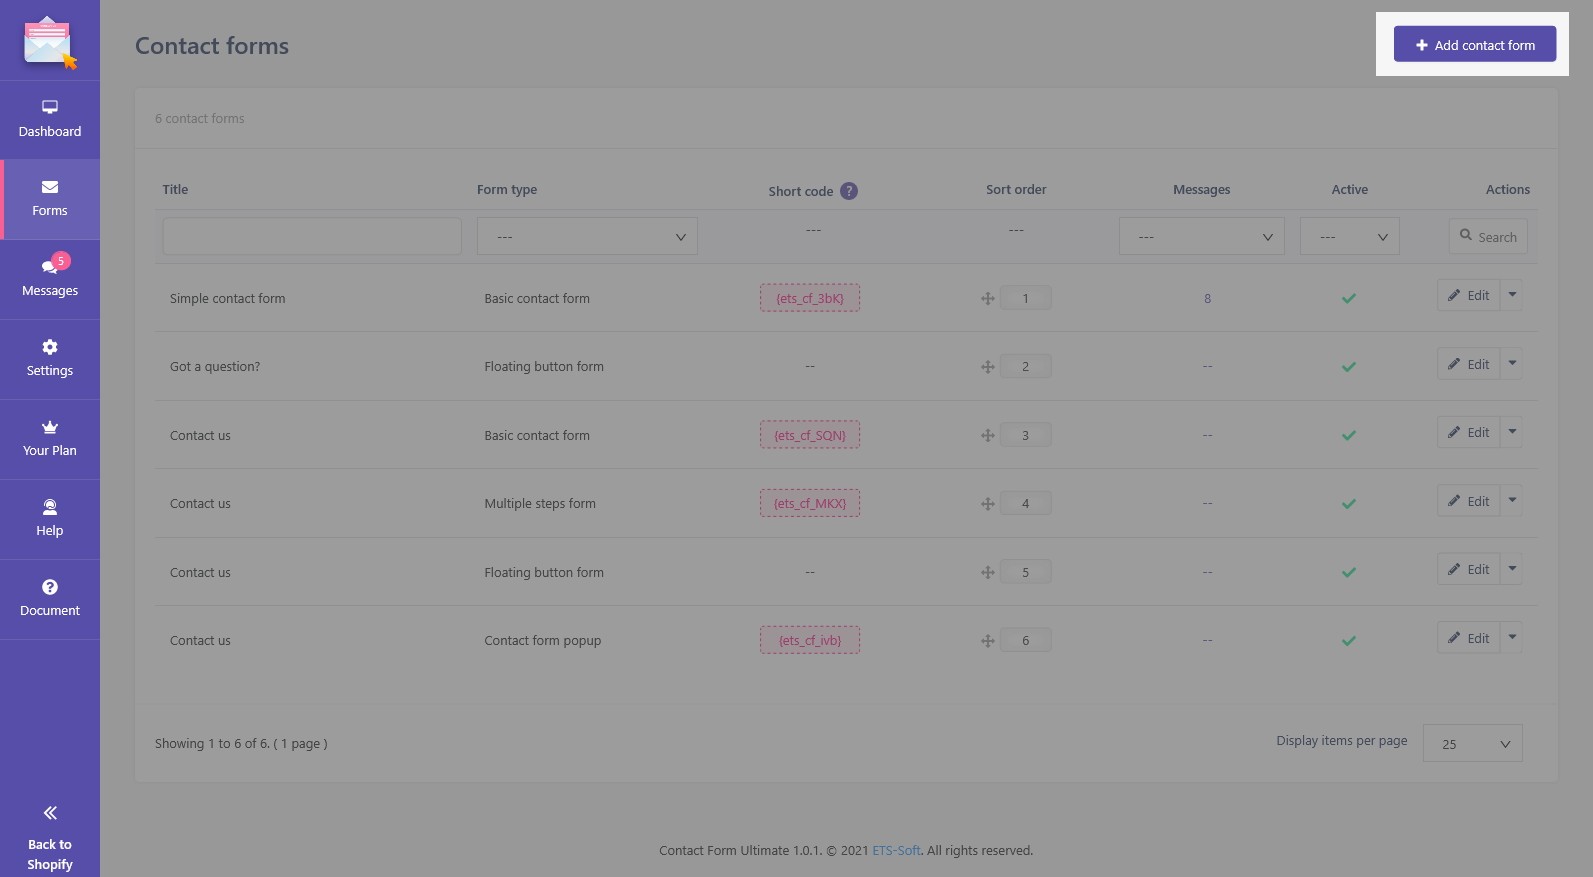
Click on “Form” tab at the sidebar to navigate to “Contact forms” tab. Click on the “Add Contact Form” icon at the top right corner of the page to open “Add new form” popup.
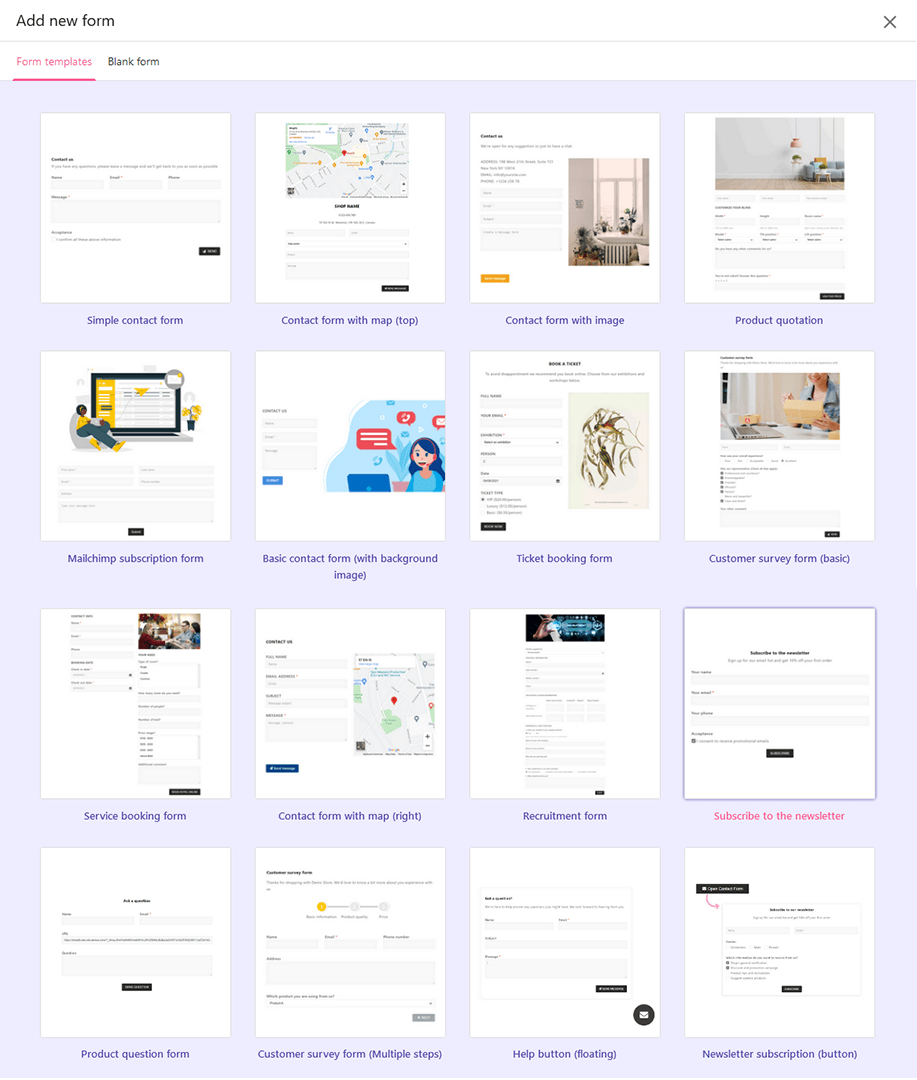
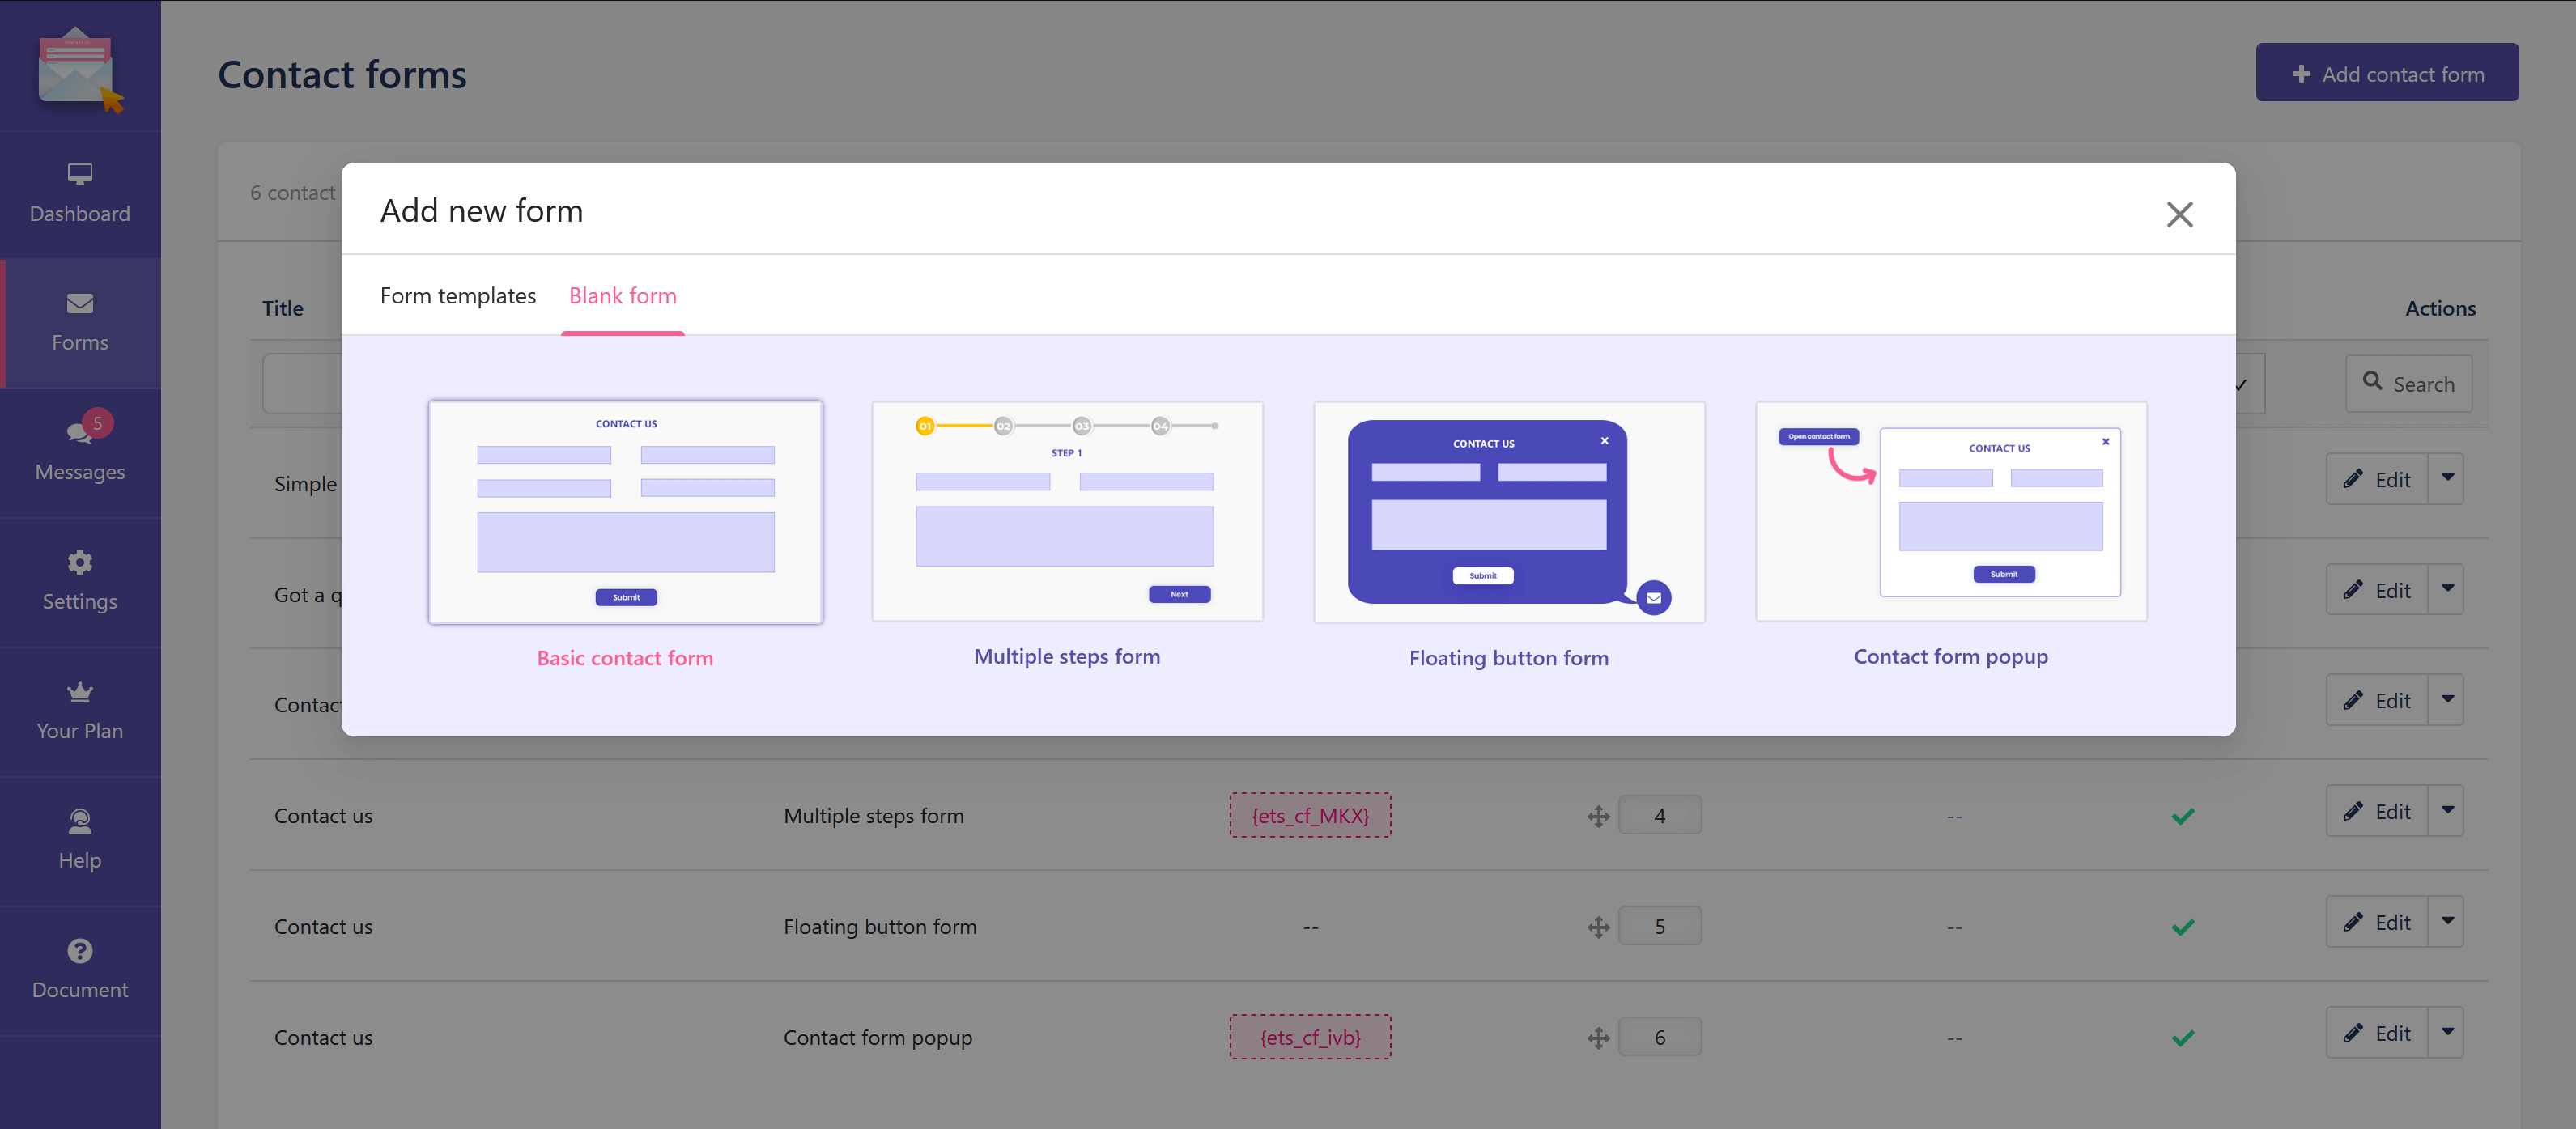
On the “Add new form” popup, you can select “Form templates” tab or “Blank form” tab.
- “Form templates” tab provides 16 types of pre-made contact forms, which are very eye-catching and convenient, you just need to choose the form type that suits your needs.
- “Blank form”: the app supports 4 blank form types: Basic contact form, Multiple steps form, Floating button form, and Contact form popup. Let create a new “Basic contact form” for example.
Step 1: Form Builder
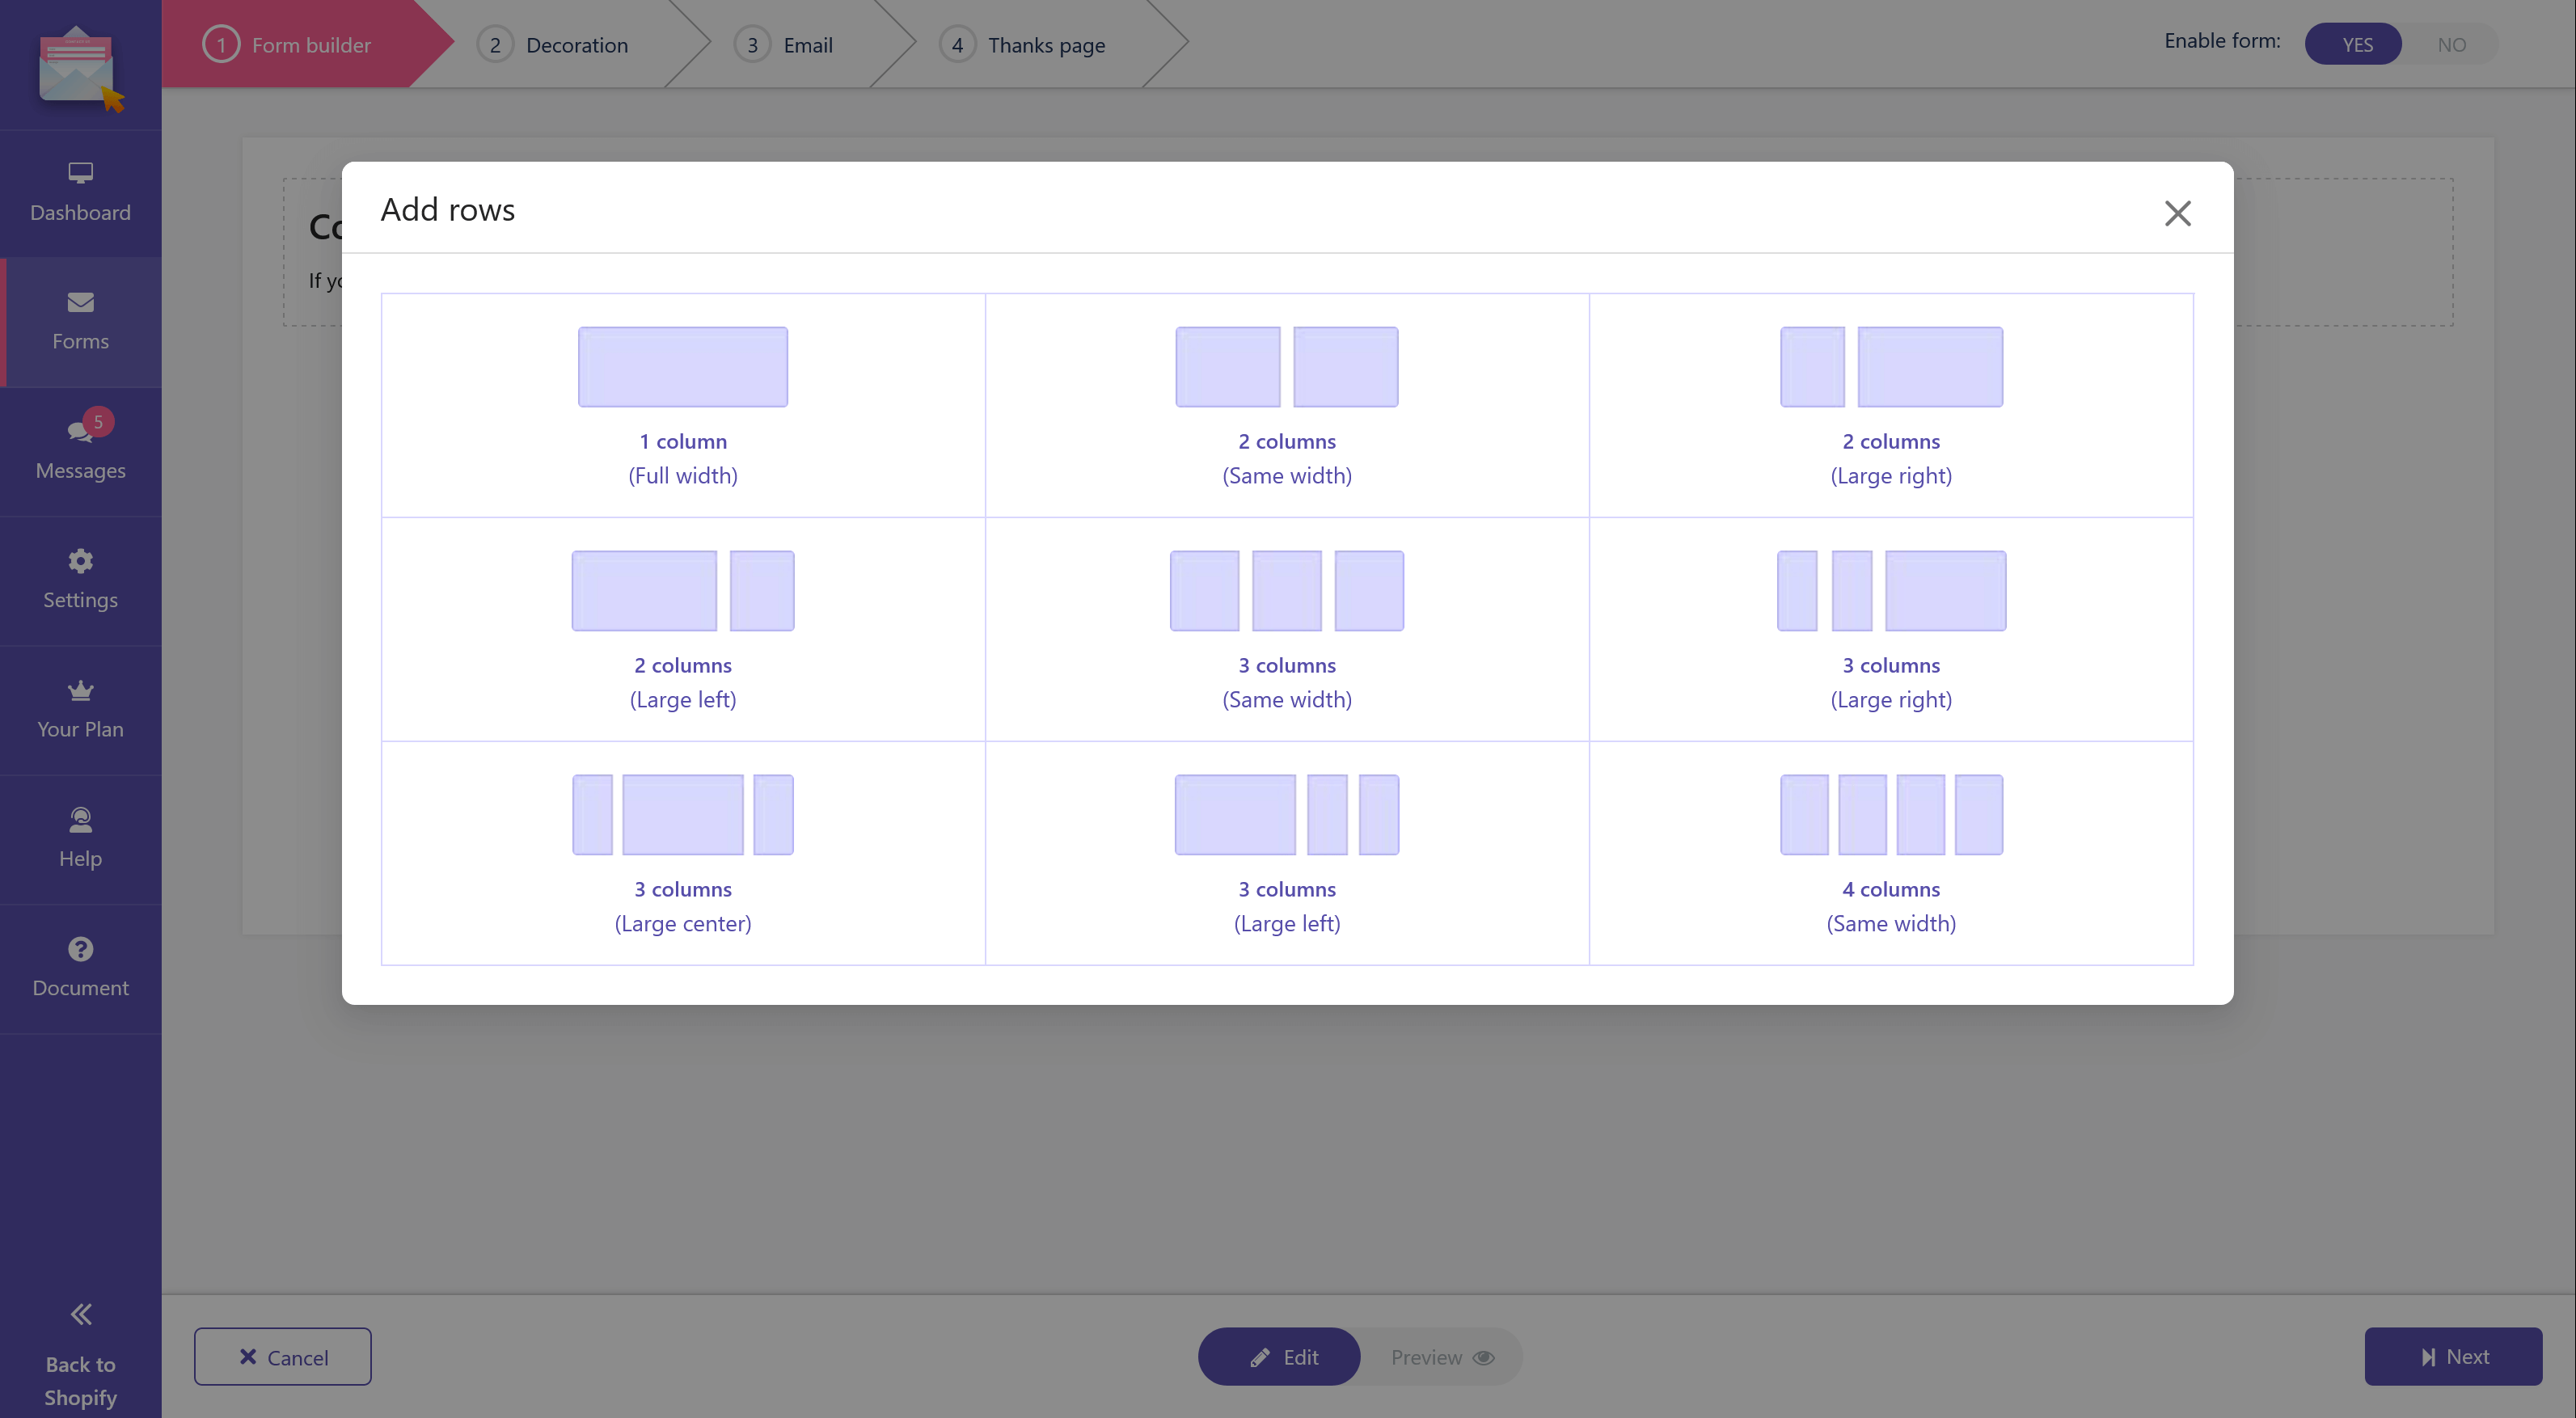
(1) Click on the button “Add new row to create your contact form”.

(2) On the “Add row” popup, there are 9 types of rows with different numbers and widths of columns. Depending on your purpose/idea, select the type of row you want.
(3) Add an input field.
- Click on “Add input field” link to open the “Input fields” sidebar.
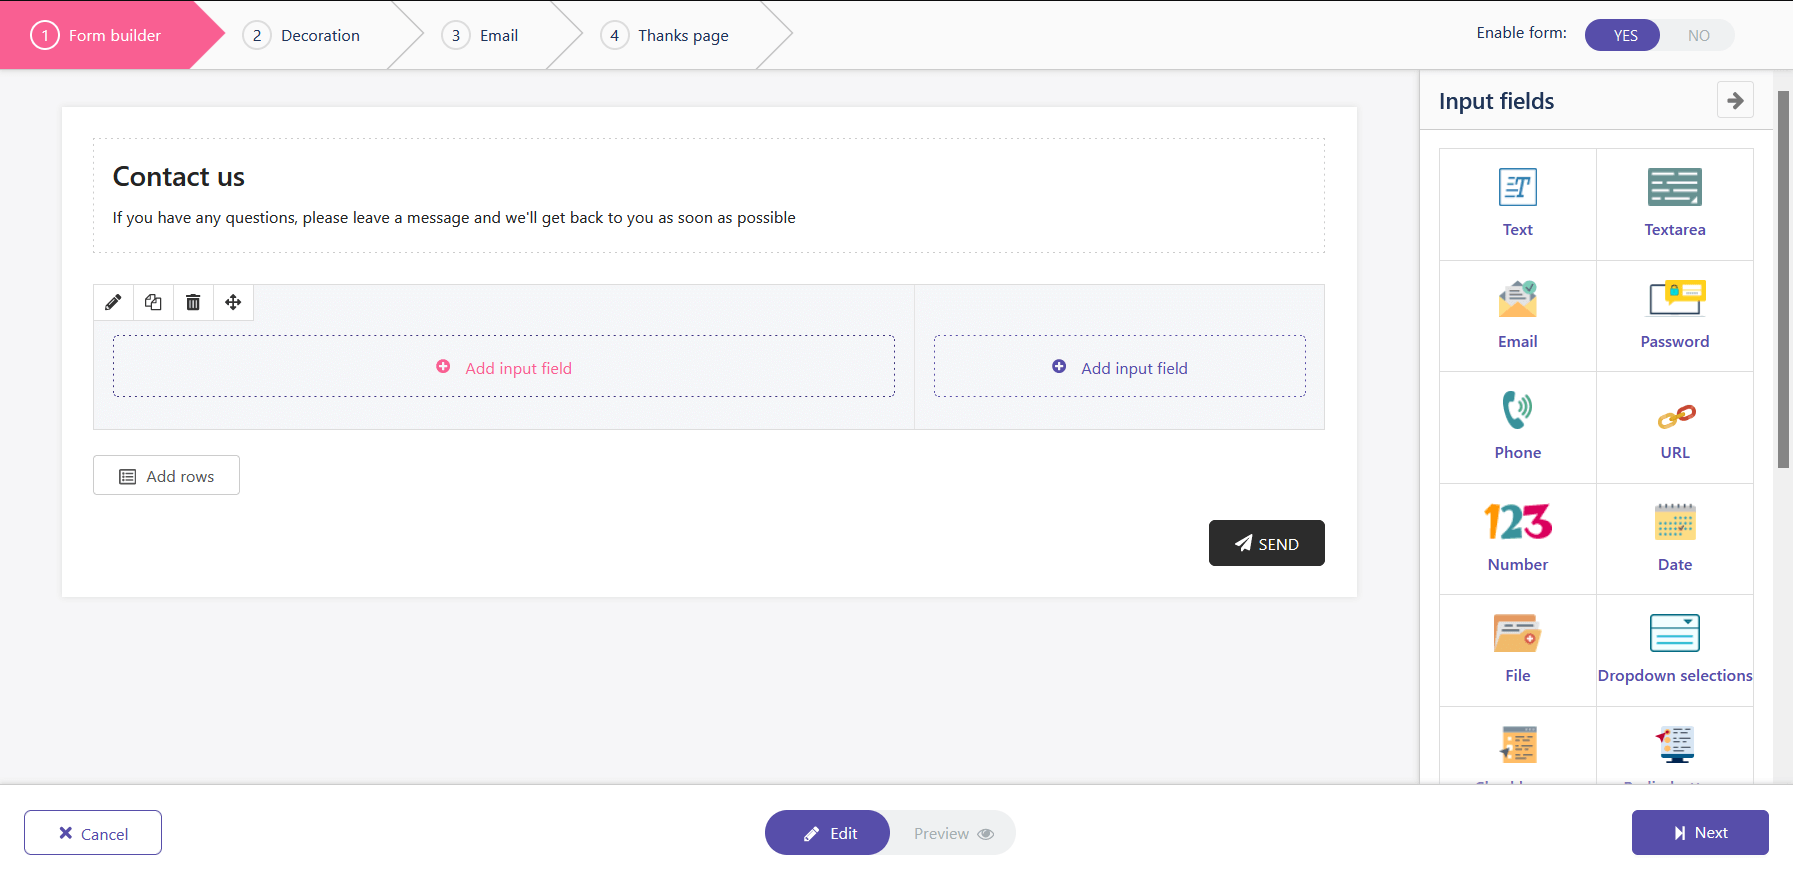
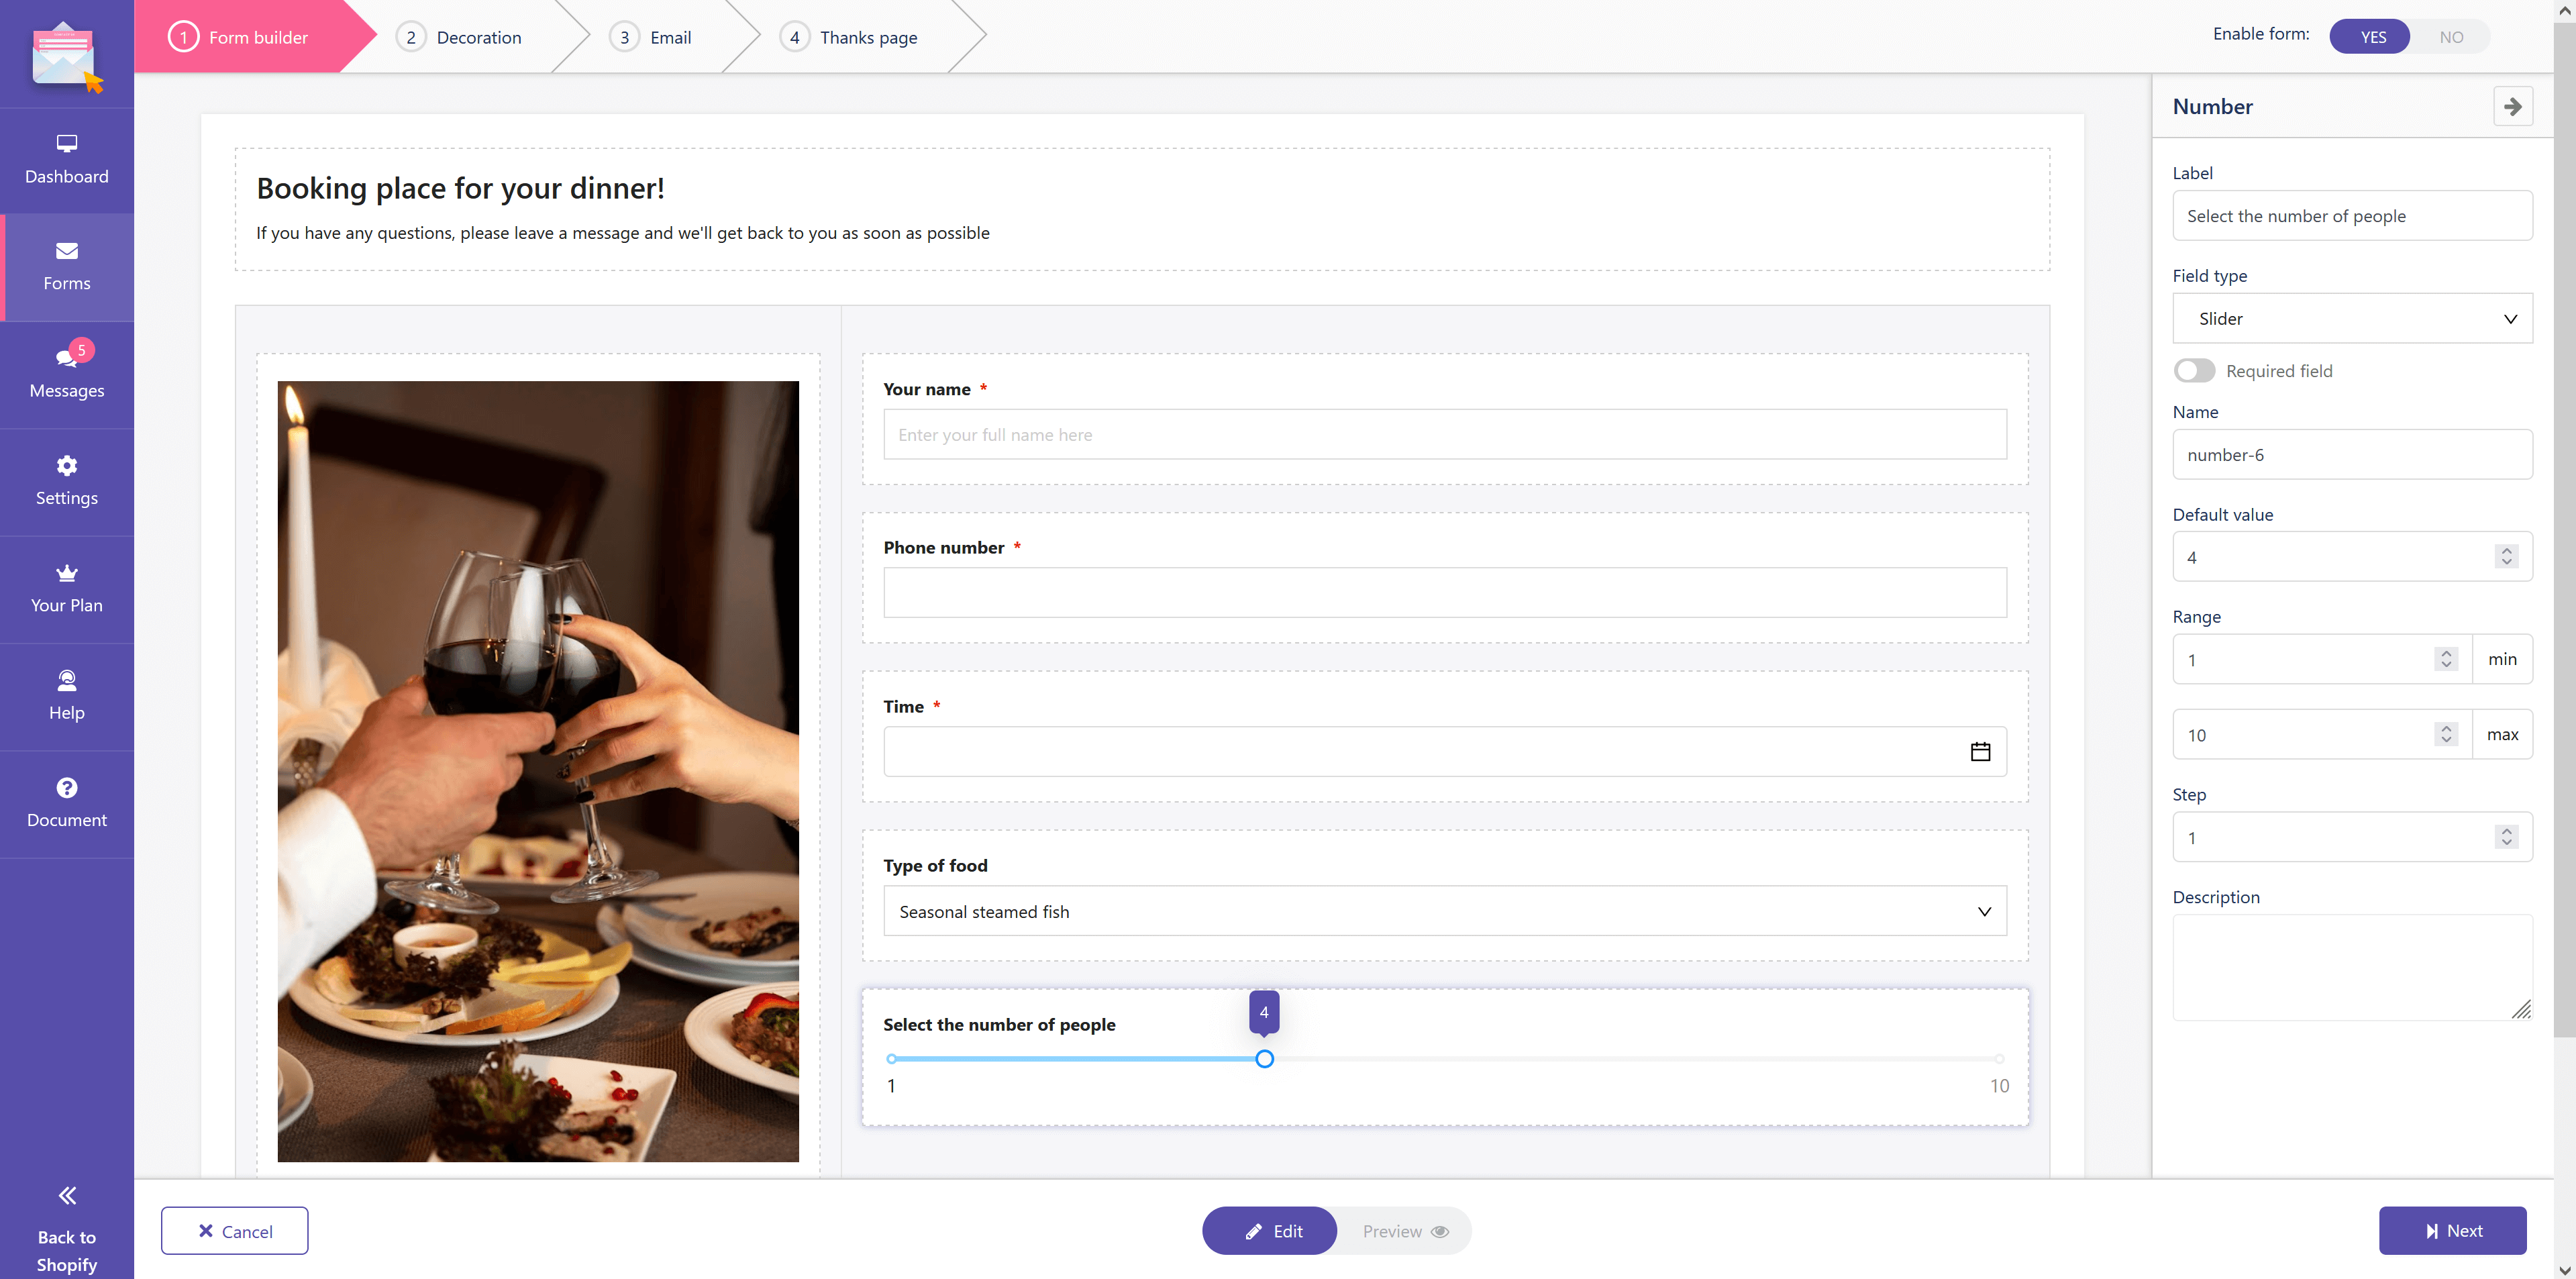
- Select an input field you want (text, text area, email, password, phone, URL, number, date, file, drop-down selection, checkboxes, radio buttons, HTML, quiz, acceptance, reCAPTCHA, image, countries, rating).
- You can delete, duplicate or edit the input field as you wish.
- Add rows and input fields until you complete your contact form.
- Click “Next” to move to the next step.
NOTE:
To add the reCAPTCHA input field, you need to enable reCAPTCHA first. Find and read the instruction to activate reCAPTCHA feature on Settings page of this documentation.
When your contact form is spammed, this app may delete spam data/messages. Therefore, we recommend you use reCAPTCHA for all contact forms to prevent spam and increase security.
Step 2: Decoration
You will see the new contact form you have just created at the center and its setting sections on the right.
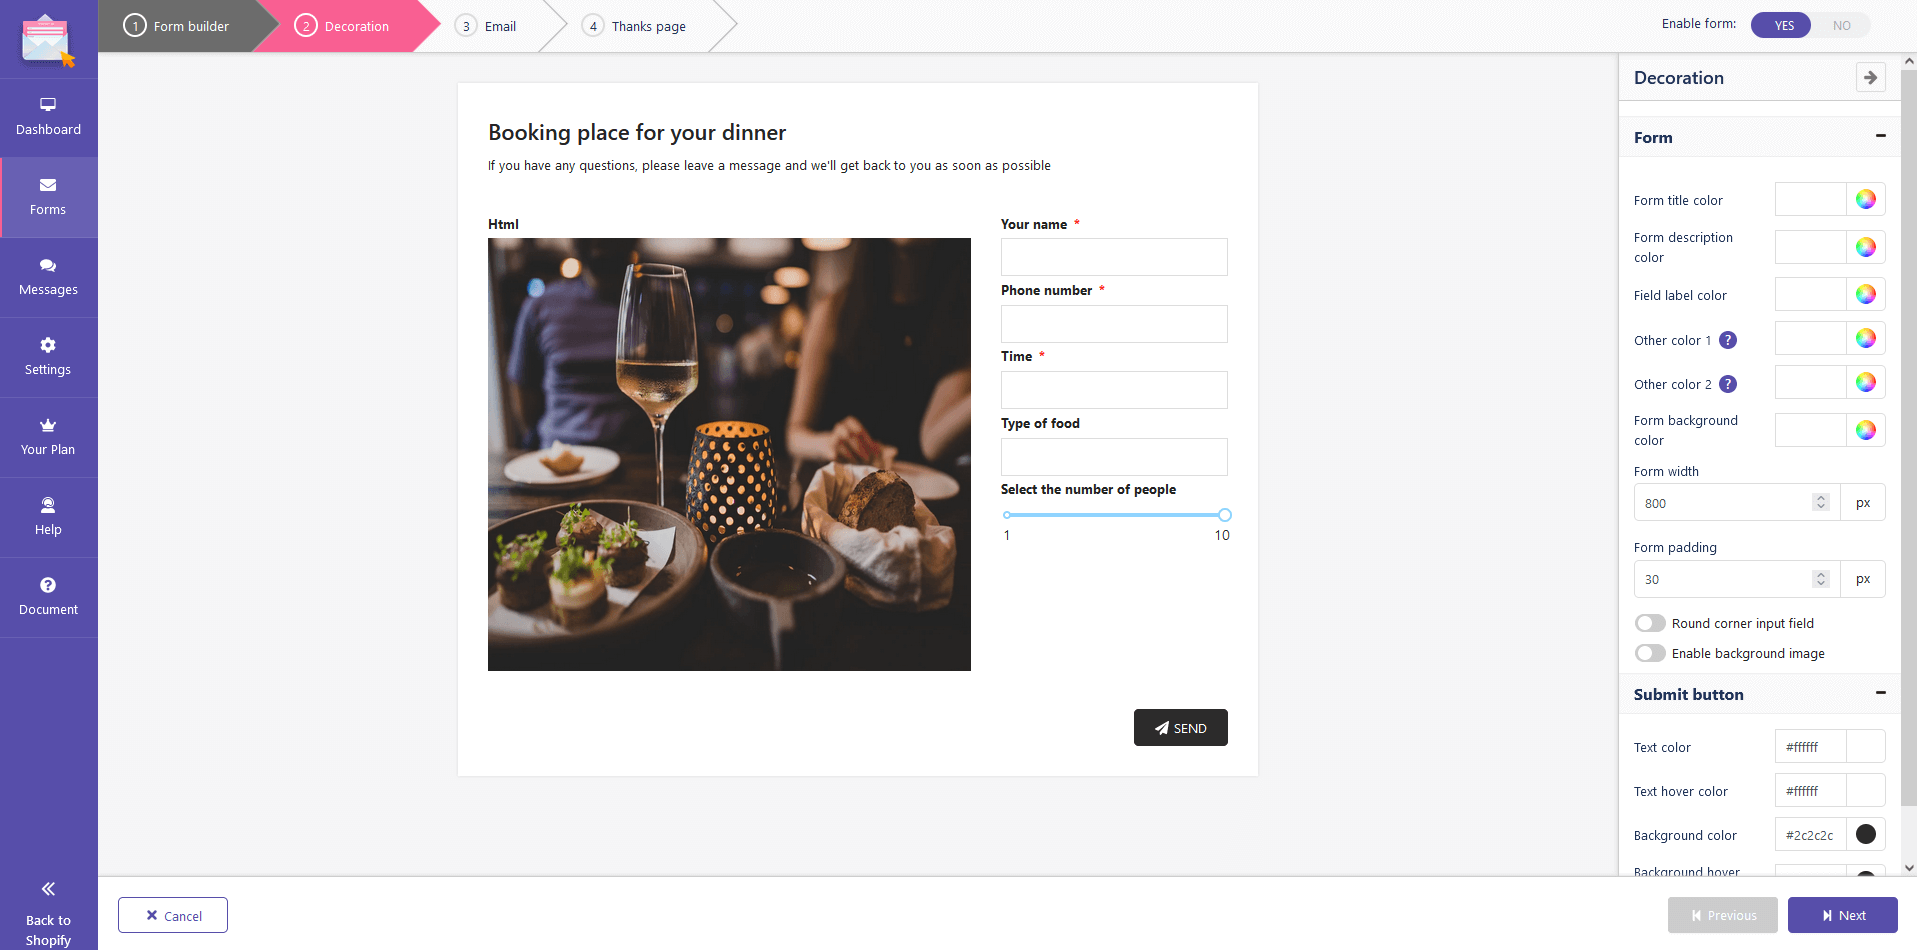
You can set up and freely customize each element in the form such as colors, form width, form padding, upload background image, choose the position for submit button, etc.
Click “Next” to move to the next step when you finish decorating.
Step 3: Email settings
Contact Form Ultimate app supports an email system sent to both customers and admin.
1. Email sends to the customer:
As soon as the customer fills in a contact form and presses the submit button, an automatic confirmation email will be sent to the customer. Field content such as subject, message body can be edited.
You can see 2 sections of the “Email send to customer tab”: the email options section and the “Field values” section.
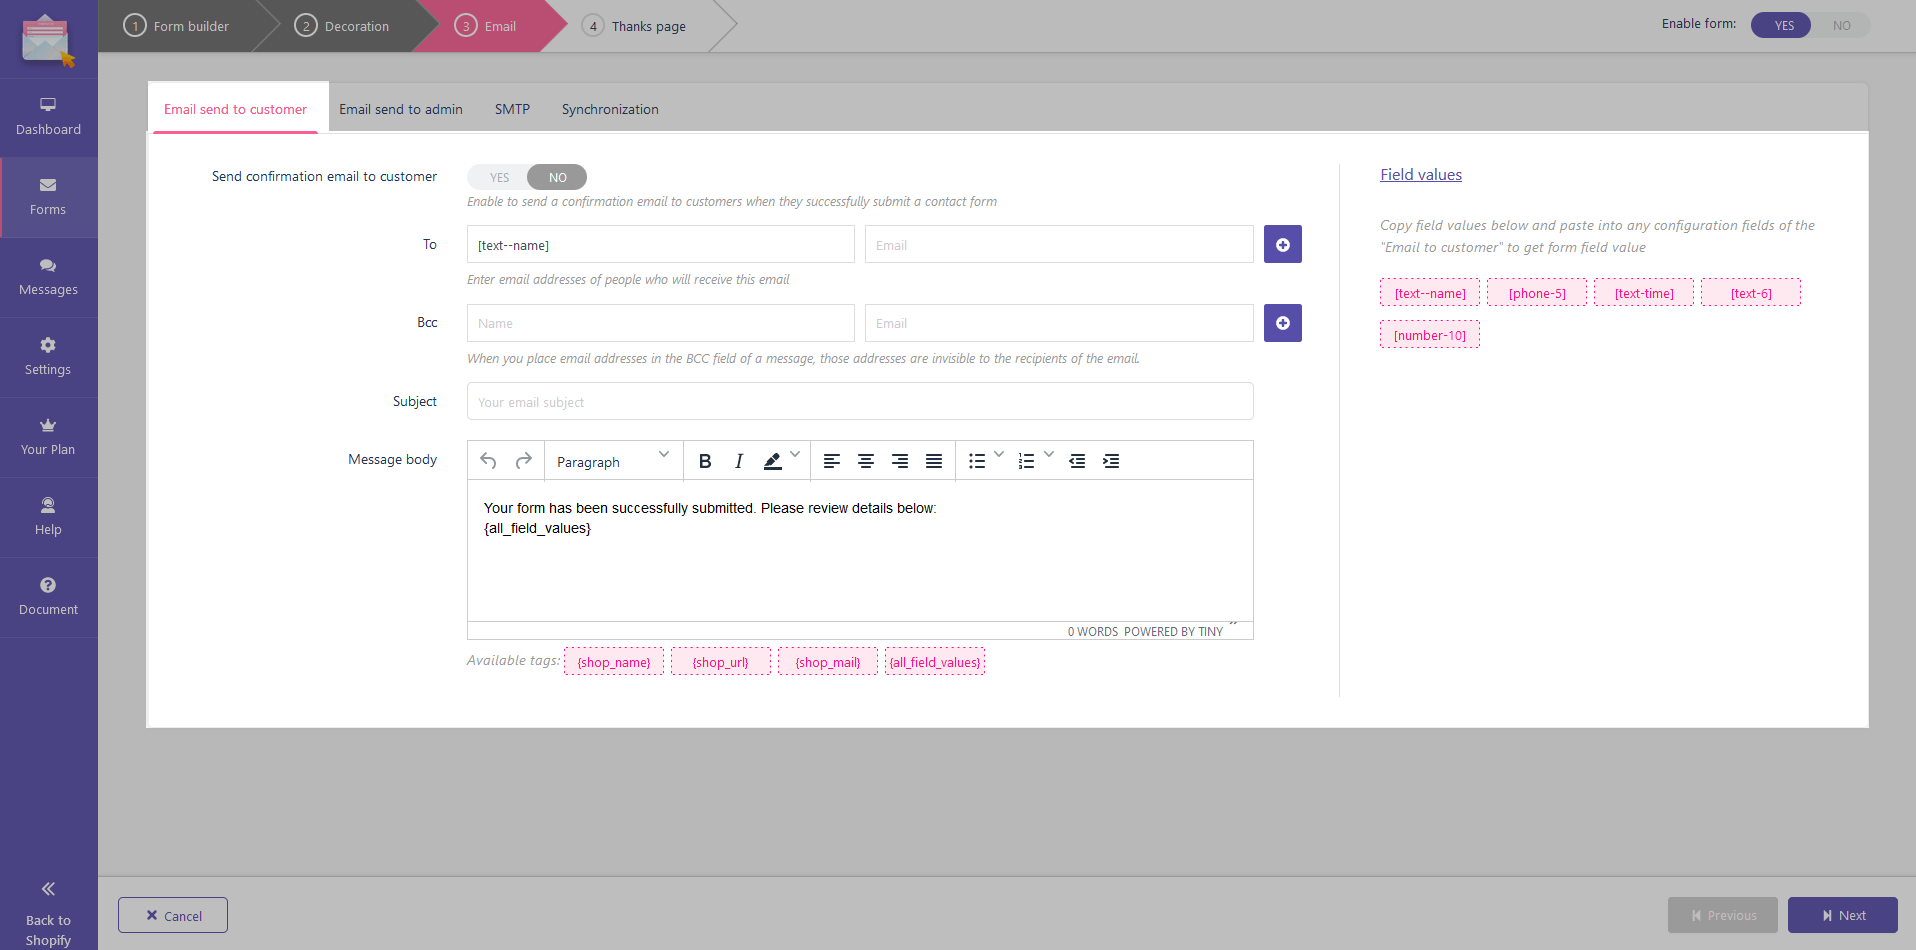
“Field values” are provided from the “Name” of every input field you added. To make field values easier to remember, you should set reminiscent “Name” for input fields such as [email-customeremail], [name-customername], [text-firstname], etc.
2. Email sends to admin:
Similar to customers, you need to set up the email send to your store administrators when there is a new contact form submitted. You also can use the field values provided and paste them into any configuration fields of the “Email to admin” to get the form field value.
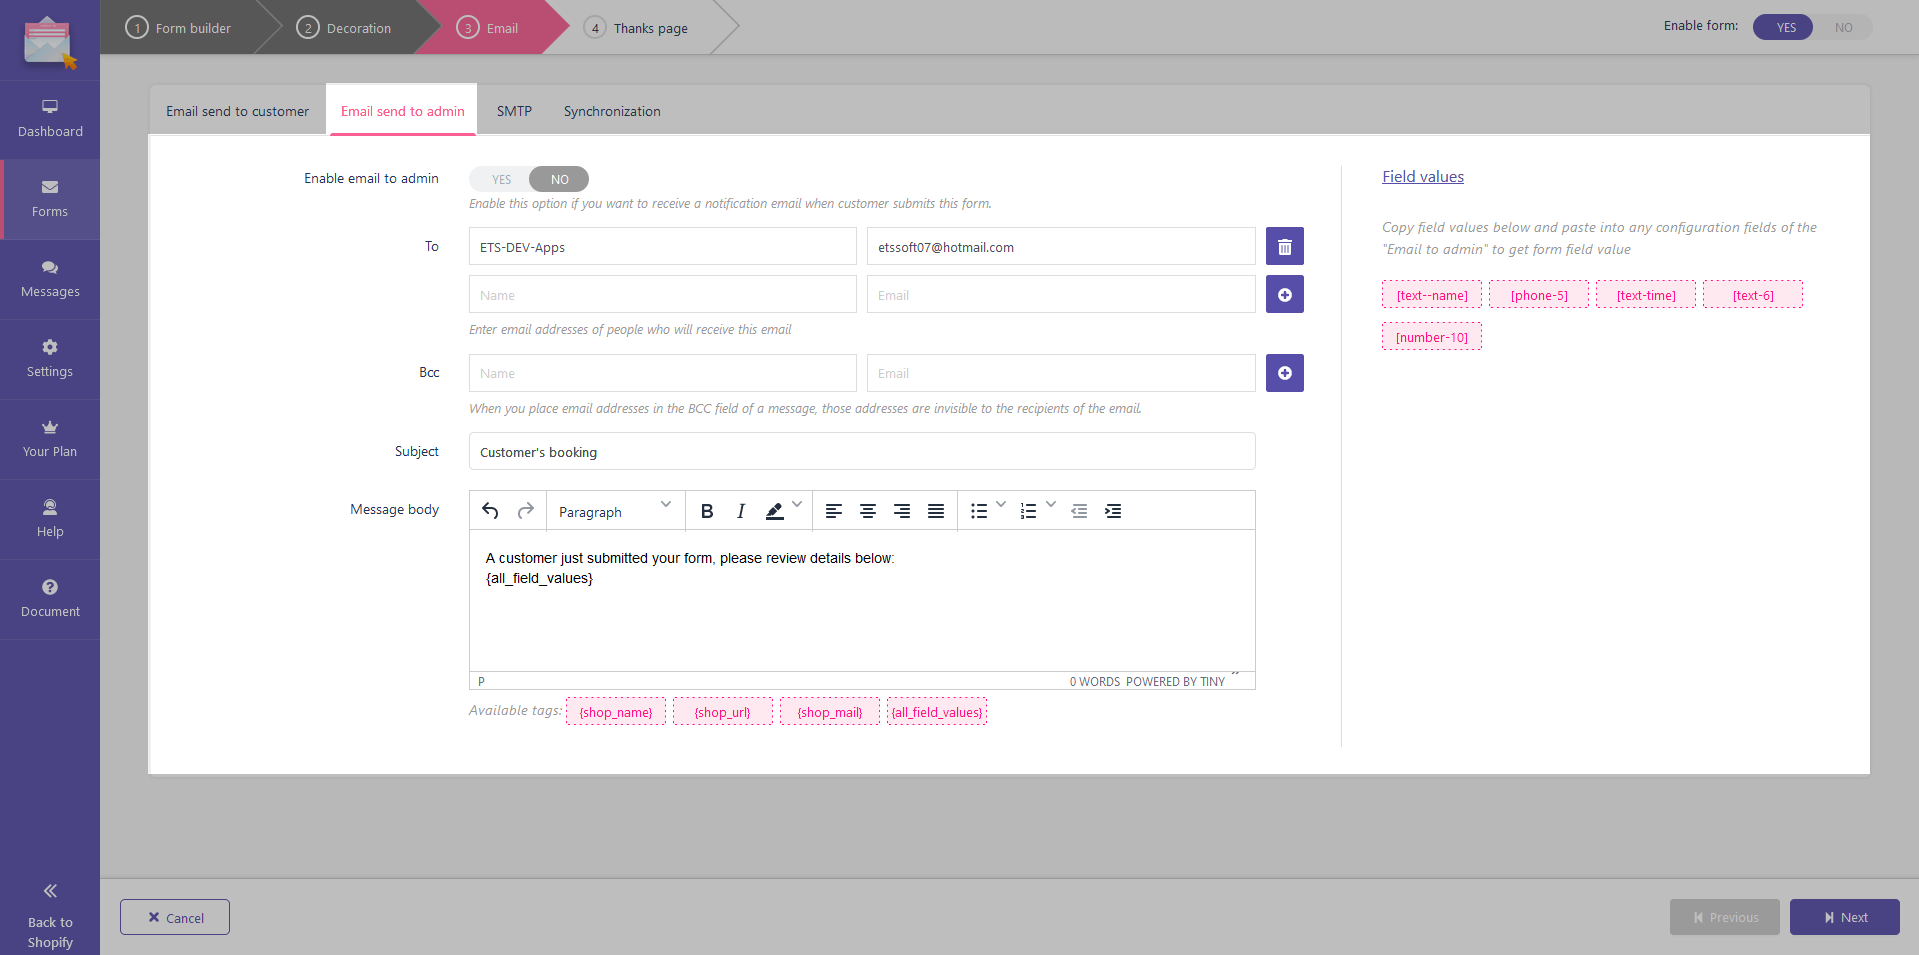
You can add multiple admin email addresses to receive notifications emails when there are messages from customers submitted.
3. SMTP:
There is a list of SMTP services that this app provides, you can choose the SMTP service you want to use.
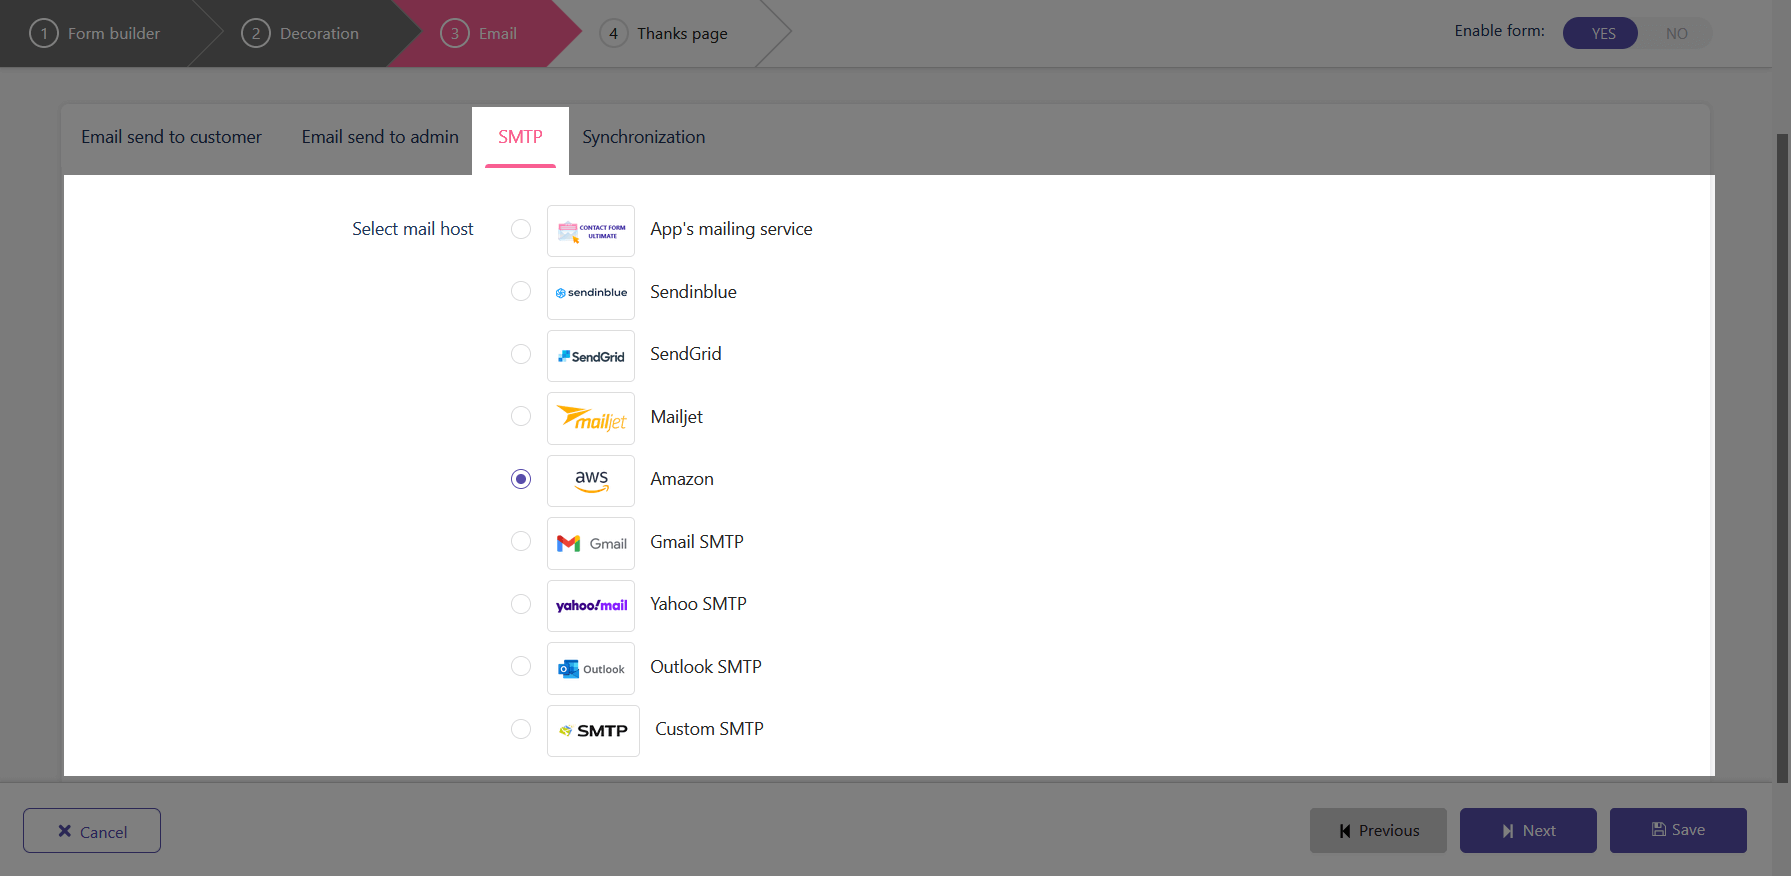
NOTE: you need to configure the SMTP service before choosing. To configure SMTP services, you need to go to the “Settings” tab. See how to configure the SMTP service in the Settings section in this documentation.
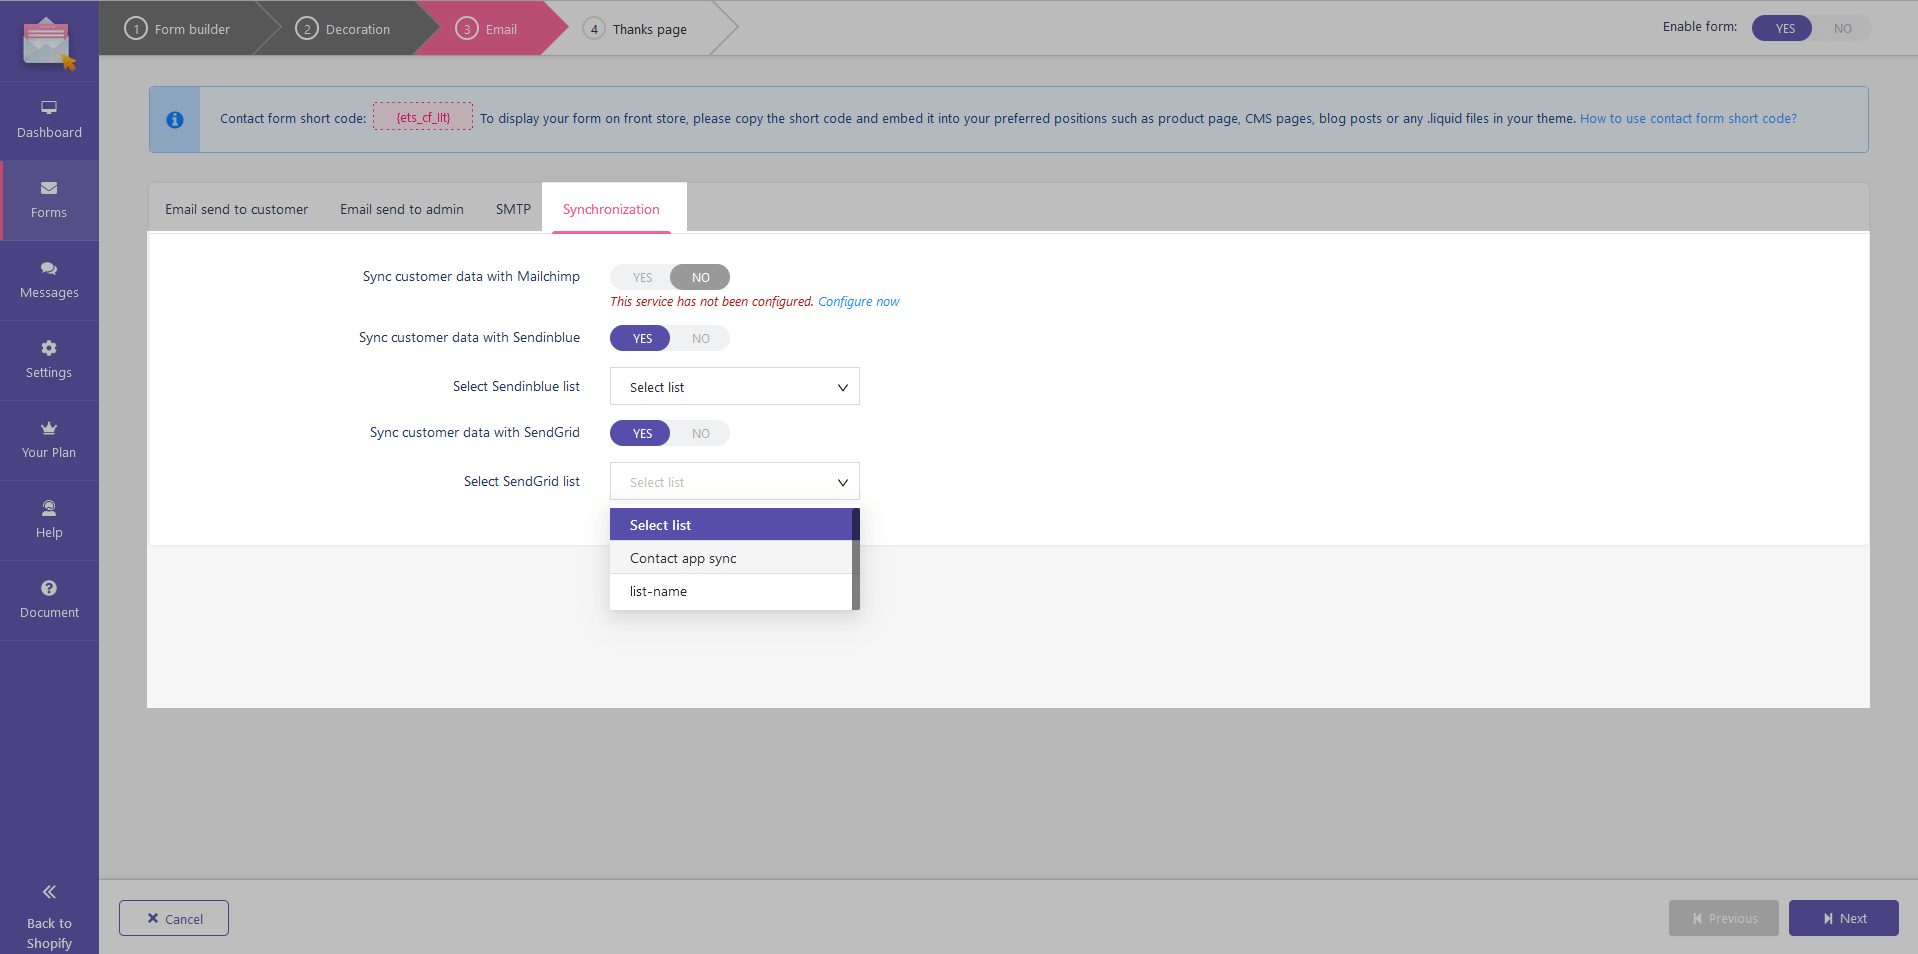
4. Synchronization:
Options allow you to synchronize data you collect through contact forms with contact data of mailing services. Enable the options with which you want to sync customer data.
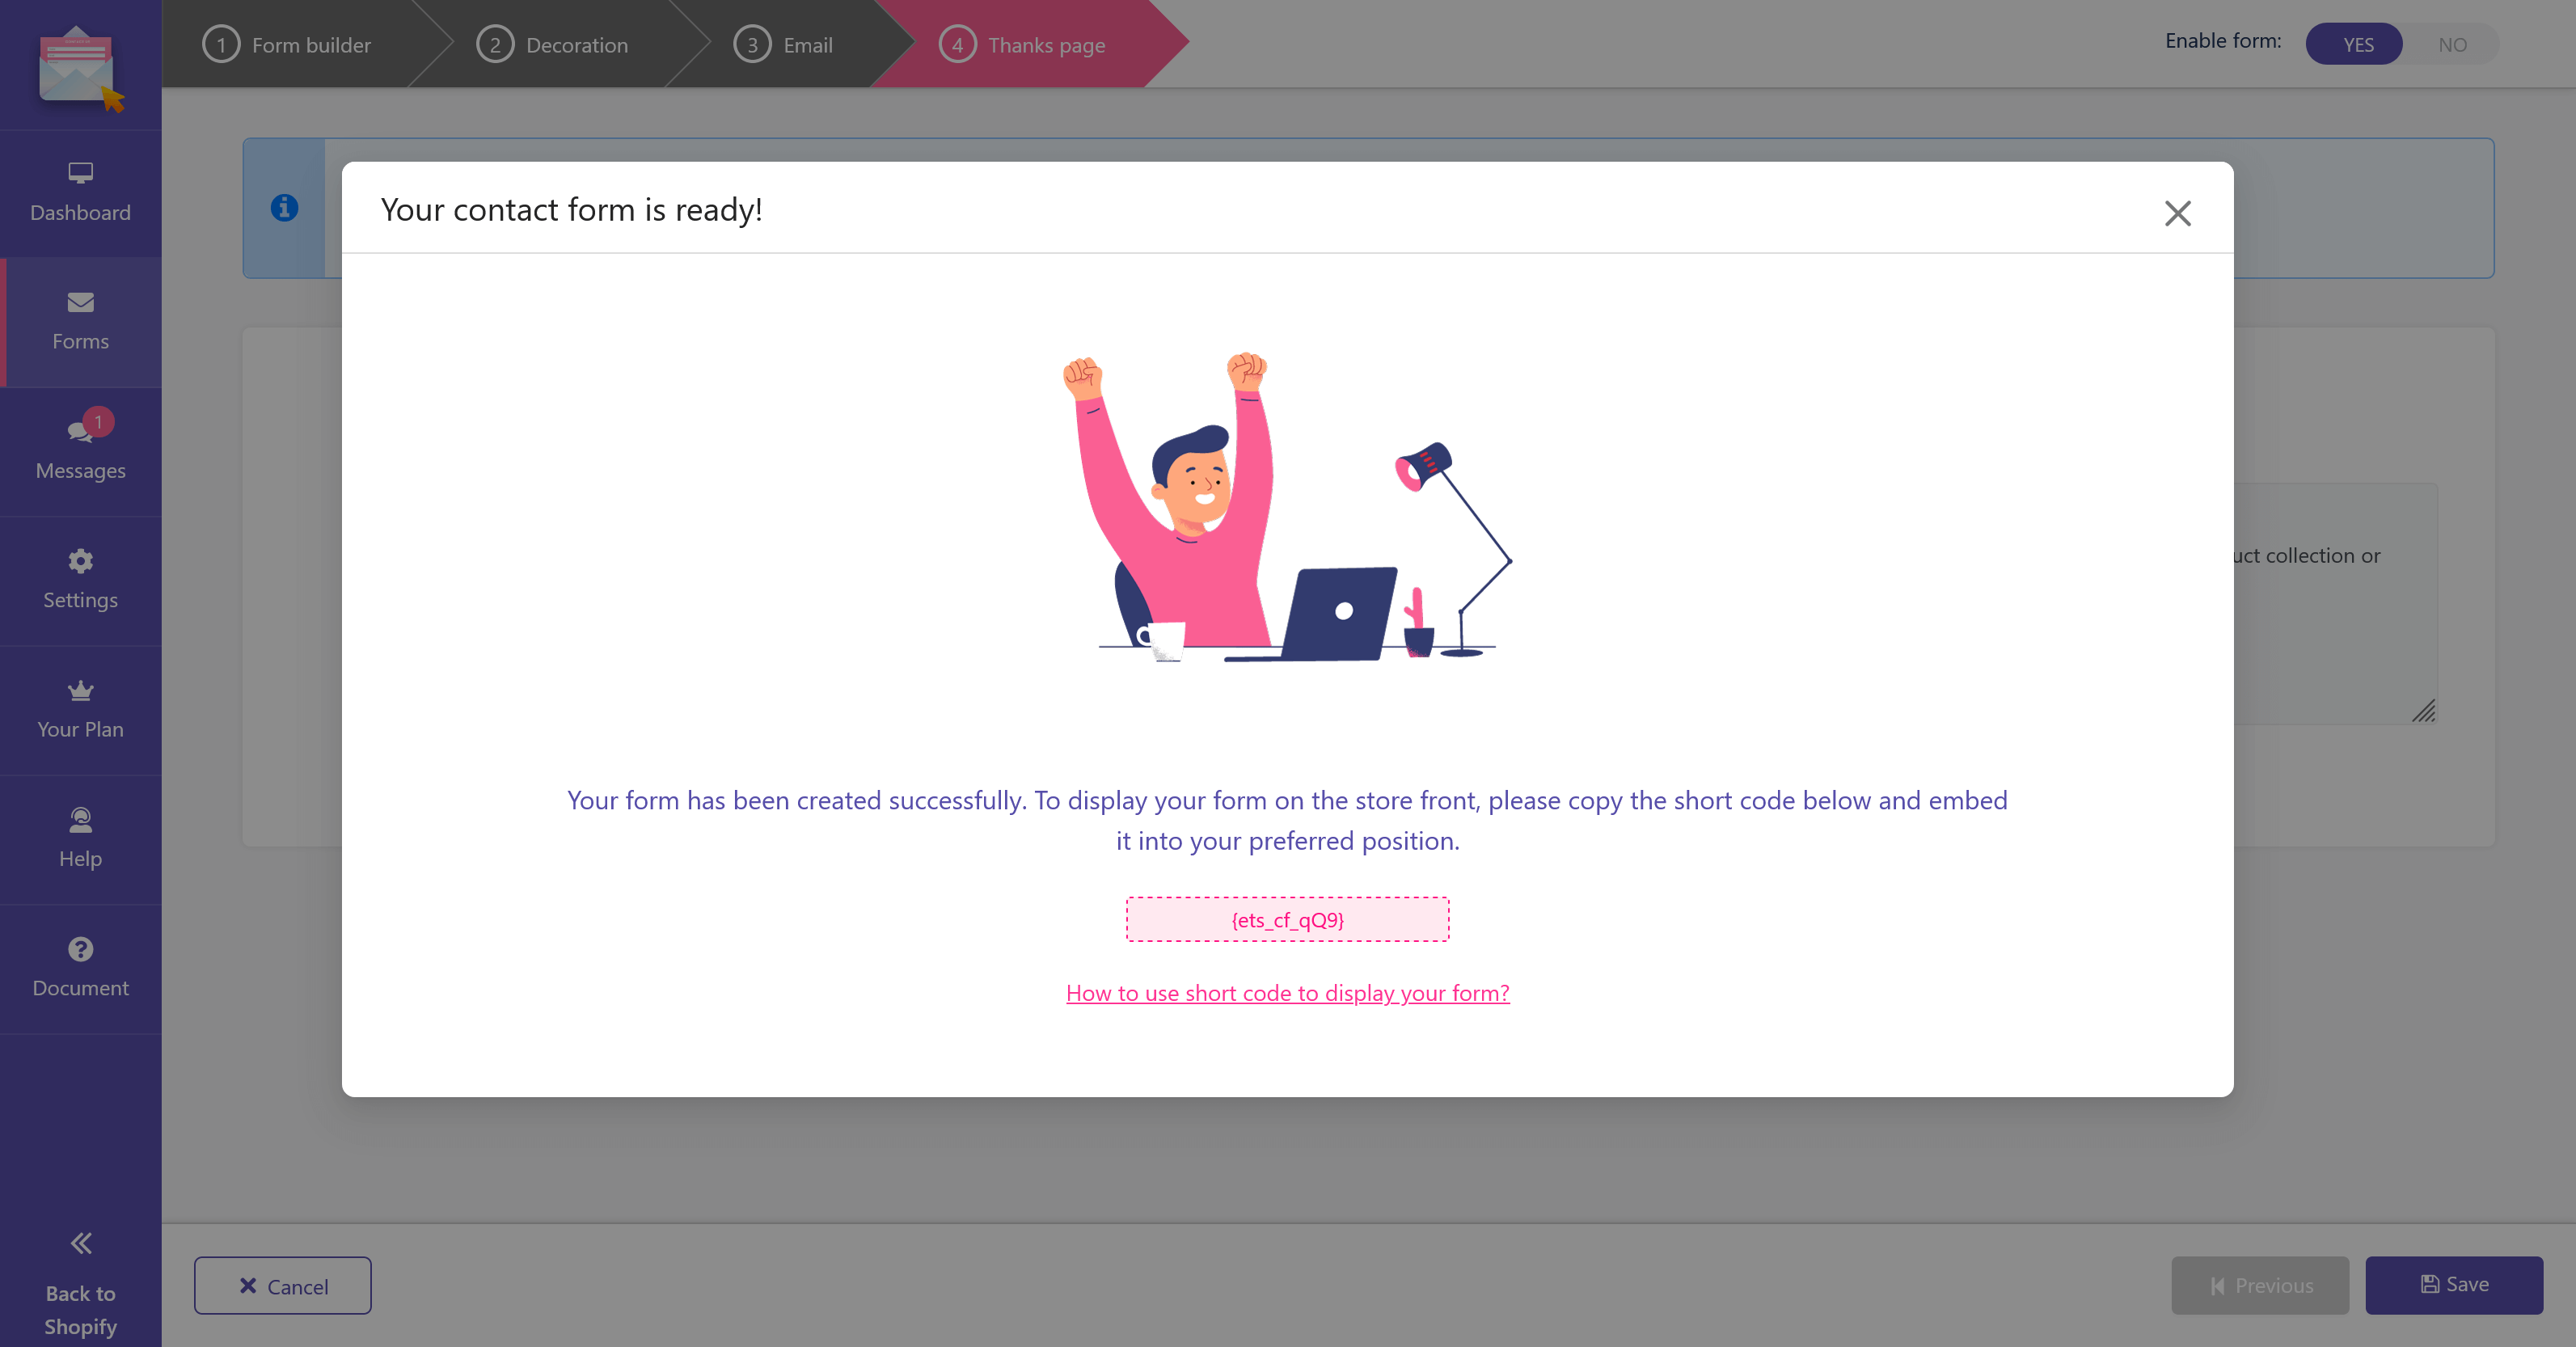
Step 4: Thanks page
You can set up a “Thanks” page to send a confirmation message to customers after they submit a form. Fill ill the message content and enable the “Hide form after submission?” option if needed.
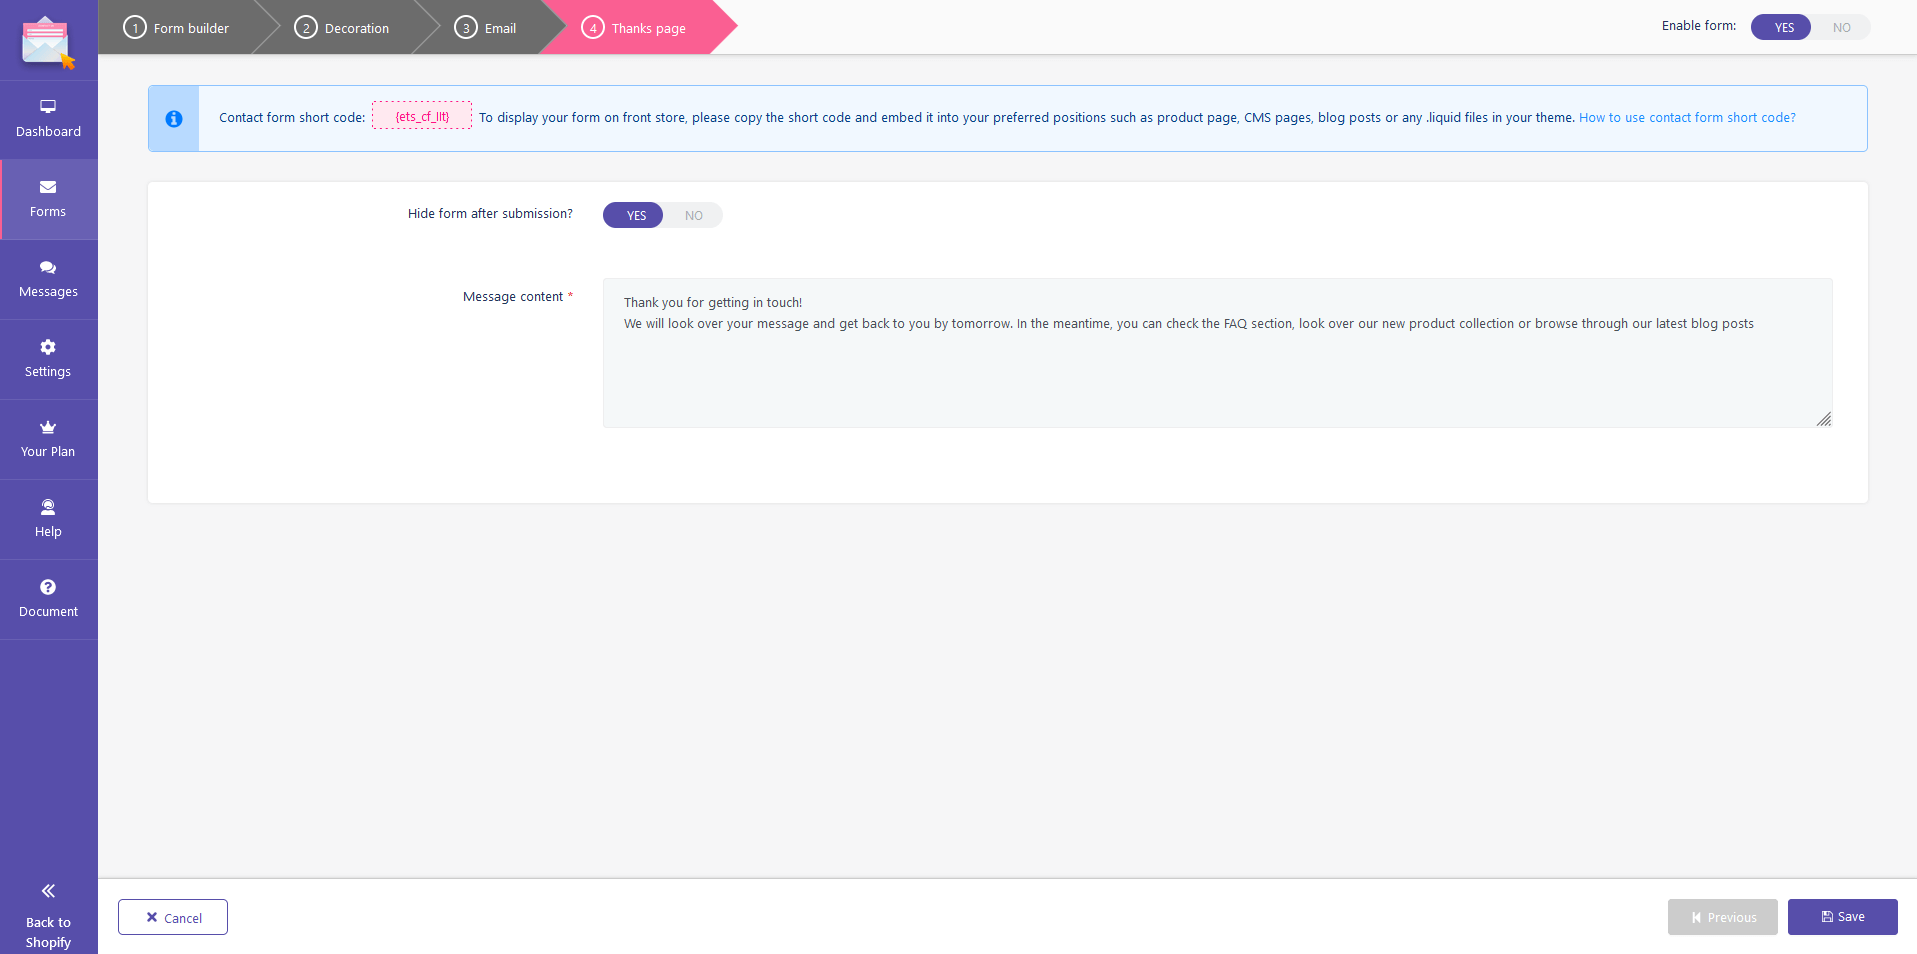
Finally, click on “Save” button to finish.
You can import contact forms into your current form list or export a specific contact form for backup purposes.
Click on “Import” button to upload a .json file including your contact form.
