FilterPro allows you to create unlimited product filters to help customers filter products quickly, limit the product range displayed in search results precisely.
(1) Filters
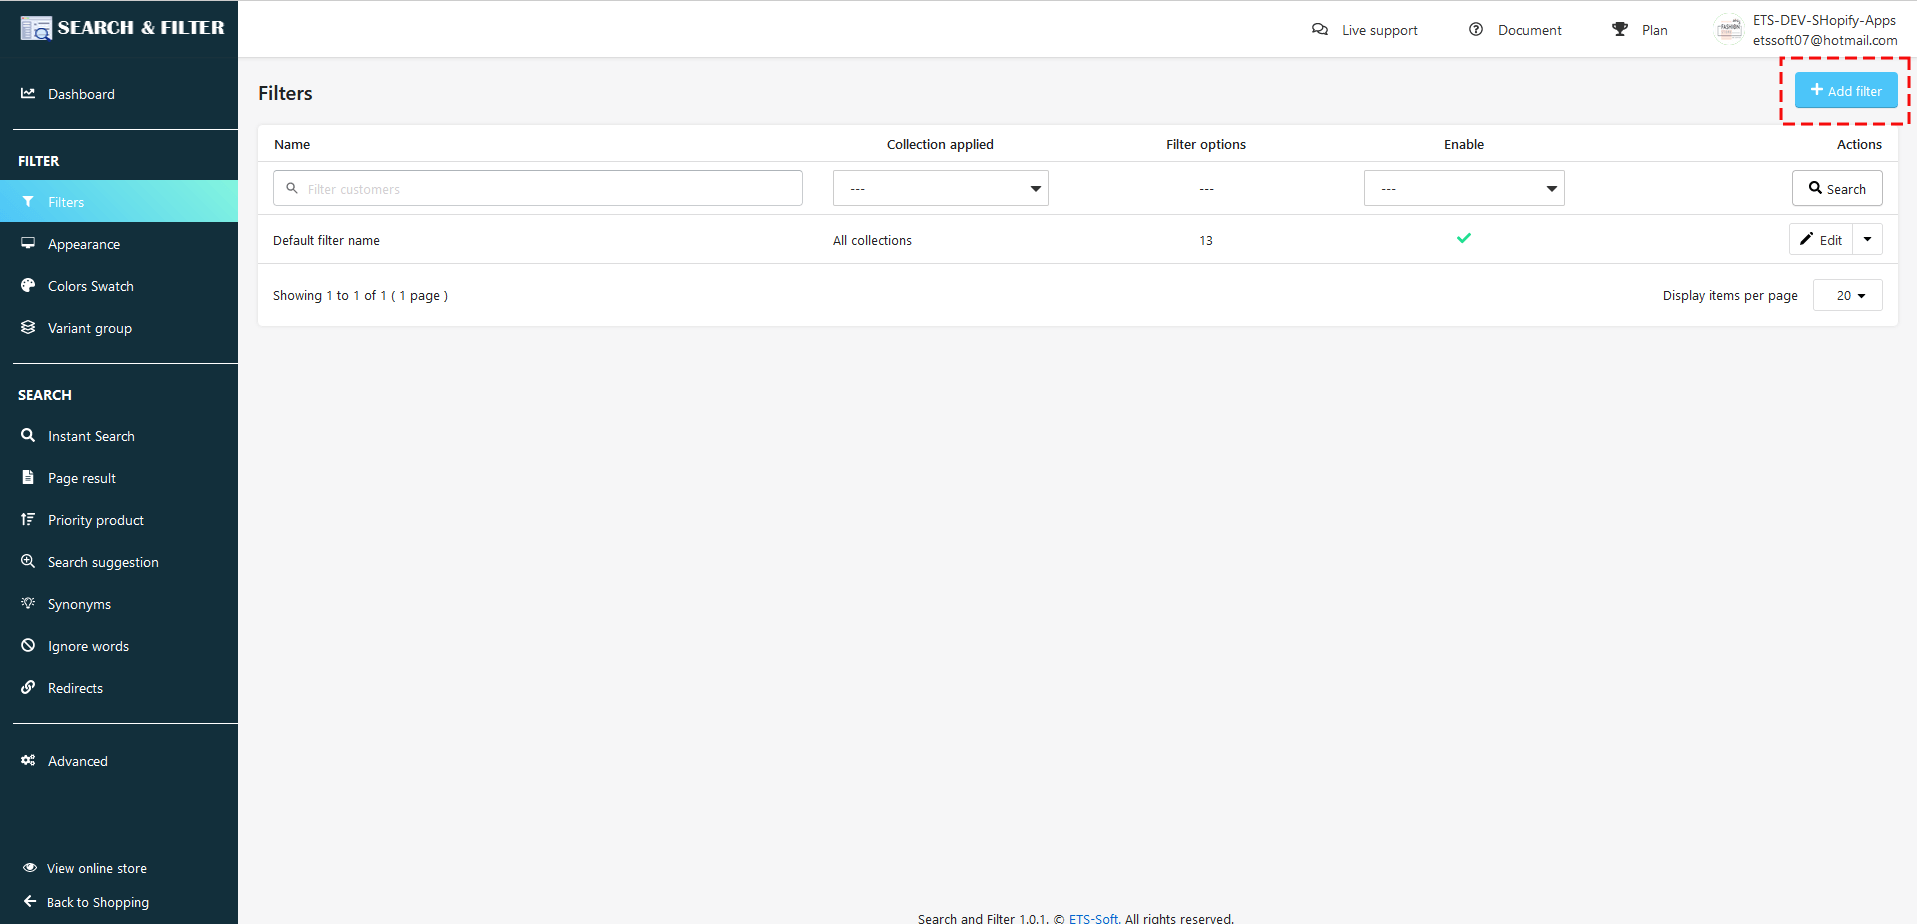
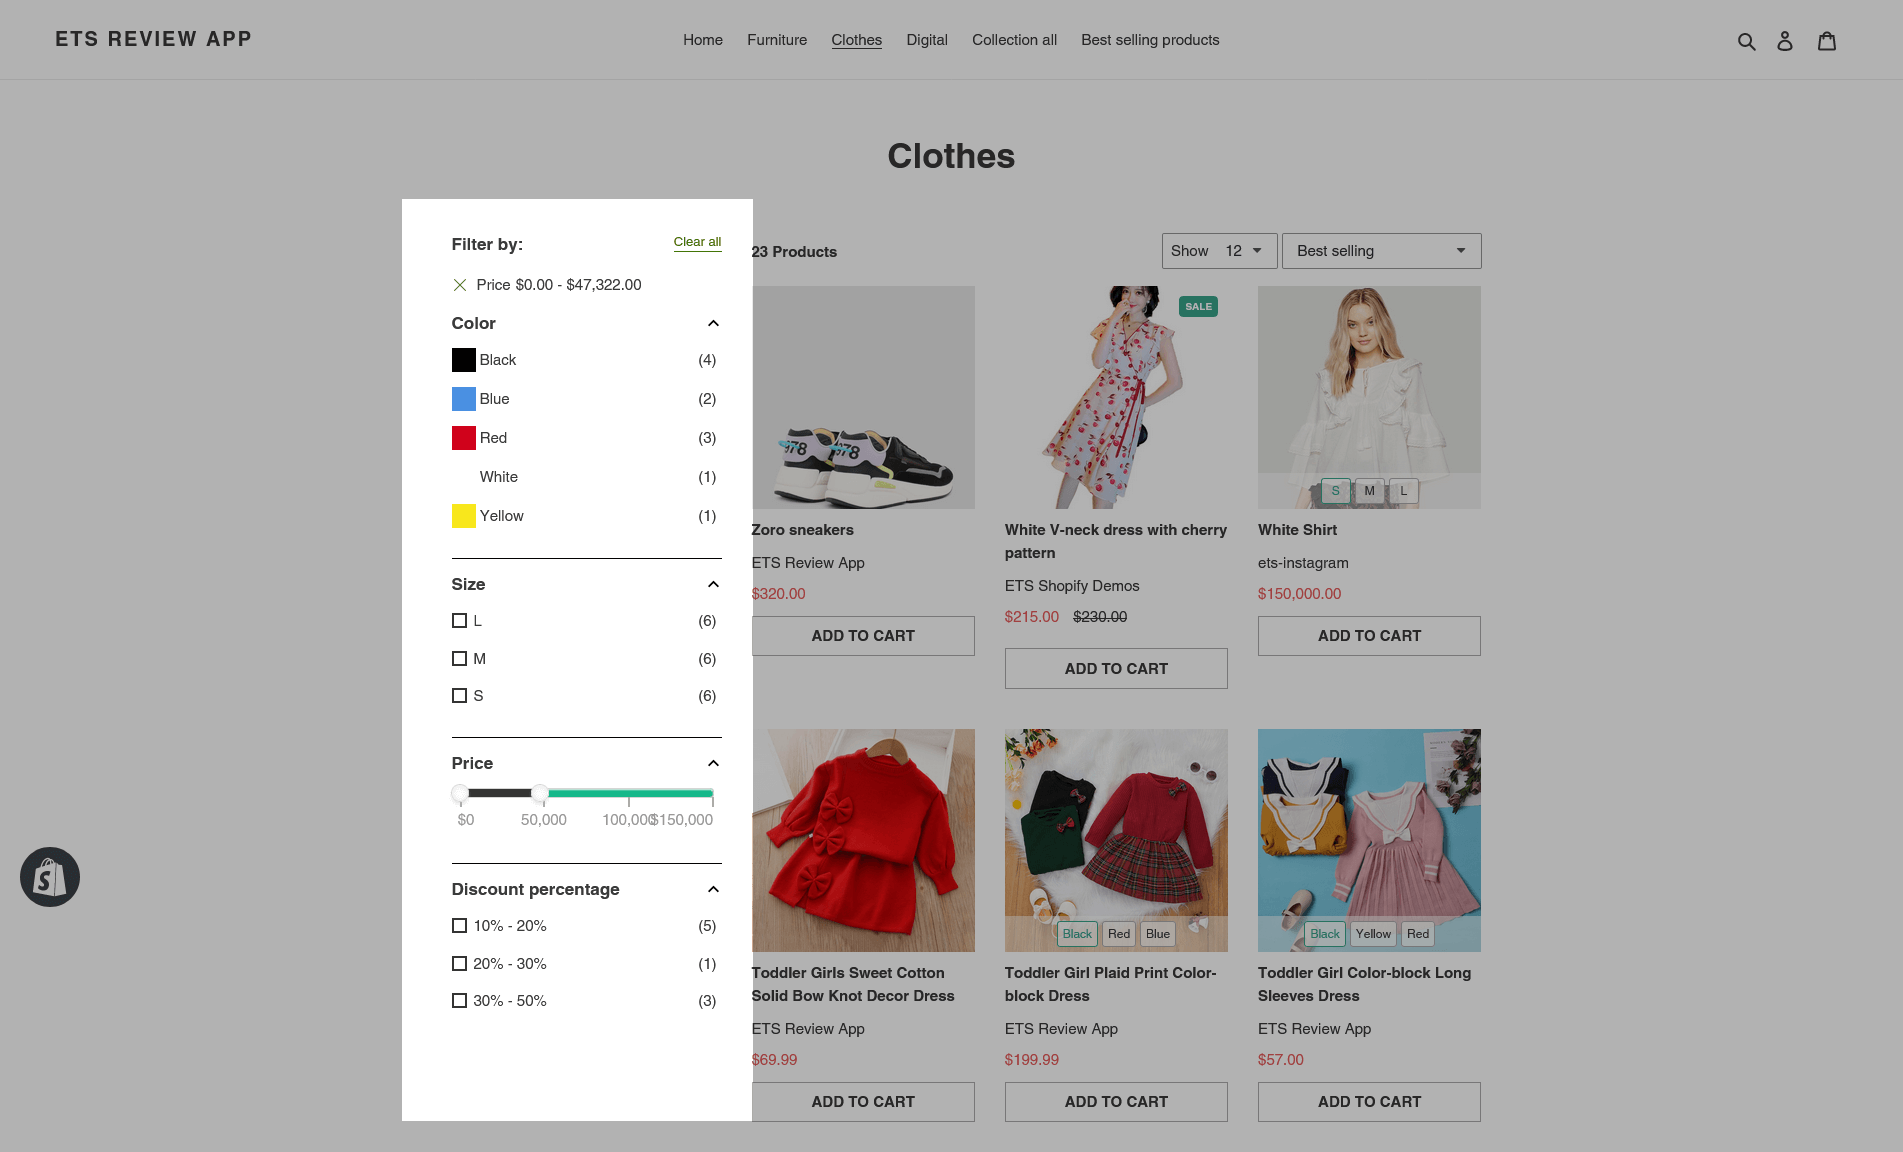
Navigate to the “Filter” page then you can create advanced filters that apply to collections depending on the attribute of the products and your use purpose.
Click on the “Add Filter” button at the top right corner of the page to add a new filter.
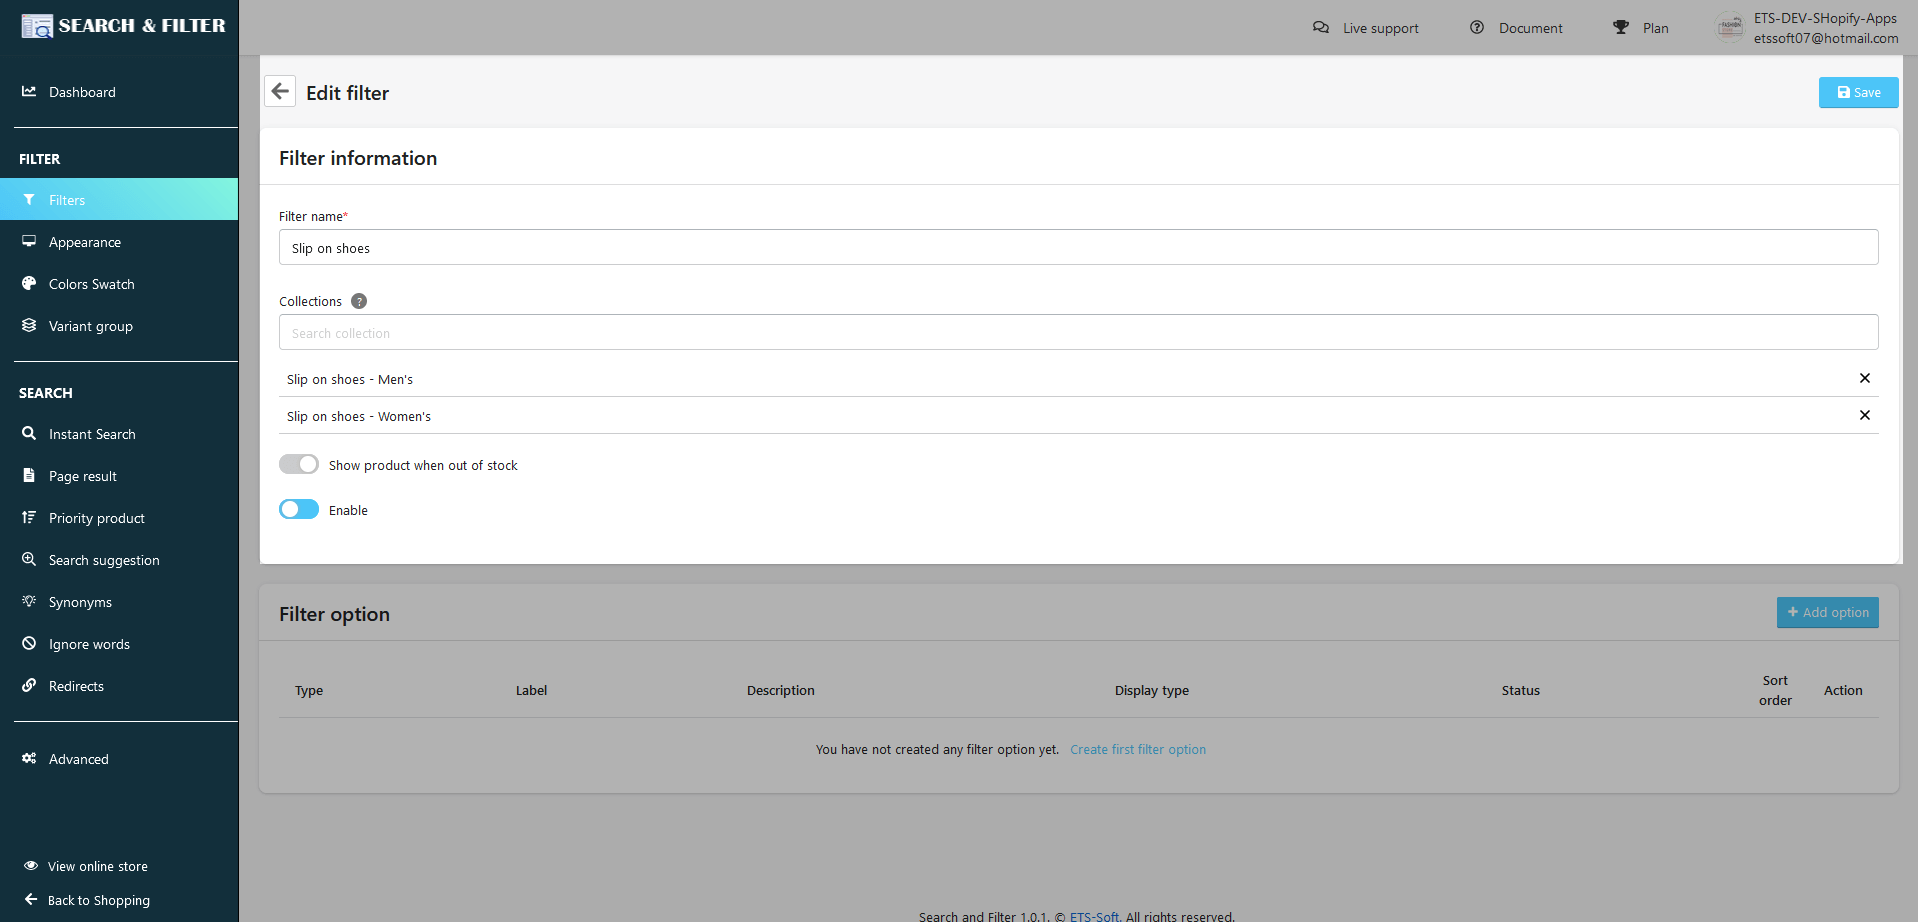
- Enter the filter name
- Select the collections you want to apply in this filter
- “Show products when out of stock” button: enable this button if you want the application still to filter and display products that are out of stock. On the contrary, the products that are out of stock will not be displayed on the search result when the customer filters if you disable this button.
- Enable this filter and “Save”
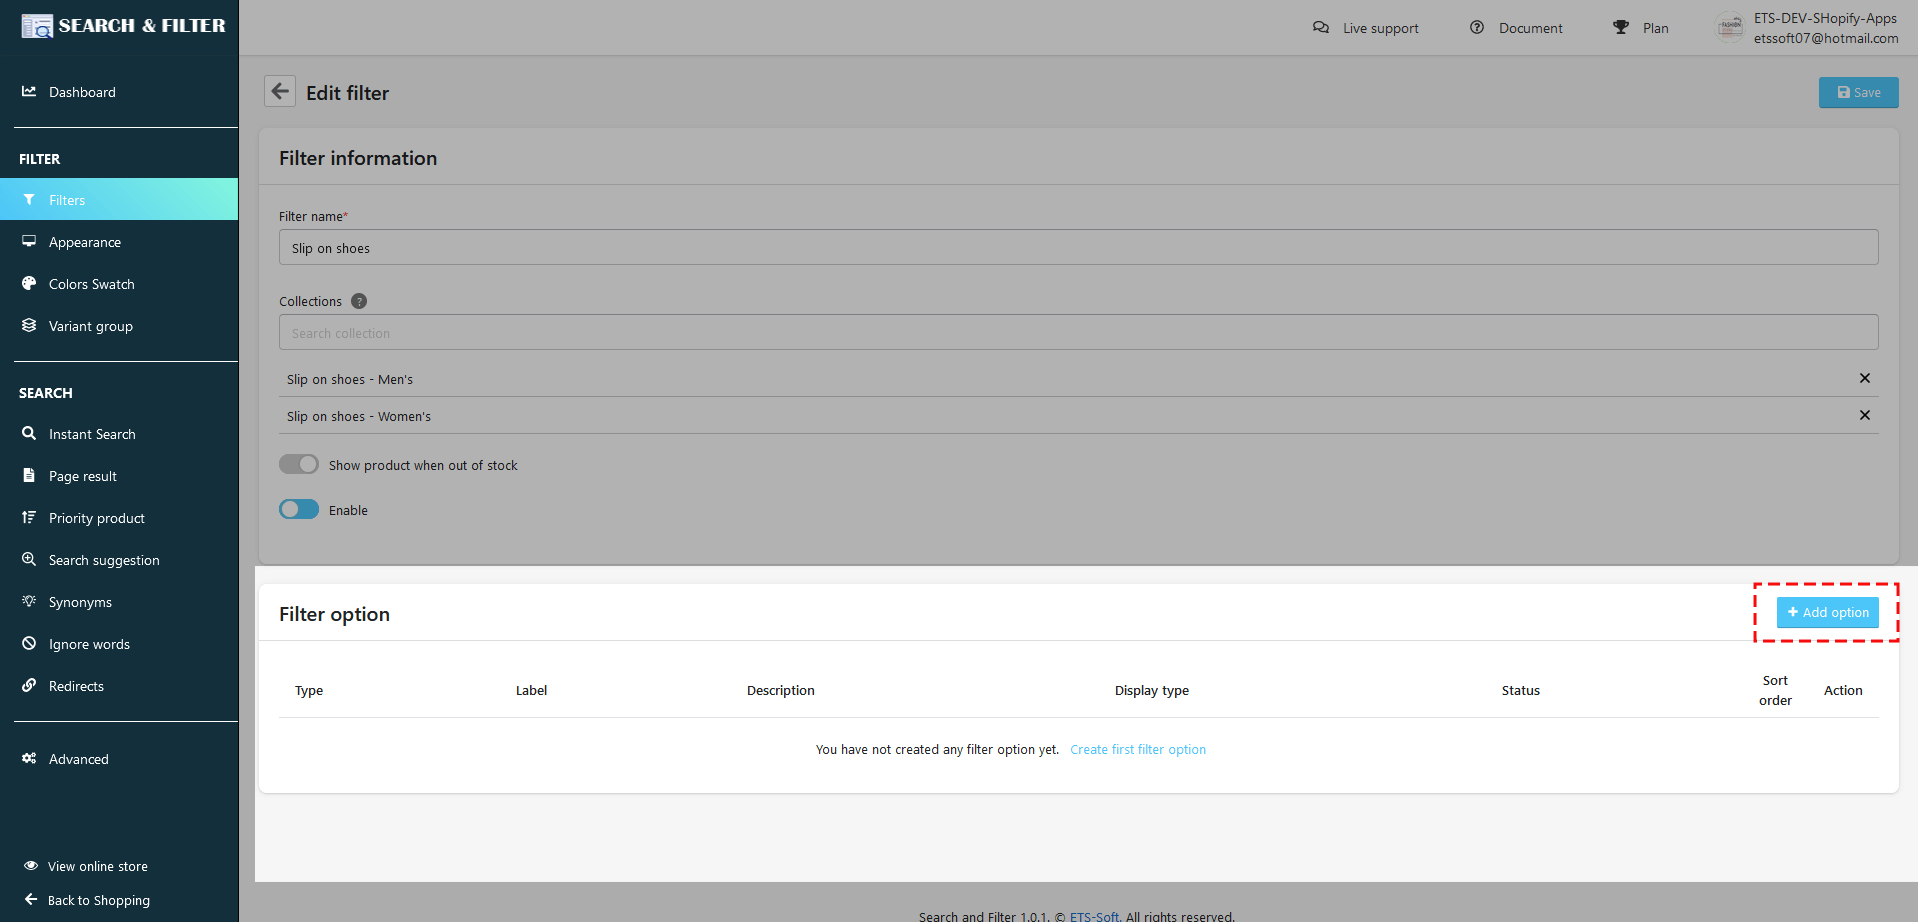
Next, you need to add filter options to the product filter you’ve created, so it’s easy for customers to filter products within the range they want to search for.
- Click on the “Add Option” button to open the “Add option” popup
- Select “Option type”
Let’s have a look at some examples!
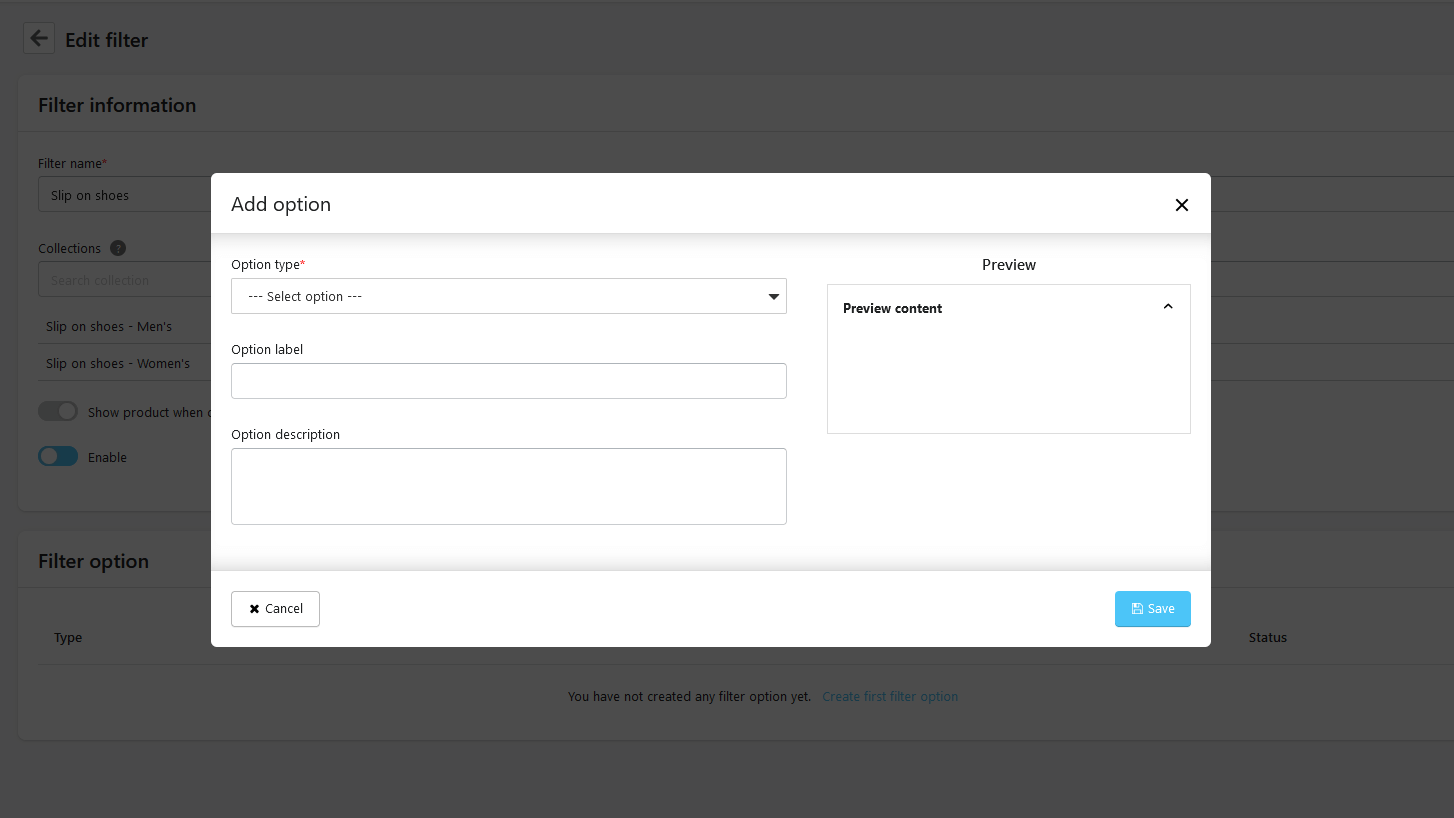

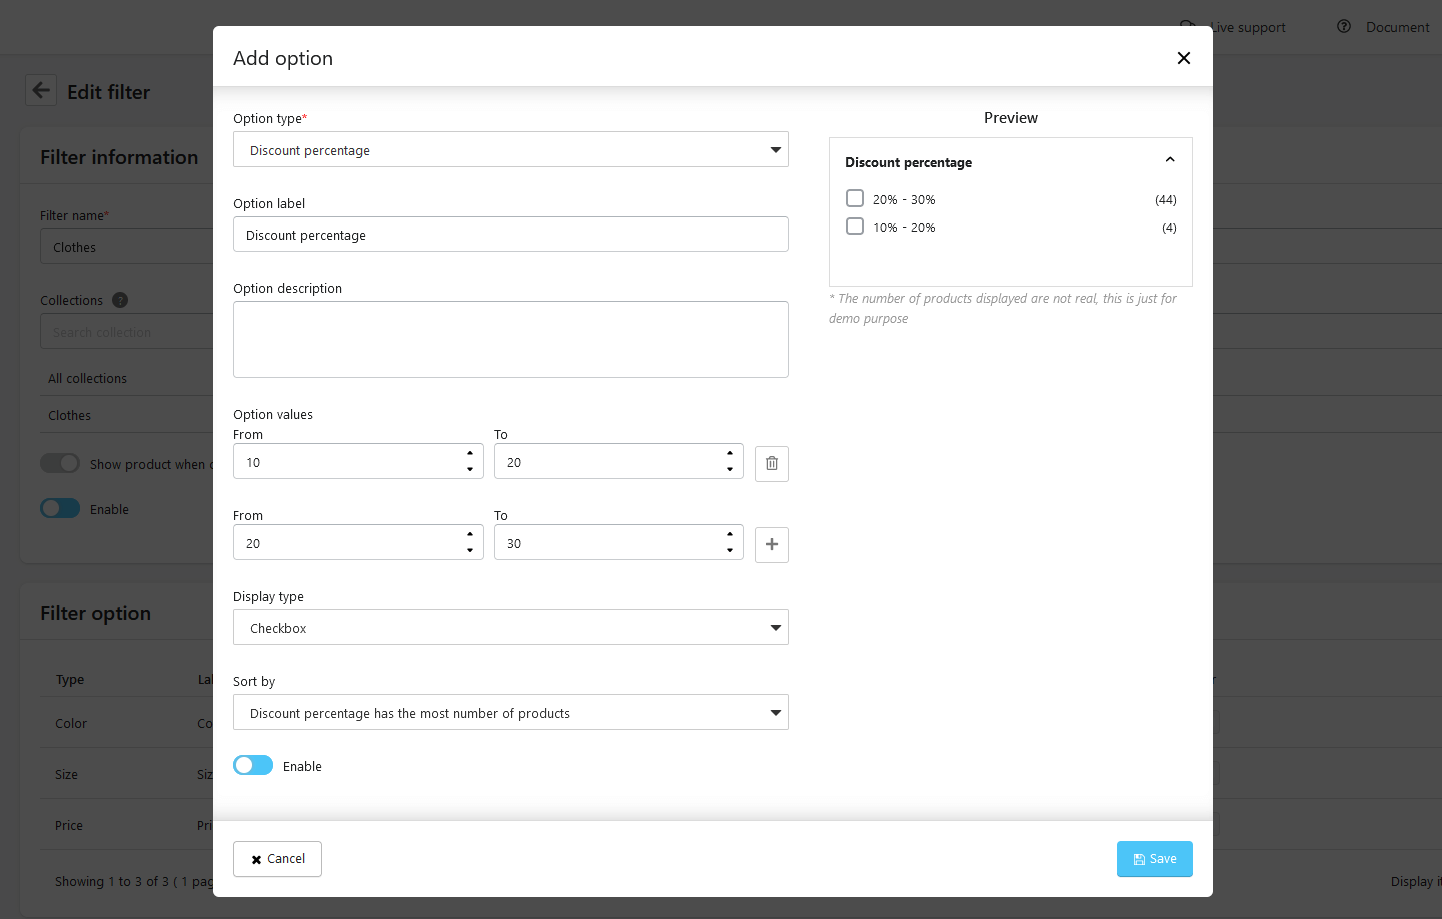

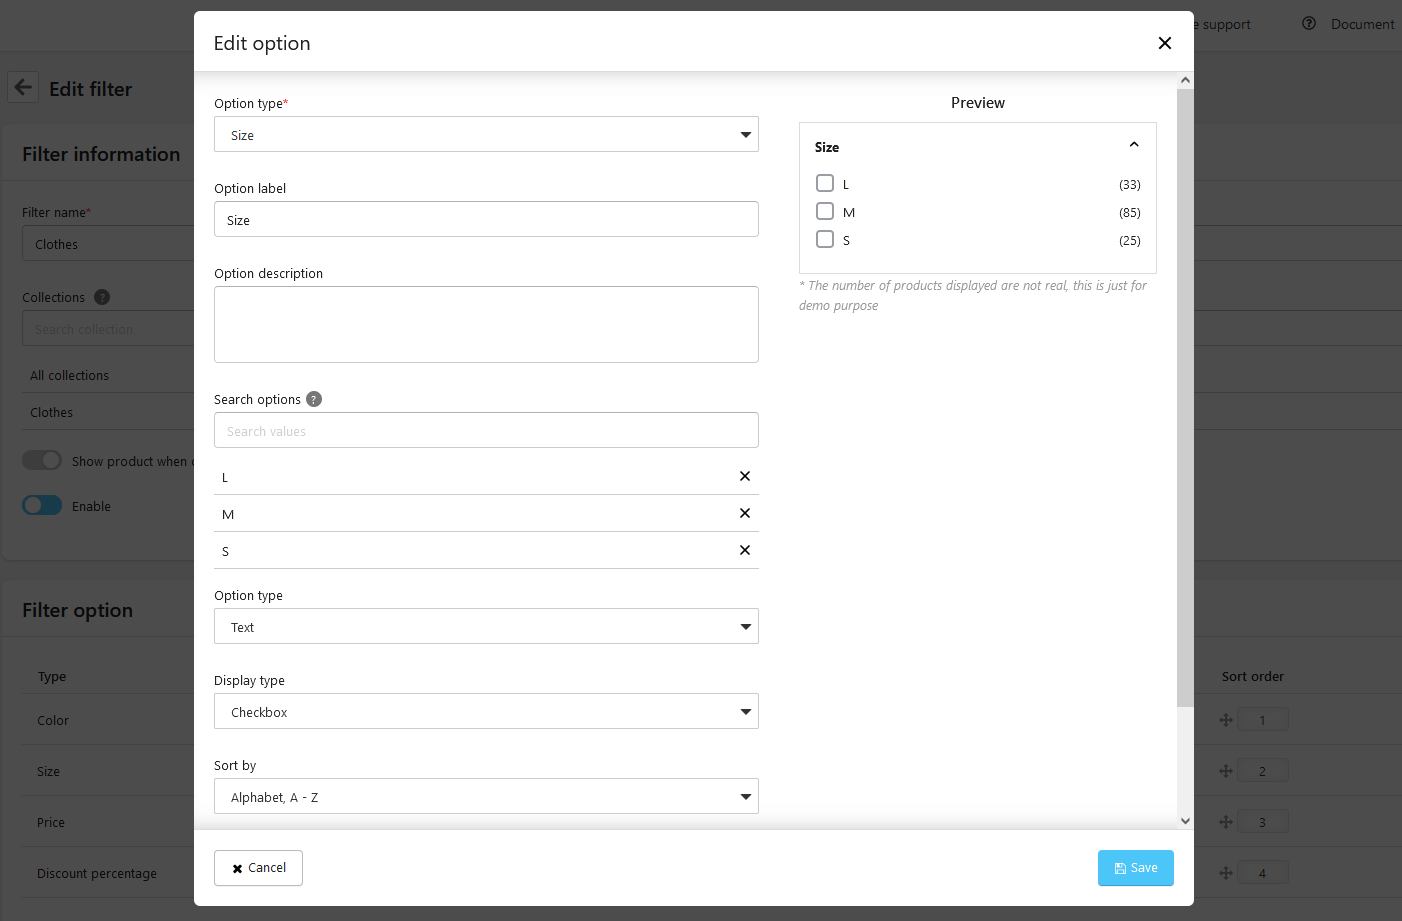
- You can customize “Option label” if you want.
- Enter “Option description” if needed.
- Enter or select other criteria according to the option type you selected. Each option type will have fields with different criteria for more precise product filtering.
- Enable this option and “Save”
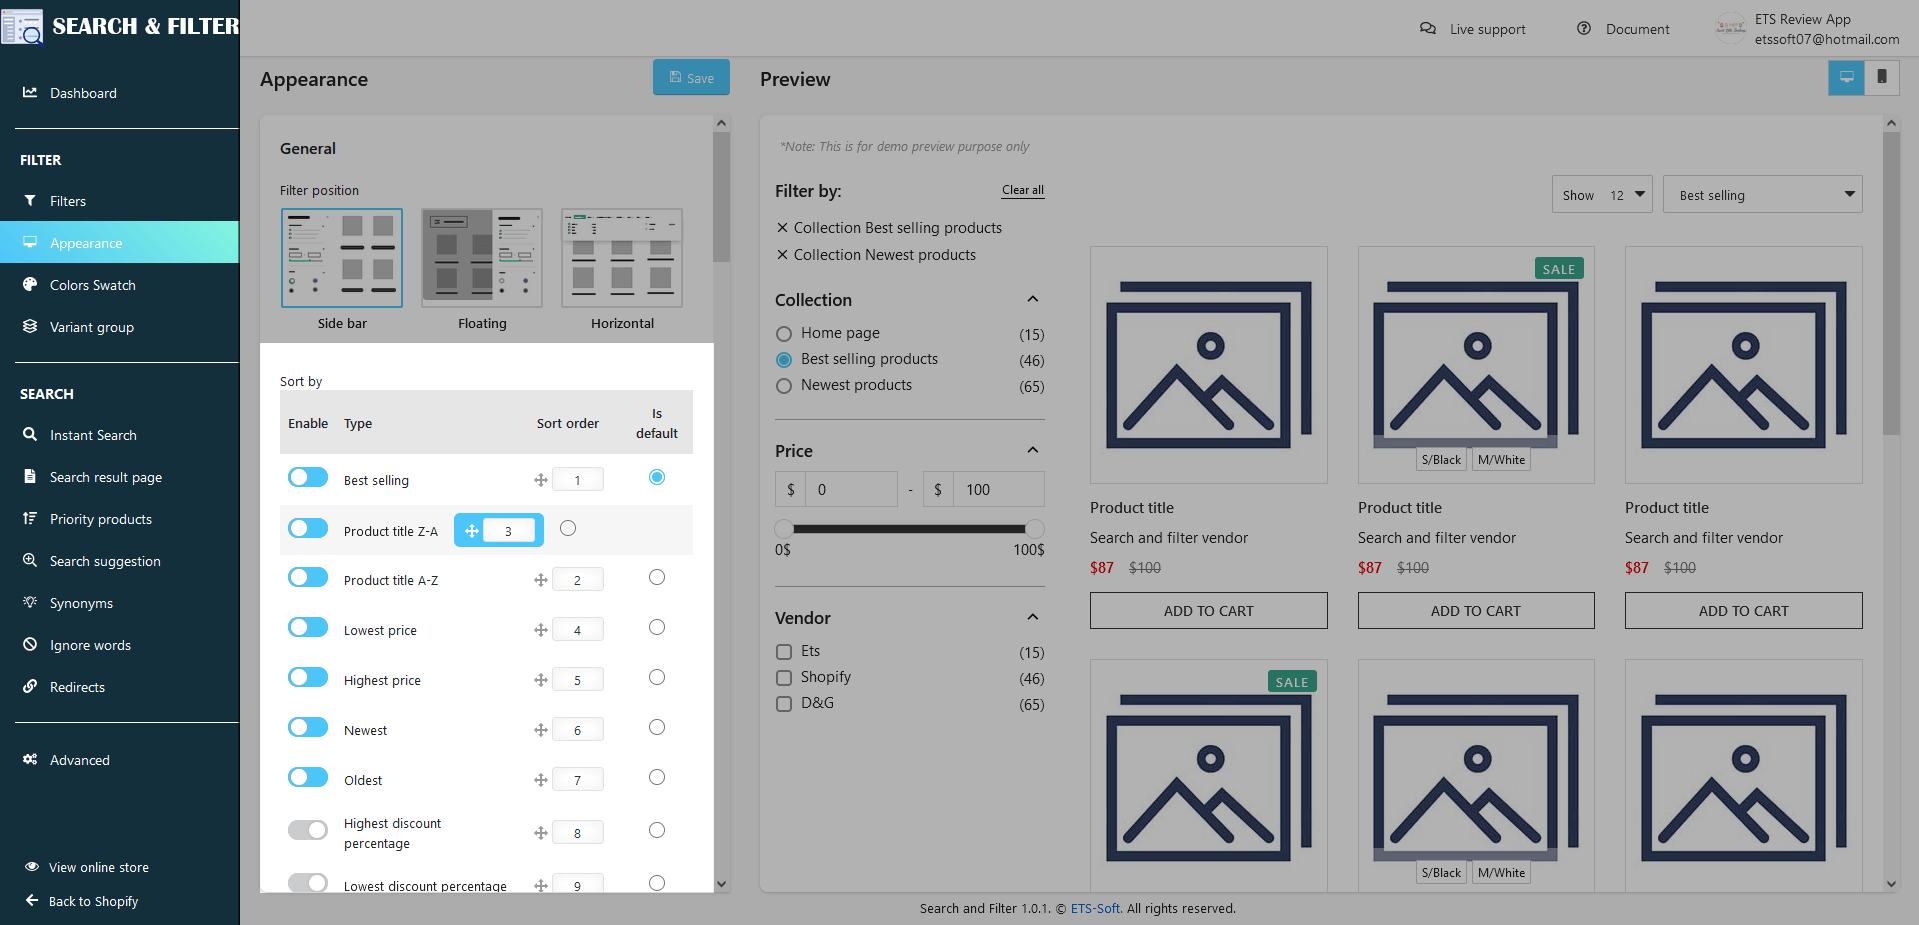
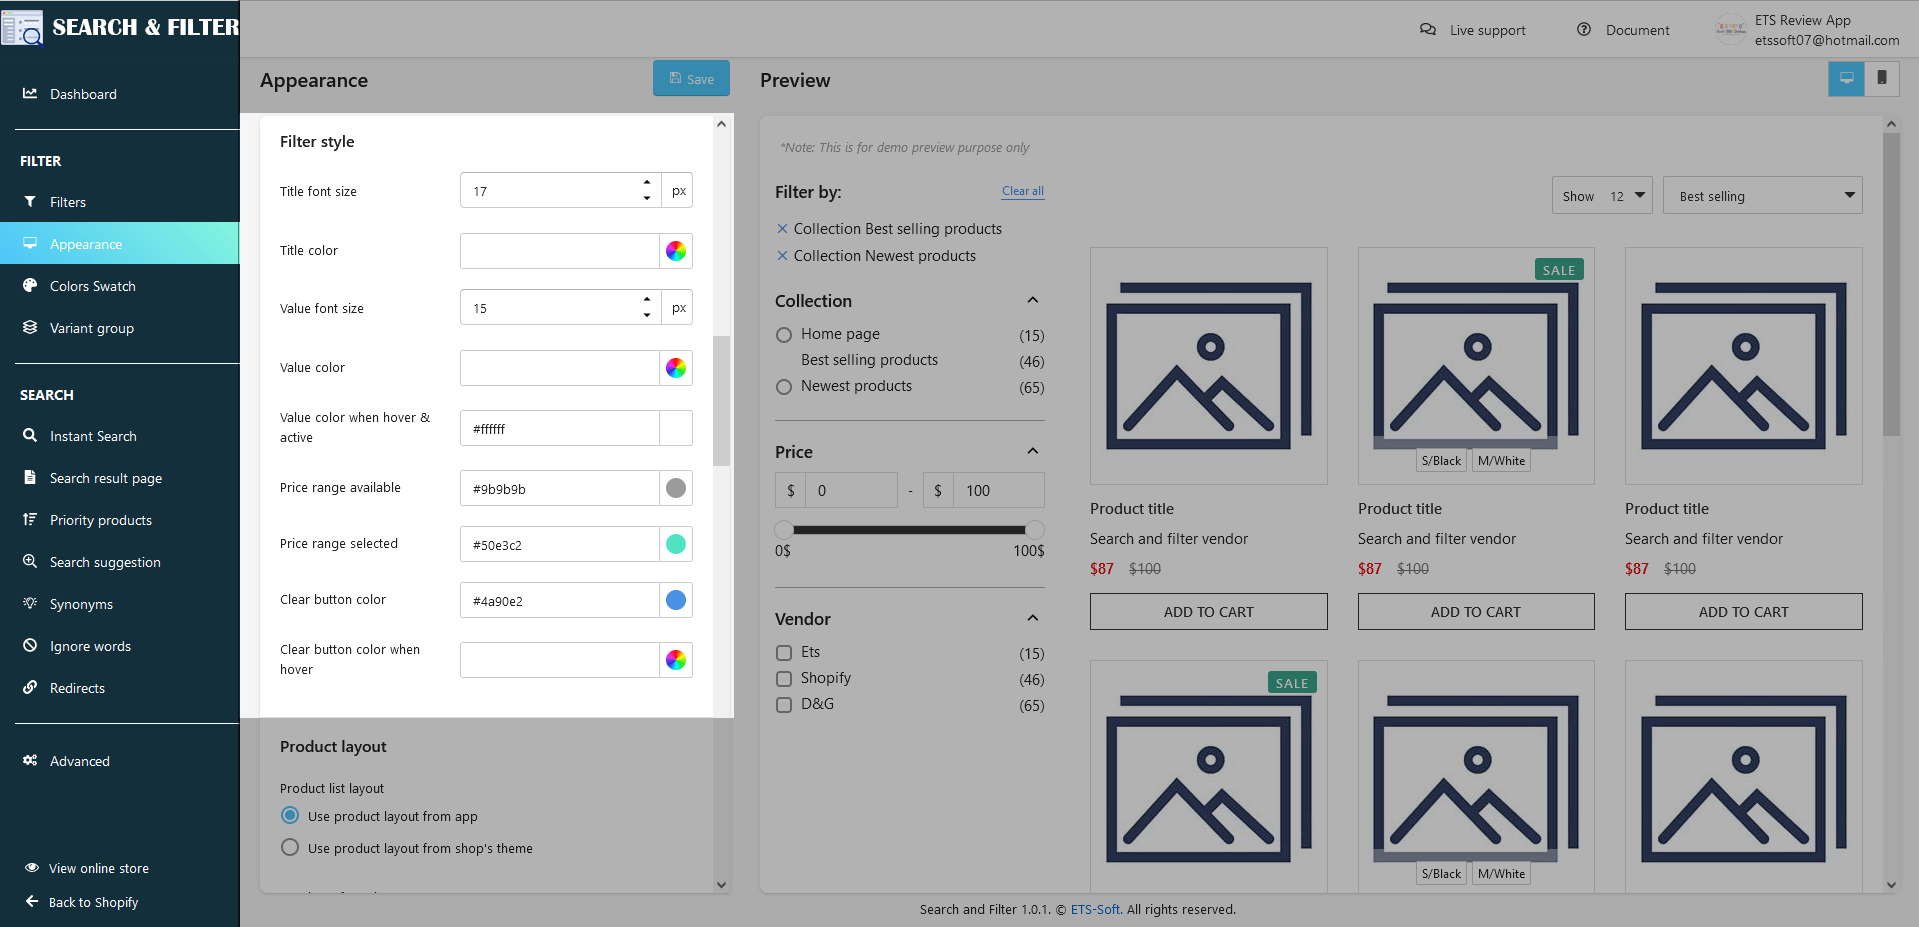
(2) Appearance
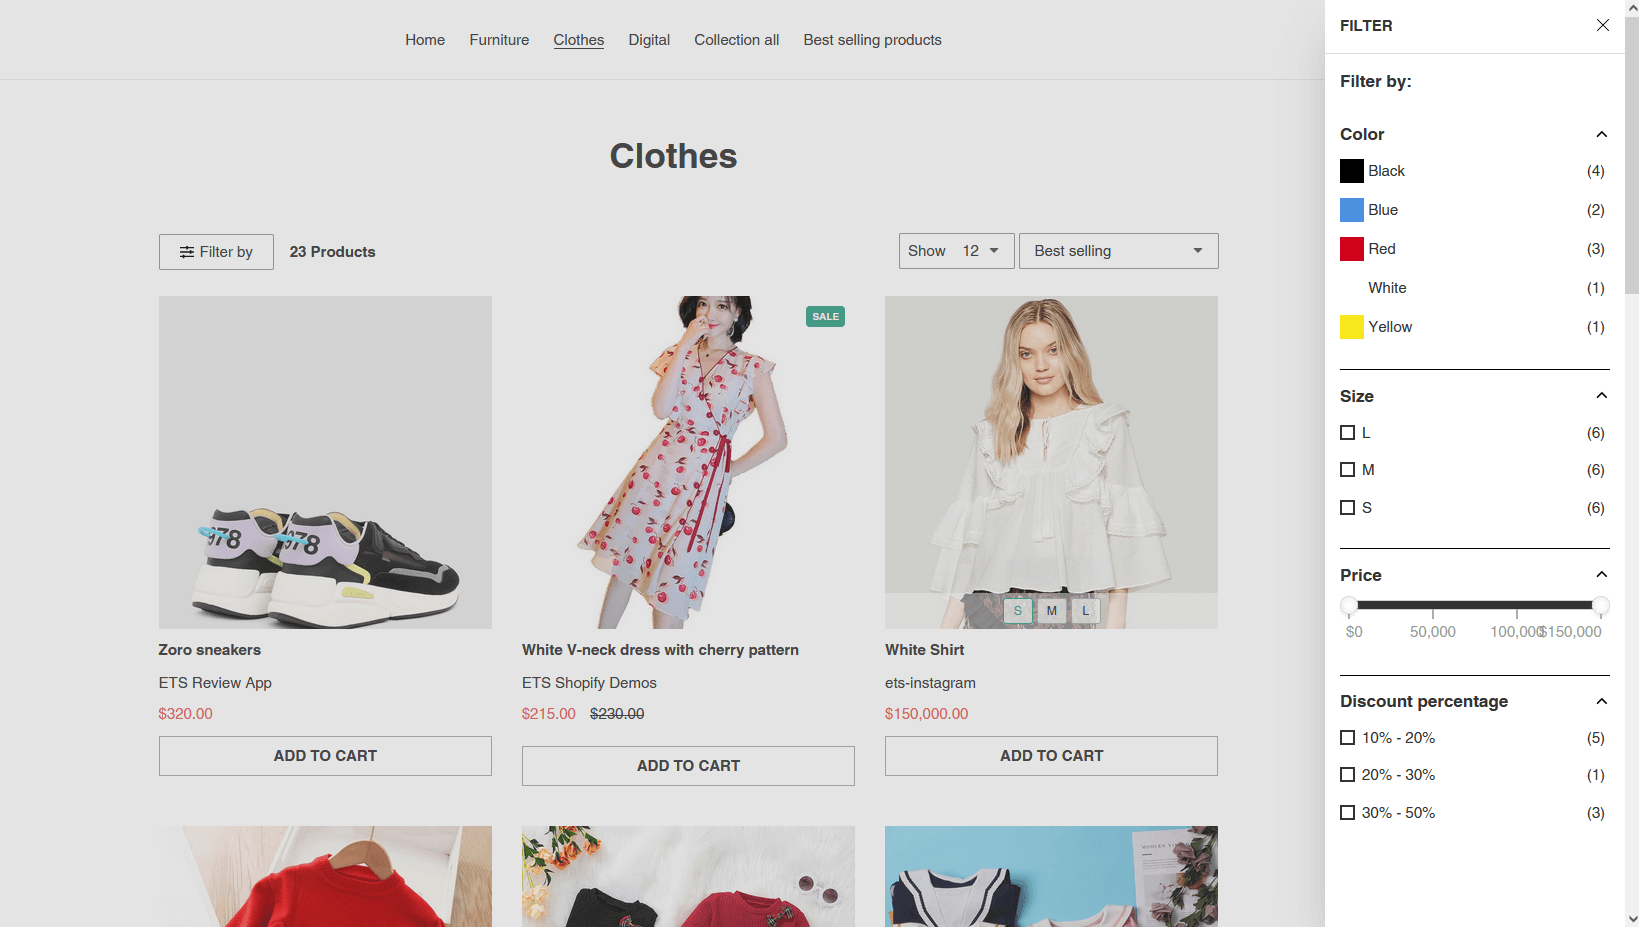
Navigate to the “Appearance” page to set up the product filter display position in the storefront. You’ll see options to set up “Appearance” for the filters on the left and the “Preview” section on the right side of the screen.
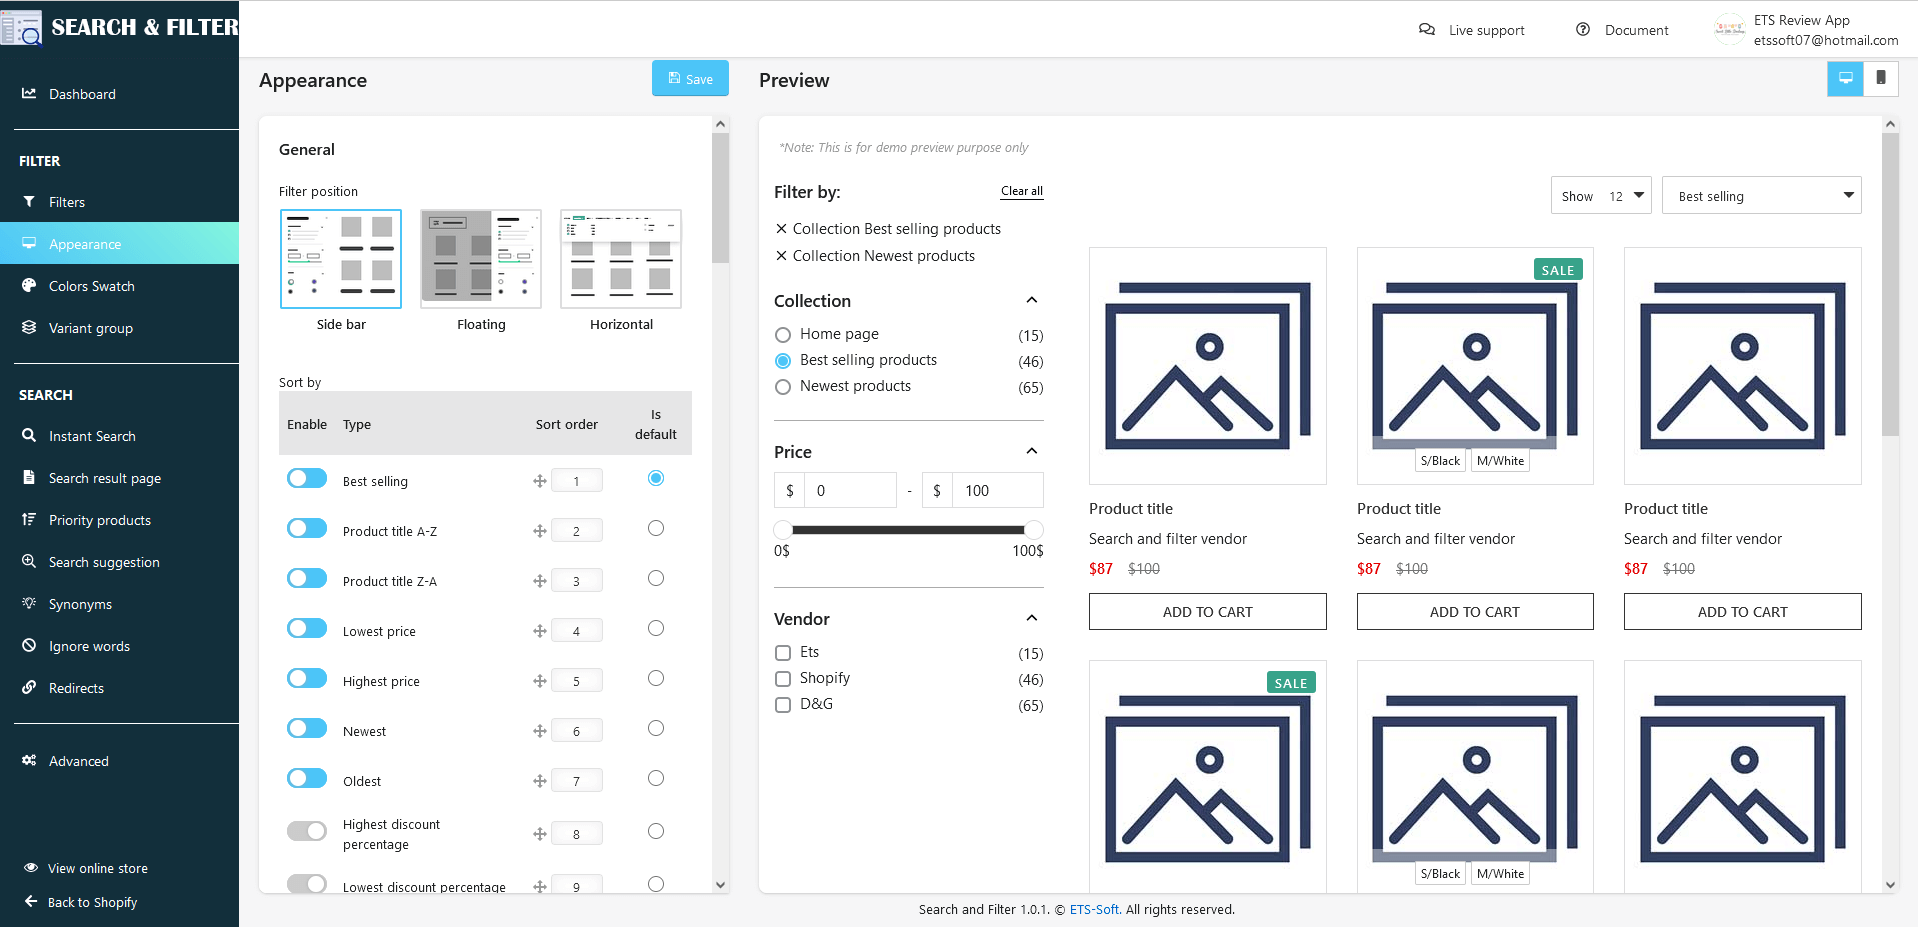
2.1 General
Our app supports displaying product filters in 3 positions: Sidebar, Floating button, and Horizontal bar.
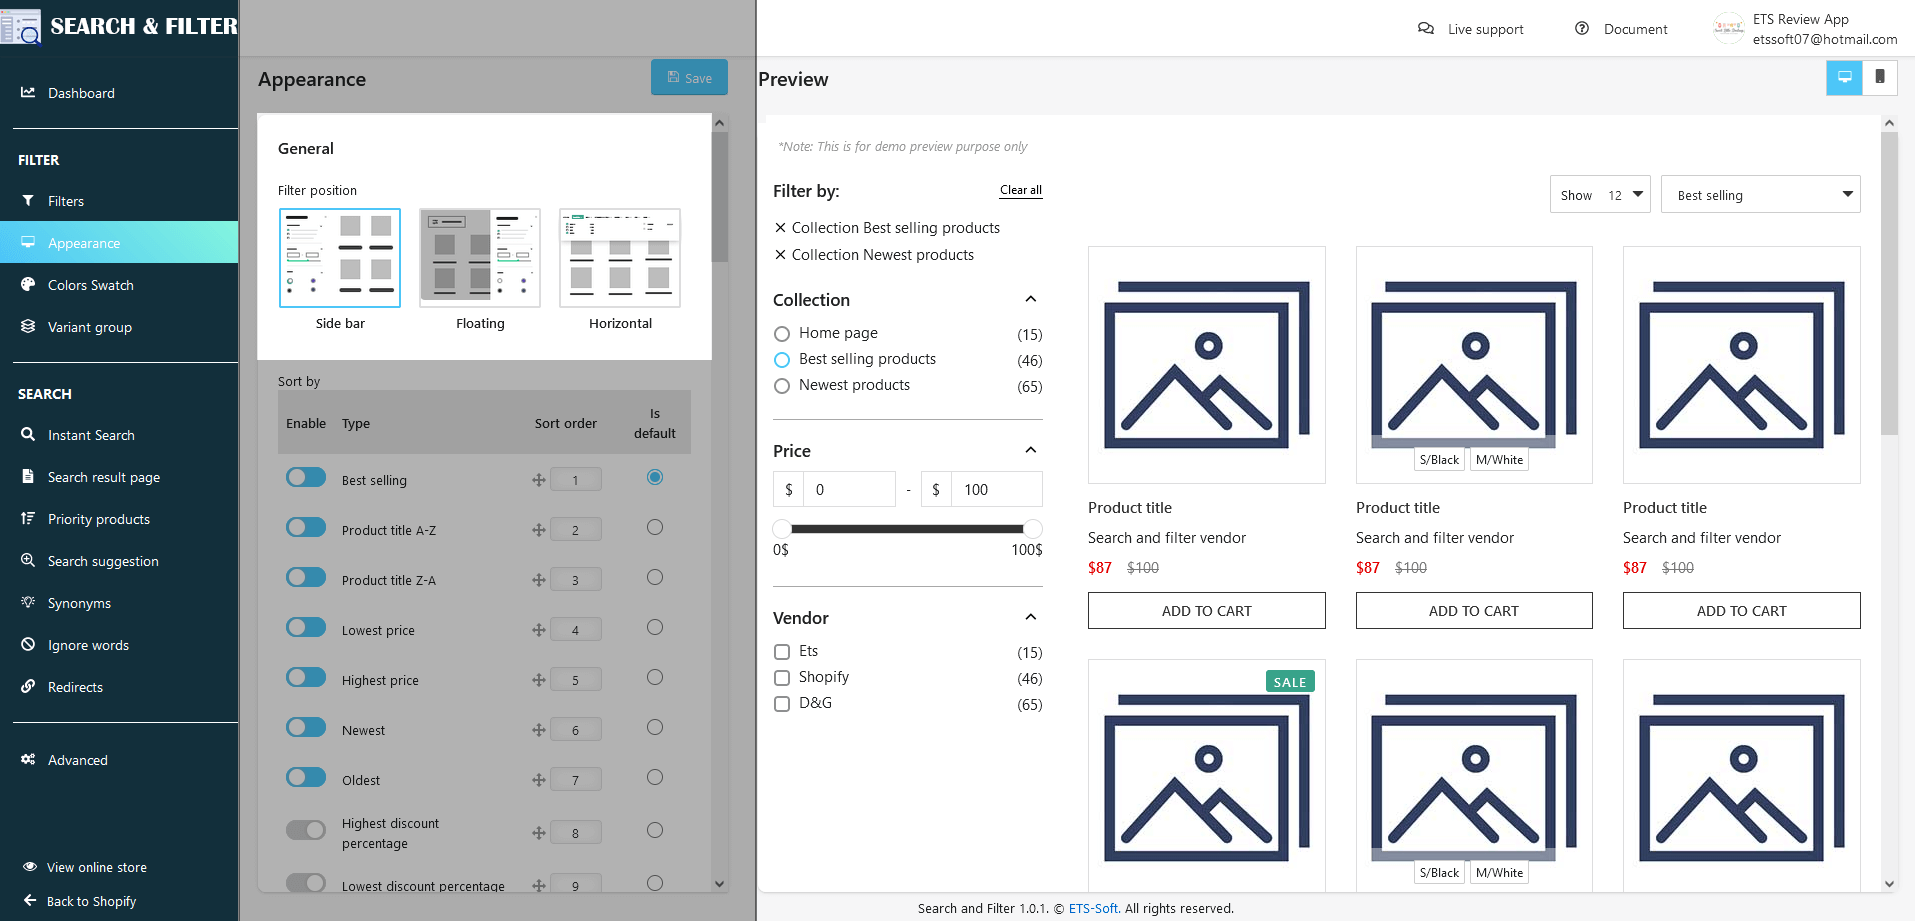
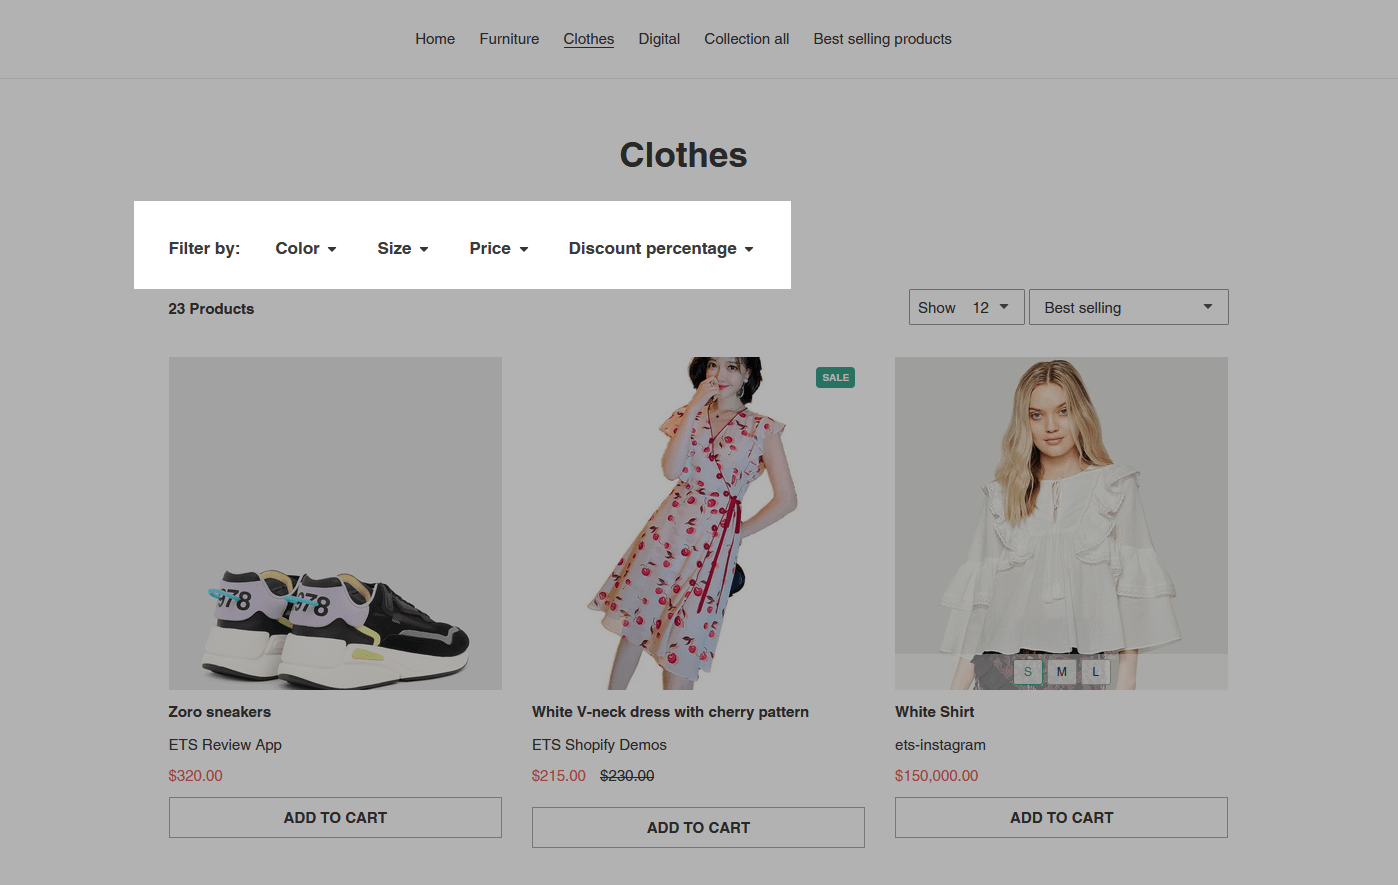
Displayed as a sidebar:
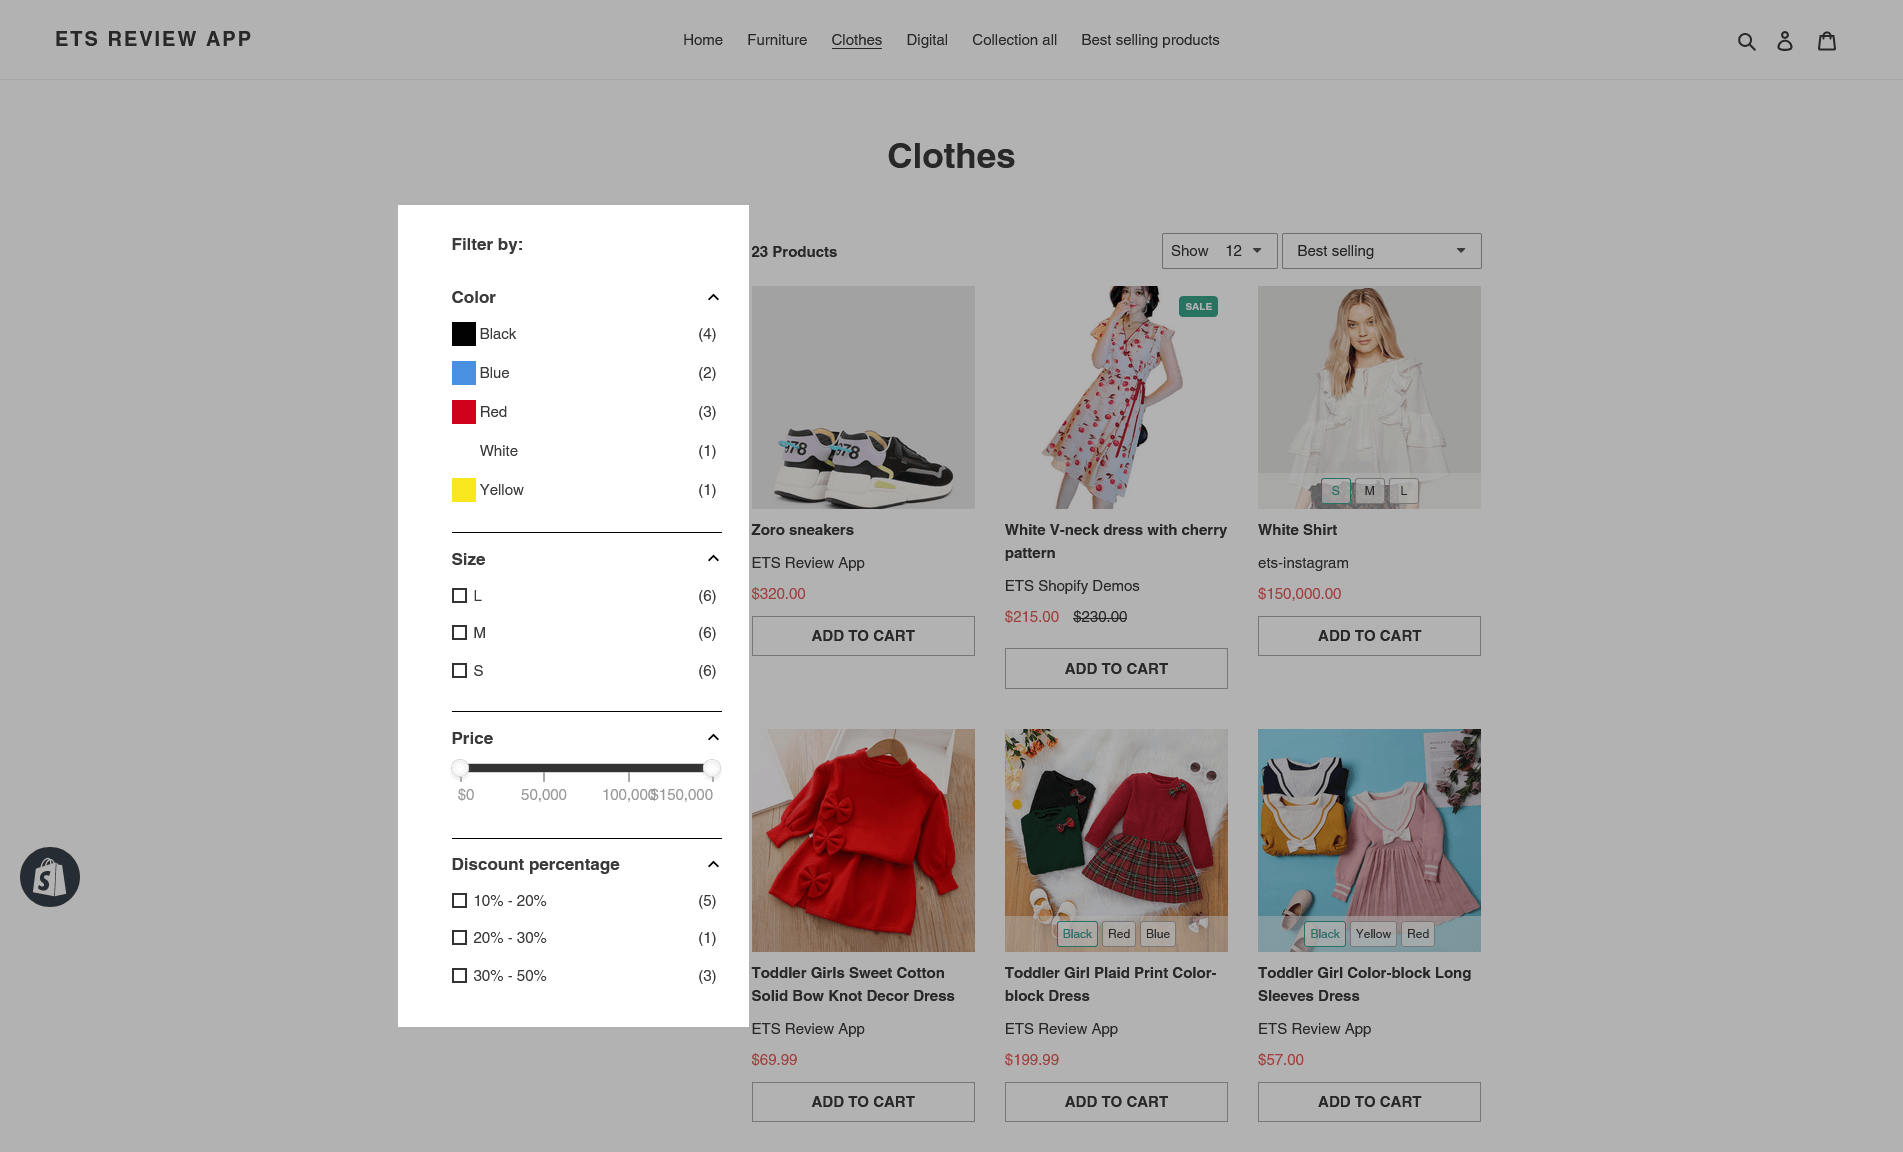
Displayed as a floating button:
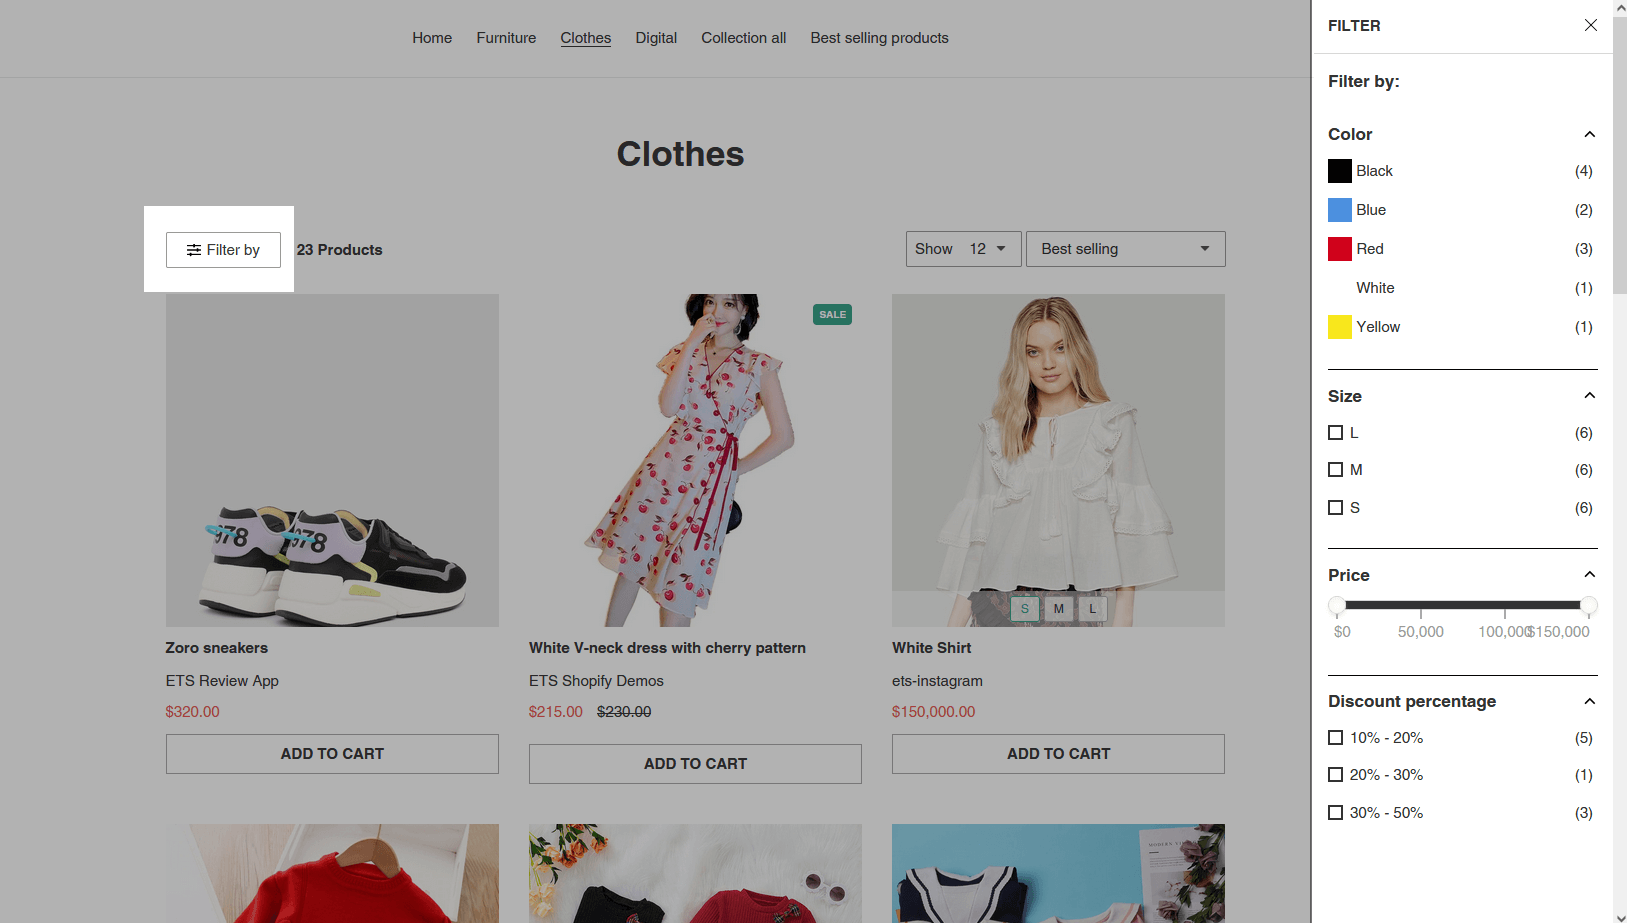
Displayed horizontally:
2.2 Sort by
You can choose the criteria to sort the products displayed in the Filter. Drag and drop to arrange the order of criteria and prioritize product display as you like.
2.3 Filter style
You are free to style all filter elements such as title font size, value font size, title color, value color, etc.
2.4 Product layouts
There are 2 ways to display product layouts for you to choose from: use product layout from the app, or use product layout from shop’s theme. (Click here to see the list of themes we supported)
If you choose “use product layout from shop’s theme“, this app will automatically use the layout of the theme the website is using and you don’t need to set up anything.
Conversely, if you choose “use product layout from app” you can customize and set up the elements for displaying the product layout as you like (the number of products per row, product title/price appearance, sale label/stock label position, etc).

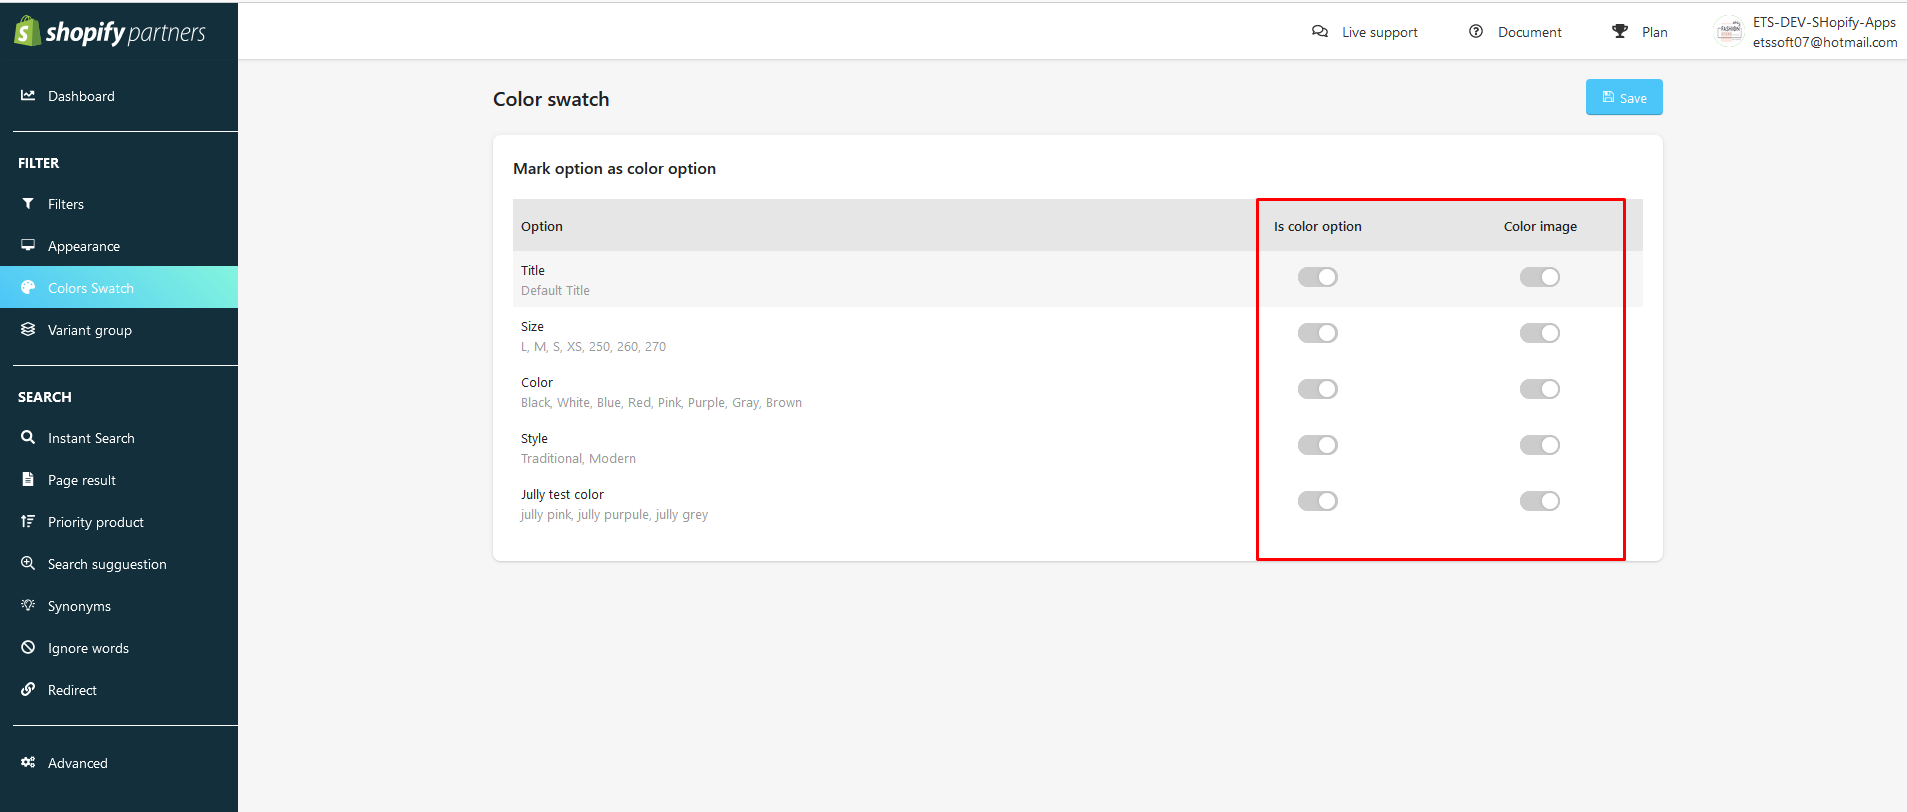
(3) Colors Swatch
Navigate to “Color Swatch” page to customize colors and images for the options displayed in the storefront.
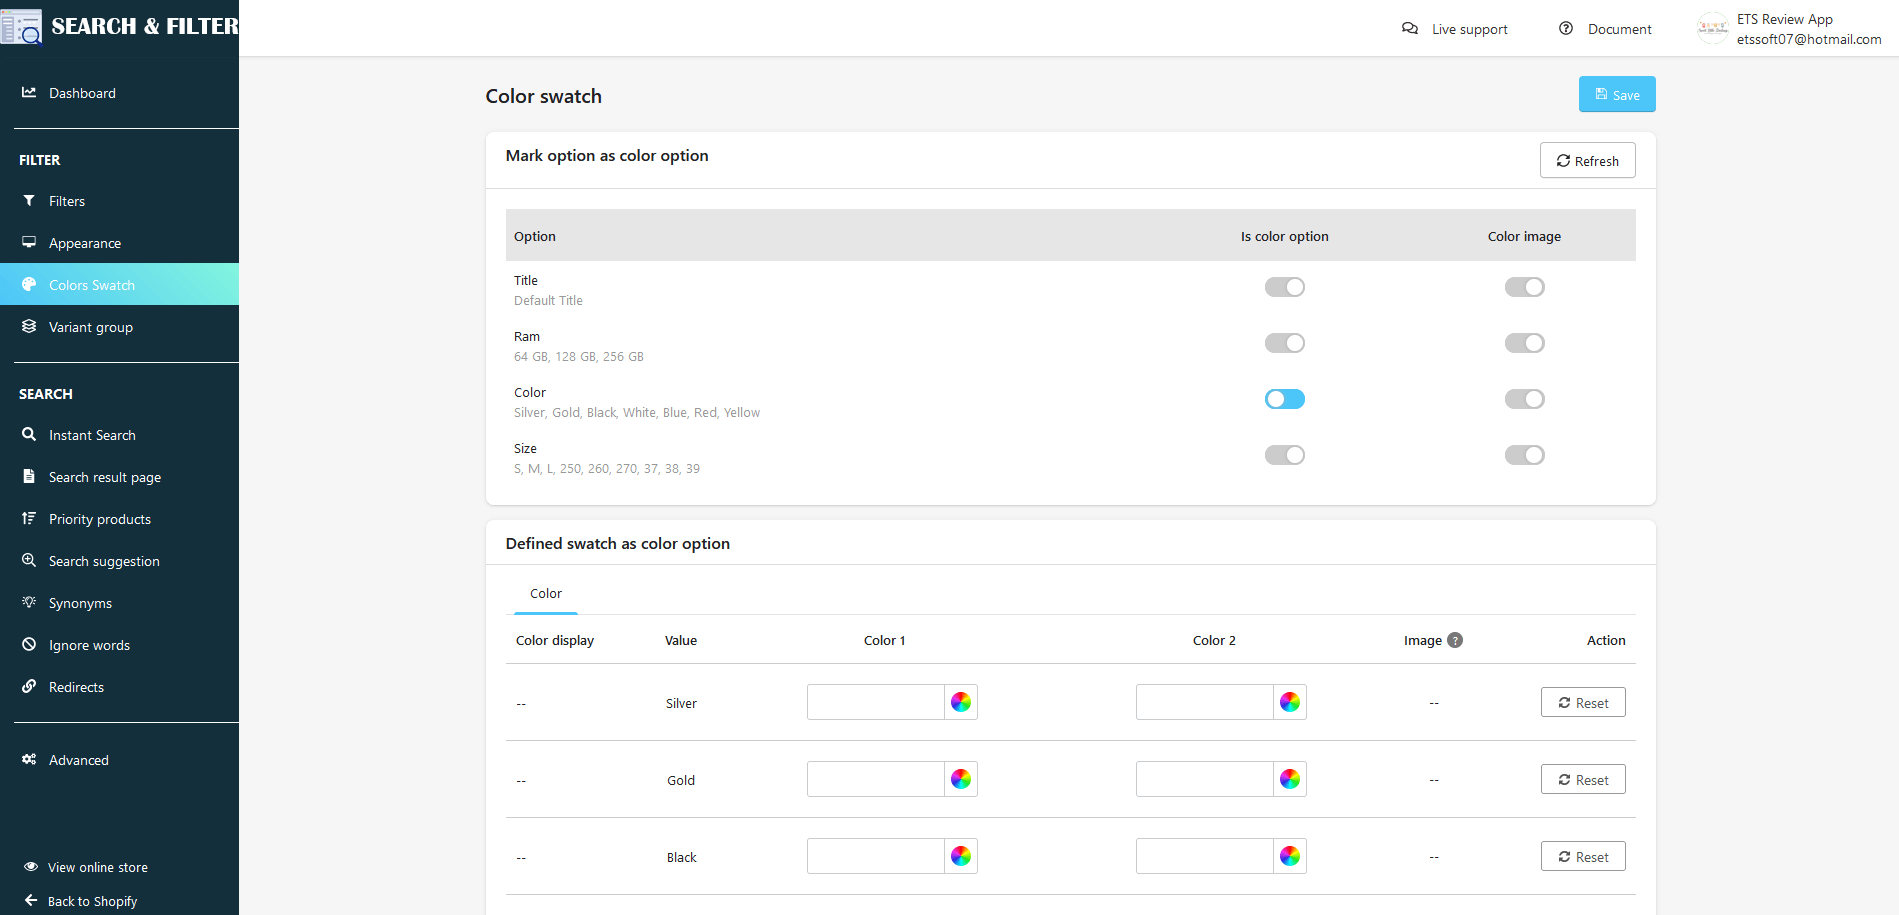
Mark option as a color option by enabling “color option” or “color image” of the filter option you want to customize.
Next, define color swatch & image for filter options. Look at the picture below for example:
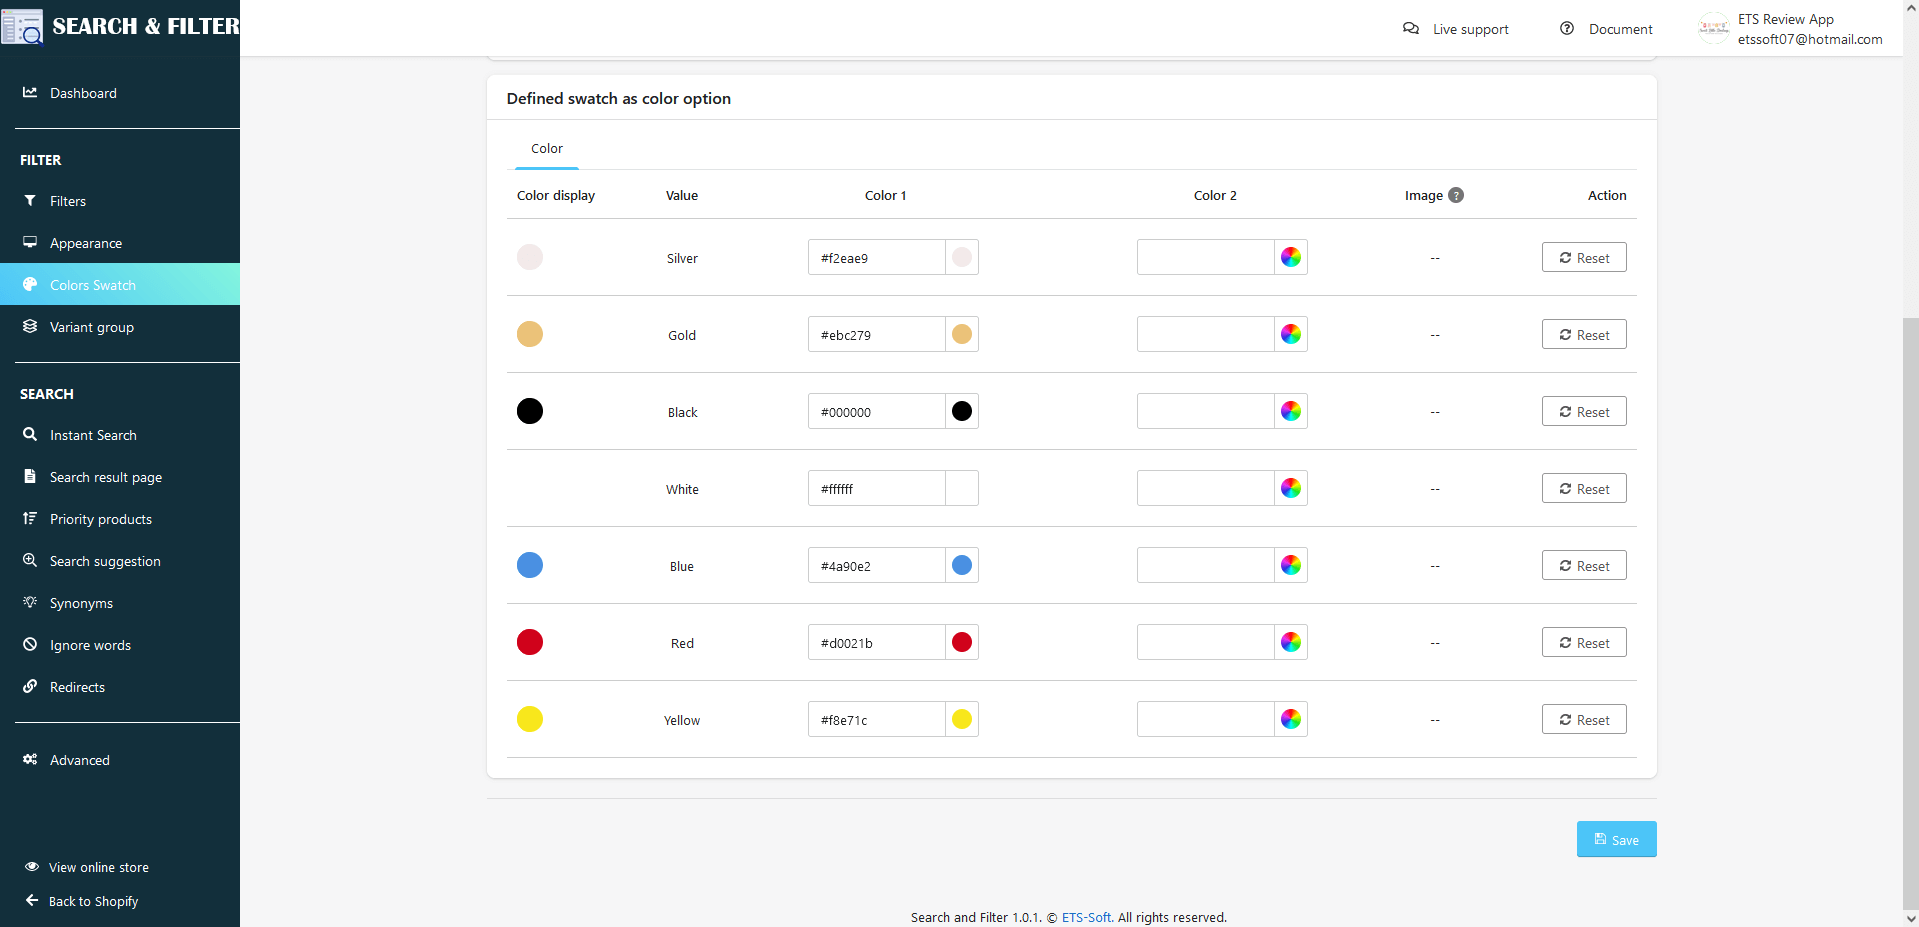
“Save” and go to the storefront to see the changes.
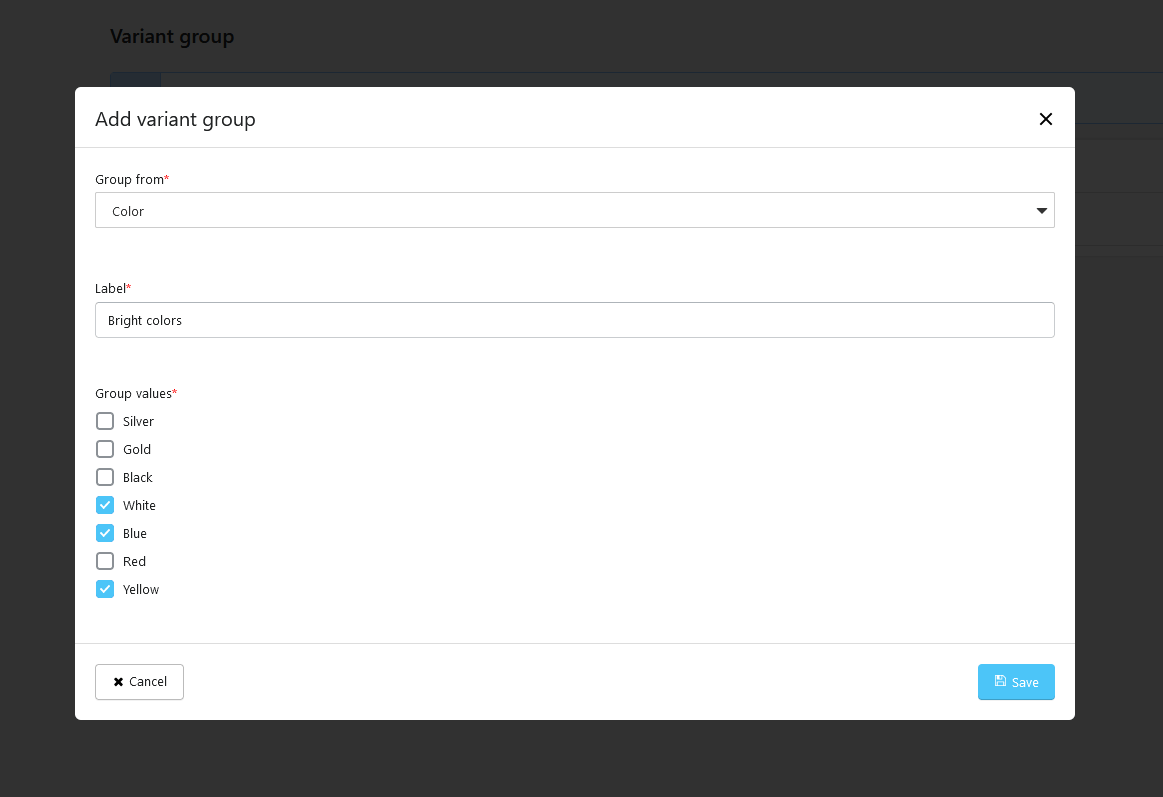
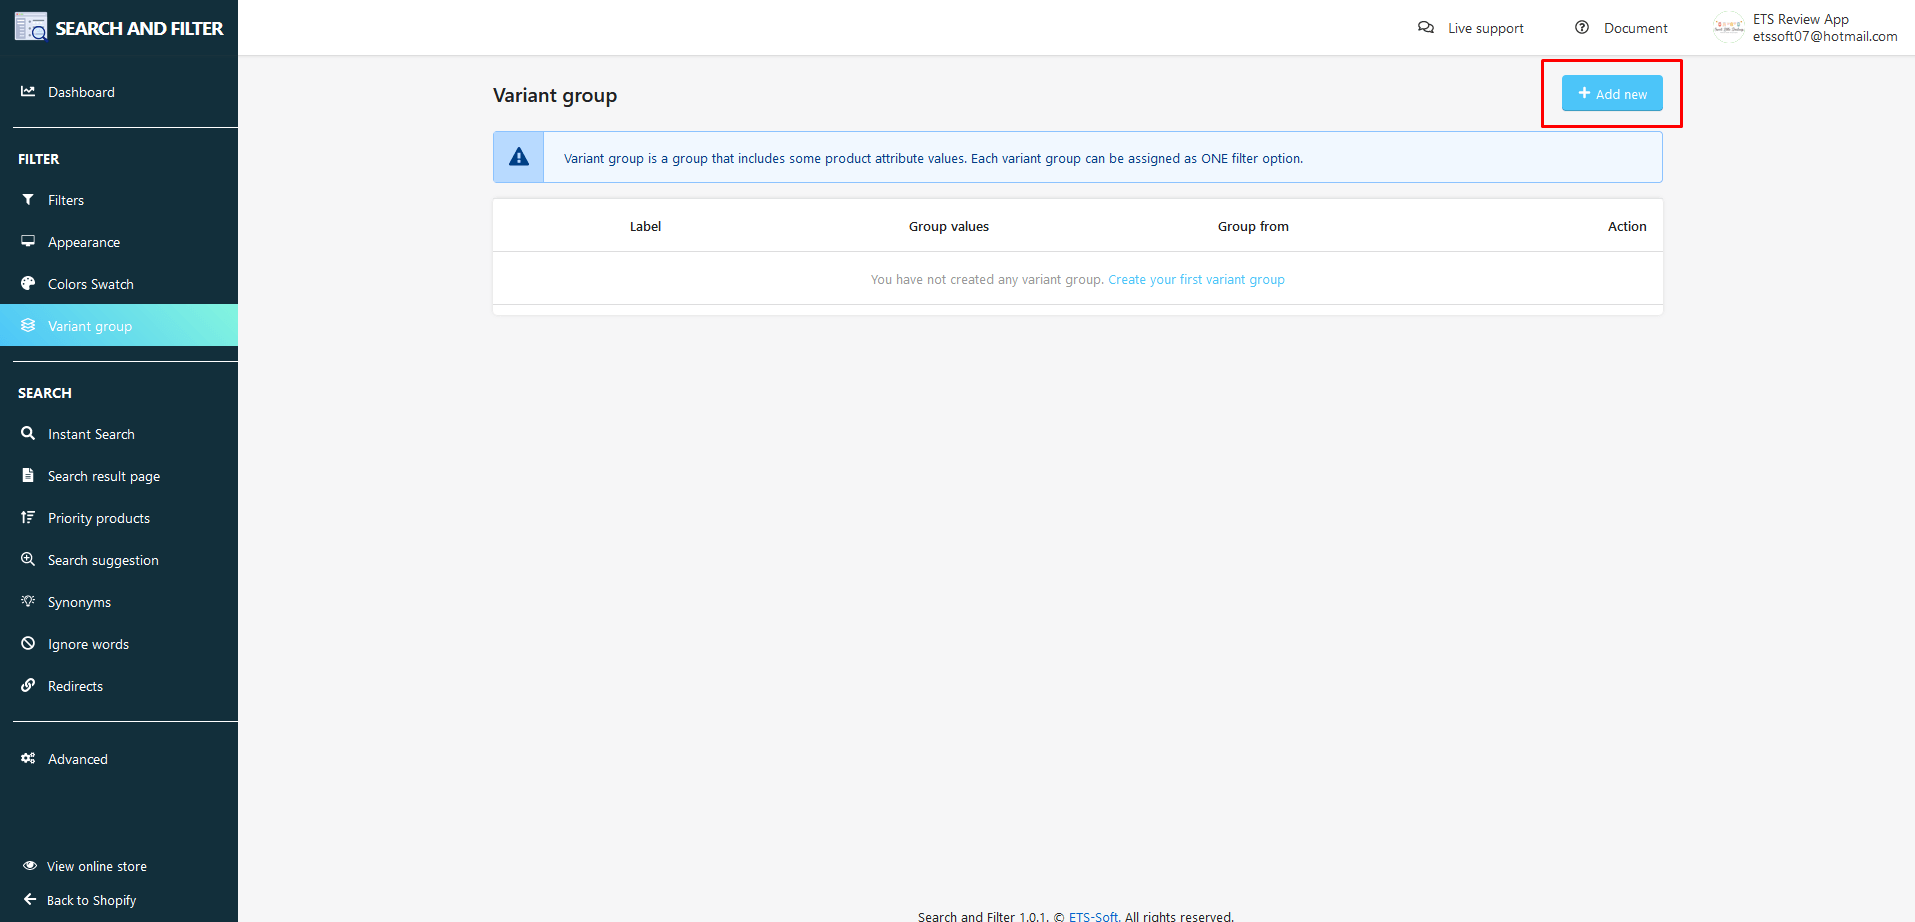
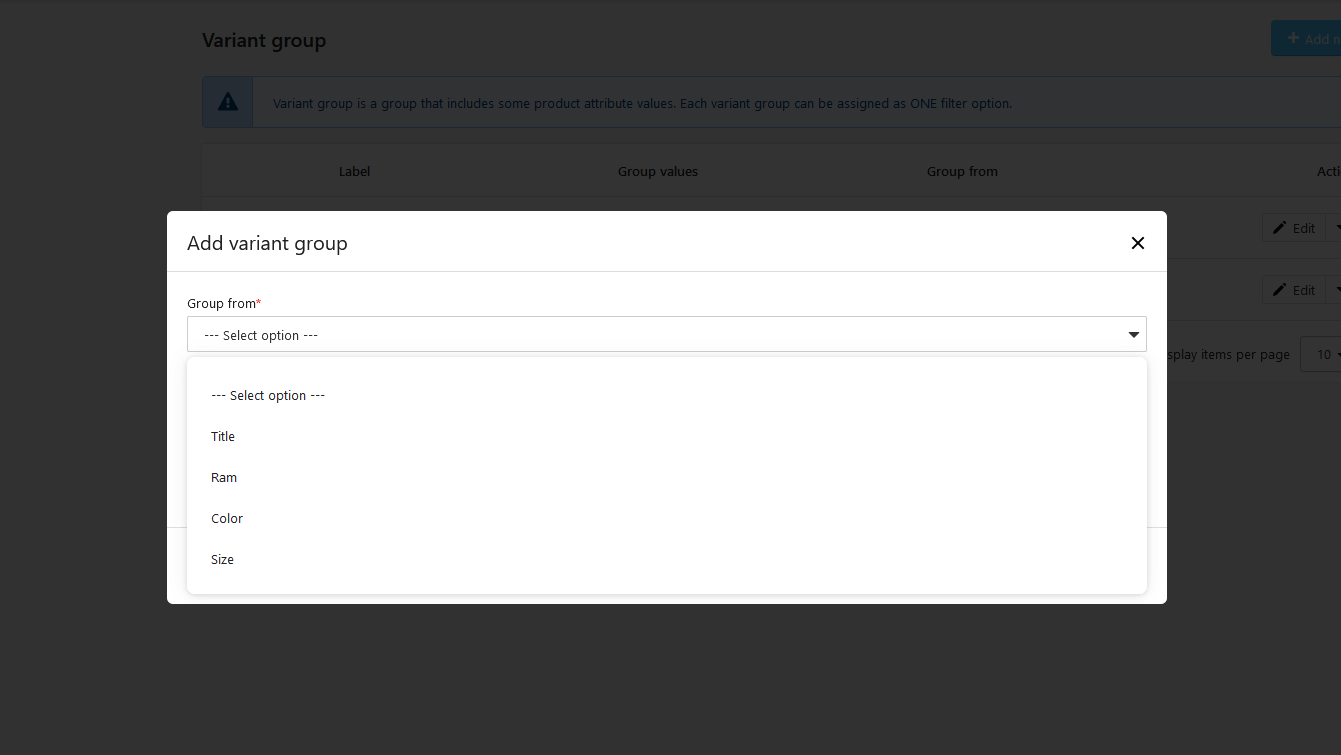
(4) Variant Group
You can use this function to group filter options together to make filtering and searching easier and faster.
Click on the “Add new” button at the top right corner of the page to add a new variant group.
- On the “Add variant group” popup, select the option you need.
- Enter the label name.
- Select filter options you want to group and “Save“.