Step 1: Open Google page and log in with your Google account. Then navigate to Google console page: https://console.developers.google.com
By default, there is a pre-made project named “My project“. We will create a new one.
Step 2:
(1) Click on “My Project” link on the header to open “Select a project” popup. Click on “New project” link.
(2) Enter your project name > select parent organization or folder (optional). Click on “Create” button.
(3) A notification will appear. Click on “Select project” to open your newly created project.
Step 3:
(1) Open the menu of project page. Select “APIs & Services” > “Credentials“.
(2) Click on “Configure consent screen” button.
(3) Select “External” option then click “Create”.
(3) Enter the required information on “OAuth consent screen” page:
- App name: enter your app name
- App logo: upload an image to set it as the app logo.
- App domain: enter your website URL into “Application home page” field.
- Privacy policy and Terms of service link: enter your website’s privacy policy and terms of service link into respective fields.
After you enter the links, Google console will auto-detect your domain(s) as a missing domain. Click on “Add domain” button.
Type your domain then click on “Save and continue” button to complete. You can add multiple domains for an app.
NOTE: please add “social-login.pro” domain into your Google app. This domain is required so that the Redirect URIs can work later.
Step 4:
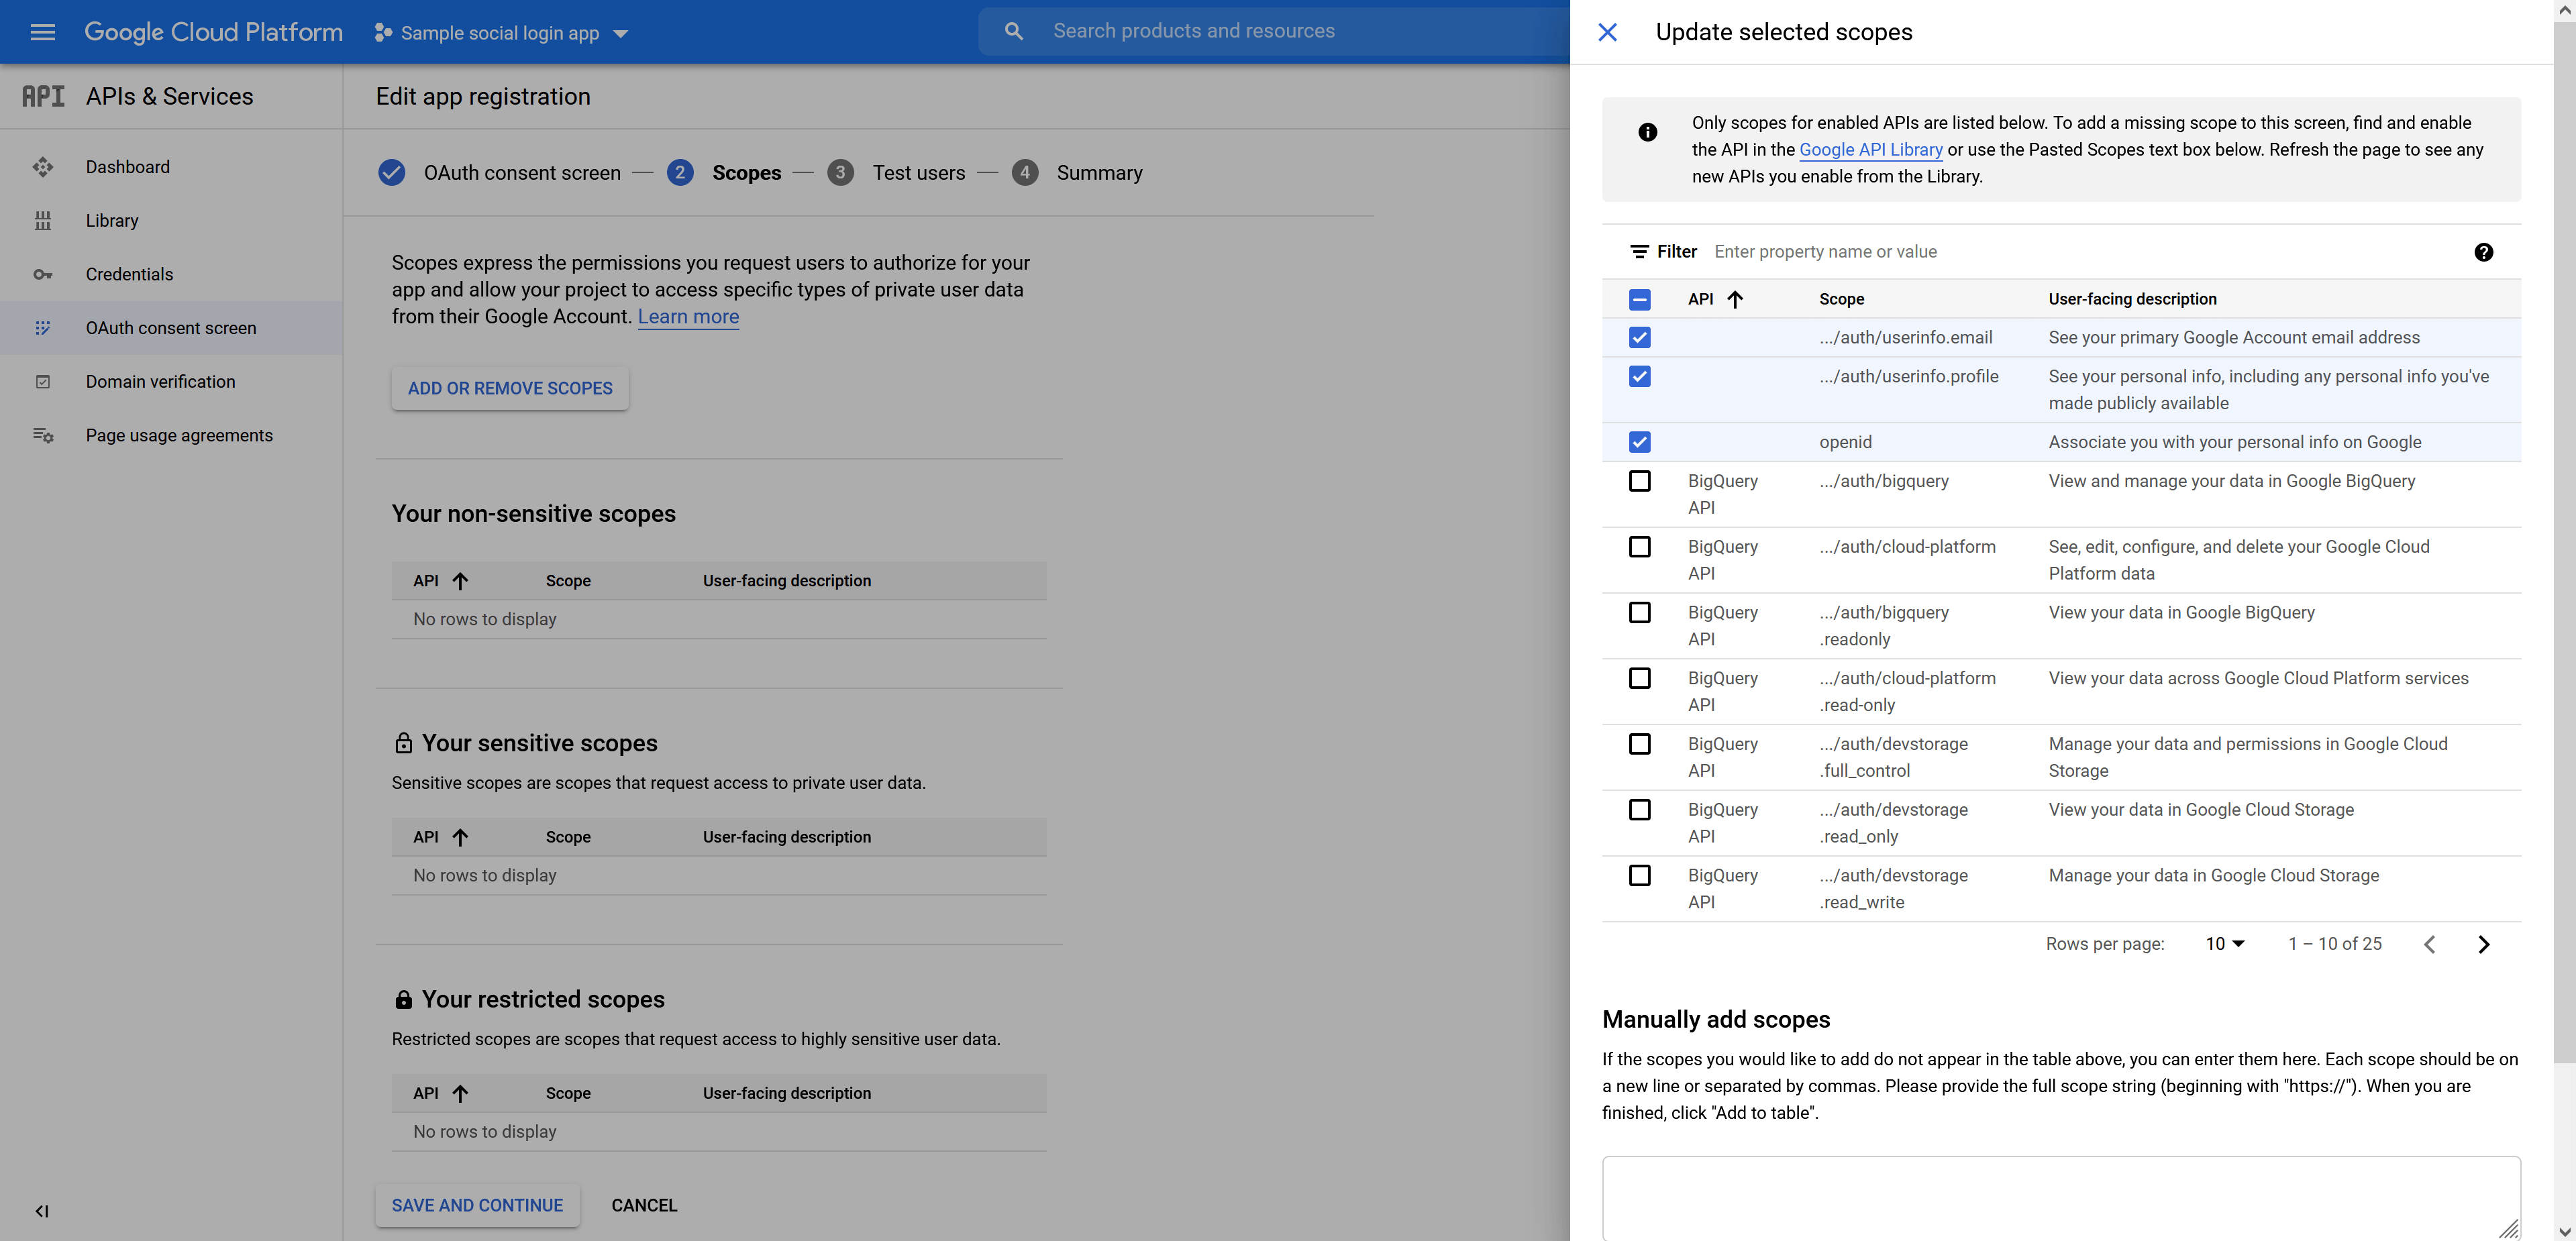
(1) Click on “Add or remove scopes” button.
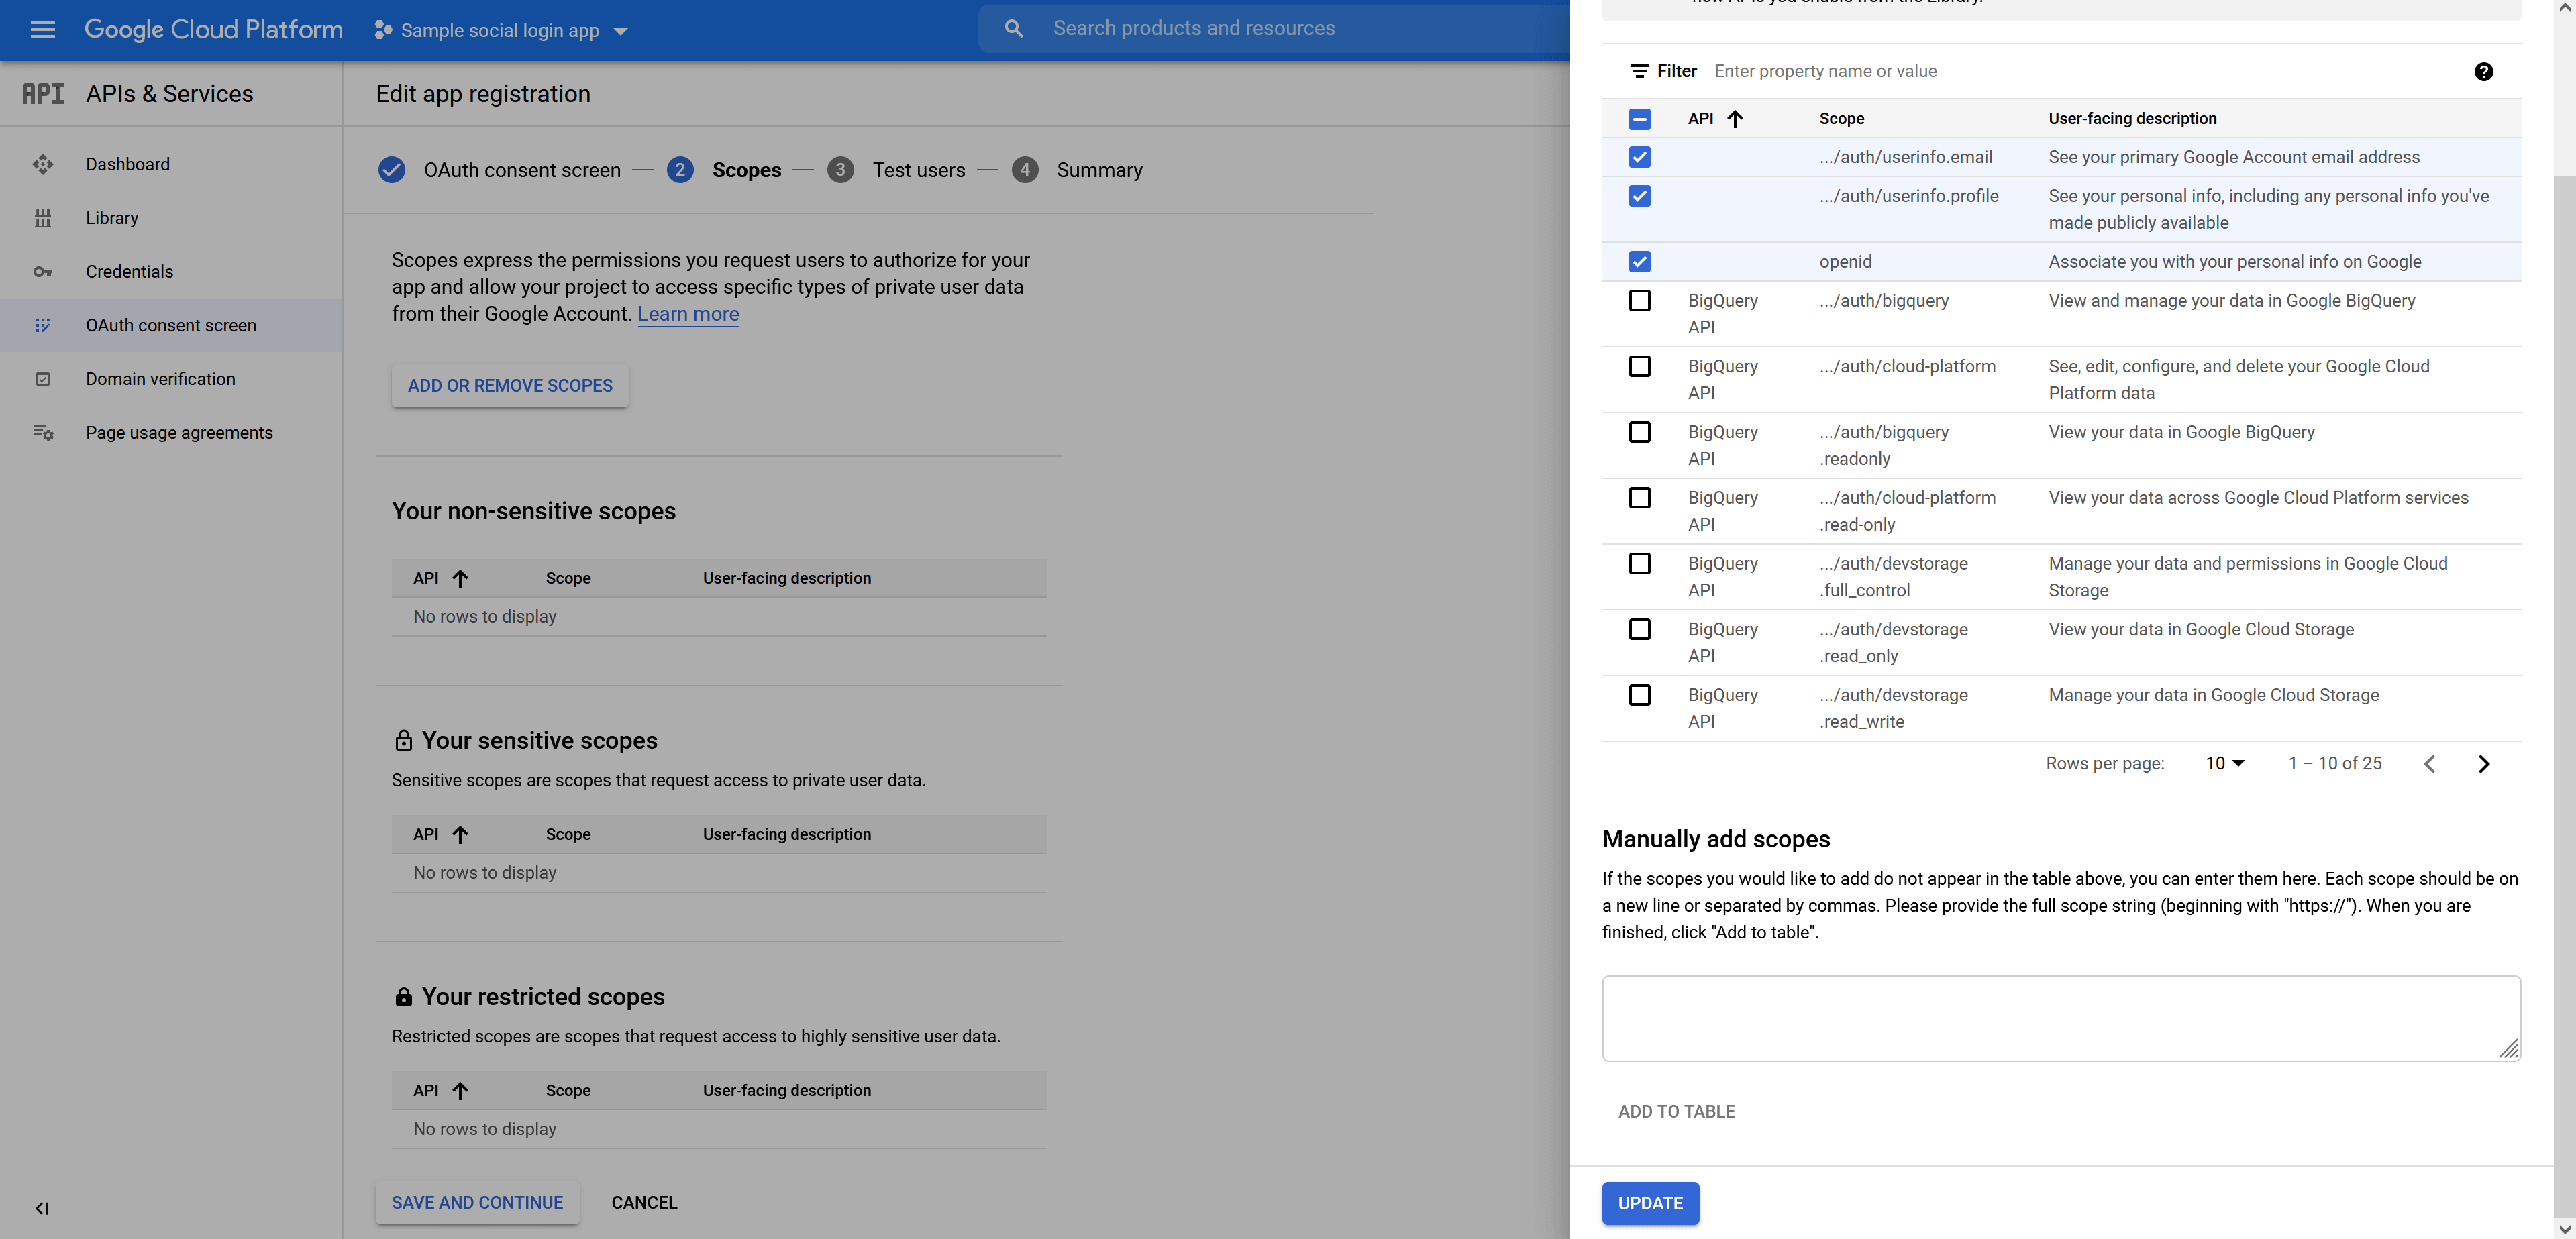
(2) Select the following scopes:
- …/auth/userinfo.email
- …/auth/userinfo.profile
- openid
Then scroll down and click on “Update” button.
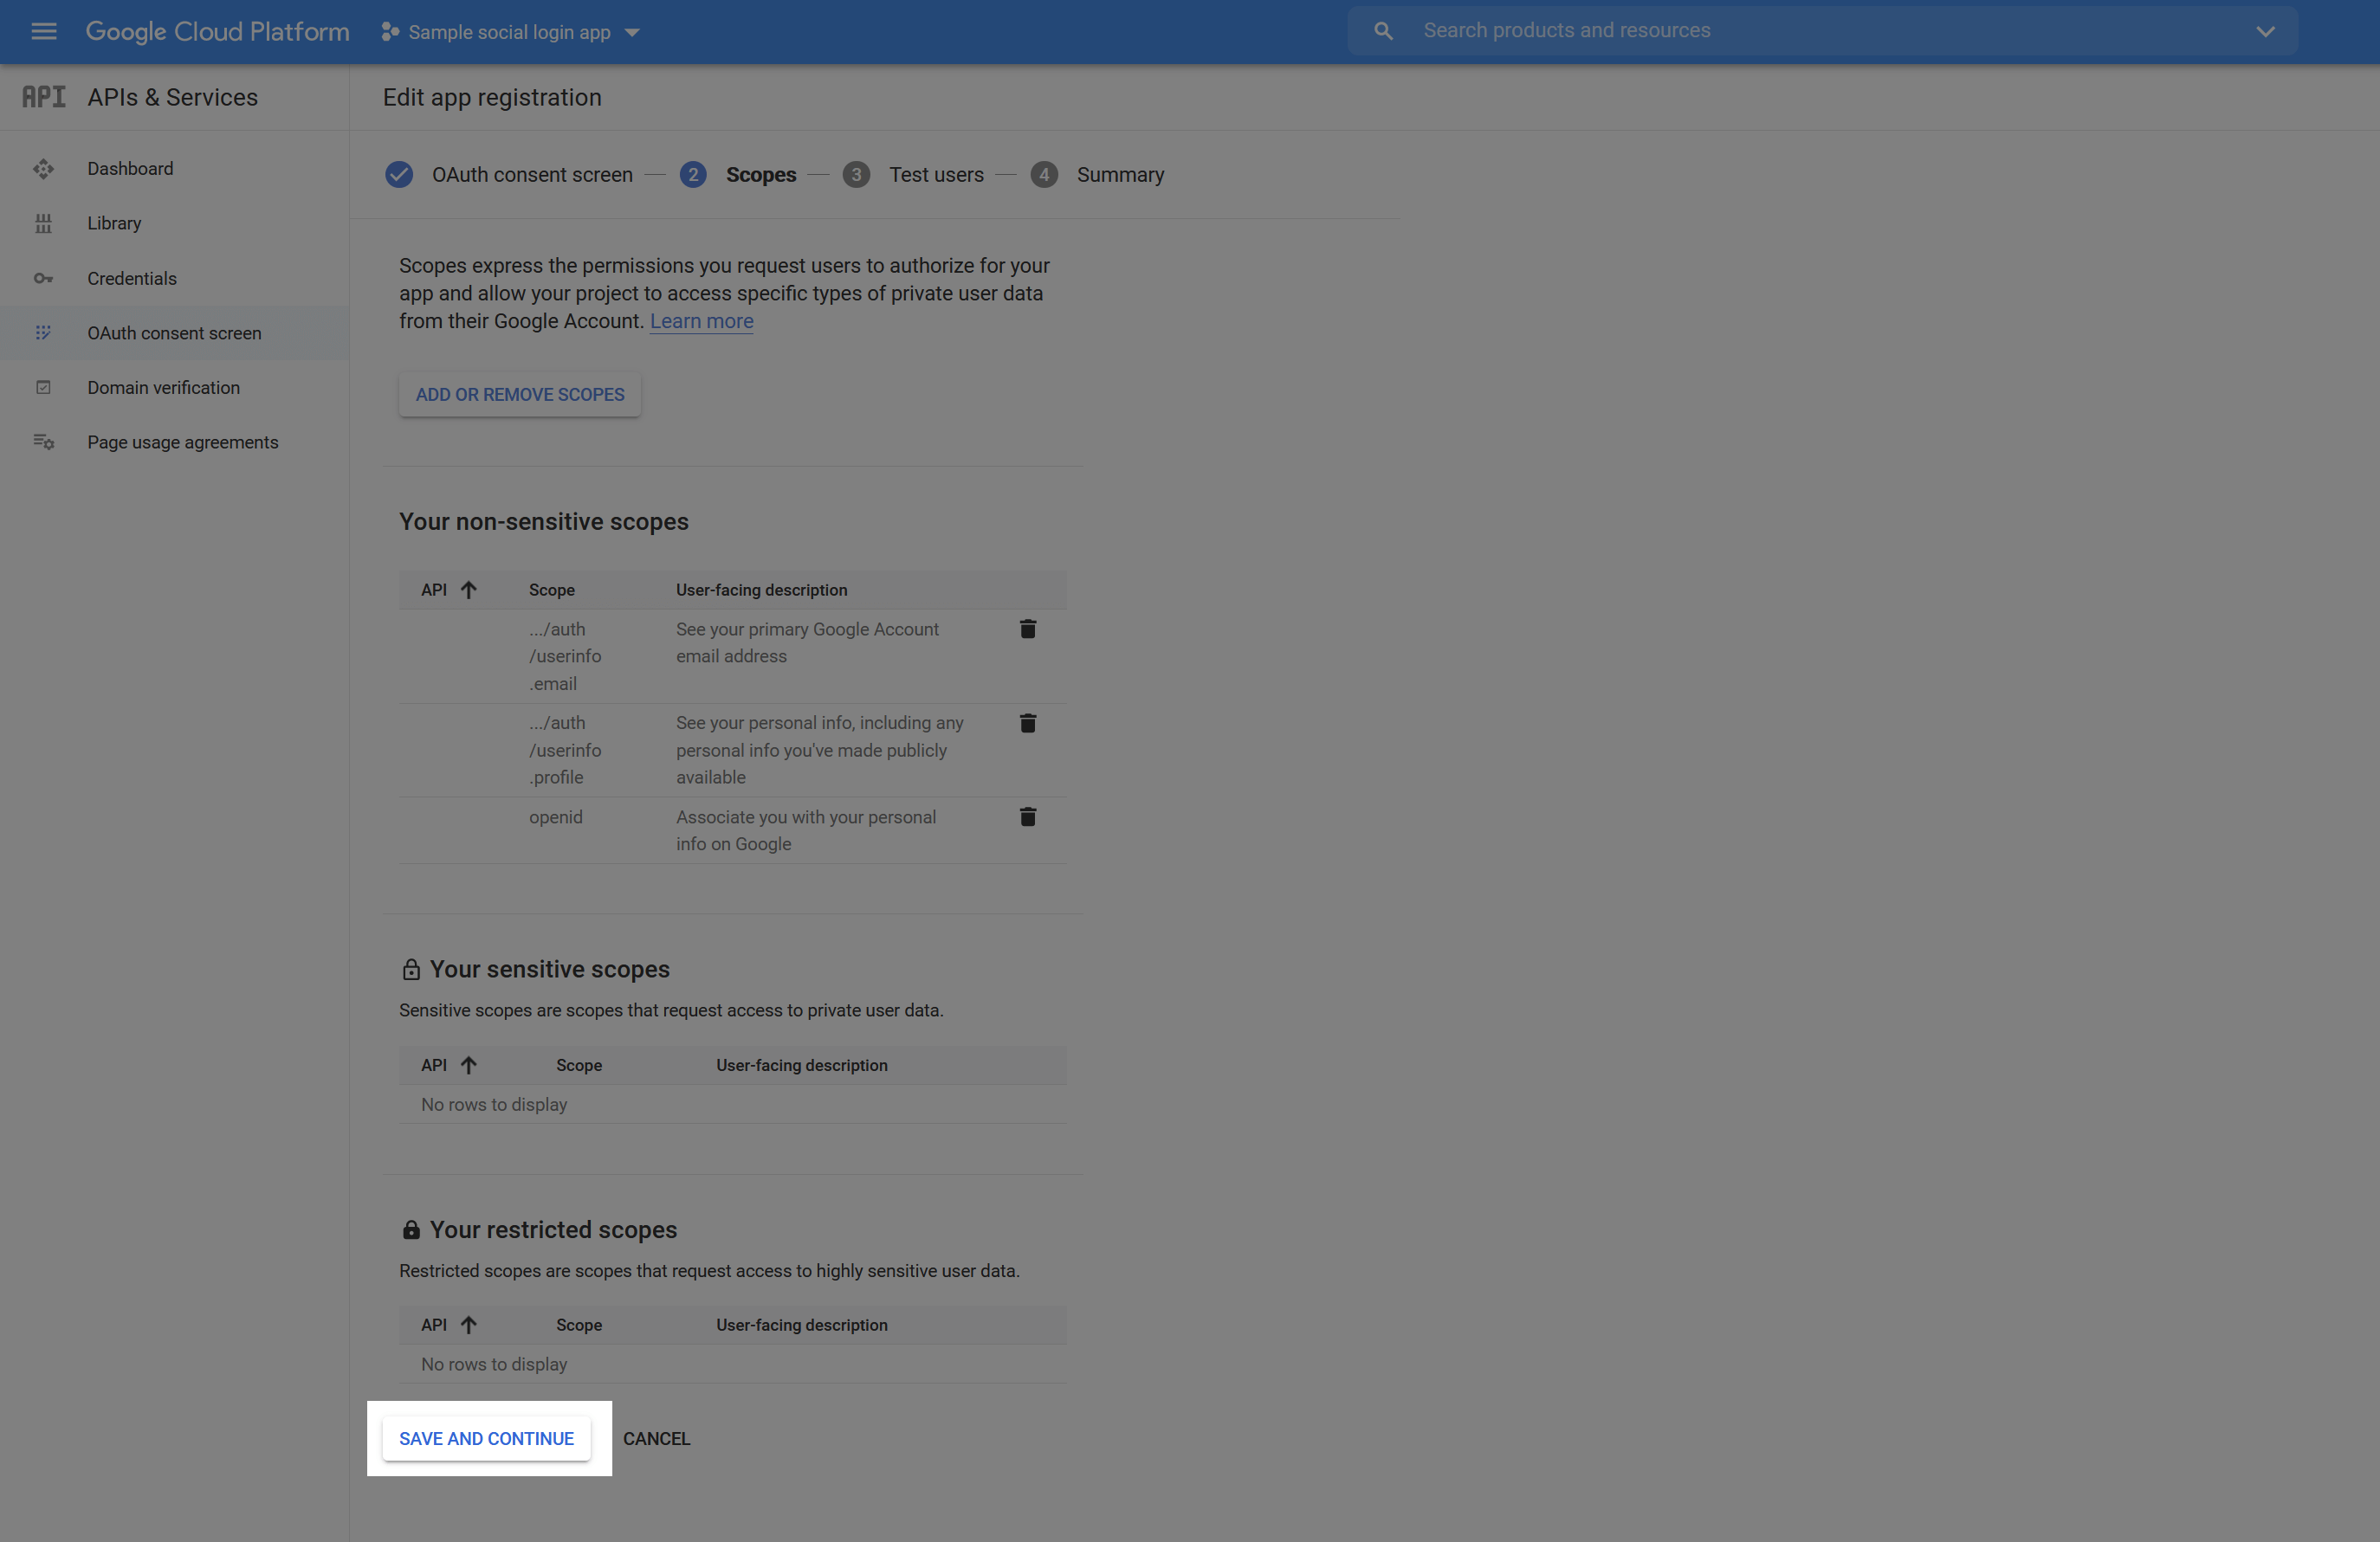
(3) Click on “Save and continue” button.
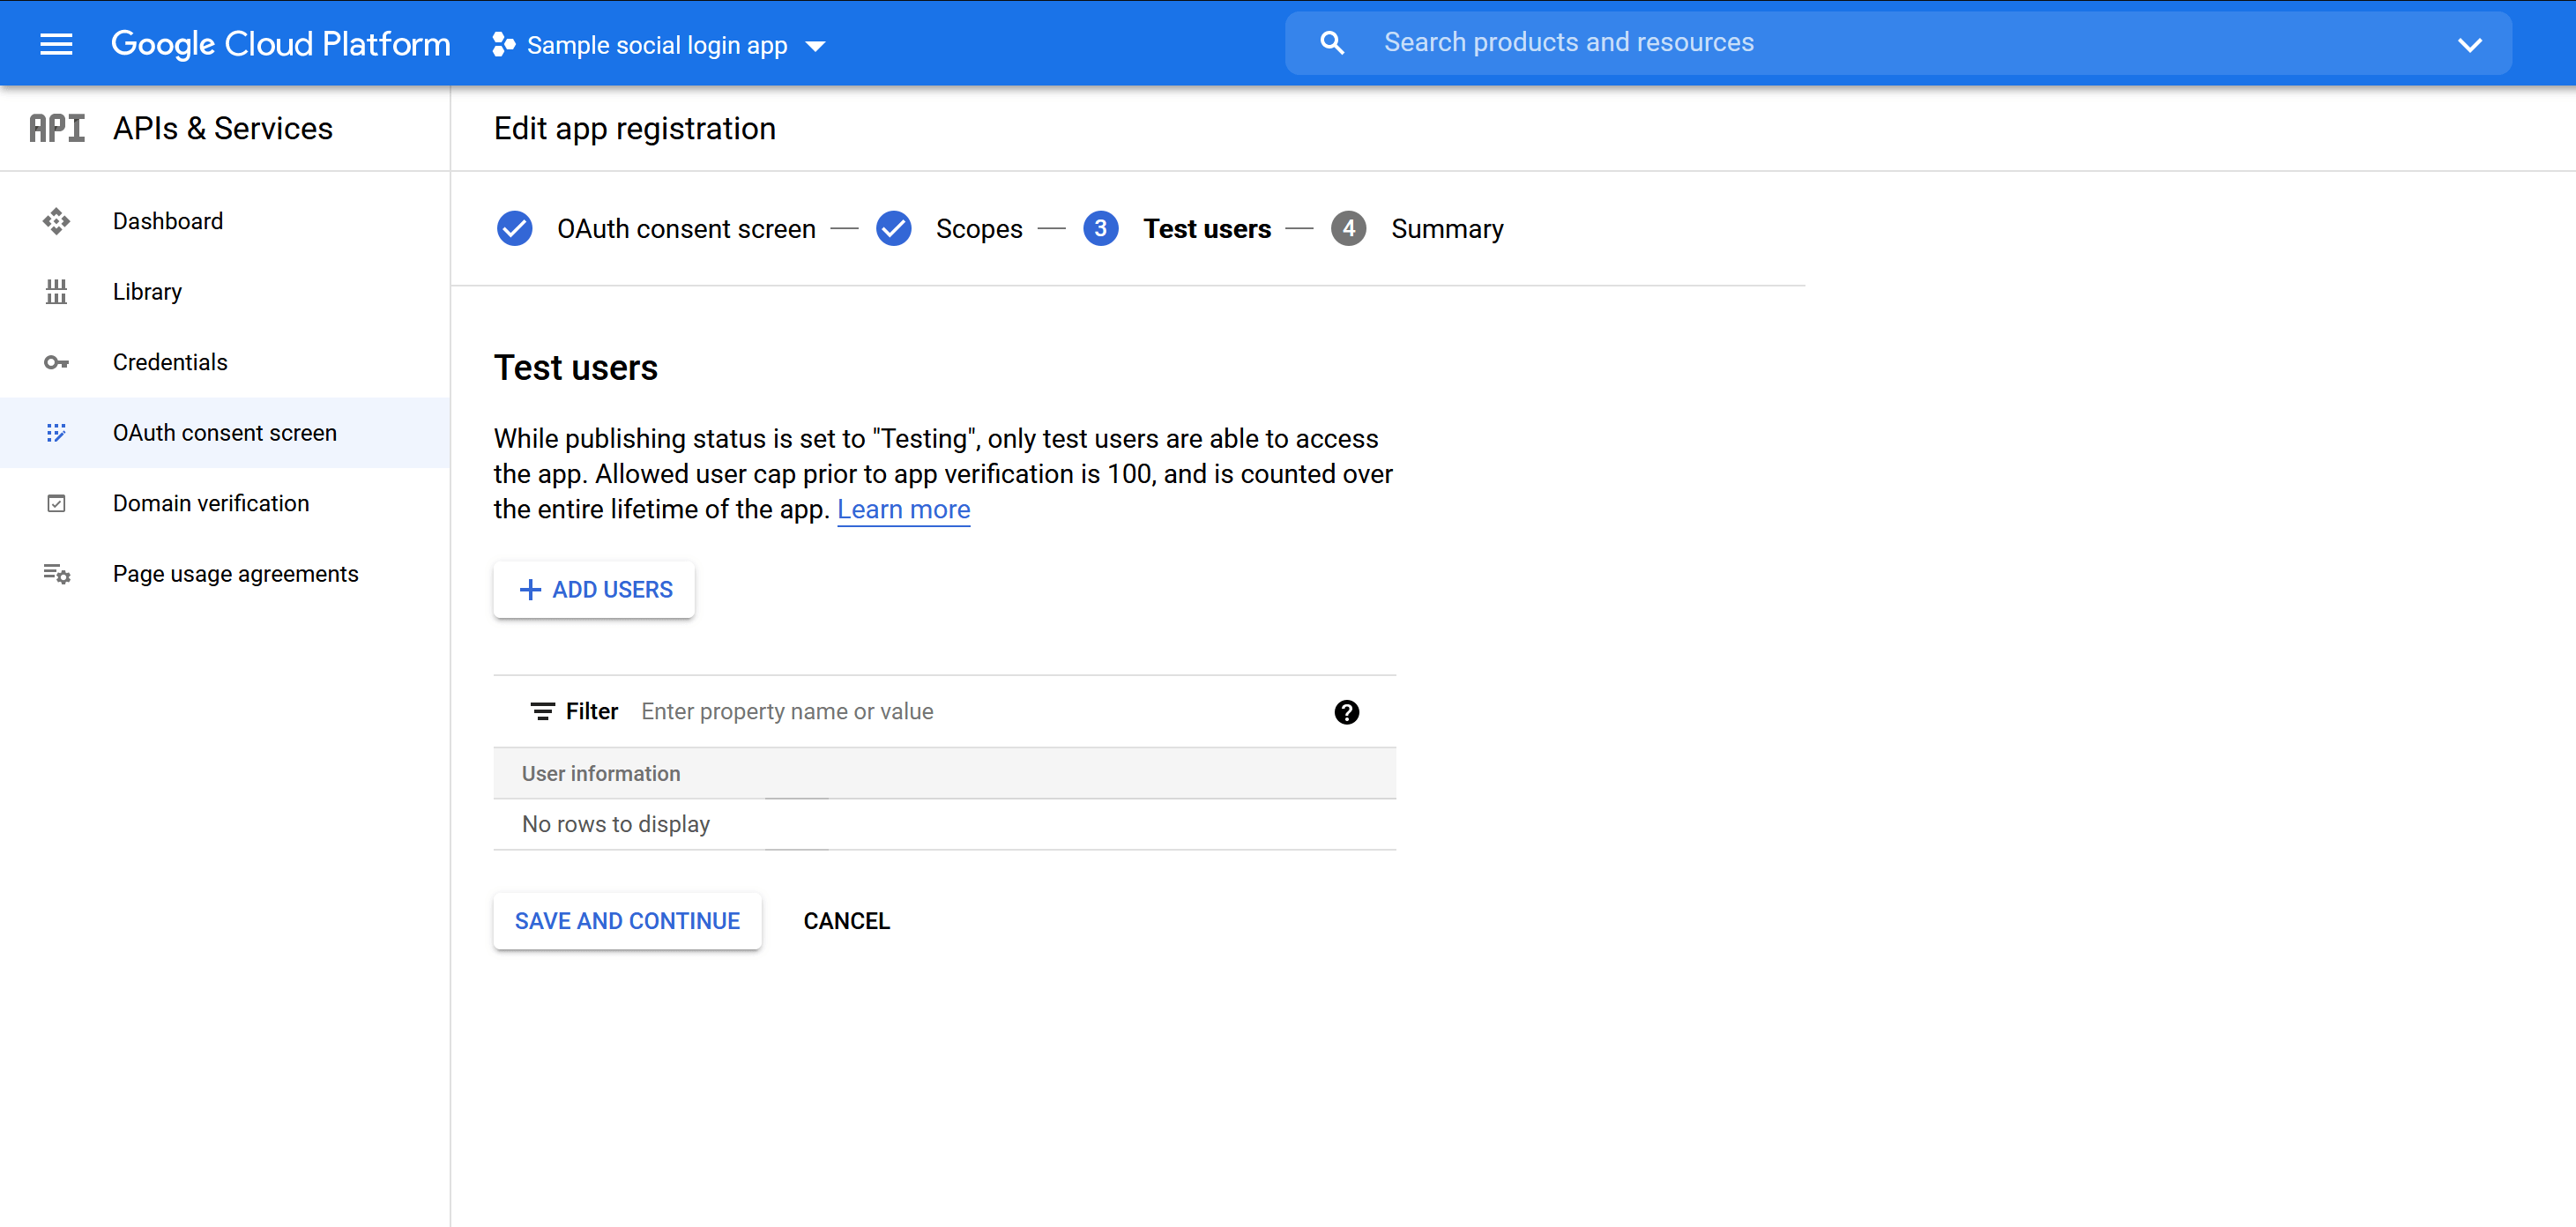
(4) Click on “Save and continue” button again.
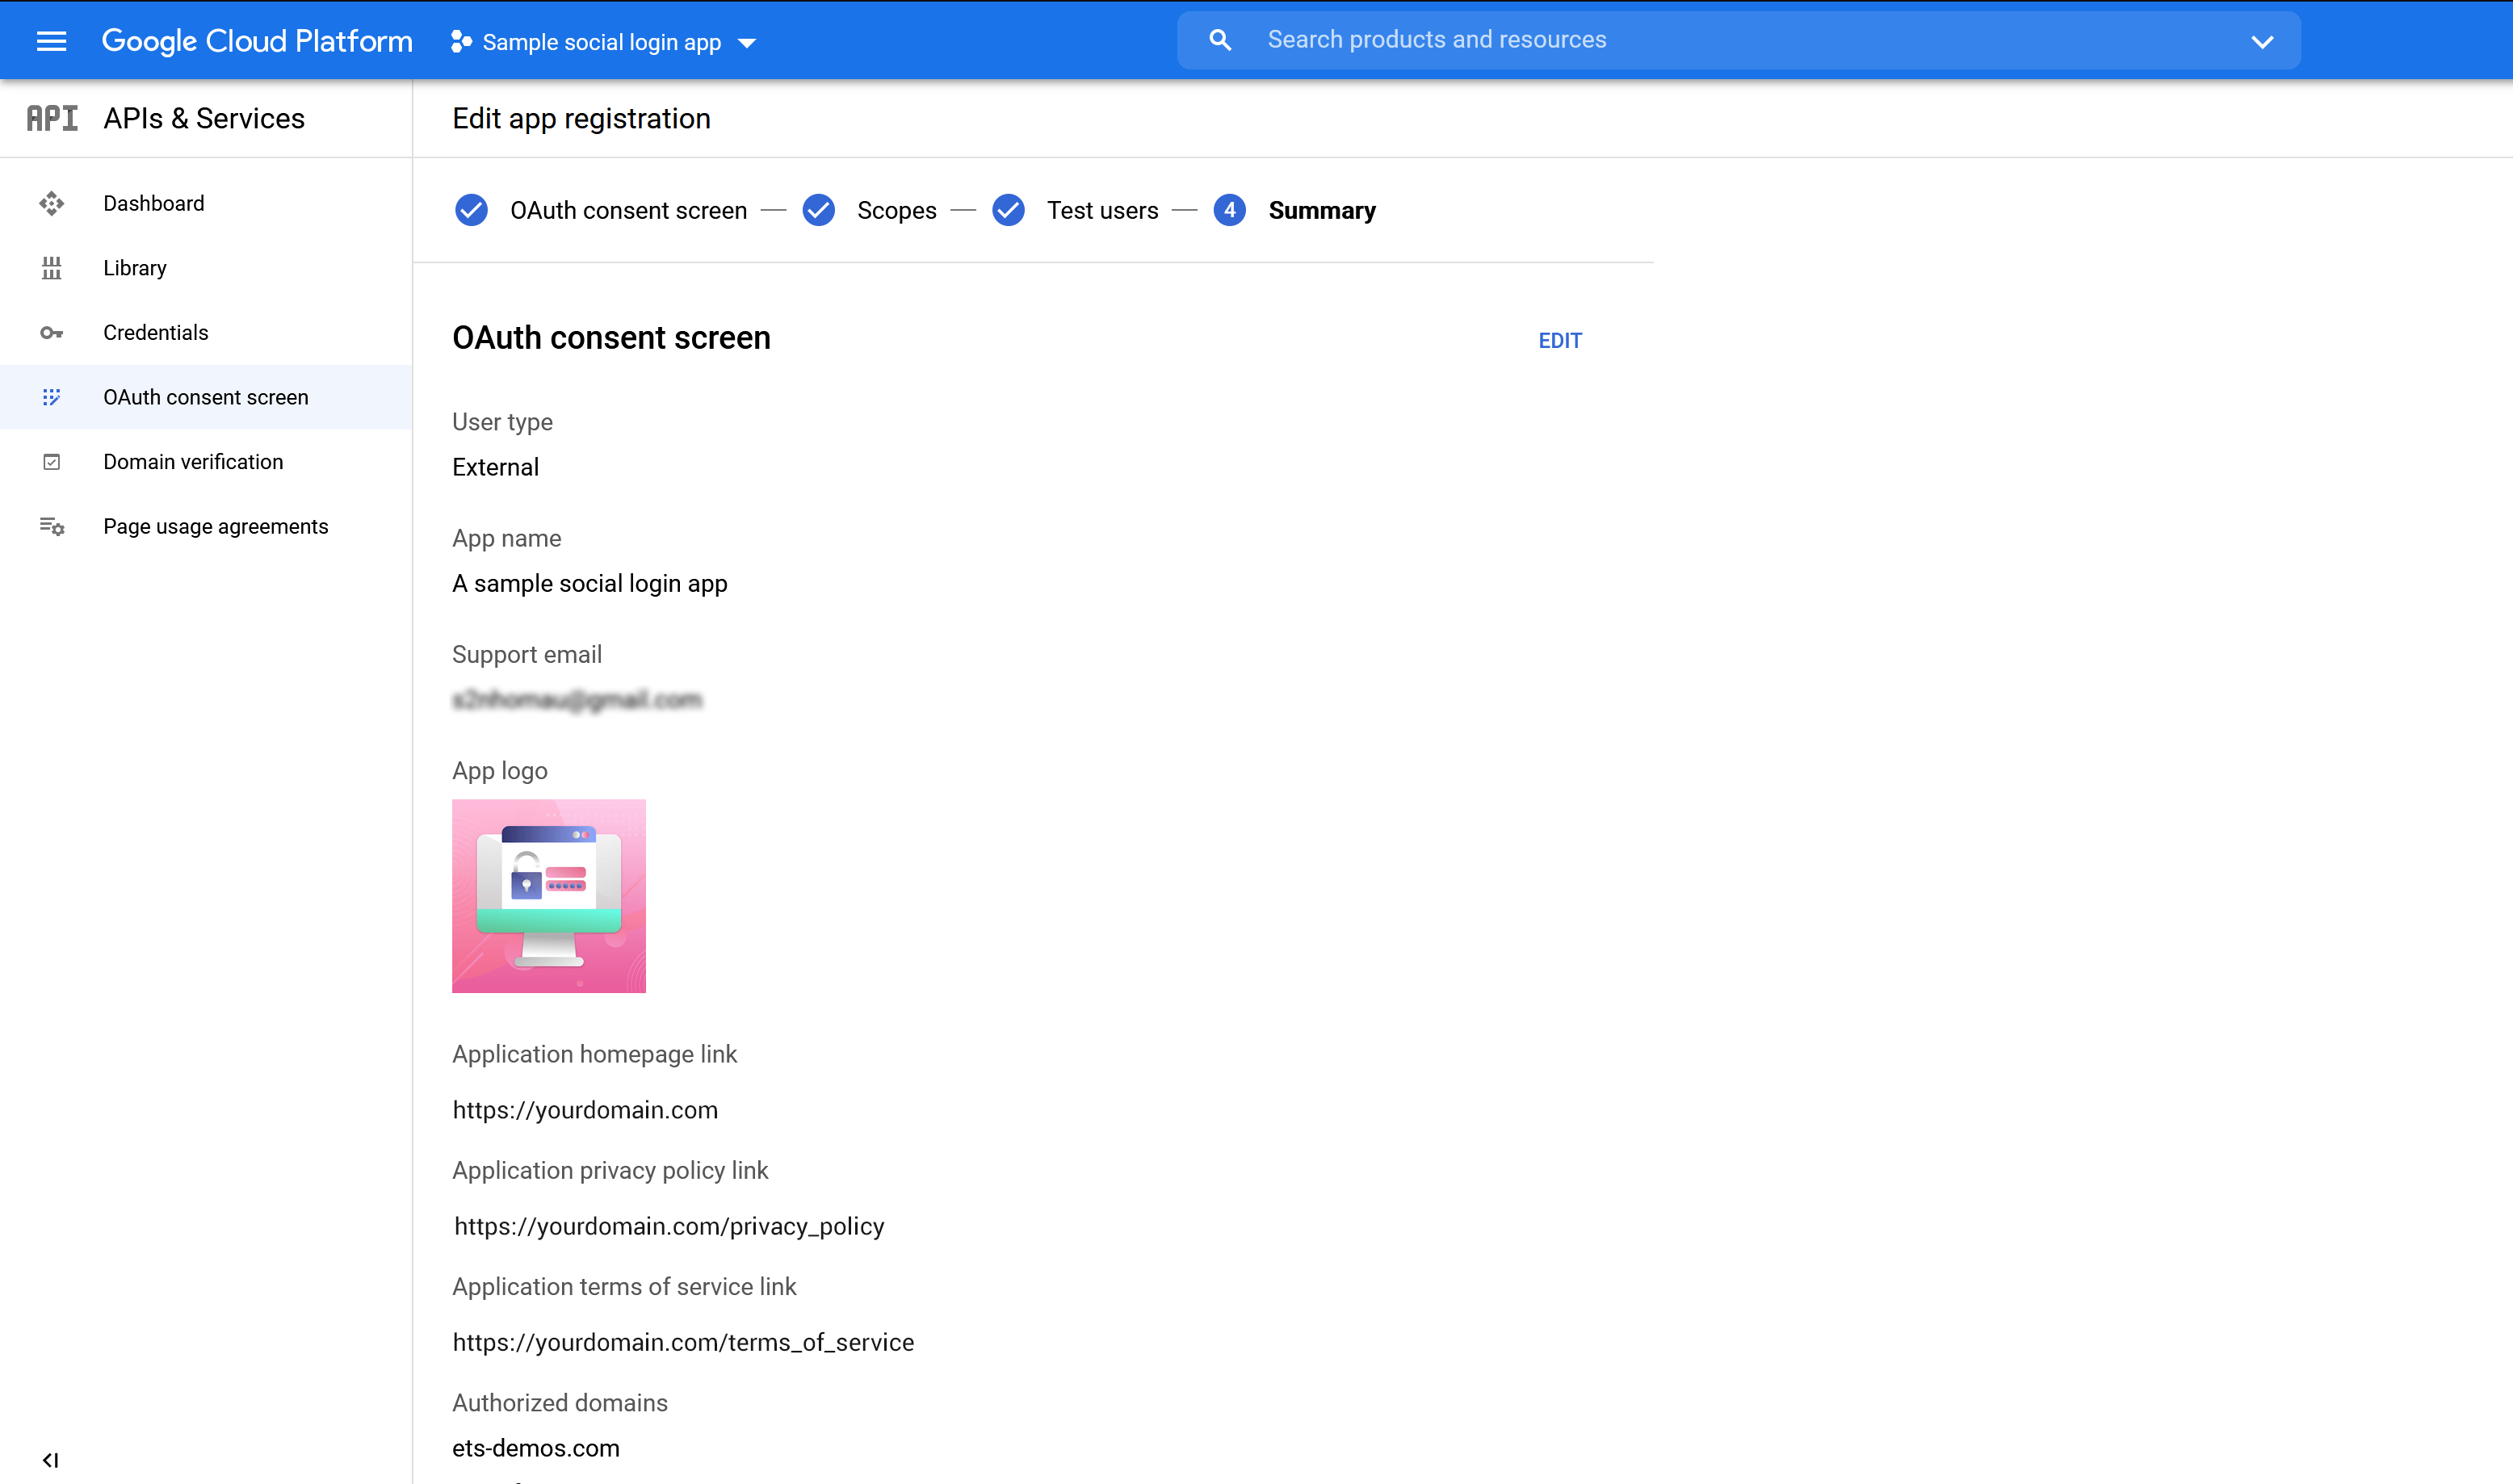
(5) Review all the information. If you want to change any info, click on “Edit” link.
Step 5:
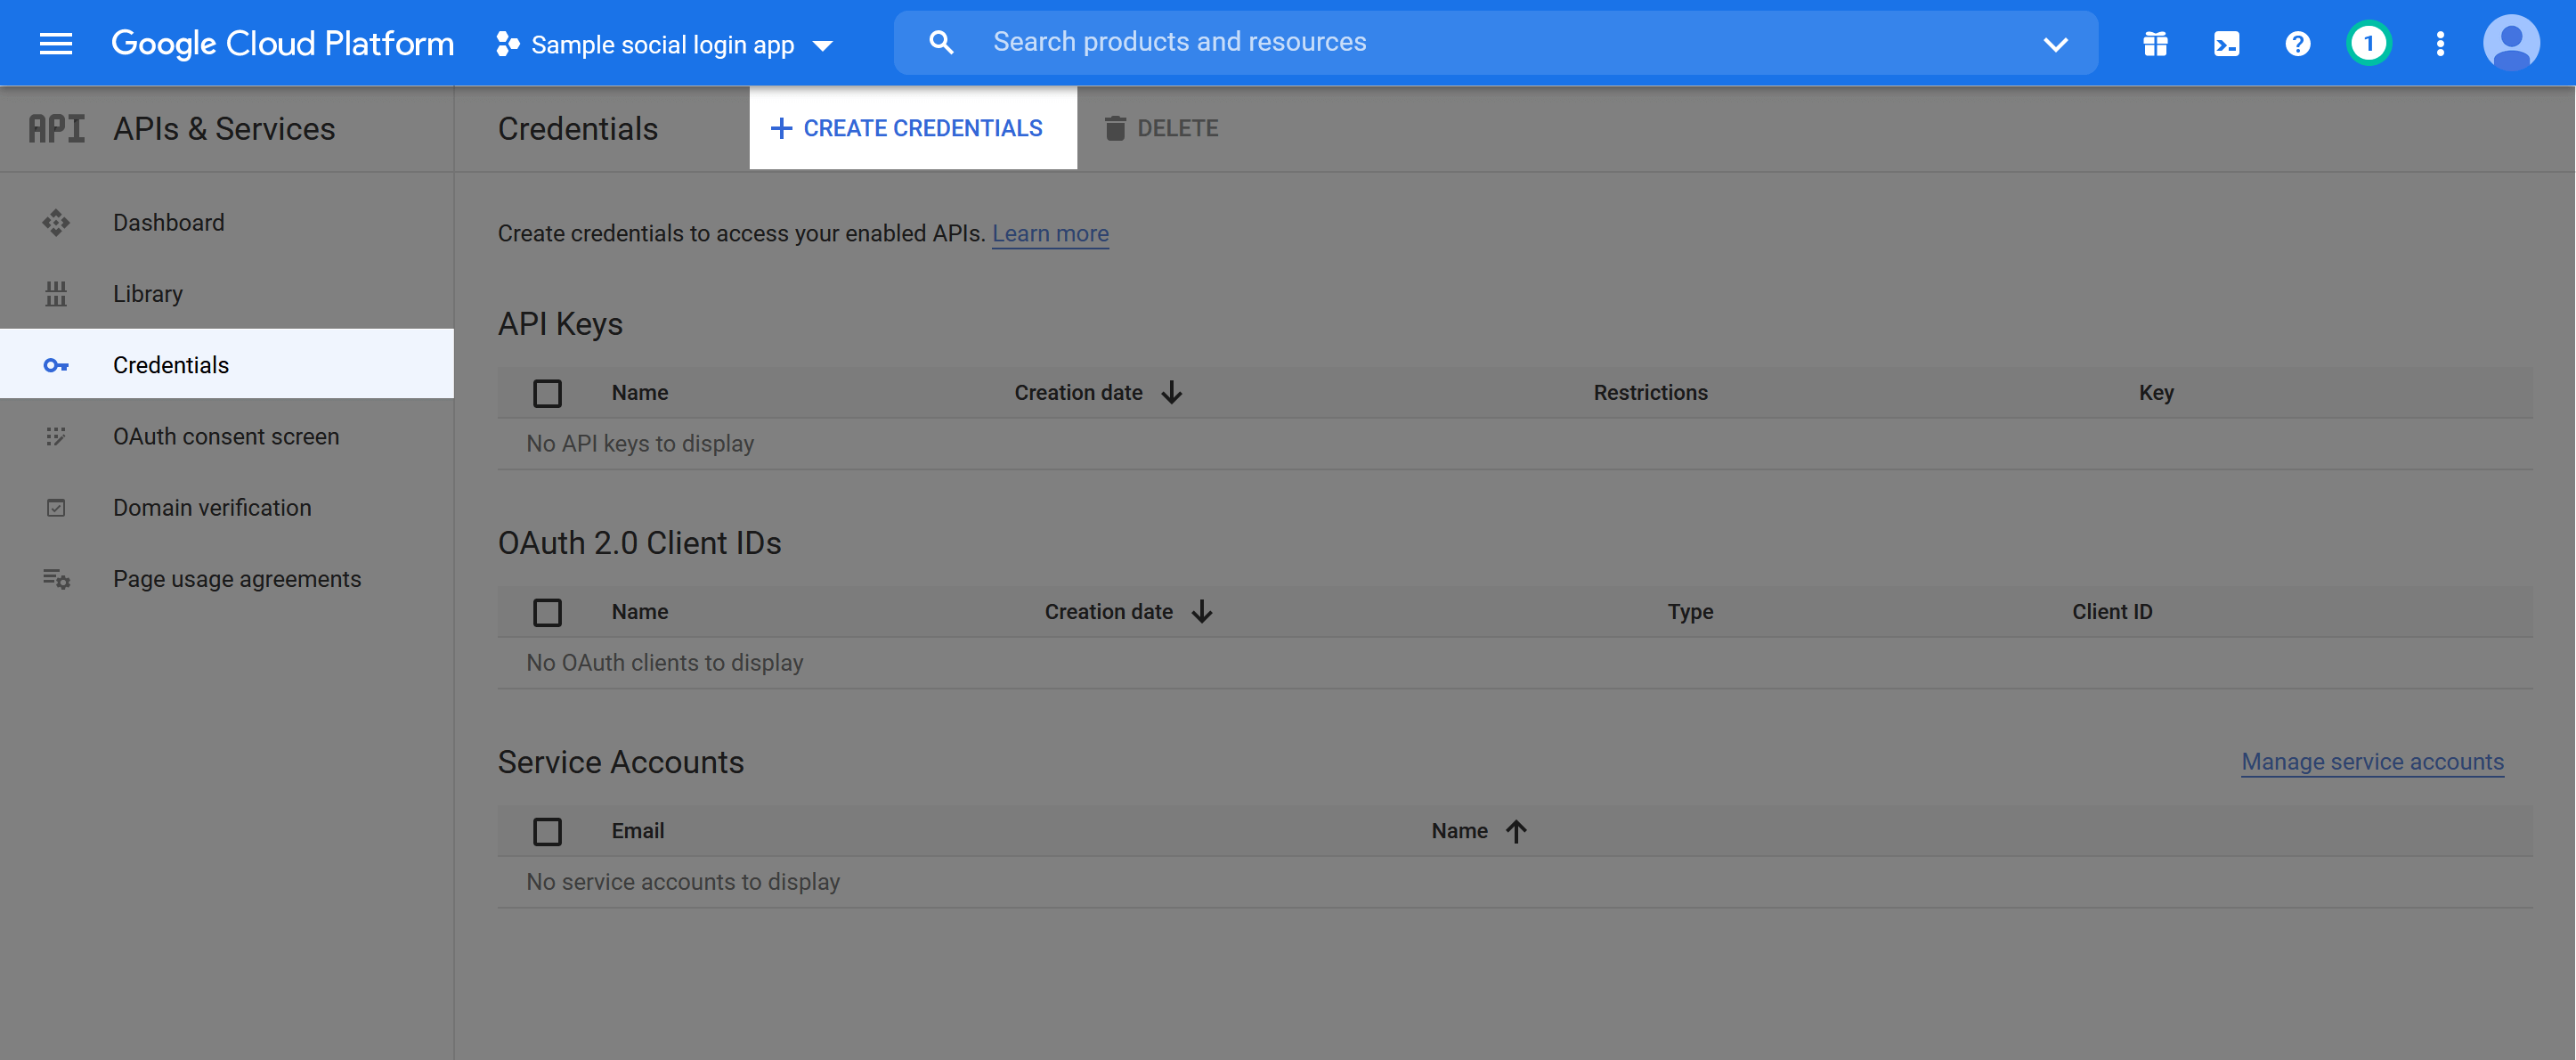
(1) Navigate to “Credentials” page. Click on “Create credentials” button.
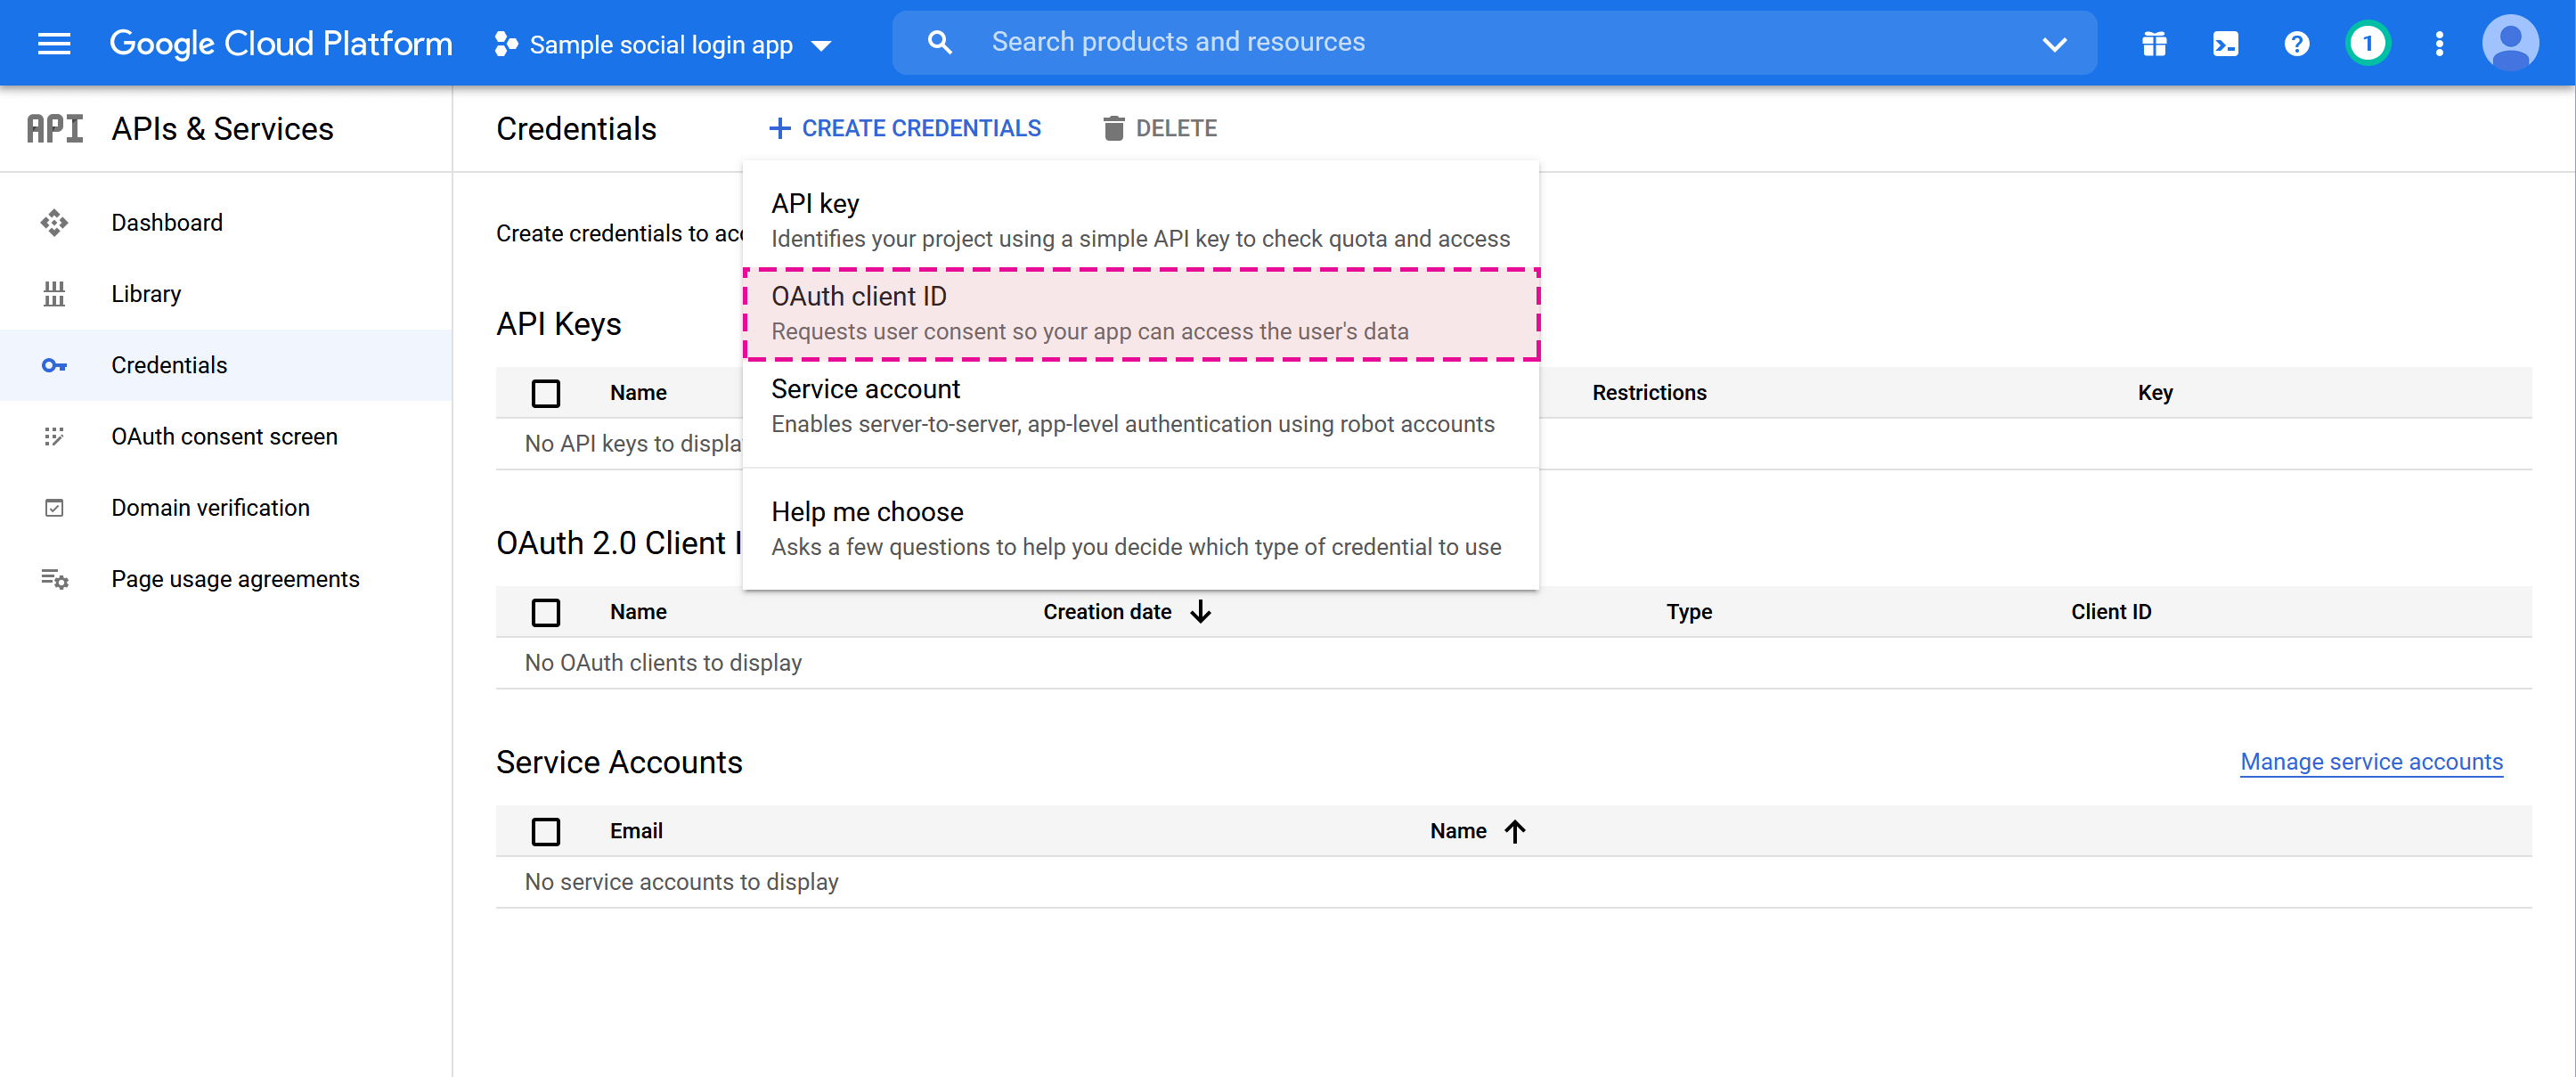
(2) Select “OAuth client ID” option.
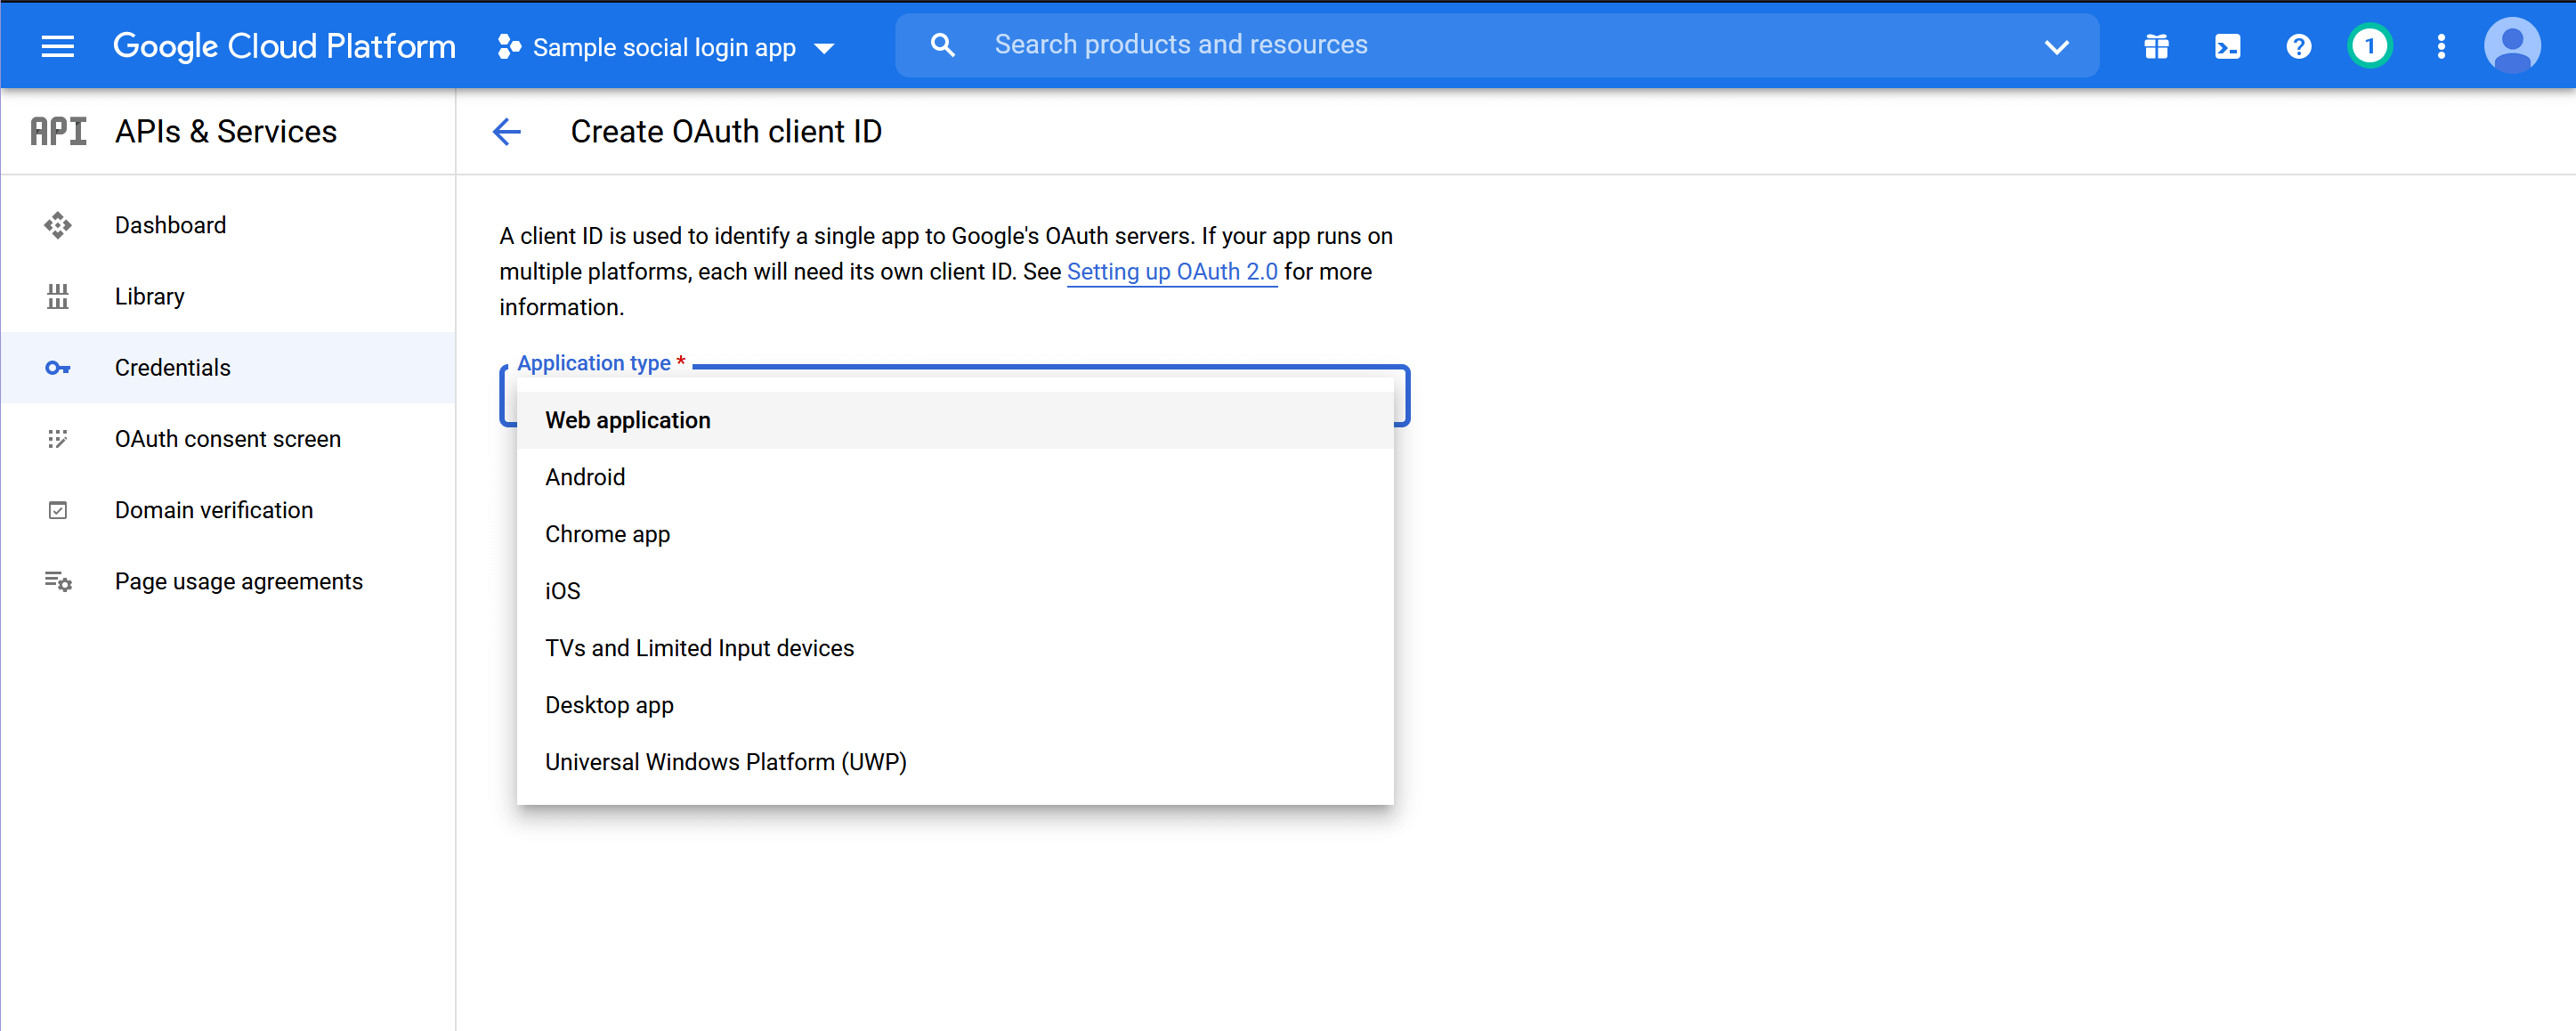
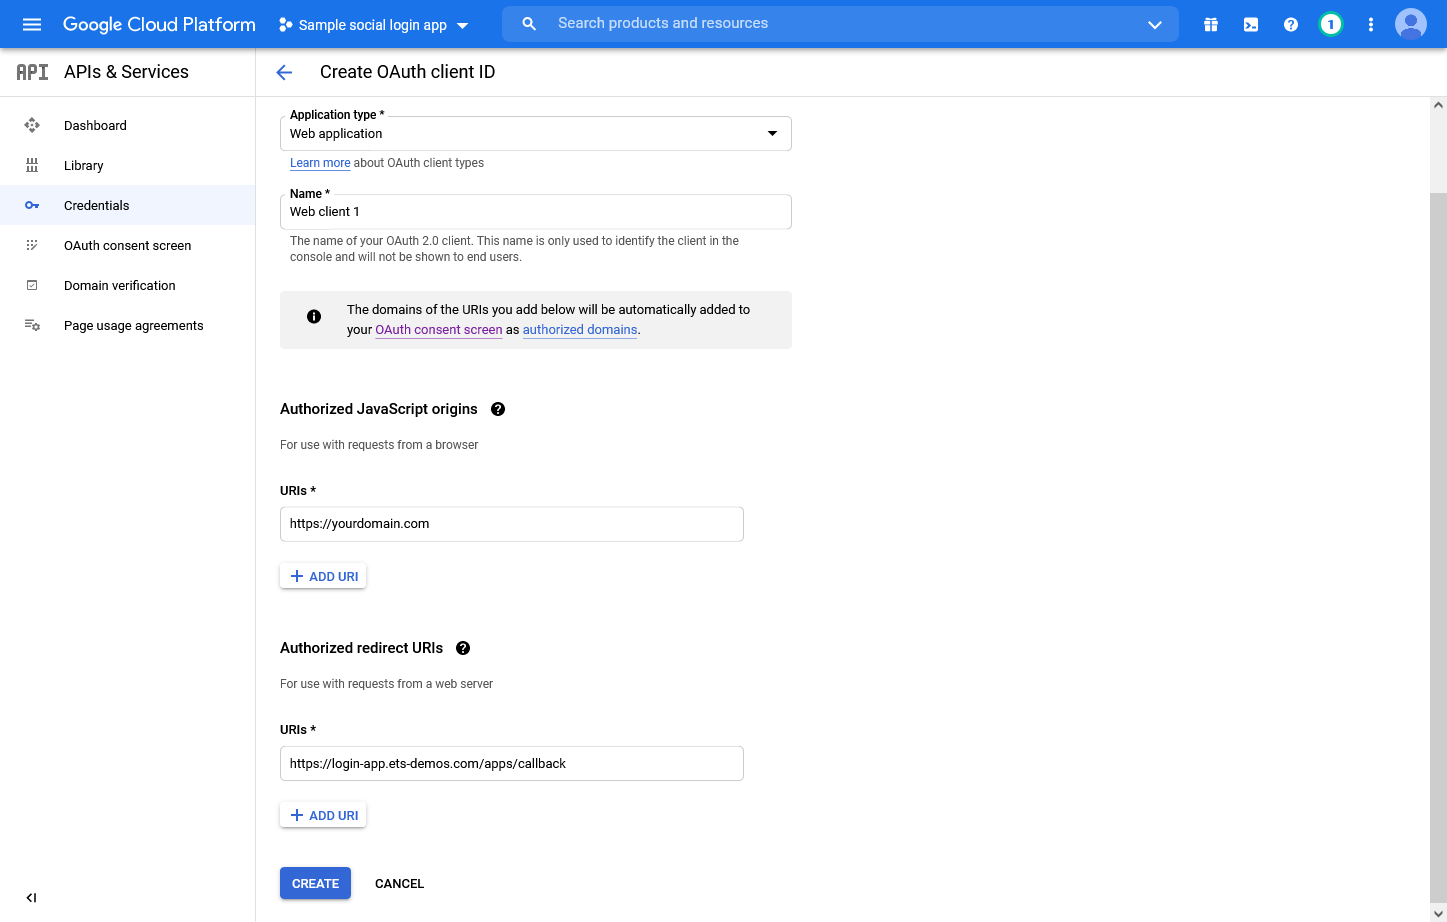
(3) Select “Web application” for “Application type” field.
(4) We will need to enter “Authorized JavaScript origins” and “Authorized redirect URIs“. Click on “Add URI” button and:
- Enter your website URL for “Authorized JavaScript origins“
- Enter the redirect URI provided by Social Login Pro app for “Authorized redirect URIs“
Finally, click on “Create” button to finish.
(5) Copy the client ID and client Secret then paste them in Social Login Pro app setting.
Step 6: Finish Step 5, your app is only available for test users. To publish your app to all users, you will need to verify your domain.
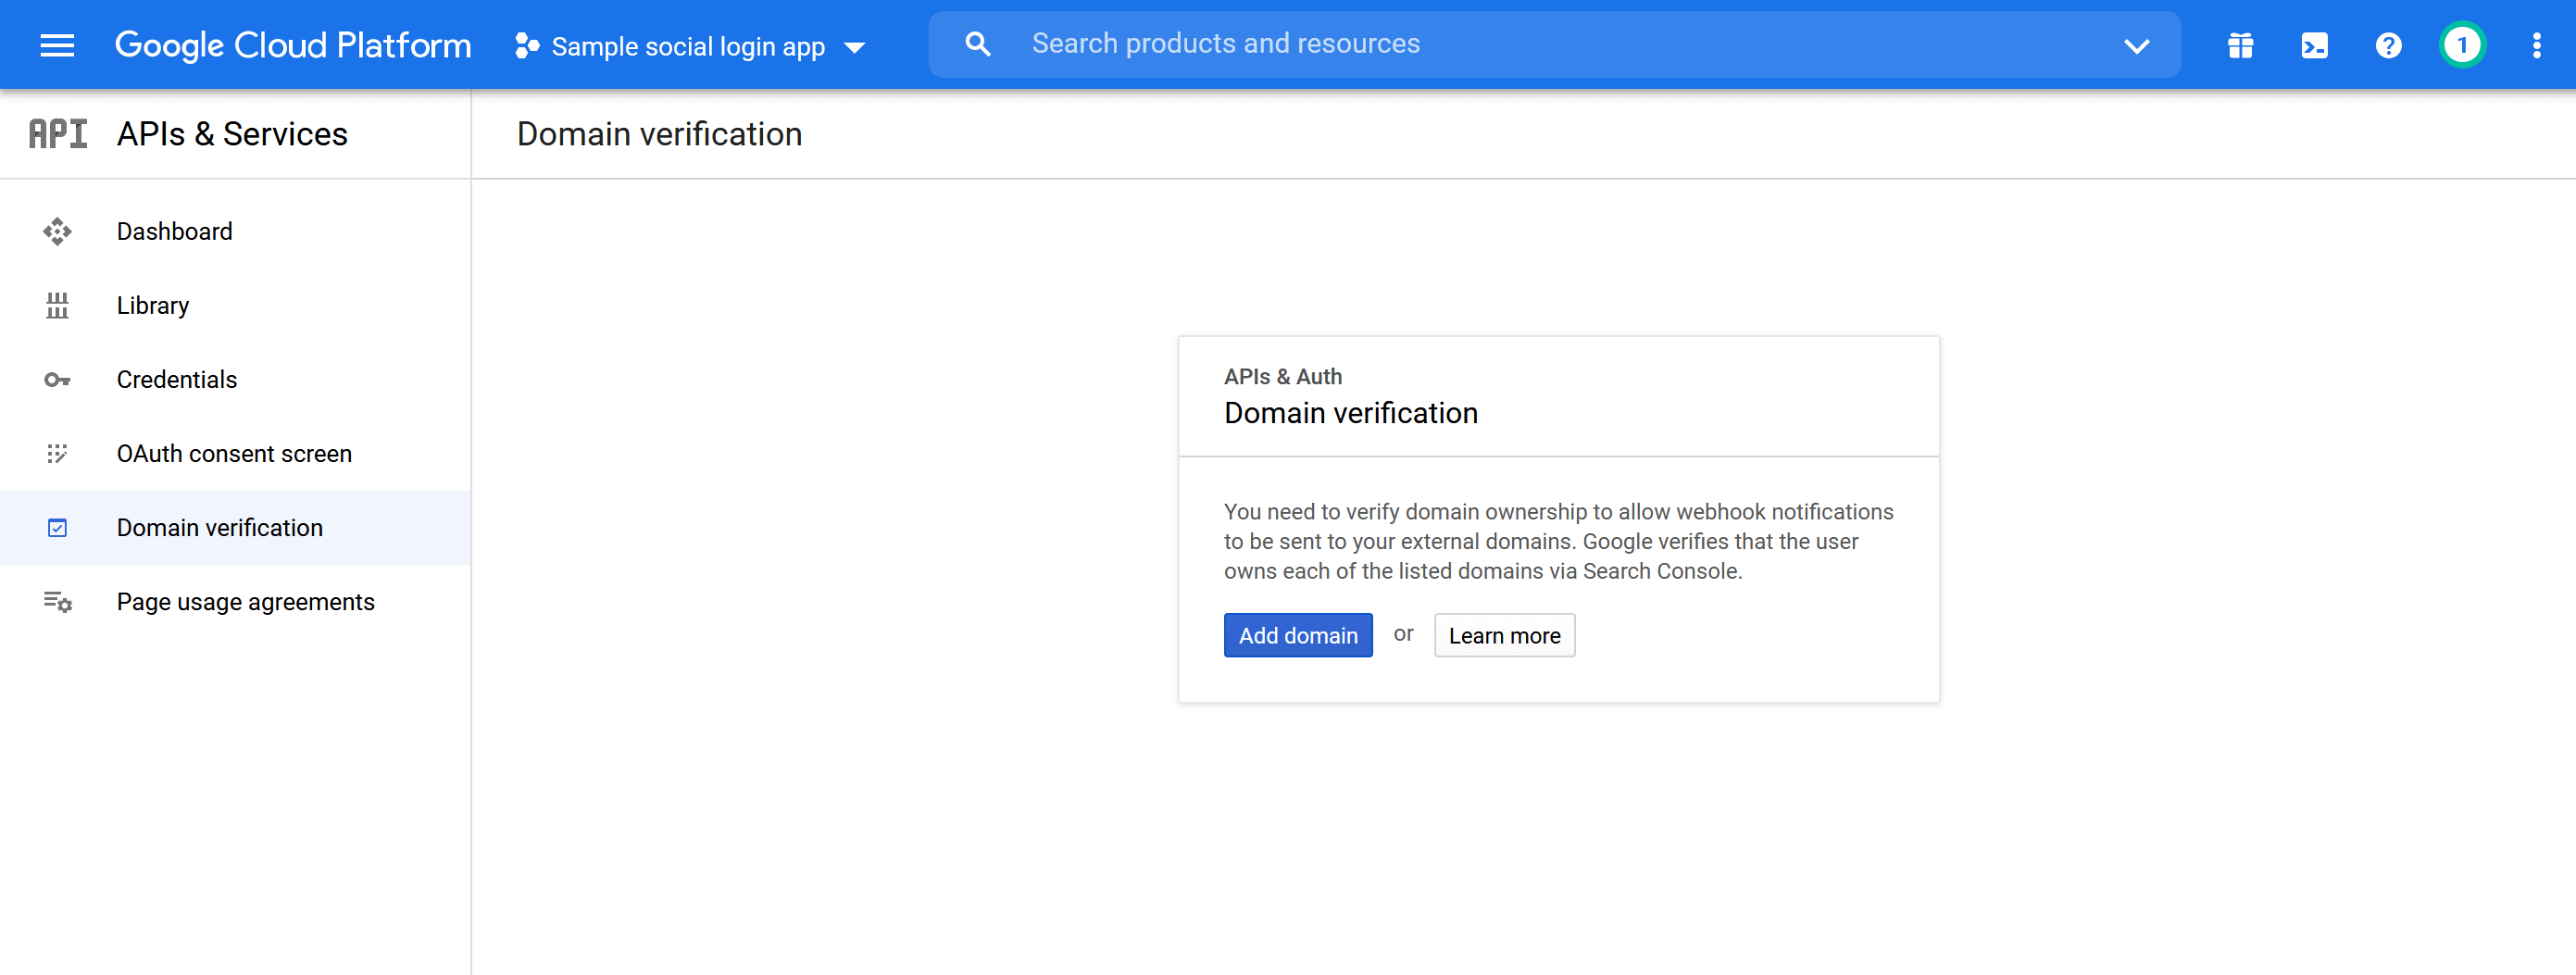
(1) Navigate to “Domain verification” page > Click on “Add domain” button.
(2) Enter your domain then click on “Add domain” button.
(3) Click on “Take me there” button.
(4) You will be navigated to “Webmaster Central” page. Click on “Add a property” button then enter your domain > Click on “Continue” button.
(5) Follow the instruction of “Recommended method” or “Alternate methods” to verify your domain.


